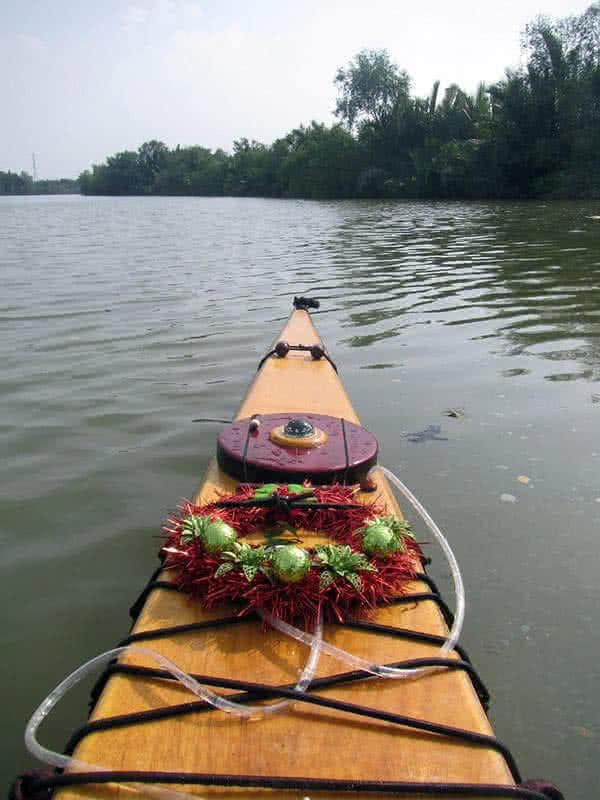
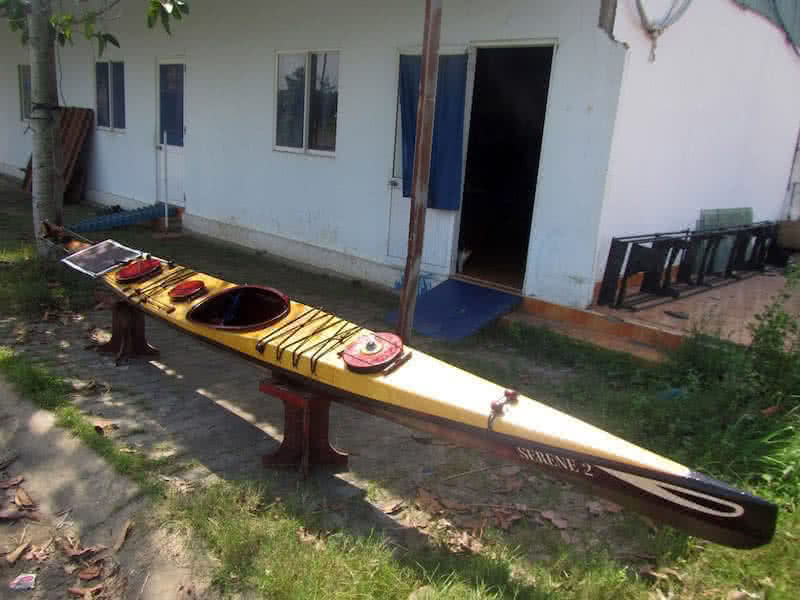
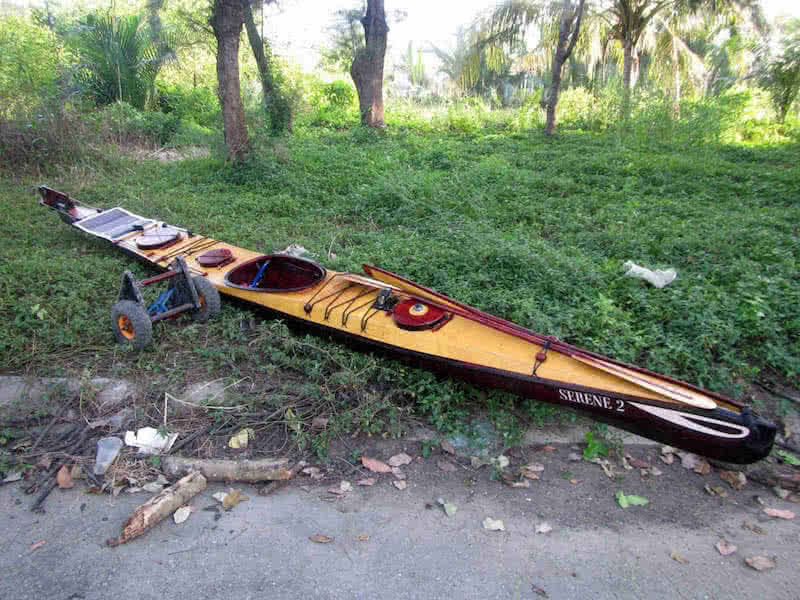
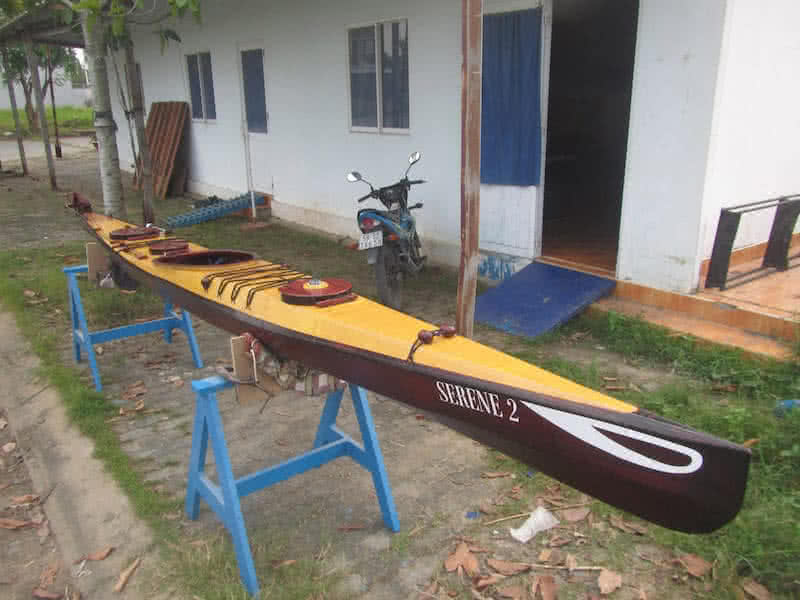
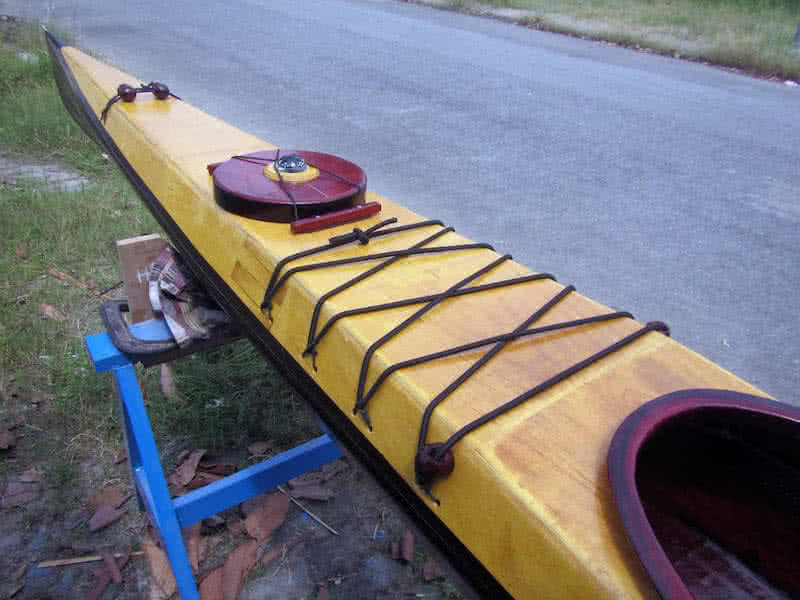
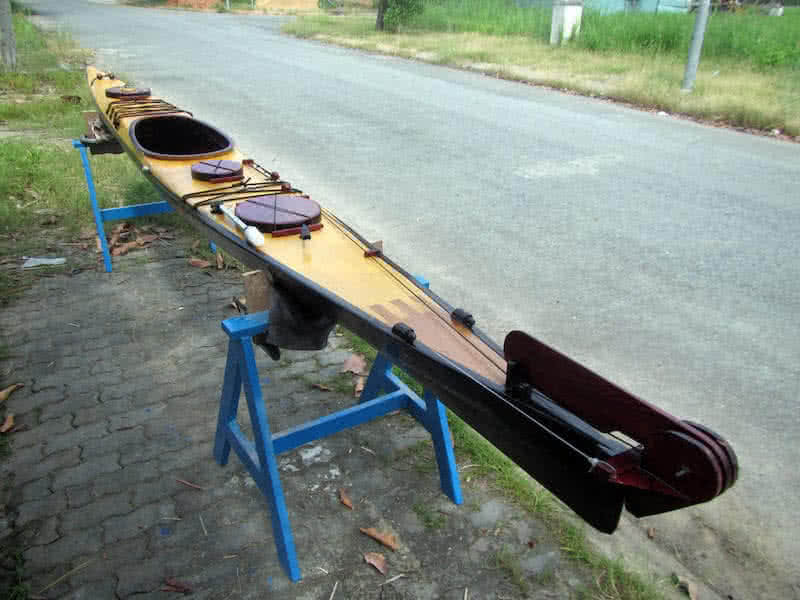
serene – 2, part 42

ade some more longer paddlings (20 ~ 25 km) to get to really know her, my newly – built Serene – 2. It’s not until now that I could get myself familiarized with the boat’s primary stability, which could be really “frightening” to most novice paddlers. In reality, Serene – 2 is “more stable” compared to Serene – 1, but with a much higher free board, the secondary stability comes a bit later, to assure that everything is alright!

Actually, I’m a bit concerned about the boat’s primary stability, cause it has lots of V – bottom the under side. I would need to trail the kayak in its full capacity, to really make sure that the boat reaches its expected stability when fully – loaded with gears for a multiple – days paddling trip. The “fearful, uneasy feeling” caused by the low primary stability should not be taken for granted at all, even when I know that it’s safe.

Cause you would virtually going nowhere when all the time, you’re just worrying about it, worrying that something (a potential capsize) would happen. I’m pretty sure that the boat would be fine at its designed displacement, but only trialling would tell precisely. Looking back at all my boat building, boat playing times, lots of fearful moments, lots of self – doubting, self – disappointments, self – blaming, etc…

But that’s the nature of boating things, of “adventures” on the water. It requires lots of practicing and improving, to make sure that everything is right, that everything just works. My paddling performance is really really bad lately, with very little training ever since my last 9 days paddling trip in June. Obviously, something need to be improved here, and that would be among my resolutions in the coming new year! 😀

serene – 2, part 41

ade several longer paddlings (15 ~ 20 km) to see how the kayak would perform. As with all my previous boats, it takes some little time for me to adapt myself to a new boat, in particular, the primary stability. Each kayak differs by a little, after a few dozens of kilometers, I would feel more comfortable and confident with the boat’s motions. Only after that, the speed measures could be evaluated more accurately.

The Garmin GPS data shows that I could sustain about 7 kmph with my new kayak. That’s pretty much very good, though only slightly better compared to Serene – 1 (it was about 6.5+ kmph). The 7 kmph value is very closed to the average speed that other famous sea kayakers would usually make. The improvement at this point is very critical, since I can hardly make any more gain without sacrifices to the boat stability.

The weather this season is quite ideal for paddling, the temperature is dropping to around 20 ~ 25 degree (Celsius). The Northern wind is blowing, but much a lesser amplitude compared to this time last year. But too bad, I’m quite busy with my works and can’t spend much time on water, my paddling performance is not truly at its peak, so it’s still early to say more about the new kayak’s performance characteristics.

Anyway, I’m feeling very pleased with my new kayak, and I think that with more training, I could bring her to a much better performance level. Some more works required still on the kayak though, in essence, I would have to rework the USB – charging circuit, the current one is over – powered by the 3 powerful Lithium cells and wouldn’t work very well. Christmas and New Year season is coming, happy season to everyone! 😀

serene – 2, part 40

ontinue trialling and adjusting various boat equipments. The 2.2 Amph SLA battery works, but not to my expectation, first, it’s too heavy, second, its capacity is quite small, and third, the battery doesn’t hold its electricity for too long, about 2 days without charging and the battery would exhaust… After consulting with some other paddlers, I’ve decided to replace it with 3 Lithium cells, the results are just… superb!

I now have about 10 Amph in the very small 3 Li-ion cells, almost 5 times more the capacity, and 5 times less the weight, yet 5 times the price 😀, advancements in battery technologies is just amazing! According to one of my friend, an “expert” in electric and electronic devices, the Li-ion would usually last longer, and compared to the SLA, with zero maintenance cost. After replacing the battery, I fitted the last electrical components.

The AA charger and the USB charger, they’re positioned inside another waterproof box, connected to the battery box with electrical wires inside a plastic tube. The installation is pretty easy, the two devices are connected via two switches, simply put your iPhone (or your VHF radio, or your AA batteries) into the box, turn on the switch, close the box, and let the Li-ion cells, plus the solar panel do their job!

Also, I’ve removed the plastic seat, replace it with just a back – rest instead. The back – rest is built from plywood, bent into a curved shape, covered on 1 side with a rubber sheet (to make your back resting more comfortable), and fitted into the cockpit aft, it could be rotated slightly to suit my various sitting positions. These are last updates for the boat in this 2016 year, now it’s time to just enjoy the water!

serene – 2, part 39

ade several short paddlings (10, 12 km) to trial my newly – built Serene – 2 kayak. The overall feeling is very pleasing, the boat is much easier to control compared to my previous one Serene – 1, and it’s faster, taking up momentum in just a few light strokes! But the velocity measures would be postponed until I could finish all equippings, all adjustments, and begin longer paddling to know precisely.

Yesterday, I had a capsize in my kayak, reason is that the seat raises the center of gravity (CG) by approximately 5 cm, just a very short distance but severely affect the boat stability. This is something I’d already knew in the designing phase, but still try to do the silly thing of installing the inappropriate seat. The solution is quite simple: remove the seat, just sit barely on the bottom, and build just a back – rest instead.

Apart from that, everything works well enough: the bilge pump, the rudder and rudder pedals, other electrical devices, etc… The shorter hull reacts more sensitively to load balancing, the kayak needs to be trimmed a little bit further aft to reach its most stable point. I’m especially happy with the rudder, to give a decisive conclusion on the Rudder vs. Skeg debate: the Skeg is simply left too far behind to argue! 😀

Only long paddling would tell, if there’re some significant improves in “economical speed”, the important point of a kayak designed for cruising: the minimum effort required to propel the boat on large distance and in prolonged period of time. It takes some more efforts and times to really complete harnessing my Andalusian horse and make it ready for sea paddling trips in this Northern monsoon wind season!

serene – 2, part 38

any miscellaneous jobs required still to finish equipping my new kayak for upcoming paddling trips. First is adjusting the seat’s back rest, it’s a bit too high that strapping on the spray skirt could be a bit difficult. I simple cut down its back, then rivet the cut – out part onto the rest part. The hatches’ gaskets are cut from a thin (5 mm) rubber sheet (1st & 2nd images), should do their job of keeping the water out.

I made a new cart for transporting the boat on land, it’s just a smaller and lighter version of the previous one. I reused the pair of wheel, couldn’t reduce the wheels’ size since they have to be big enough so that the cart wouldn’t sink in when pulled on sand and mud. The result is quite satisfactory, big enough to easily transport the kayak, and small enough to not affect the boat stability when carried on the aft deck.

The list of small jobs to really finish the boat seems to be never ending, there’s always something I could do to improve, here and there, e.g: a mesh bag would be installed inside the cockpit, under the deck, to store various things I could need during a paddling trip, e.g: a small knife, a tiny light torch, a small monocular (to be equipped), reserved batteries for camera and GoPro, lighter, my tobacco box, etc…

It’s an interesting experience equipping a kayak for long paddling trips: everything need to be ready and accessible around your cockpit: food and drink, the back up paddle, the paddle float, radio and camera, everything… 😀 Fortunately, my newly purchased PFD has two pockets on the front side where I could hold some crucial things with me: the VHF radio, the Garmin and the Cannon waterproof small camera!

serene – 2, part 37

ontinue trialling my newly – built kayak with some short paddlings. The adjusted rudder pedals now work properly and smoothly. The battery system charged well, everything works as expected. One point I’ve found out is that, the SLA (Sealed Lead Acid) battery should be positioned upright for it to be charged to its maximum capacity. I was thinking about Lithium battery which is more compact, lighter, has more capacity…

But that would be later, maybe I should deploy a system of SLA and Lithium in parallel, as the SLA could provide short – bursts of hight current (required by the bilge pump), and the Lithium could provide a lower amperage for a longer period of time. Today, the Sea – to – summit spray skirt package arrived, the all – neoprene thick skirt fits well to the cockpit coaming, it should do its job of keeping the water out well!

Also I’ve found out that I need to adjust the seat’s back rest a bit, it’s too high that strapping the skirt on could be a bit difficult. One important add-on to the kayak is the water drinking system. 2nd image: the 2 plastic water bags, from left to right: 10 and 8 liters respectively. The smaller oval – shaped water bag is put in the forward compartment, with a water tube running through a cable gland over the deck.

That way you can drink (suck the water out of the reservoir through the tube) without having to stop paddling. The low – lying bags would help with the boat’s stability, no more bulky water bottles needed, and the deck space would be clearer for other items of necessity. I’ve found this drinking system idea very practical, as I’ve lost quite some water bottles lashed to the bungee cords in heavy sea, when strong waves wash over the deck.

serene – 2, part 36

ade the first trialling of my kayak today, a short 10 km paddling just to verify if everything works! All goes smoothly, hurray! The solar panel is adding juice to the battery, could see that obviously since the lights have become more intense, and pump has become much stronger (I almost used up the battery the day before). Under this tropical sun, that wouldn’t be a hard task for the solar cells, I guess!

The rudder works nicely, the pedals could be easily kicked by my legs, changing direction instantly. The pedals movements could be improved however, to become lighter and more responsive. Every parts of the boat simply just work! And the paddles also, I’m feeling pleased with the new paddles. And for the main part, the boat itself… it feel just a bit more stable (that’s what I was expecting for), but the hull now tracks much better!

It could go quite straight even without the rudder deployed. The feeling that the shorter boat is very steady, and could possibly go faster compared to my previous Serene – 1 kayak. Though the LOA (length over all) of Serene – 2 is shorter, its LWL (length waterline) is pretty much the same. The higher free board makes climbing into the boat a bit more difficult, but that’s not a problem, cause the cockpit now is a bit larger.

The slightly higher free board is very important, it should keep water out of the deck for many of the times, and hence waves shouldn’t threaten flooding the hatches much. My overall feeling is very pleasing, for those months of efforts put into the watercraft! 😀 But 10 km is too short, I need to trial the new kayak more, and record the routes by my Garmin, to really evaluate the boat’s performances in precise numbers.

serene – 2, part 35

ticking the vinyl decal decorations is among the last steps that complete the kayak. Since the deck spaces are almost used up for various accessories, the boat names and owner’s informations go onto the port and starboard sides instead, and the boat eyes intrinsic for any Vietnamese boat of course! The solar panel is tied on the aft deck, stretched with two short wooden spars, and lines through its grommets.

There’re some more items to be built or fitted for this kayak: the seat, the carriage for transporting the boat. I would rebuild my previous carriage, reuse the 2 wheels, but build it lighter and smaller, to easier carry it on the aft deck. The seat and back rest are also important parts, but those would be postponed to a later phase of the project. Also, I’m still waiting for my spray skirt to be shipped from Amazon.

After sticking the vinyl decal decorations, the bottom receives additional 2 layers of transparent PU paint, making them 3 layers in total for the bottom (the deck only received 2 layers), protecting the vinyls. The handle line pulling through a hole drilled at the bow (with a wooden block inside) is just a simple hang – man knot, the kayak has no handle at the stern, since the rudder has taken up all the space.

It’s so good a feeling to see the boat completed! Looking back on the building progress, there’re still things that I’m not really pleased with, in building quality, in the look & feel, in equipments… But I believe this is my best boat so far, accommodating various small design changes that I’ve found neccessary from my paddling experiences. I should start trialling the kayak soon, to see how she would behave on water! 😀

serene – 2, part 34

he bilge pump is a critical component of this Serene – 2 kayak. Empty out a flooded boat, or simply make your seat less wet, it gives you lots of confidence and convenience on long paddling trips. Today, I installed the bilge pump with its water hose (through a hole drilled on the port side). Electrical wires are connected and carefully sealed inside plastic tubes with silicone glue to make them really waterproof.

I wouldn’t want the whole system to collapse just because of one leaked electrical wire (anyhow, there’s still the fuse in case of a power surge, e.g: short circuit somewhere). Watch the short video below to see how the bilge pump works, it’s just so great! 😀 I would just move a wooden knob (the reed switch), and the water jumps out! The small “buzz, buzz” vibrating sound of the bilge pump is so fascinating!

One problem, however, due to the very deep V – bottom of the kayak, some small amount of water remains still at the bottom which could not be sucked out by the pump. That’s not a big problem anyhow, cause I would install a seat that raises me a few centimeters higher on the floor, and wouldn’t make my pant soaking wet. In the video, the water flow doesn’t look very strong, since the battery is already running low.

I would make more thorough testings to see how the whole system works in combination: battery, solar panel, lights, and bilge pump! But I would wait until the 12V battery “fuel gauge” shipped from Amazon, so that I can have exact measures on the battery usage, how many times it could pump out a boatful of water. It’s important to understand how your system works, so that you could make good uses of them on longer journeys!

serene – 2, part 33

ectified one problem with the signal light, the bulb is too greedy, it eats up a lot of electricity and could potentially burn up the reed switch (I’ve noticed the reed switch has malfunctioned sometimes due to the high current). So I replace the bulb with 8 small white LEDs (1 Watt each). Some more soldering work, but finally it’s done, equally bright, but less power consumed, and safer for the switch.

Today, I installed and tested the rudder system. First is the two cable lines used to pull the rudder up and down. The 2 lines run back to the cockpit and are attached to 2 small wooden balls, with a short segment of bungee cord. Third image: the wooden balls and bungee cord. The bungee serves as a shock cord, in case the rudder should collide with some thing and kicked back, so that no damage would be done to the whole system.

One simple rule to operate the pull up / down lines: grab the ball that is further from the cockpit and pull it. Well, it sounds pretty simple, but useful enough, when in action, you just don’t have to think over and over again: which line is up, and which line is down! 😀 The two rudder control lines run back to inside the cockpit where they’re attached to the pedals via 2 small wooden jam cleats to adjust the lines’ tension.

All works well, but the pedal motions are not really smooth, because the bungee cords are not strong enough to pull the pedals back (once one pedal is kicked, I would just have to kick the other pedal to balance the rudder). But I would just leave them as they are for now, as they’re working already, would consider replacing the bungees with stronger ones (or revise the design a bit) later on.