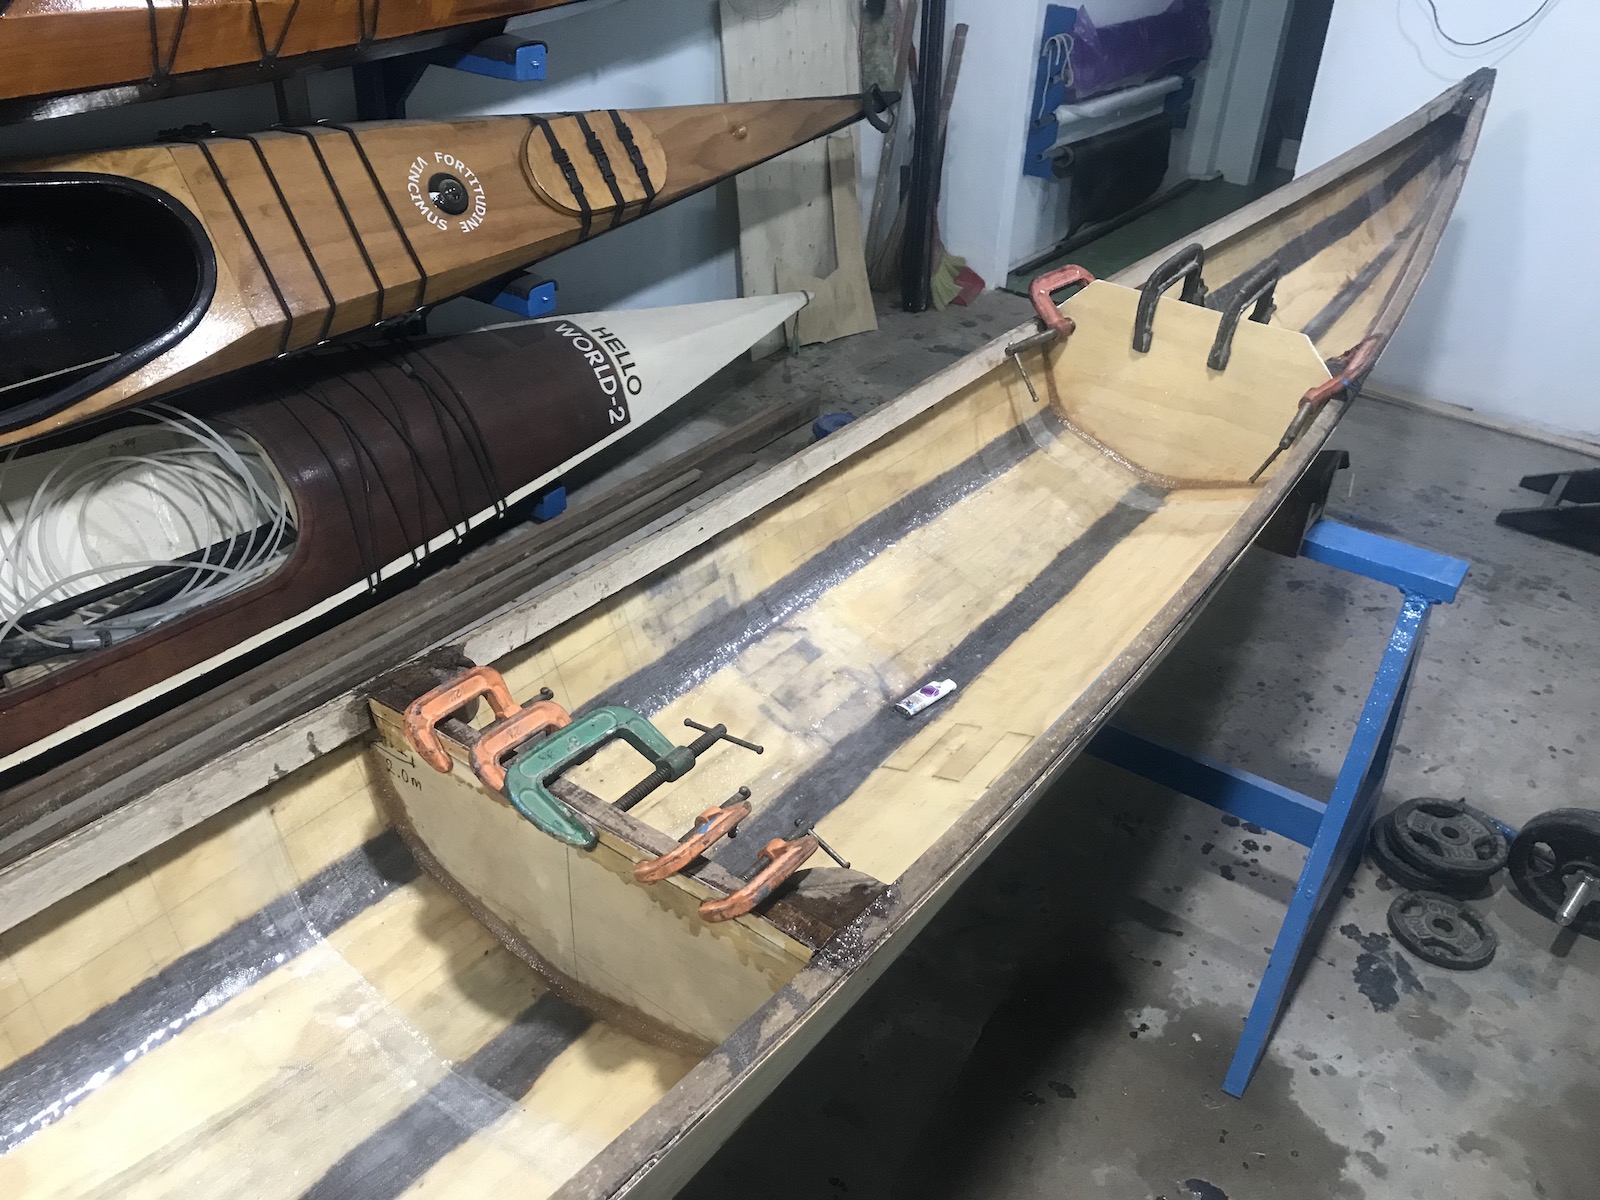
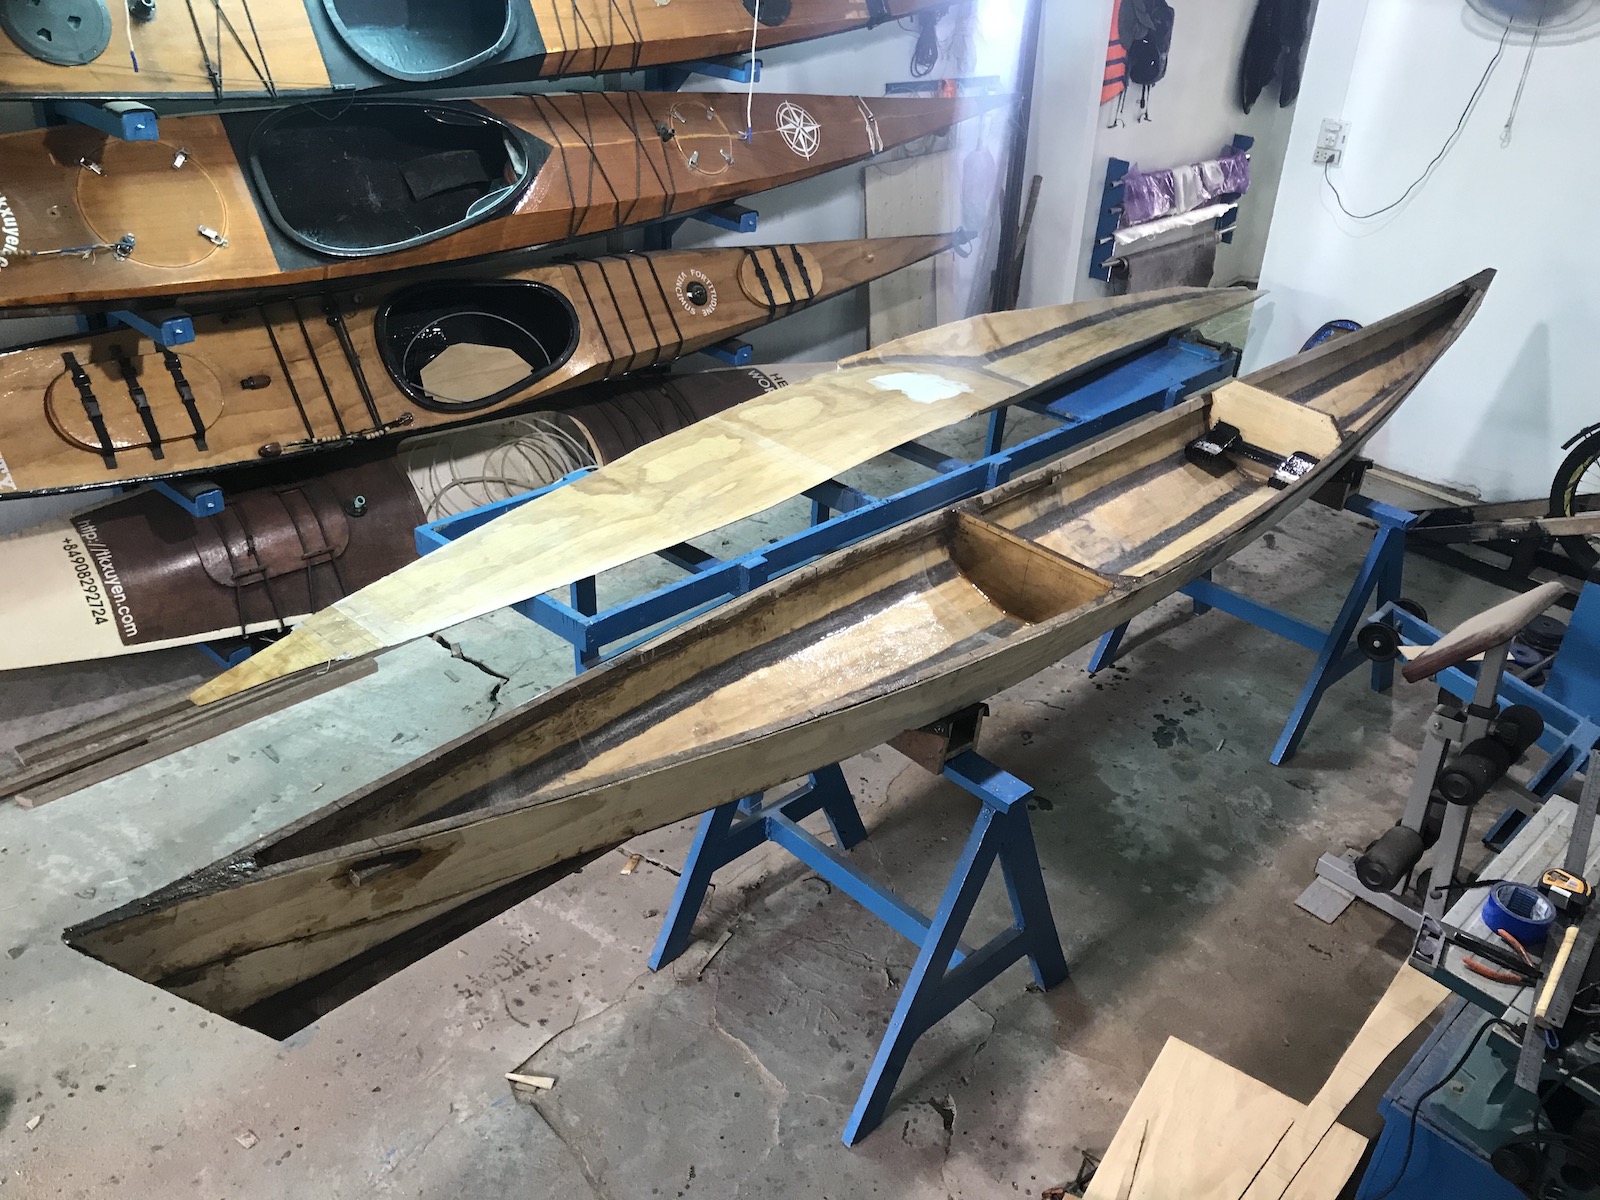
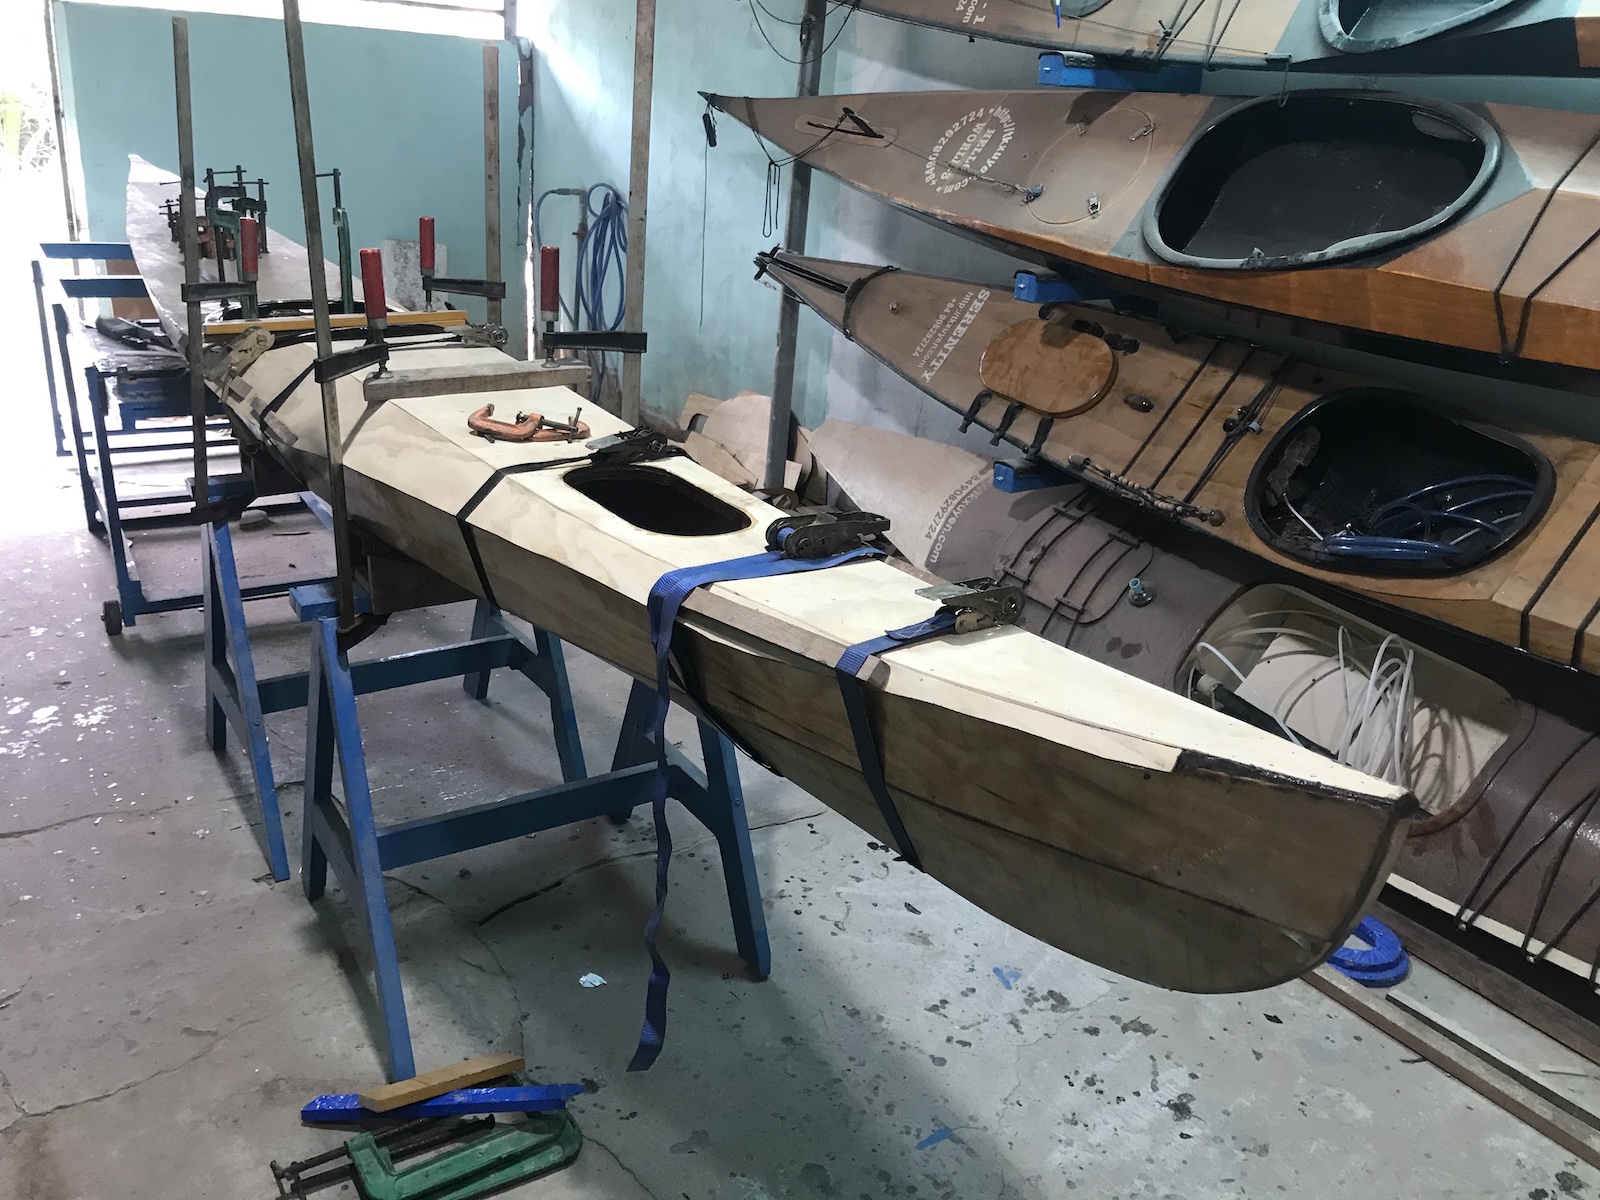
First part is about the general design, now the second part! First, putty-ing… till perfection. Share a tip on how to make a good putty joint between boat’s bilges. Apply the wood-flour-thickened-epoxy at the seam, pay attention to the mixture’s viscosity, too thin it will sag, too thick it will be difficult to work. Spread the putty into a curvy surface, then apply a layer of duct-tape over the seam (choose the thick, cloth based tape, don’t use the thin, nylon one, the thick holds shape better), then using a foam-roller to roll over. When epoxy cured, peal the duct-tape off, you would have a very smooth surface, a perfect blending between the hard-chine bilges, so that glassing would be easier later on.
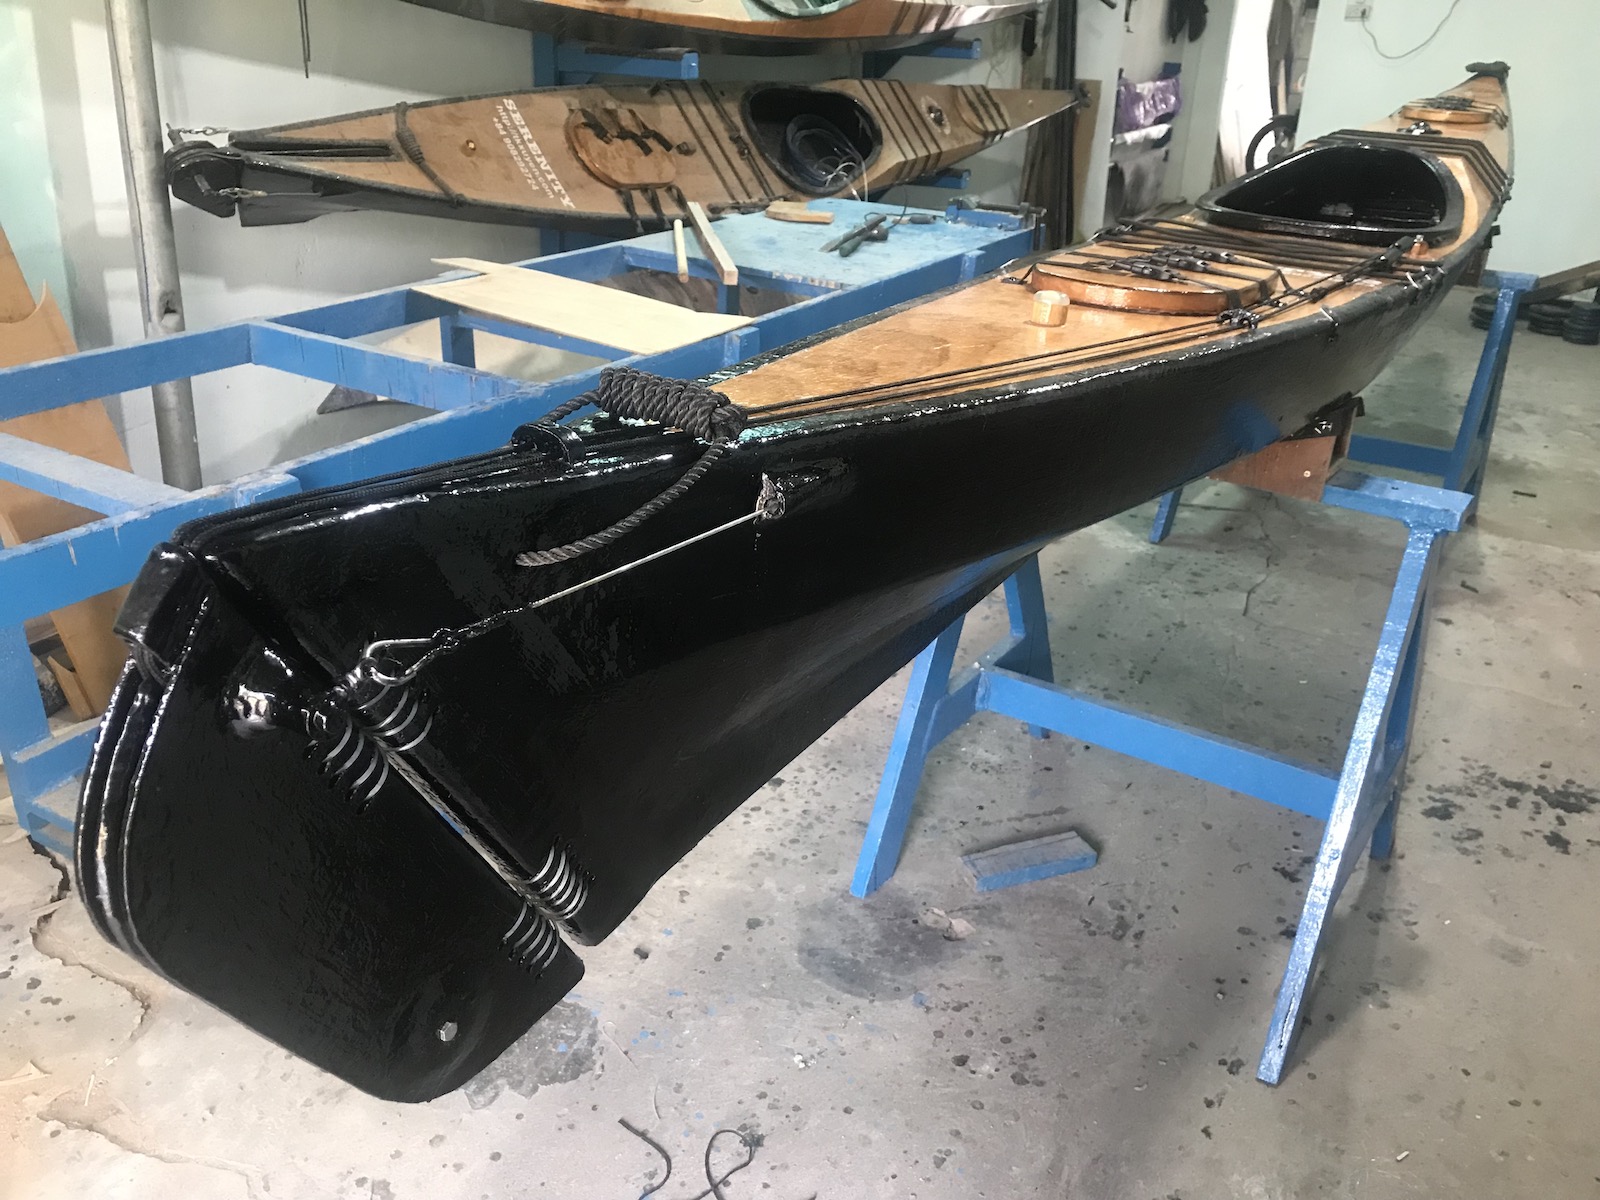
Next is about glassing, I prefer to use a foam-roller to apply epoxy over the fiberglass surface, but sometimes, the epoxy is too thick (it could be that I’ve accidentally bought the batch of epoxy from the bottom of the vendor’s large container), its viscosity is too high, too “dense” for the roller to move smoothly. If it’s the case, mix with some thinner solvent. I’ve always found xylene works best, much better than acetone. But also be careful, don’t add more then 10% (by weight), or the cured glass would be weakened. After building those many boats, my glassing skills (if it could be called so) has become very good, almost no bubbles, no sagging… The result is just pure, smooth glass, very satisfying!
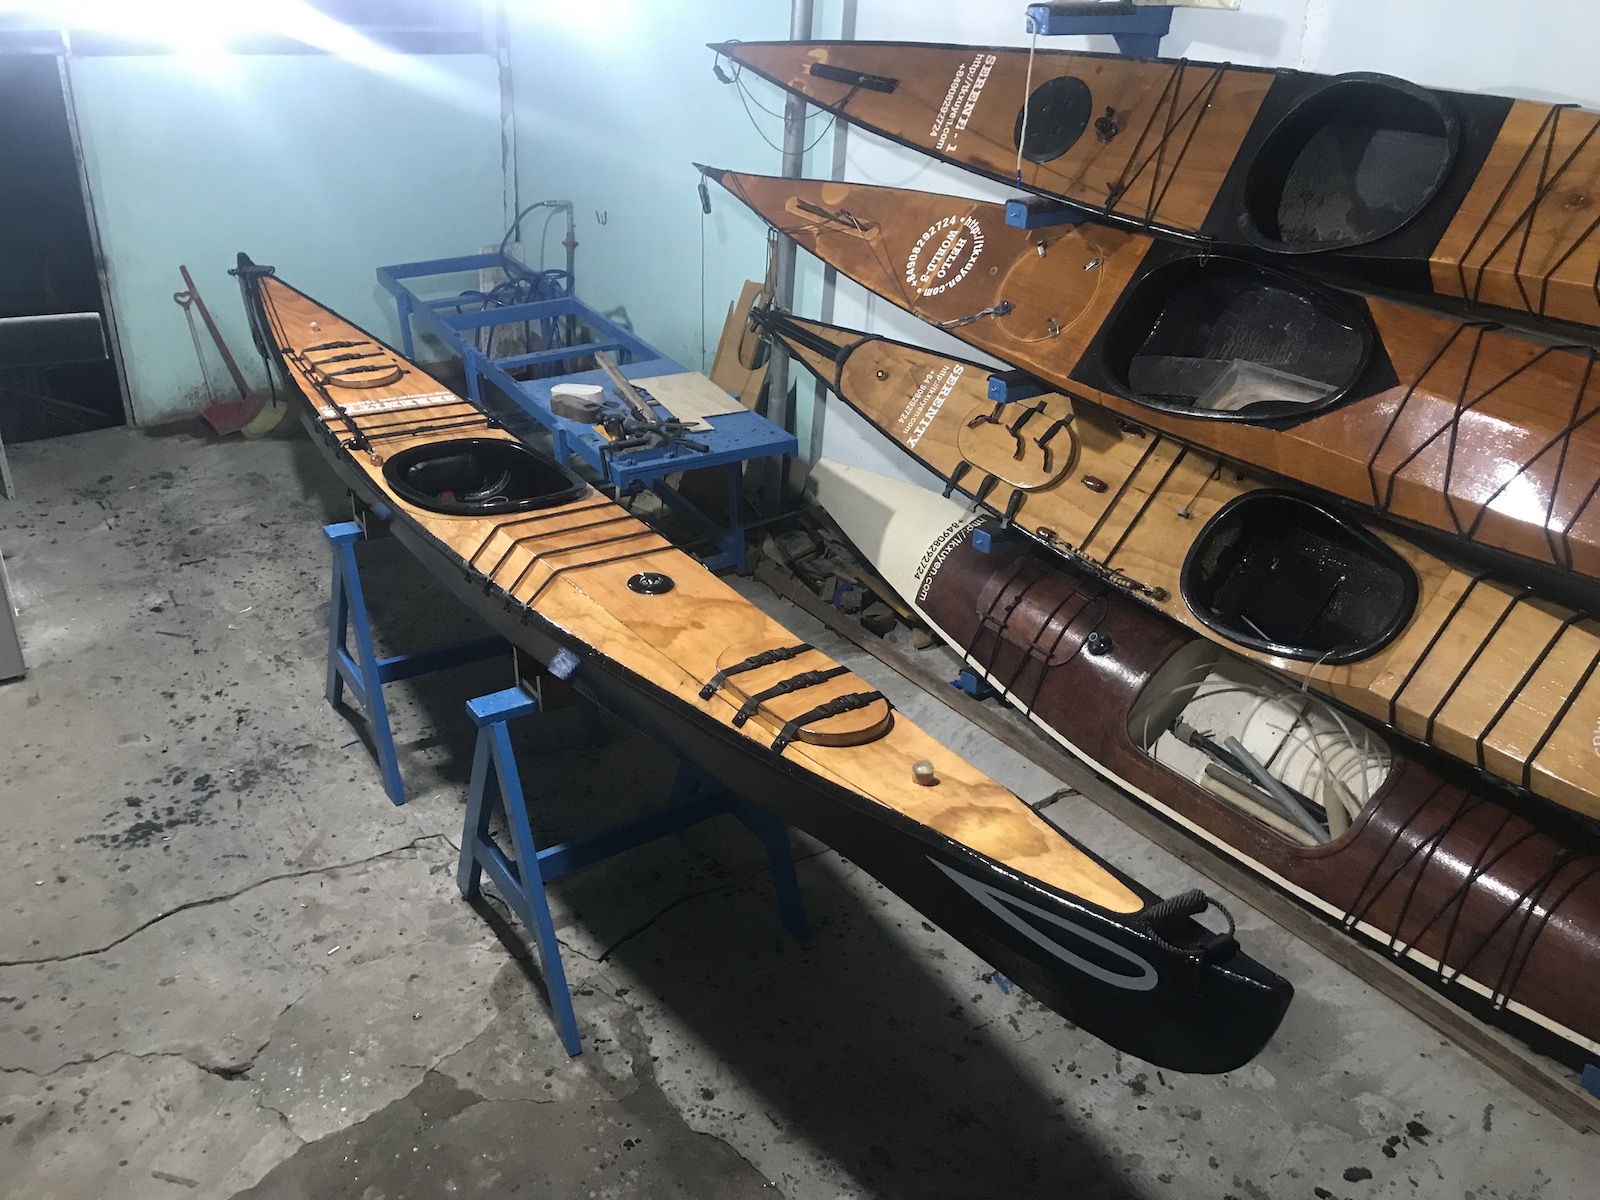
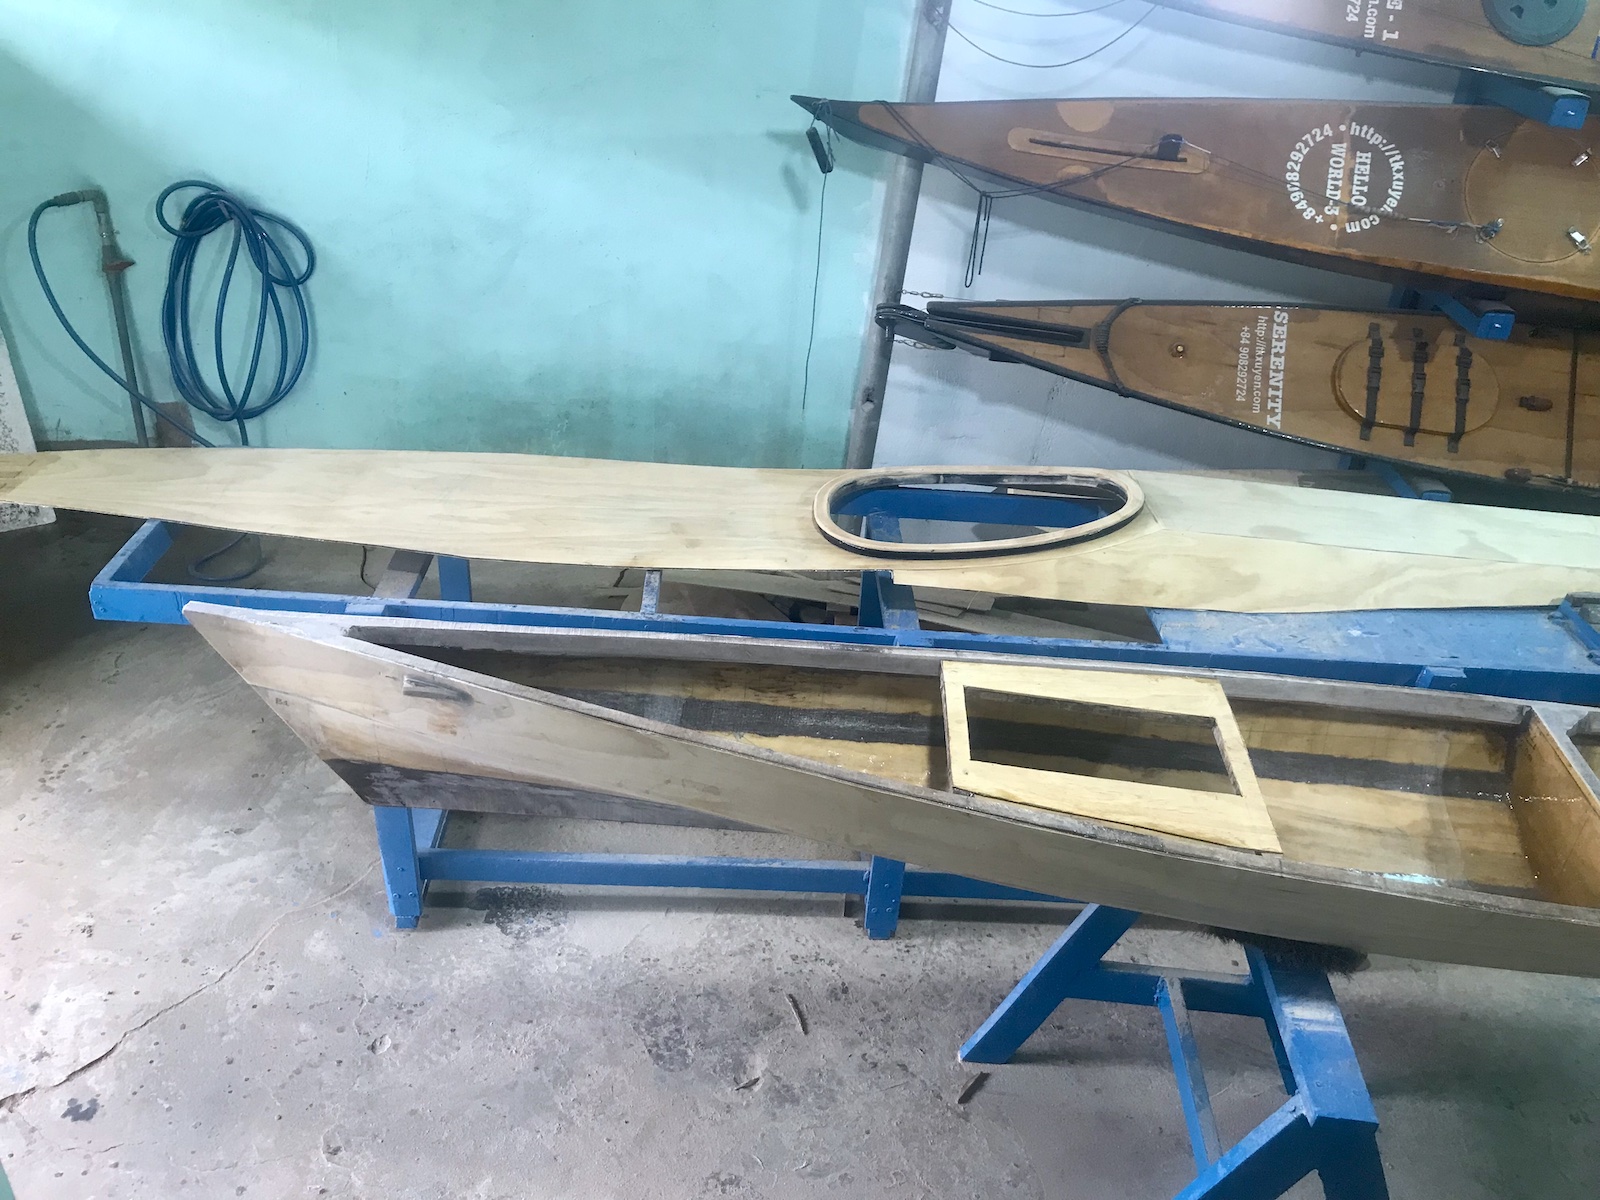
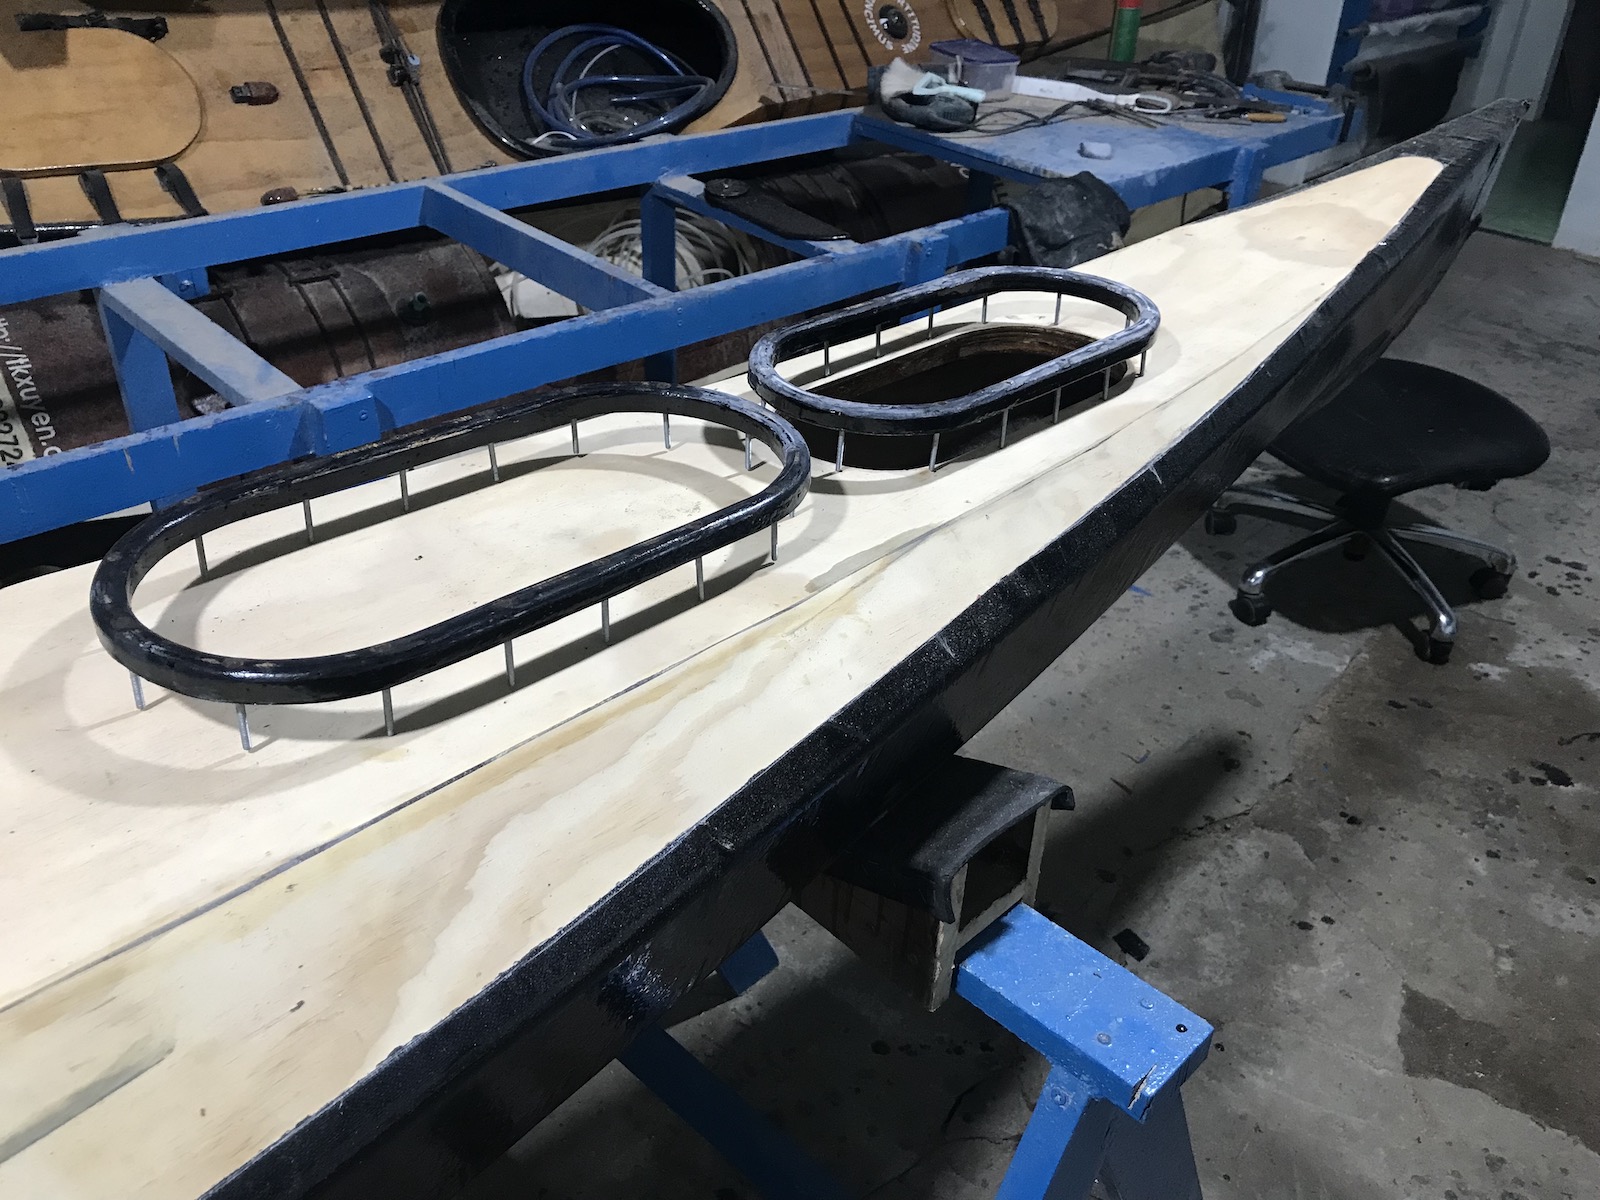
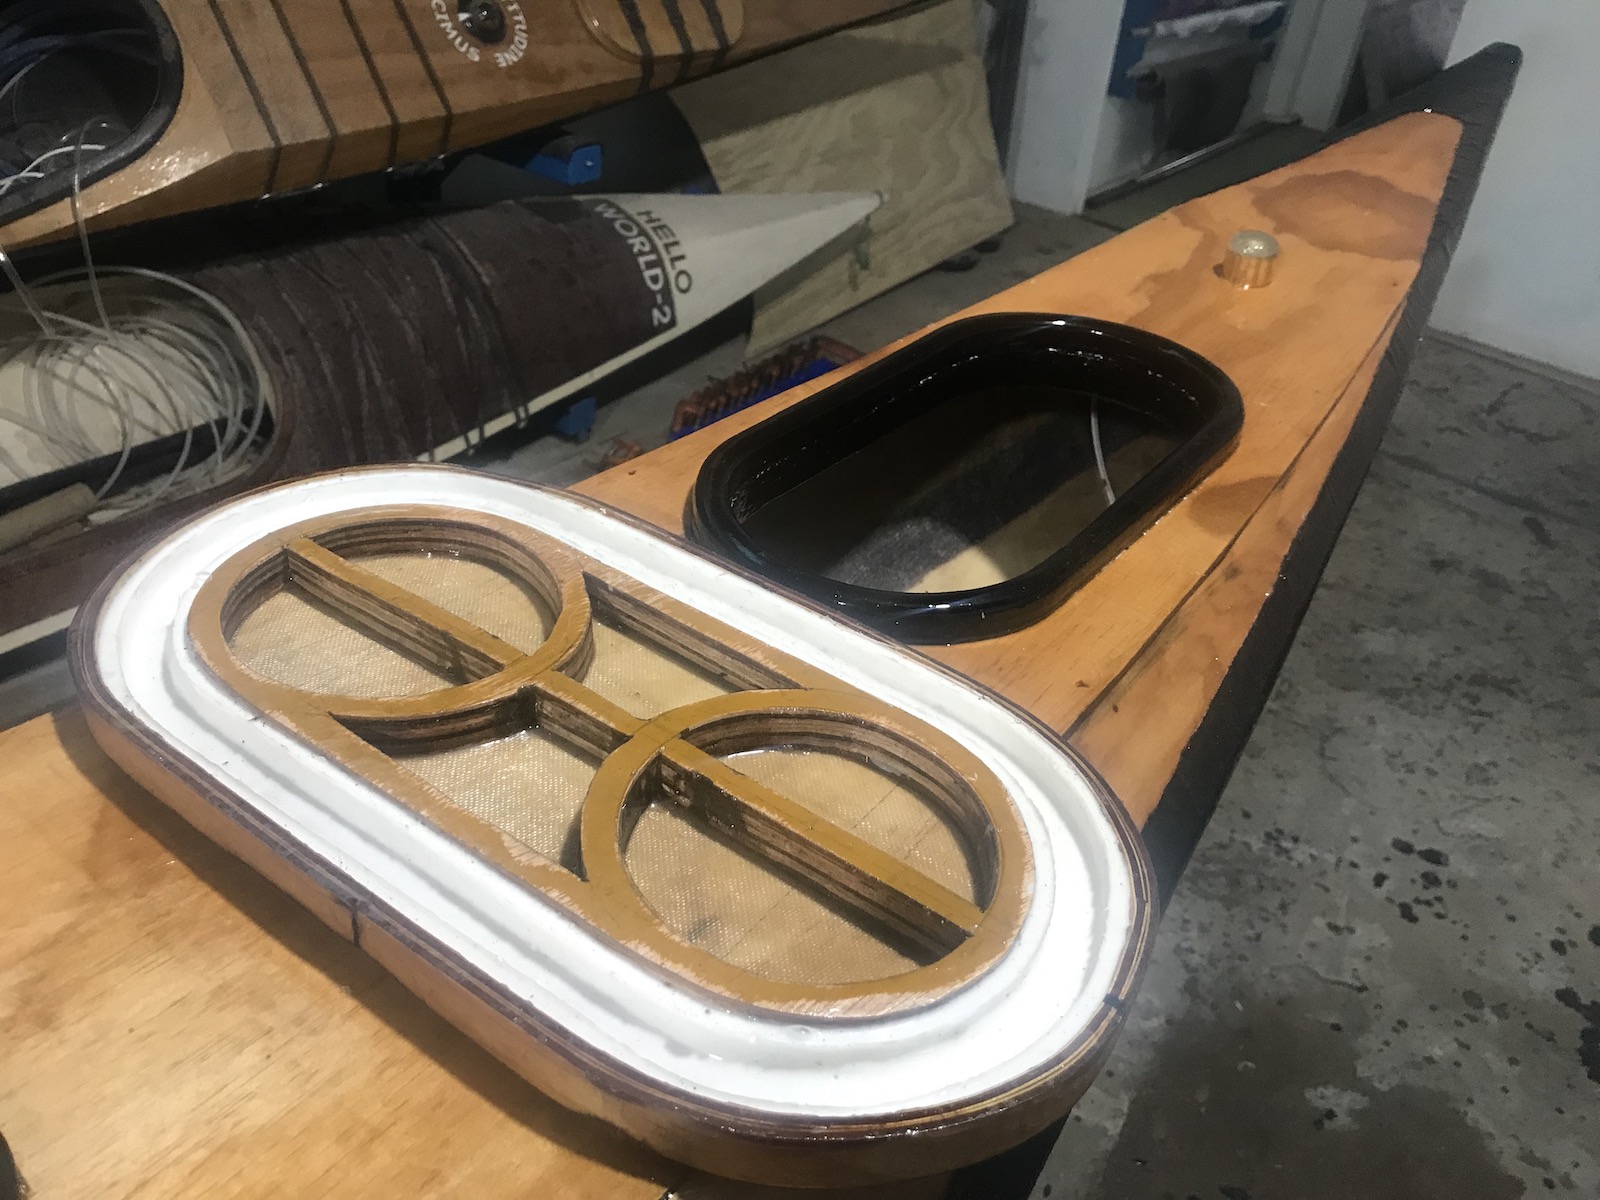
A lesson learnt from the previous build, the 2 hatches now have some stringers to support underneath, cause just a 4mm plywood deck would bend over time and under load. With this support, the hatches’ rims would stay in shape and help keeping a tight fit. After lots of “brainstorming”, I’ve decided to mold the water-proof gaskets from… epoxy, not the type of hard-epoxy commonly used for boat-building, but a softer, bendable one. The stiffness of the material used for gaskets is important: too hard and it won’t brace well to the rim, too soft and it could deform over times. Although I believe this is the best “hatch solution” (rim + lid + gasket + lock) I’ve found out so far, only real-world tests will tell!
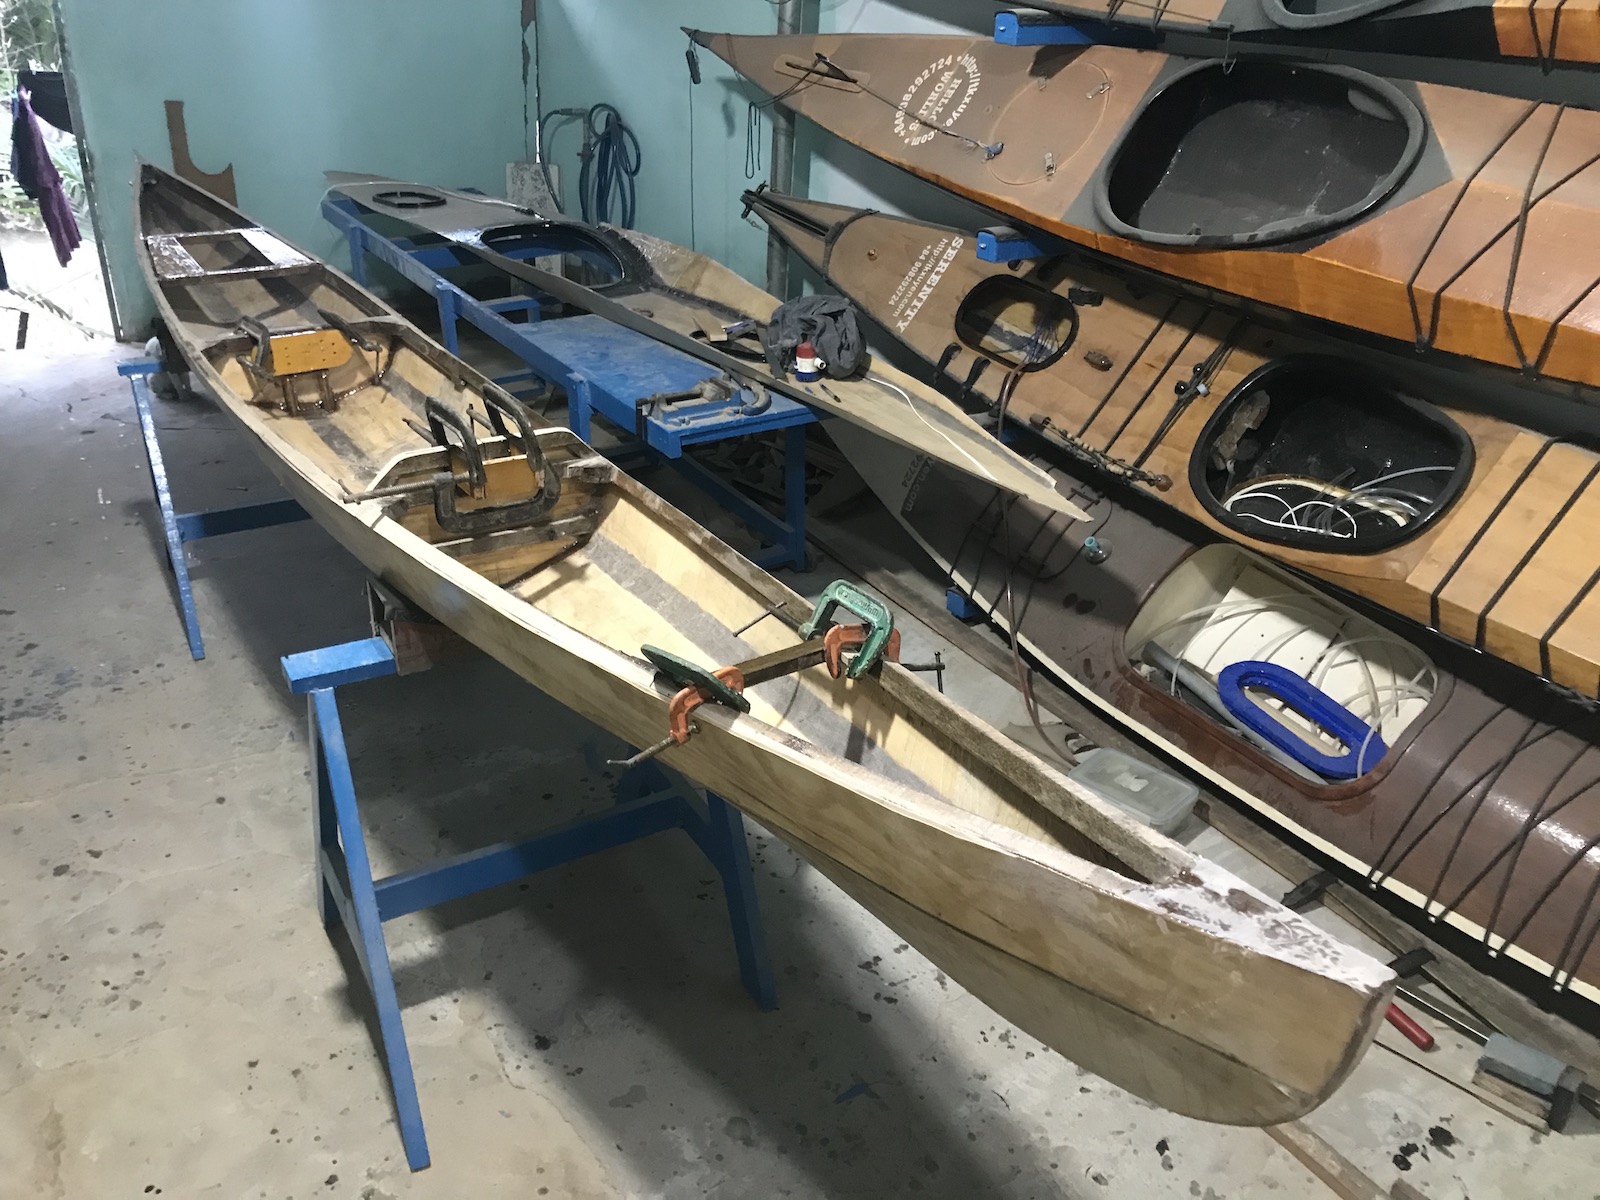
There’re so many miscellaneous, time-consuming jobs not described here: running the rudder control lines, attaching the rudder pedals (I reuse those of a previous build to save time), running the electric lines under the deck, trimming the bilges outer joints, adding an additional protecting layer of glass at the boat’s two ends, building the rudder parts (the rudder will be fastened by rope to the rudder post, like that of a Wharram cat), building the cockpit coaming, preparing mounting points for the compass and bilge pump, etc… before the hull & deck parts could be joined together. I hope I could finish this build before Tết holidays (Vietnamese Lunar new year), but a few days delay would be just fine!

First part is about the general design, now the second part! First, putty-ing… till perfection. Share a tip on how to make a good putty joint between boat’s bilges. Apply the wood-flour-thickened-epoxy at the seam, pay attention to the mixture’s viscosity, too thin it will sag, too thick it will be difficult to work. Spread the putty into a curvy surface, then apply a layer of duct-tape over the seam (choose the thick, cloth based tape, don’t use the thin, nylon one, the thick holds shape better), then using a foam-roller to roll over. When epoxy cured, peal the duct-tape off, you would have a very smooth surface, a perfect blending between the hard-chine bilges, so that glassing would be easier later on.
Next is about glassing, I prefer to use a foam-roller to apply epoxy over the fiberglass surface, but sometimes, the epoxy is too thick (it could be that I’ve accidentally bought the batch of epoxy from the bottom of the vendor’s large container), its viscosity is too high, too “dense” for the roller to move smoothly. If it’s the case, mix with some thinner solvent. I’ve always found xylene works best, much better than acetone. But also be careful, don’t add more then 10% (by weight), or the cured glass would be weakened. After building those many boats, my glassing skills (if it could be called so) has become very good, almost no bubbles, no sagging… The result is just pure, smooth glass, very satisfying!
A lesson learnt from the previous build, the 2 hatches now have some stringers to support underneath, cause just a 4mm plywood deck would bend over time and under load. With this support, the hatches’ rims would stay in shape and help keeping a tight fit. After lots of “brainstorming”, I’ve decided to mold the water-proof gaskets from… epoxy, not the type of hard-epoxy commonly used for boat-building, but a softer, bendable one. The stiffness of the material used for gaskets is important: too hard and it won’t brace well to the rim, too soft and it could deform over times. Although I believe this is the best “hatch solution” (rim + lid + gasket + lock) I’ve found out so far, only real-world tests will tell!
There’re so many miscellaneous, time-consuming jobs not described here: running the rudder control lines, attaching the rudder pedals (I reuse those of a previous build to save time), running the electric lines under the deck, trimming the bilges outer joints, adding an additional protecting layer of glass at the boat’s two ends, building the rudder parts (the rudder will be fastened by rope to the rudder post, like that of a Wharram cat), building the cockpit coaming, preparing mounting points for the compass and bilge pump, etc… before the hull & deck parts could be joined together. I hope I could finish this build before Tết holidays (Vietnamese Lunar new year), but a few days delay would be just fine!
Work until the last days of the (Lunar) year, the progress has stagnated recently. A setback in building progress, I did hope I could finish the whole boat within the old year, but when molding the hatches’ gaskets, the (soft) epoxy just didn’t cure, maybe because I’ve been storing it for more than 2 years, its “shelf-life” has ended, or maybe another reason I don’t know, have serious doubts about the quality of every materials here in VN! Materials’ qualities are important, cause if they’re not upto the “standards”, then most of the time, instead of building, you would just “fix this, fix that”, problems that arise during the progress, it adds much more time to the building, which is already labour-intensive.
For the epoxy, it would be a total mess if epoxy doesn’t cure properly, the best scenario is you can somehow, scrap the whole jelly, sticky thing away and the worse case is that: all you’re working on has to be thrown away (and building new ones). And I’m building 2 completely new hatches! Well, I’m used to it already, sometimes, a simple task has to be done 2 times to be right! And since all stores is closed down during these 10 days of holiday, lots of building jobs have to be postponed! So I take this time and slow down all the building steps, and maybe launch the kayak without some not-too-important details, and finish it later on after the holidays when all the stores are opened again!
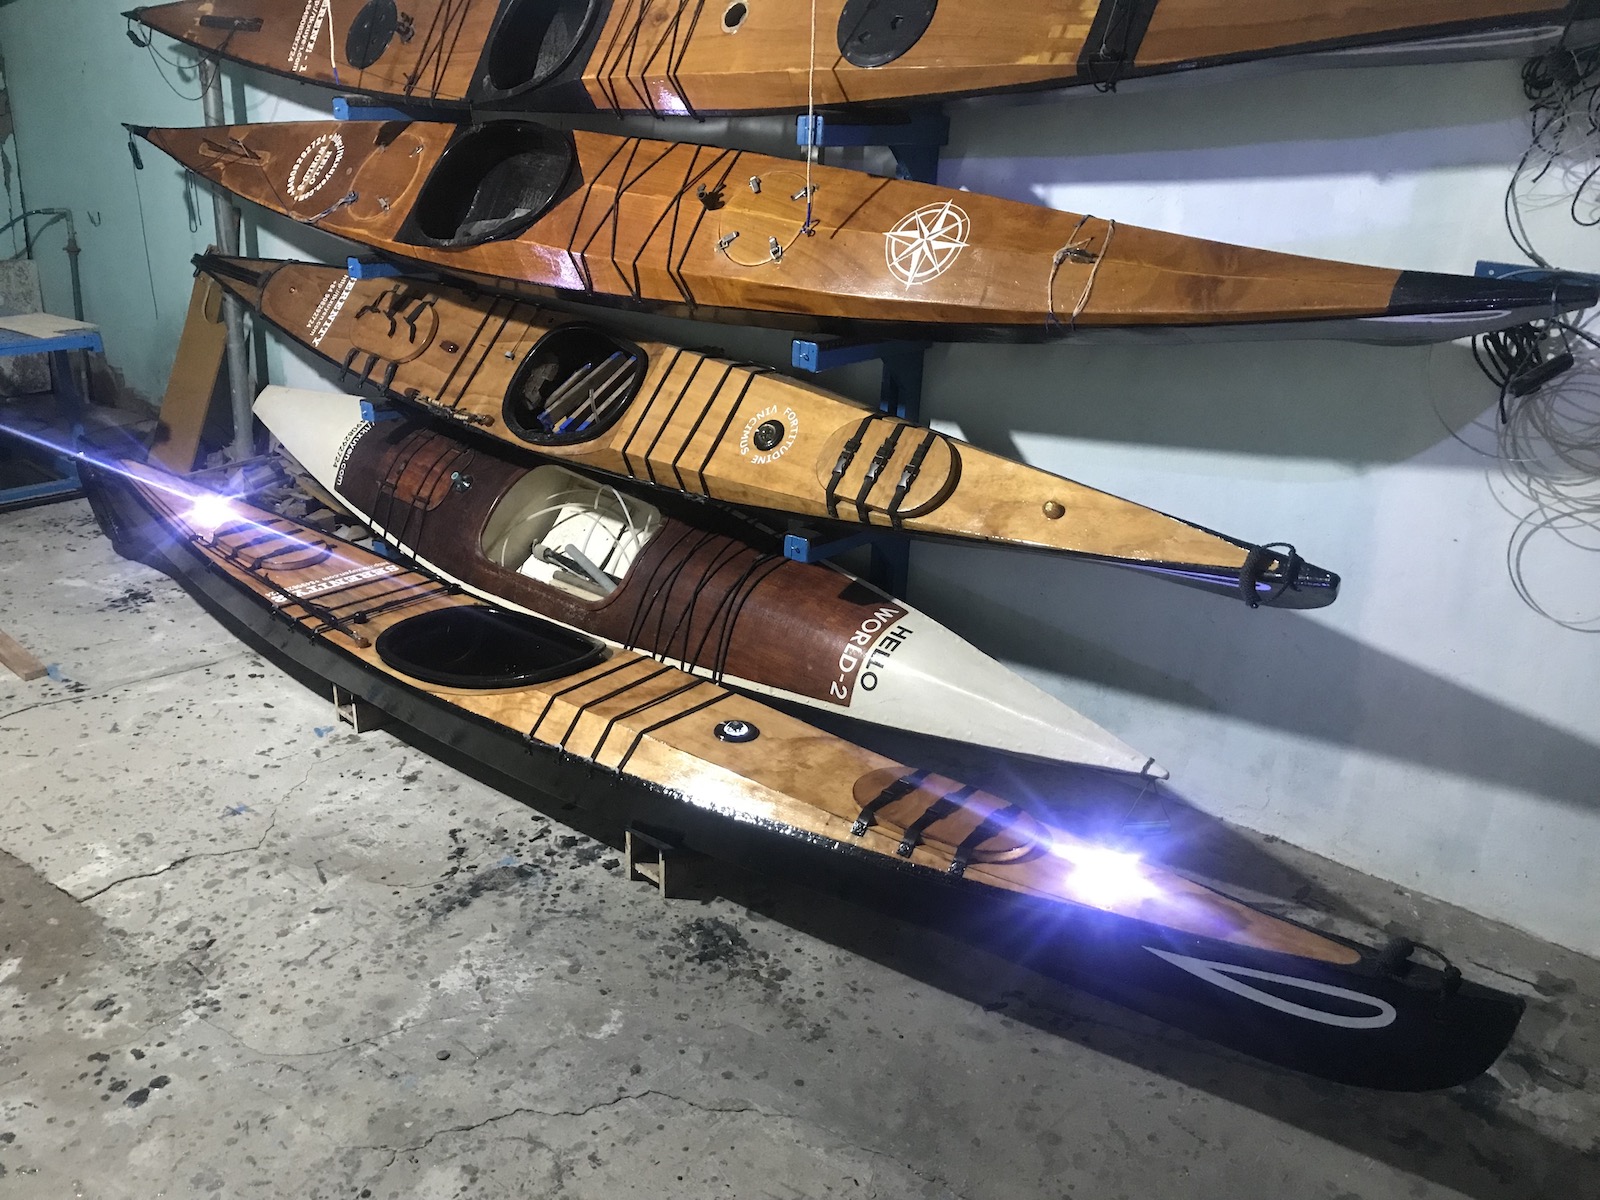
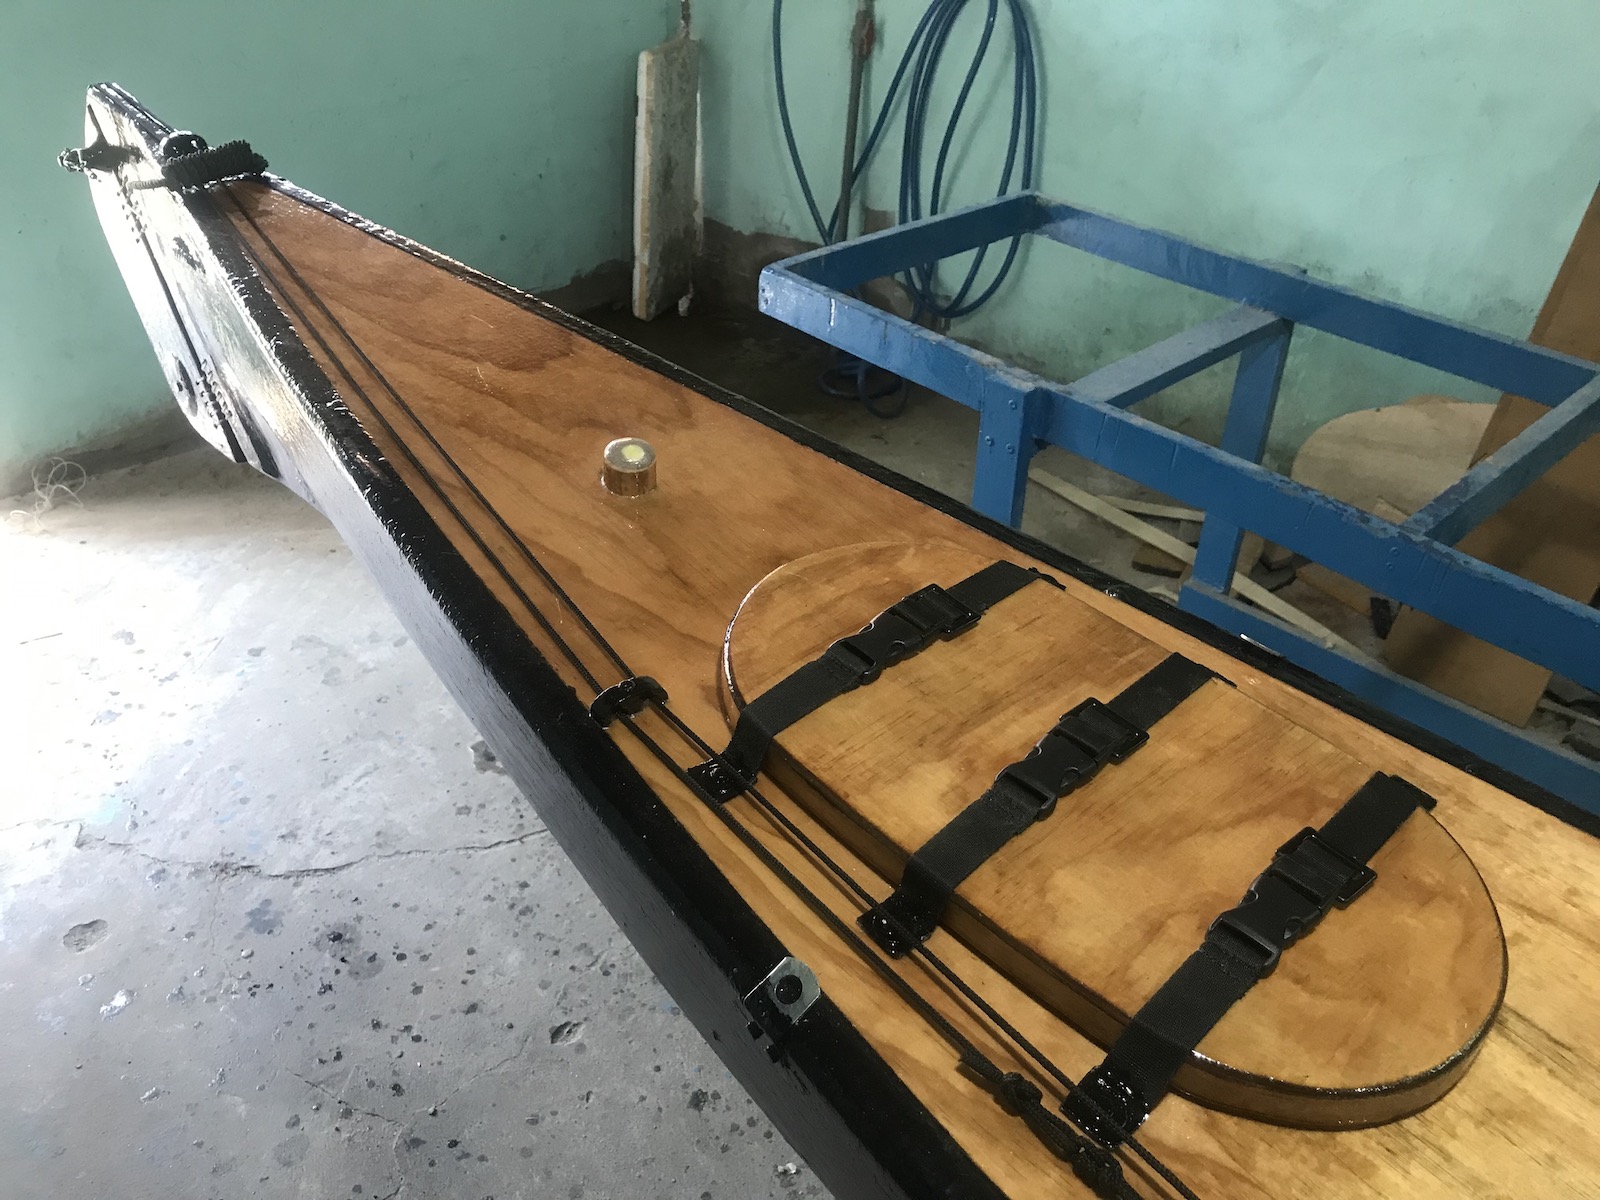
The deck part would receive 3 protecting layers: 1 epoxy layer, 1 gelcoat layer and 1 topcoat (PU paint) (not counting an initial layer of coloring wax), the bottom part has 5: 2 layers of epoxy, 2 layers of gelcoat, and 1 topcoat. As proven in the previous build, gelcoat is really great: hard, durable, not easy to scratch. The thin topcoat layer is just for the gelcoat to cure properly, as the gelcoat I’ve purchased is not pre-mixed with wax (wax is required to protect the gelcoat from making contact with air, it can only cure properly without air). Then building and fitting the rudder, then fitting the bilge pump, light bulbs and the battery box, fit the compass and those bungee cords, various details to be done!
Sometimes, I did re-use some components from a previous build, well, I did reuse the bilge-pump (leave it in the old boat and it would just rot away anyway for no good). But I really hate having to “cannibal” an old boat to get the parts for the new one, it would leave your boat collection… incomplete. But that also means I would have to build a lot of things, a new build is surely better then an old one, after some times of practical uses in real-world, you would come up with new ideas, new designs. As for this build, the battery box, the compass and bilge pump, the rudder, the hatches (caps and rims) are all improved, they’re built in a way that they can be easily swapped out for repair or upgrade later on!

Ten more days into the new year, and the boat status is still… near complete! Some more failures and the holidays are so long, every stores is closed so I can not purchase some necessary materials. Anyway, here’s the progress so far… Finish molding the silicone gaskets, now I used a harder type of silicone (A25) instead of soft epoxy! The gaskets create a very tight brace indeed, you have to push a bit for the rims to fit into the U – shaped gaskets which embrace 3 sides of the rims! The hatches’ caps will be secured to the boat deck (on the internal side) with short pieces of paracord. Explaining to other peoples: the paracords prevent losing the caps accidentally!
Explaining to myself: since the hatches, caps, rims and gaskets are all built by hand, there’re some small cutting, gluing, molding errors. So if you rotate the caps the other way around, they won’t fit properly to the gaskets, the paracords mark which end should the rims and gaskets go together! The hatches’ rims are bolted with small 3.5 mm bolts to the deck (with supporting stringers on the internal side). This way, if somehow the rims are broken or damaged, they can be pulled out for repaired, or replaced. Also, I’ve finished building the compass cup! The compass cup is made from… paper, I just use a long roll of paper, wrap around a round cylinder after soaking it with epoxy.
Once eopxy cured, the paper roll is harder than plywood, and since the cup sits inside the deck, protected from water, that’s good enough! Also, I’ve carefully drilled a small hole in the compass and inserted a small white LED bulb (the compass I could find here with built-in lighting is too big for my kayak). The compass cup is secured to the deck with 3 copper bolts (most steel bolts are ferromagnetic, and they will affect the compass heading given their very closed proximity to the compass’ magnet). This way, the compass cup can easily be detached for repair / replace later on). Also, I’ve finished building the rudder, and 2 new LED bulbs.
The hull is given 2 layers of gelcoat already, a topcoat would come next! All of a sudden, the temperature in Saigon drops to just below 20 Celsius for the last few days, which is a quite strange indeed. So the gelcoat tooks longer to cure, I have to leave it overnight for each coat. For all these 2 – components chemical things (epoxy, gelcoat, PU paint, silicone, etc…), they do not “dry” like paint, they’re real chemical reactions. So, temperature and humidity have great effects on the curing process, and sometimes it just fails “for no obvious reason” (actually, some certain combination of environmental factors that we don’t fully understand). There’re quite some more jobs to be done to finish this building…
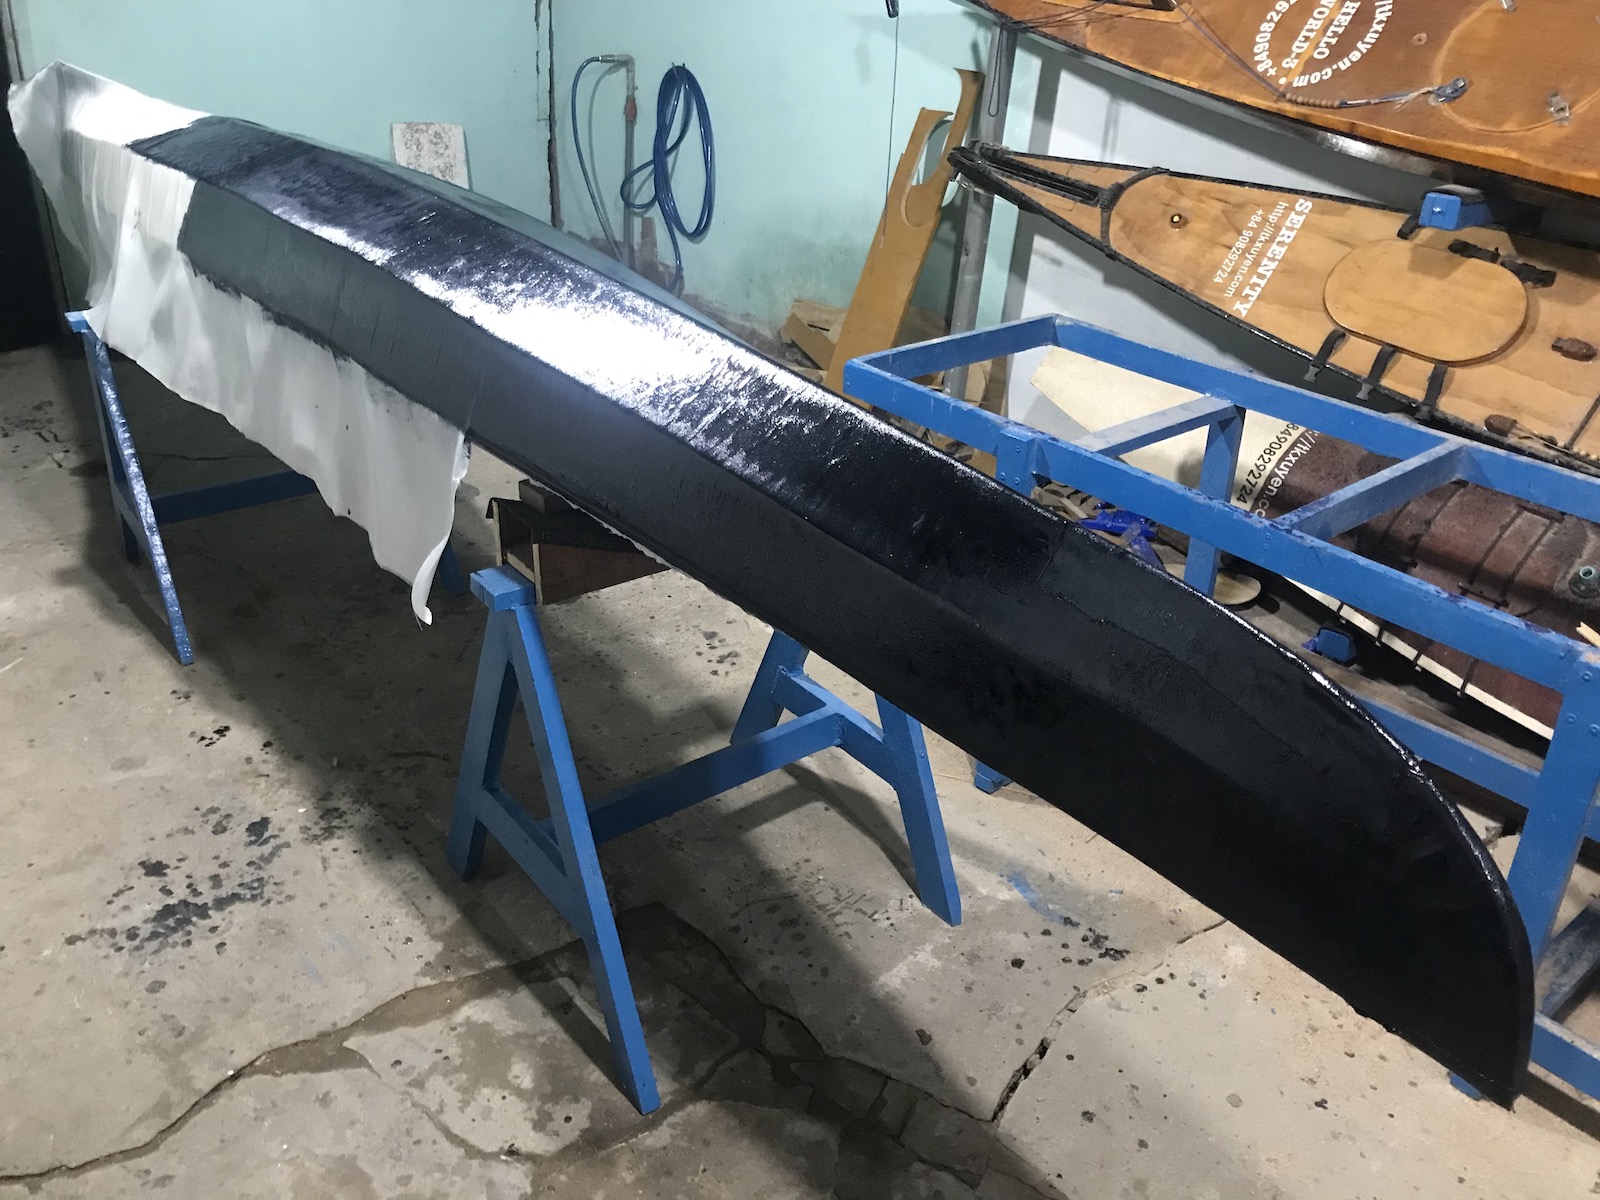
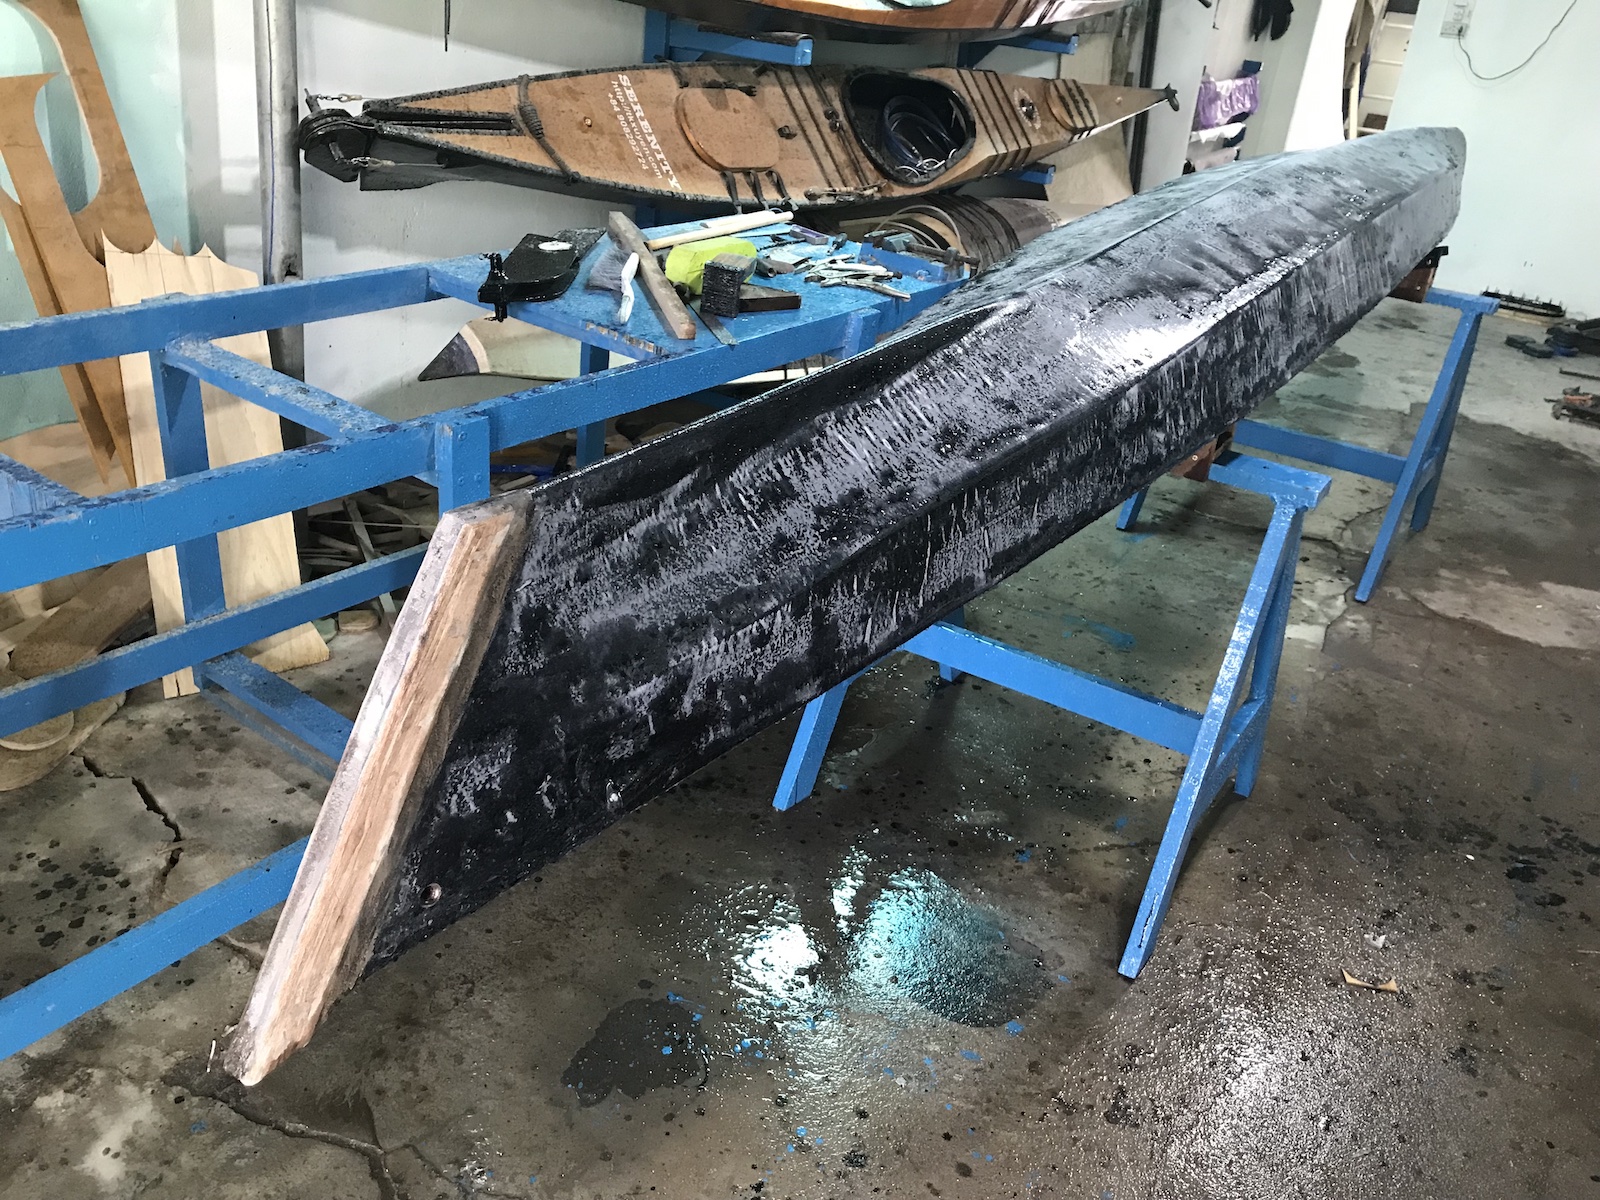

It takes really long to finish this build, some more failures, also I wanted to slow down and do it right! The hull glass is lightly sanded, then applied 2 layers of gelcoat. Another lesson learnt: gelcoat need to be thick, too thin and it won’t cure properly (think about it like a kind of chain – reaction, need to reach some “critical mass”)! The gelcoat layer applied to the rudder failed miserably, I had to scrap it out, applying a new, thicker layer. Luckily, all went well for the hull, before proceeding to the deck! This is the first time I use the MinWax wood stain, it’s a type of light oil mixed with color pigment, the color scheme is called: Golden Pelican, I really love this color: bright, vivant, and not too intense!
Unfortunately, this wood stain also has an unexpected side effect, cause it’s a kind of oil, it modifies the wood surface in such a way that applying epoxy on top of it becomes very difficult. I guess there’s something to do with fluid – surface tension, the epoxy just won’t spread out evenly, it just doesn’t mix well on the oily surface, so lots of, lots of brushing work was needed! However, the epoxy did cure properly, I then sanded it down before applying 2 layers of PU paint, I didn’t use gelcoat for the deck, fearing that it’s “not – too – optimal” transparency would affect the nice color! Next, the hatches’ rims were bolted in, initial tests gave me the impression that the hatches are even… air – tight.
Not just water – tight, it requires some little forces to push the caps in or pull them out from the rims. I think the “hatch solution” will work fine, yet for how long in real – world conditions is a question to be be answered later on! Then go in various accessories: the bilge pump with its water hose, this type of elastic PVC tube is quite special, it’s reinforced by steel wire inside the PVC wall, so that the tube won’t collapse at corners. The light bulbs and compass, wires connected, lead – soldered, run inside plastic tubes filled with silicone to make the electric connections waterproof! The battery box is rebuilt, all components are now “loosely – coupled”, they’re connected by various 12V DC connectors.
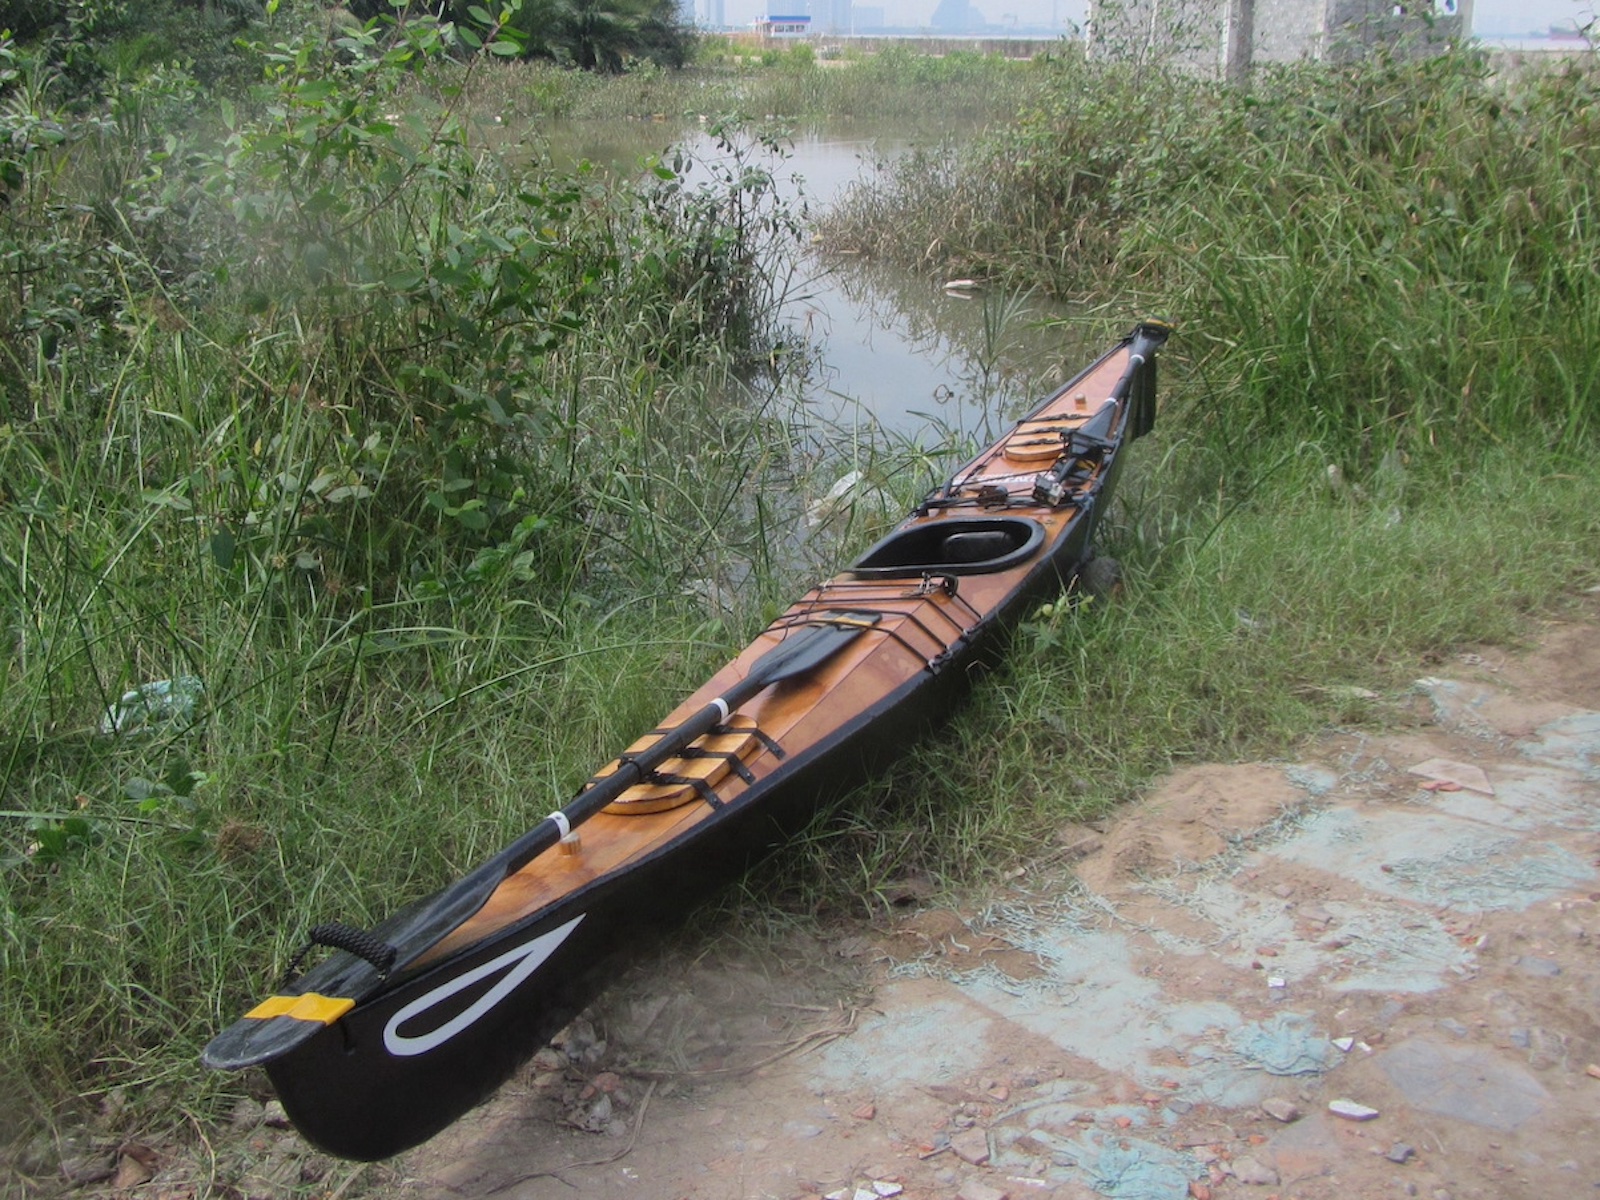
So that they could easily be disassembled for repair / upgrade later. The last major component is the rudder, it’s transom – mounted by ropes, like that of a Wharram cat: 6mm holes are drilled into the rudder box and rudder post, filled with putty, then 3mm holes are drilled again through that putty, to make the wood protected from water. The boat eyes decals, boat name, contact info, the bungee cords, and a mesh bag (a laundry bag purchased at local store) is fixed inside the cockpit, just under the deck, place to store various small items when paddling. The Lunar calendar has moved from Dahan (Đại hàn – 大寒) to Lichun (Lập xuân – 立春) a few days ago, can’t wait to launch and try the boat!

Made 2 short paddling rounds at night (due to local water conditions, about 5 ~ 10km each) and 2 hour of rolling to test the kayak, to see if everything works as expected. They’re leak – tests (much like smoke – test in electronic and software engineering). And indeed, found and fixed a minor leak in the aft compartment (at the joint right after the cockpit). The hatches are completely water – tight, there’s nothing to worry about. The tests only assure me on the “static” side of the boat: it tracks too straight (a bit hard to turn in tight corner, but that’s a desired behaviour) and the speed seems to be good too (a claim to be backed by GPS numbers later on). About “static” and “dynamic”…
Much like sailboat (but perhaps to a lesser extent), there’re much differences between “static” and “dynamic” aspects. There’re boats that seem to fair well on stable water, but behave badly in weather, and there’re boats that don’t feel very stable on calm water, but excel themselves in turbulences. So actually, it’s the dynamic side that’s more important, but that would require long testings to really know. For now, I would just try to detect and fix small issues. First is to make some small changes to the rudder’s pedals, to make the foot – work a bit more comfortable… Then test running the light – bulbs for many hours to see if they’re durable enough, and to measure the battery usage!
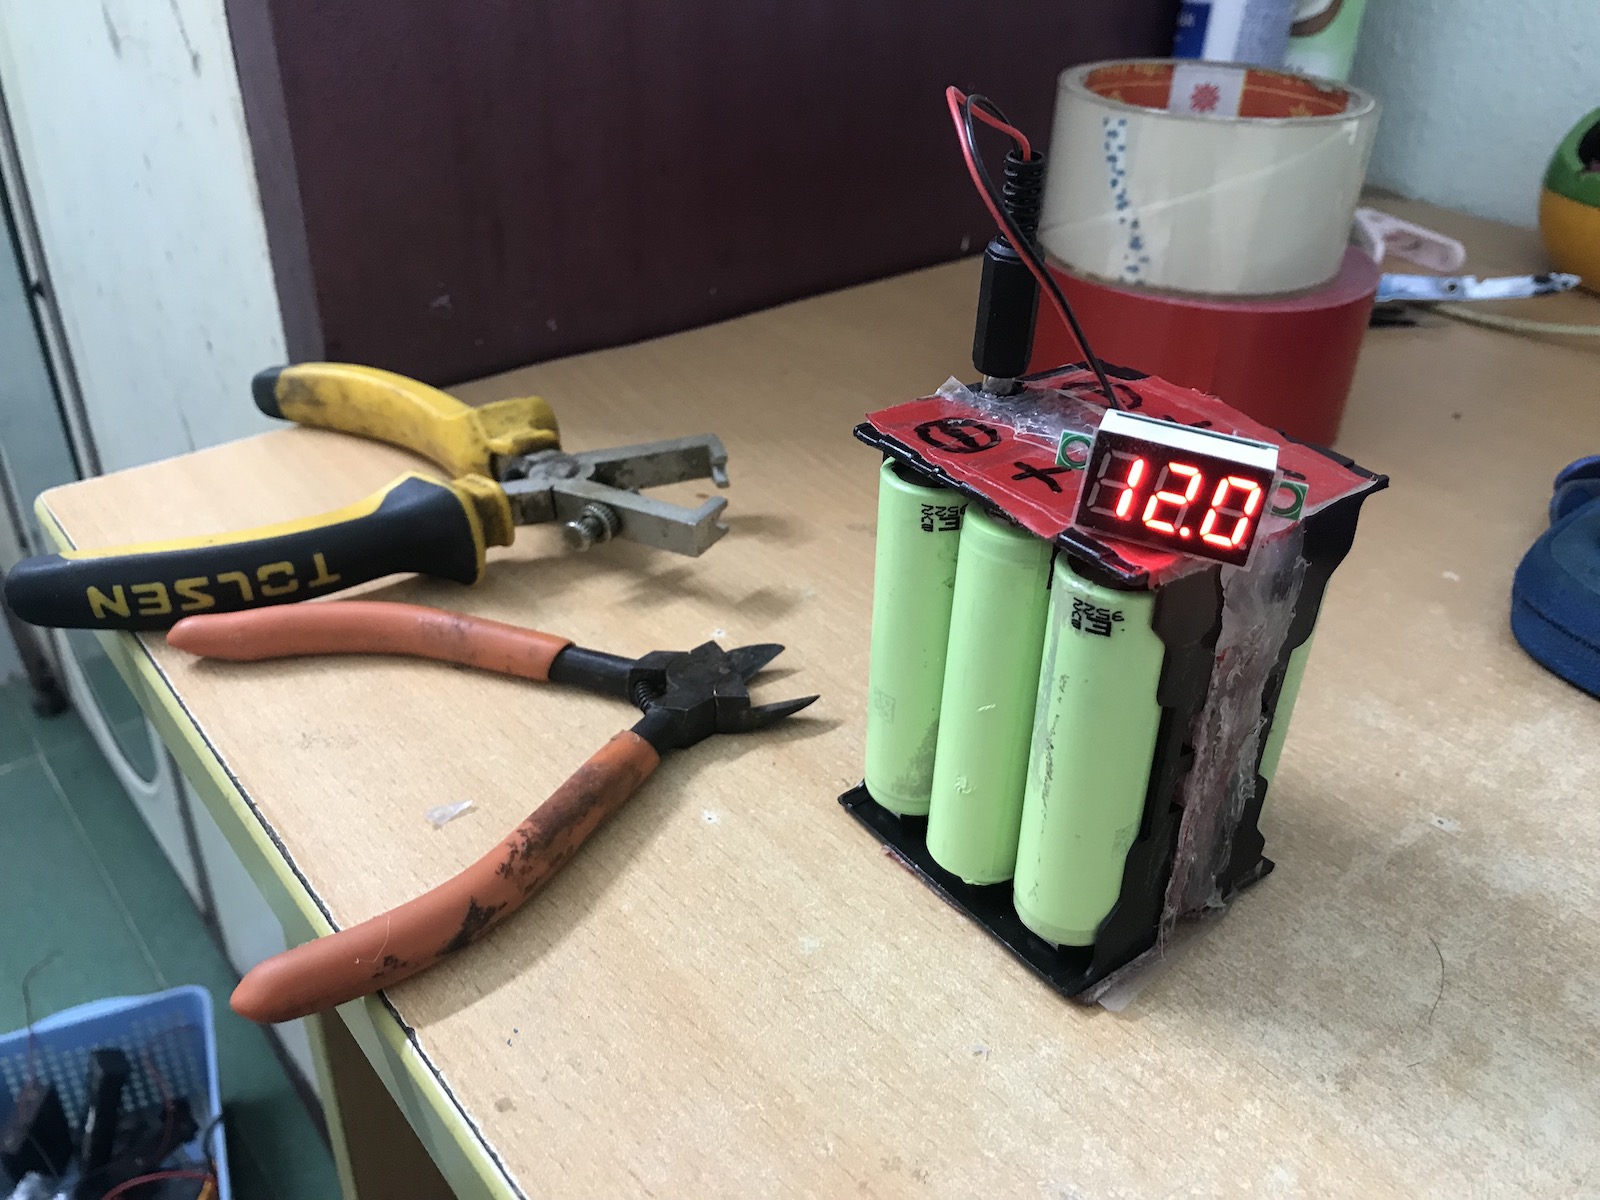
Detected a faulty (low quality) 12V DC connector which builds up too much heat if used for a long time, to the point of plastic melting down. I had to replace them with better ones. The new battery box now has 2 blocks, 12 cells of 18650 batteries in total, and 2 additional, reserved slots to install 2 more blocks later. So the maximum capacity is about 20 Ah at 12.6V, each block is about 5 Ah. I guess the actual, usable number is much less, not that advertised, ideal – conditions number. I discovered an important thing: although the voltage indicator (8-segments display) consumes very little power (less than 30 mA), letting it always ON would drain the battery pretty fast (about 0.1V per day)…
Maybe there’s some hidden, internal consumption by the BMS – battery management system). So I’ve added a switch and turn it OFF when not in use, and the battery box would last for weeks (not just days), before needing a recharge. A small chip (the size of your thumb) will be in charge of downgrading the 12V current into 5V and serve it through a USB port, it charges my iPhone just well, and pretty much every devices is using USB – charging nowadays. At this point, the boat is pretty much heavy, already over 33 kg, but that includes everything: rudder and pedals, the battery box, the compass, light bulbs, the bilge pump, etc… Would update more on boat trialling in the coming weeks…