Côn Đảo – 2017, post mortem

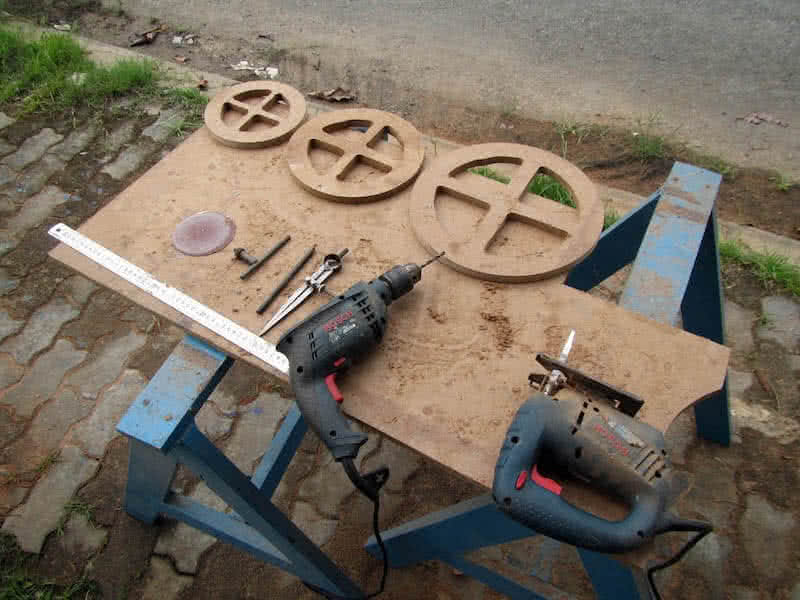
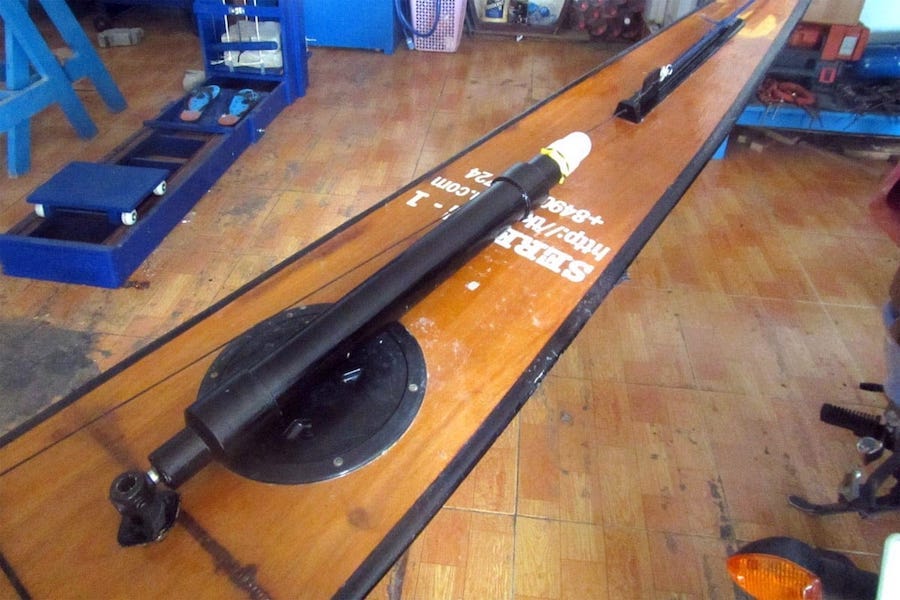
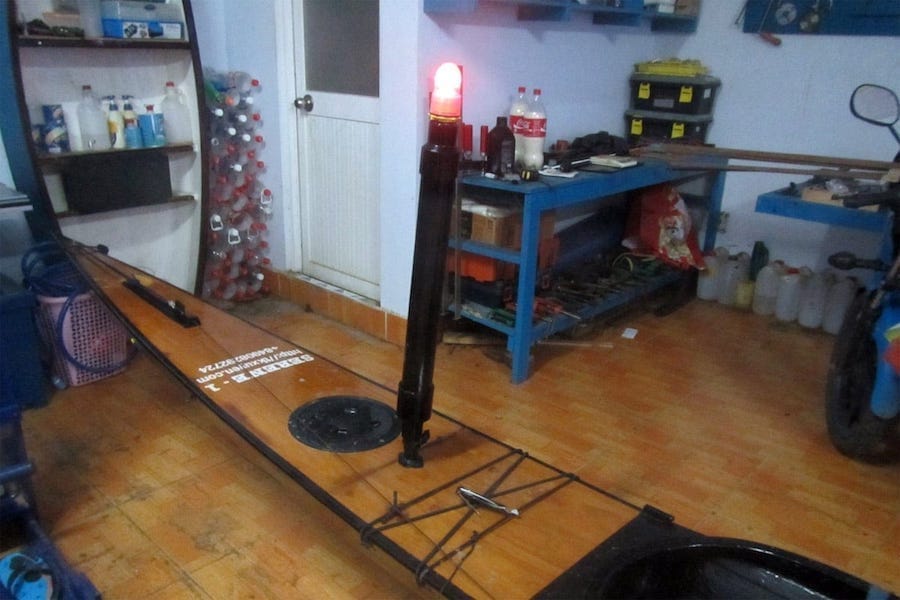
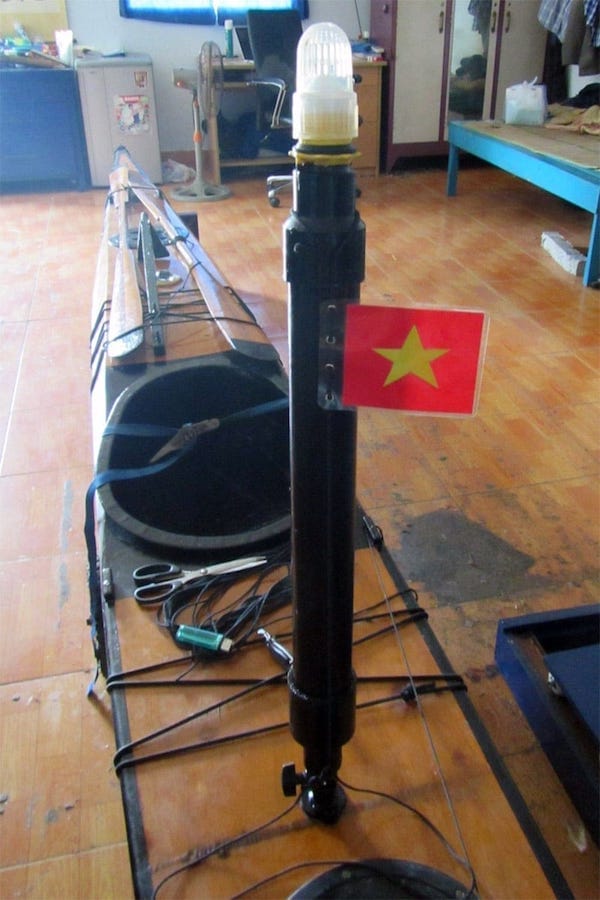
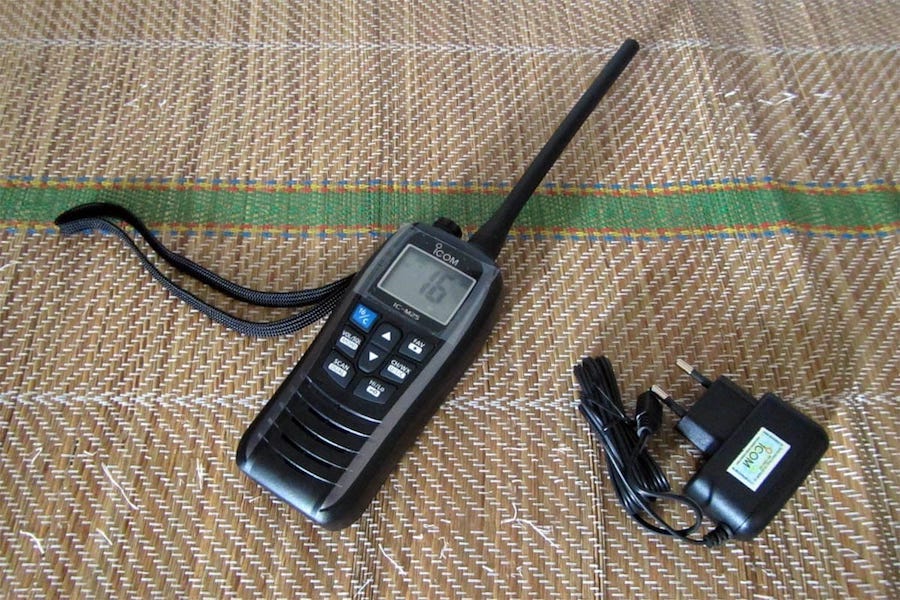
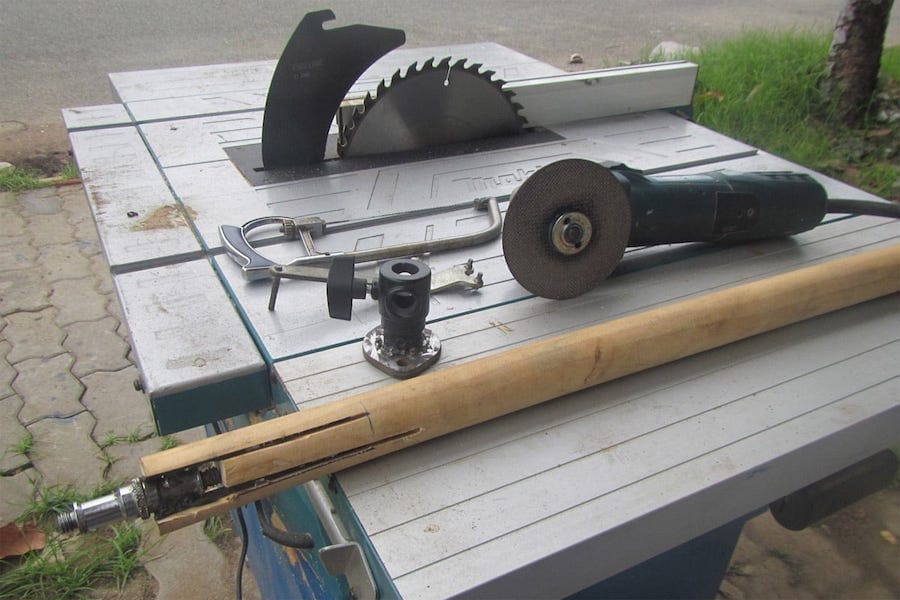
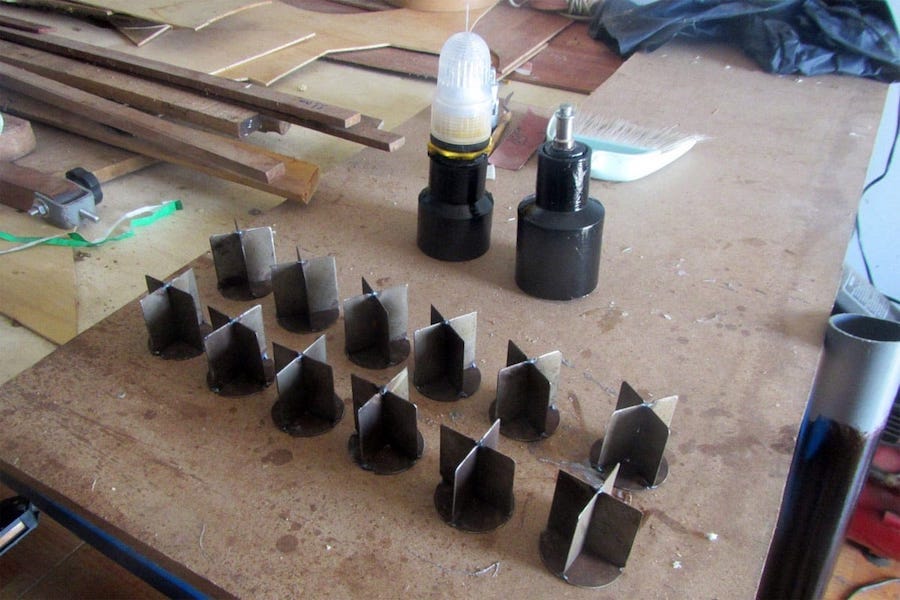
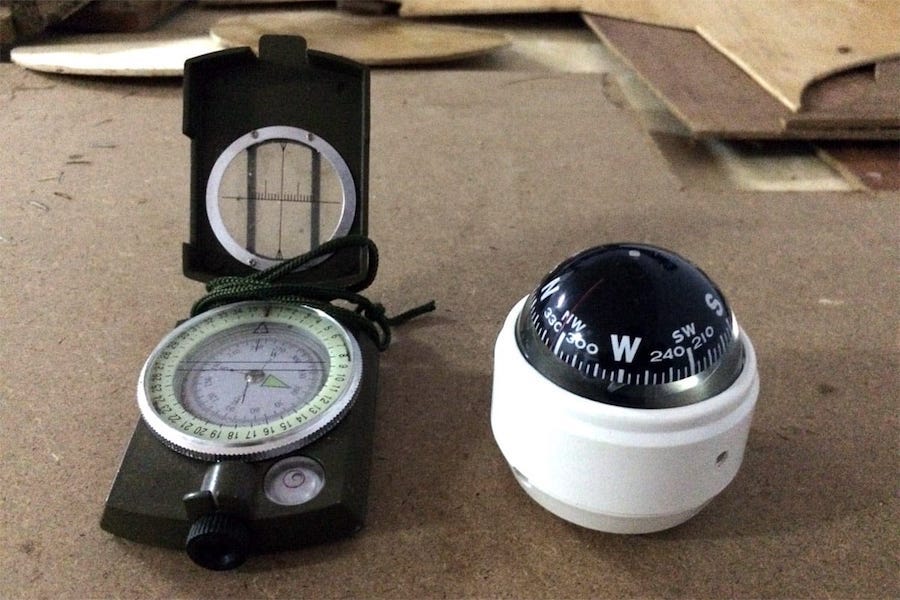
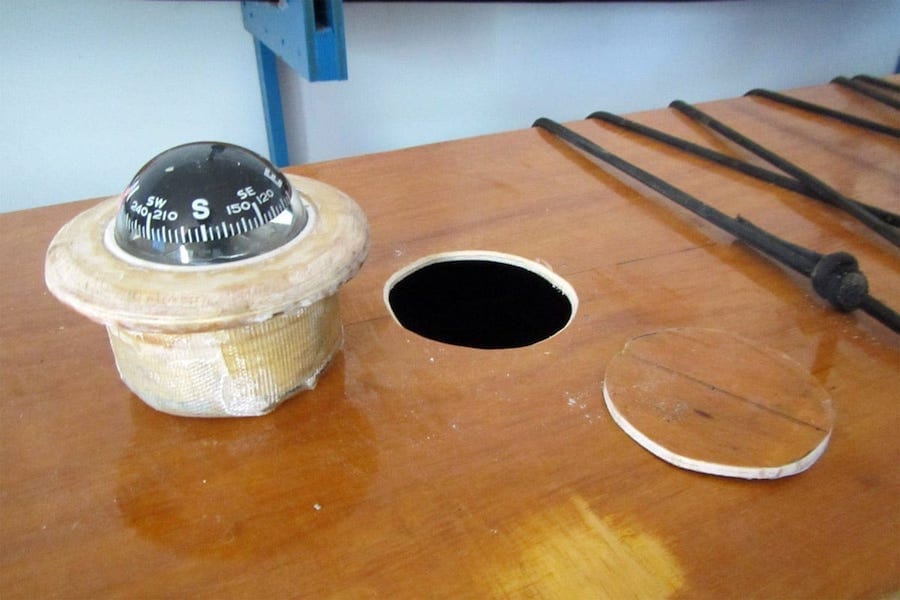
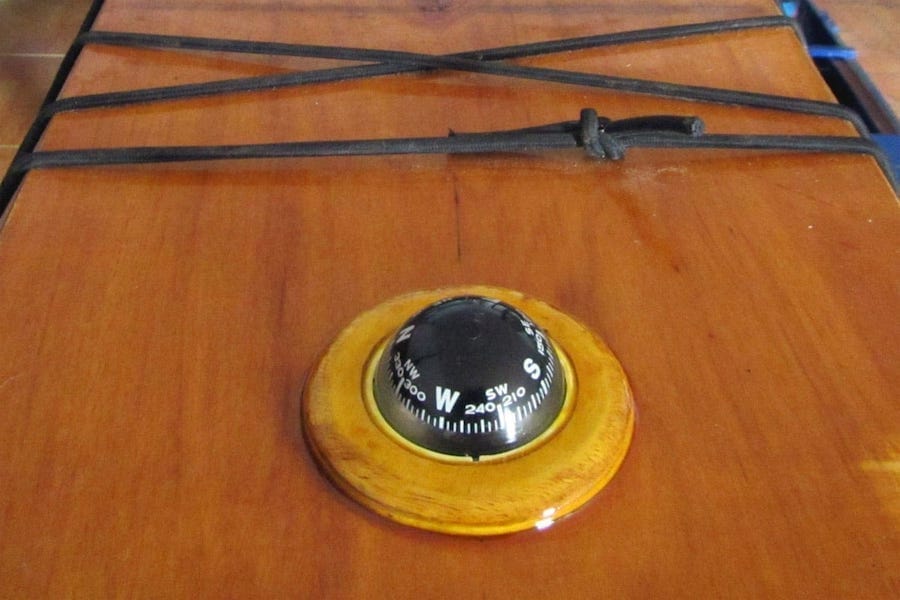
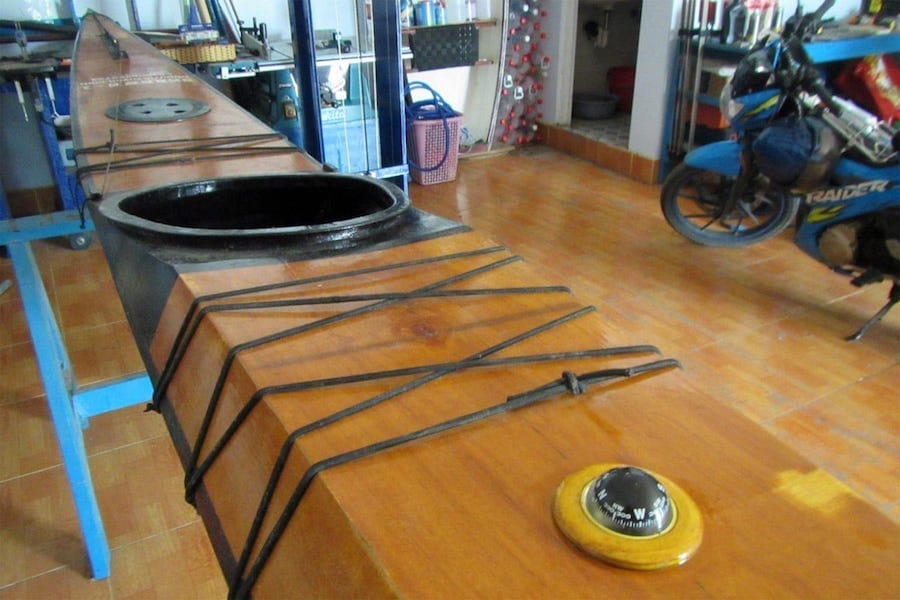
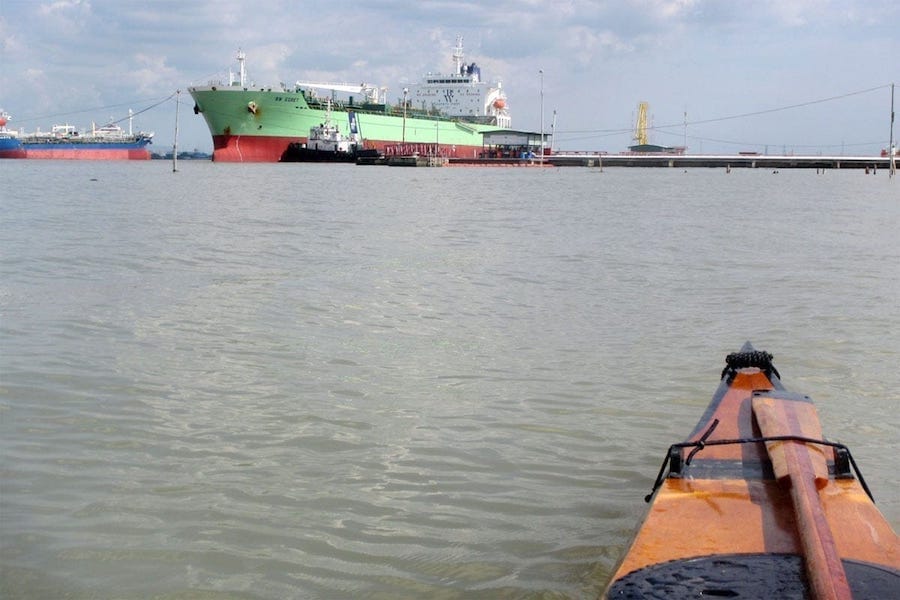
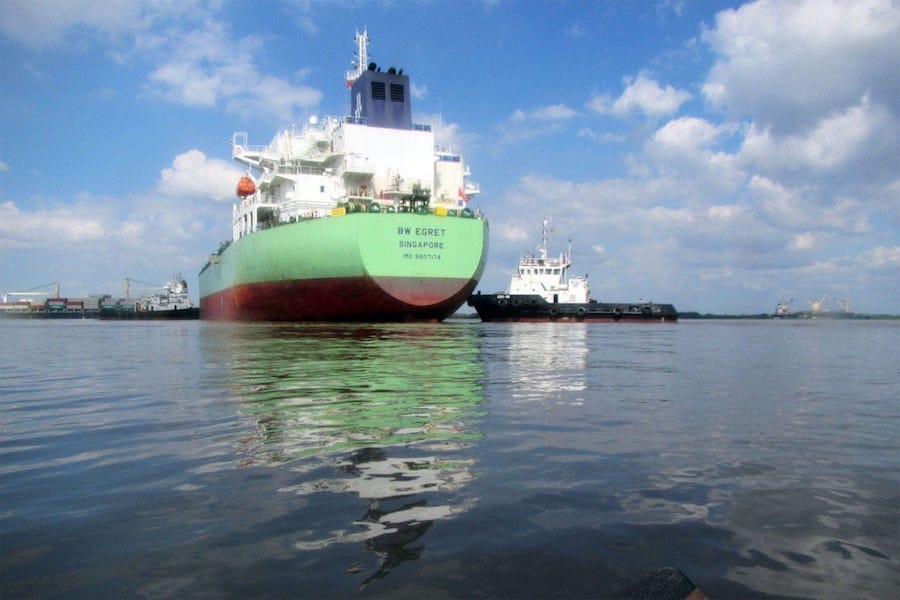
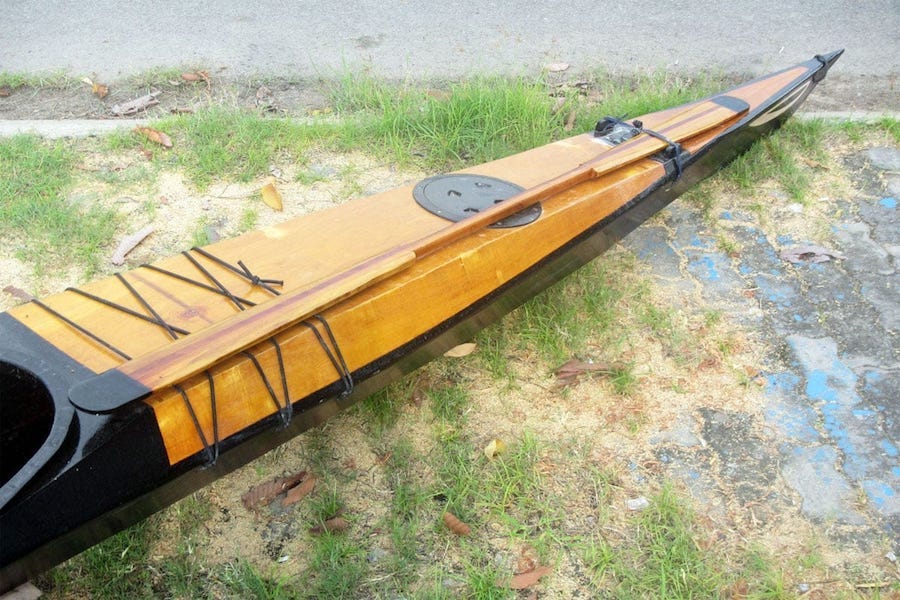
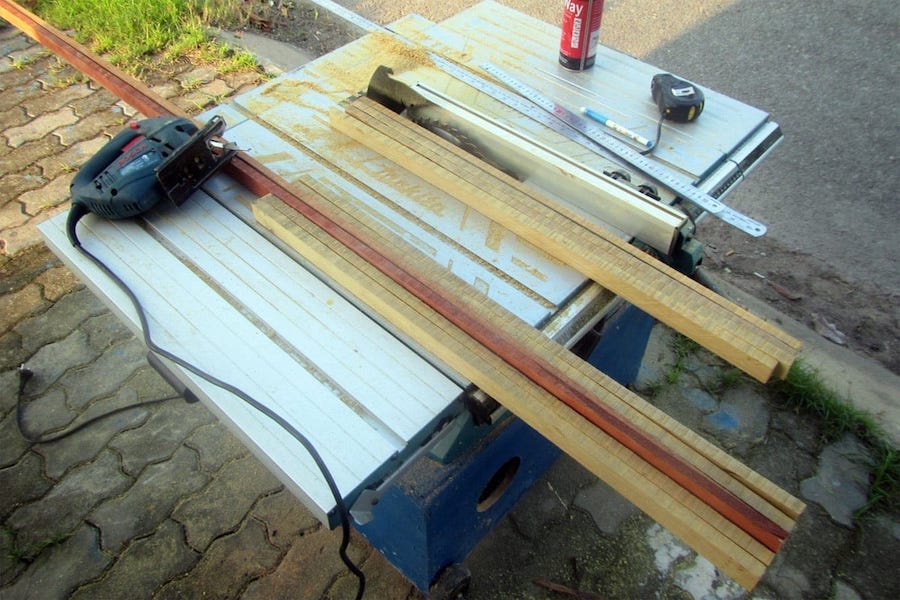
Đầu tiên nói sơ qua về quá trình chuẩn bị cho chuyến đi này. Tôi có trong tay chiếc Serene – 2, tốt hơn hẳn chiếc Serene – 1, ổn định và nhanh nhẹn hơn, có khả năng chở nhiều đồ hơn. Xuồng cũng được trang bị hệ thống điện: tấm năng lượng mặt trời, pin 18650 (25 Amph), đèn, la bàn, hệ thống bơm nước, sạc điện thoại, sạc máy ảnh, sạc cho Garmin, bộ đàm hàng hải cũng như tất cả những thiết bị điện tử khác… Serene – 2 có hệ thống bánh lái hoạt động hiệu quả. Sự chuẩn bị đi sâu vào những chi tiết nhỏ nhất: thay 11 cái cọc lều sắt (dễ rỉ, nặng) bằng 11 chiếc làm bằng nhôm hợp kim (nhẹ, không rỉ, và bám chắc hơn trên địa hình đất cát).

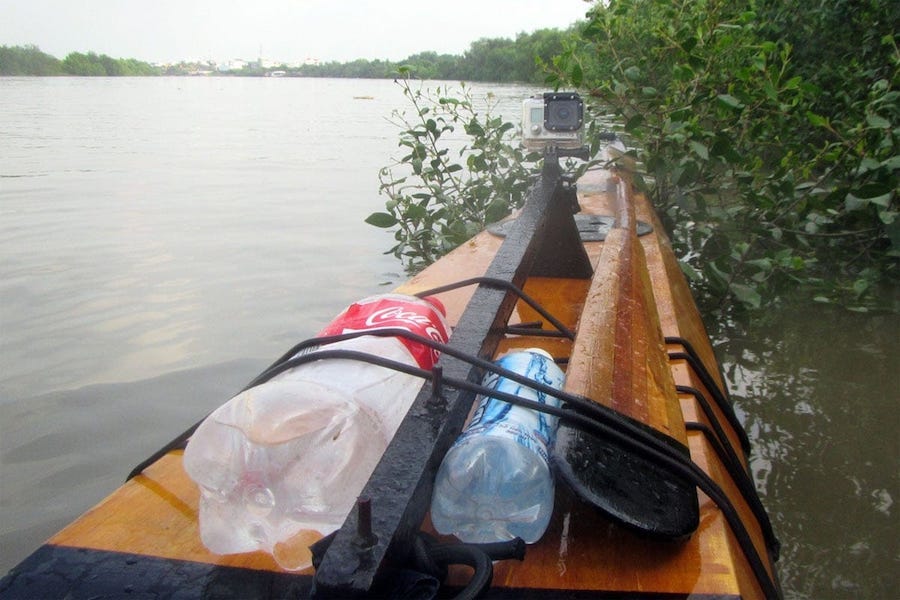
Nồi nấu cơm, bếp… tất cả đều đã được thay bằng loại hợp kim nhôm, nhẹ và không rỉ. Tôi có một chiếc Garmin Touch 25 mới, màn hình cảm ứng, và kinh nghiệm với chiếc máy này thật tuyệt! Điều hay nhất là với cảm ứng (touch), bạn có thể thao tác, zoom in/out bản đồ, đọc thông tin rất nhanh. Điều đó rất có ích cho việc nâng cao situational awareness, nhận thức tình huống, chỉ mất vài giây để đọc thông tin từ thiết bị, đưa ra phán đoán và hành động đúng. Cần phải nói rằng kỹ năng quan trọng nhất với 1 skipper / sailor trên biển là khả năng nhận thức tình huống: ta đang ở đâu, ta đang đối mặt với những gì, ta cần phải làm những gì.

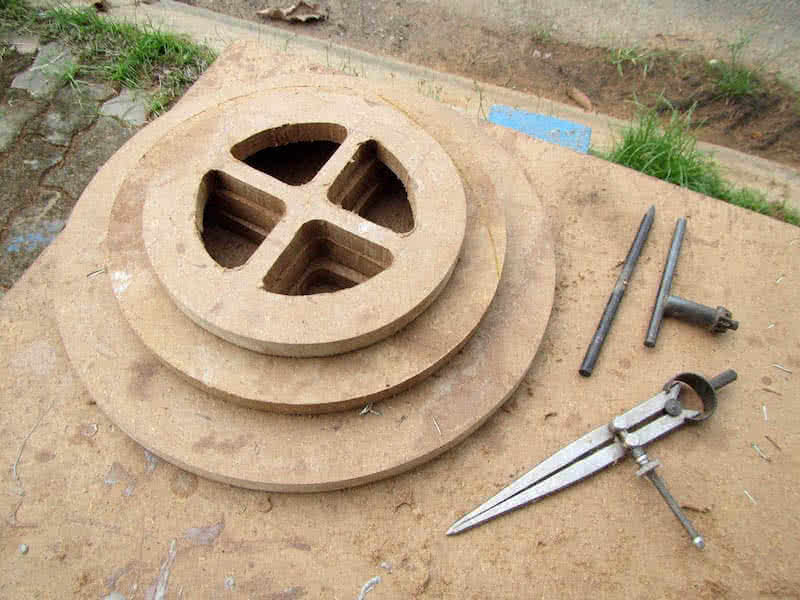
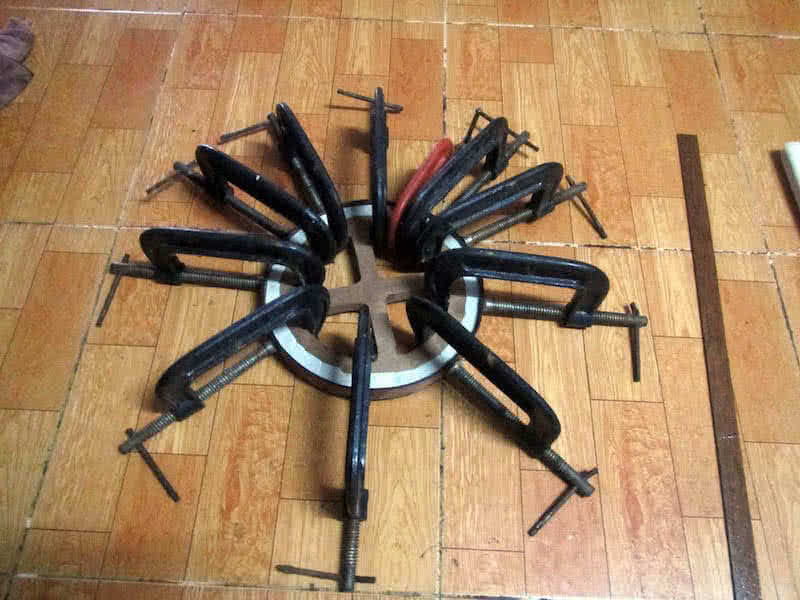
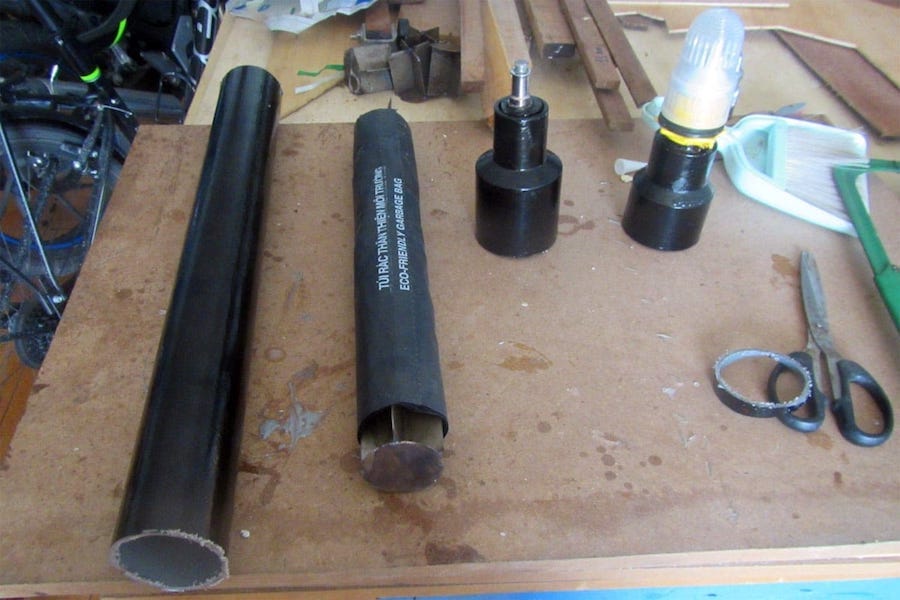
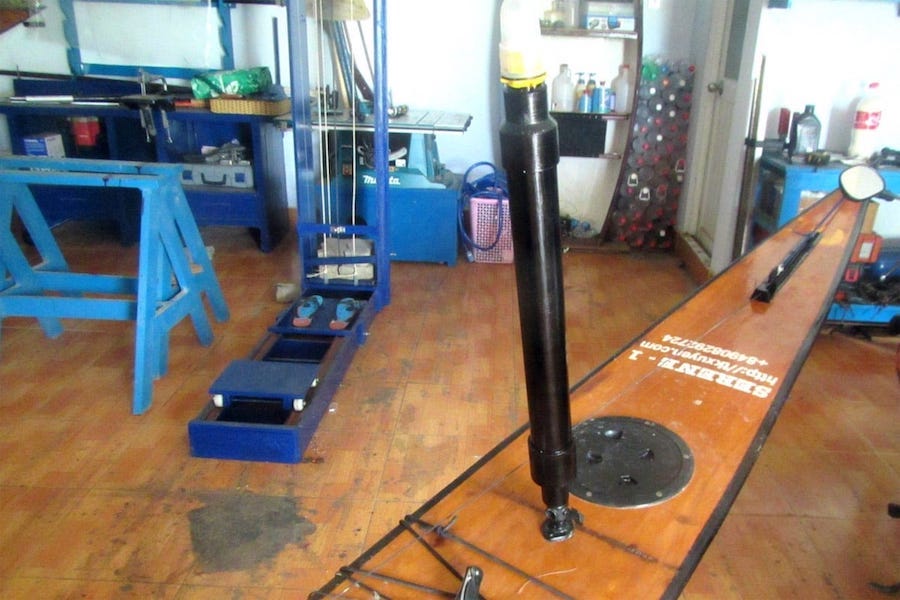
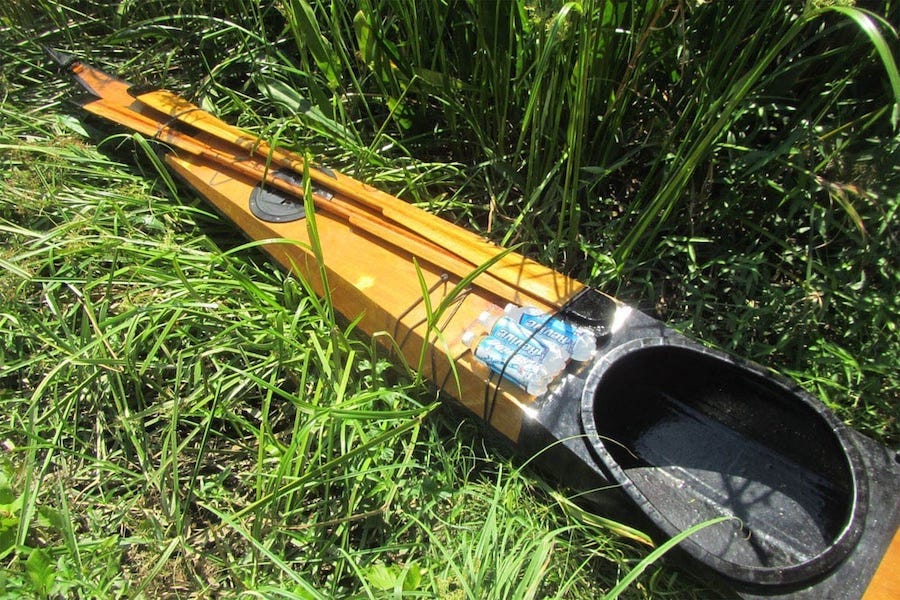
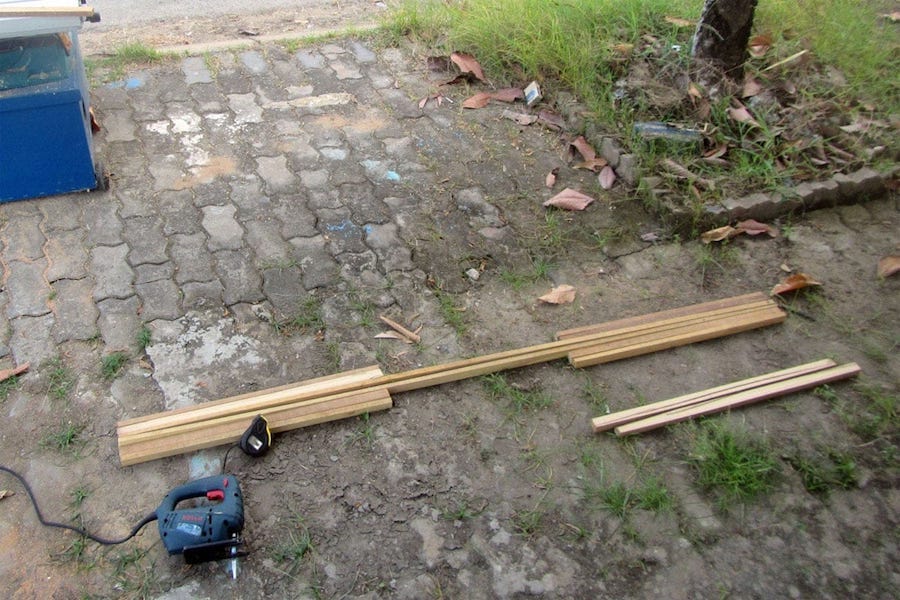
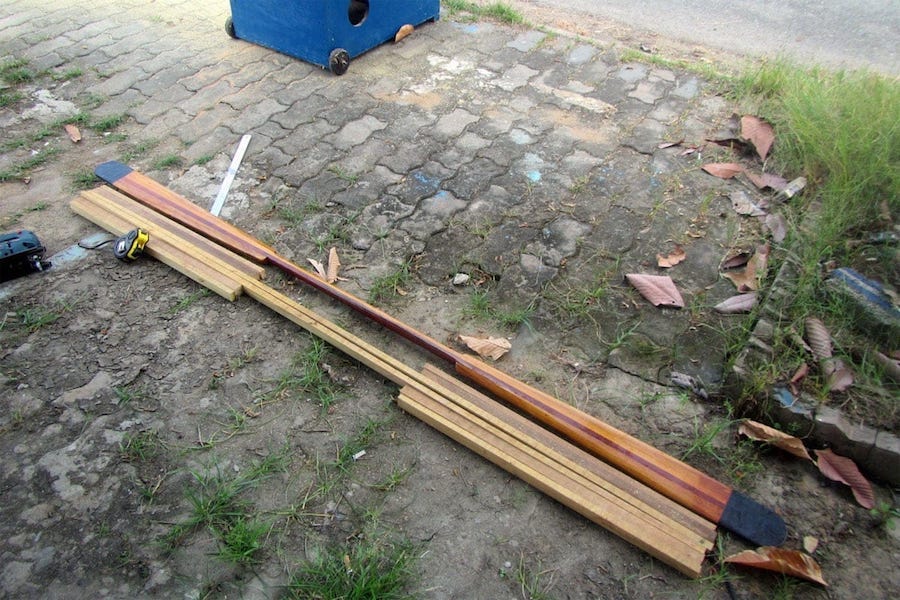
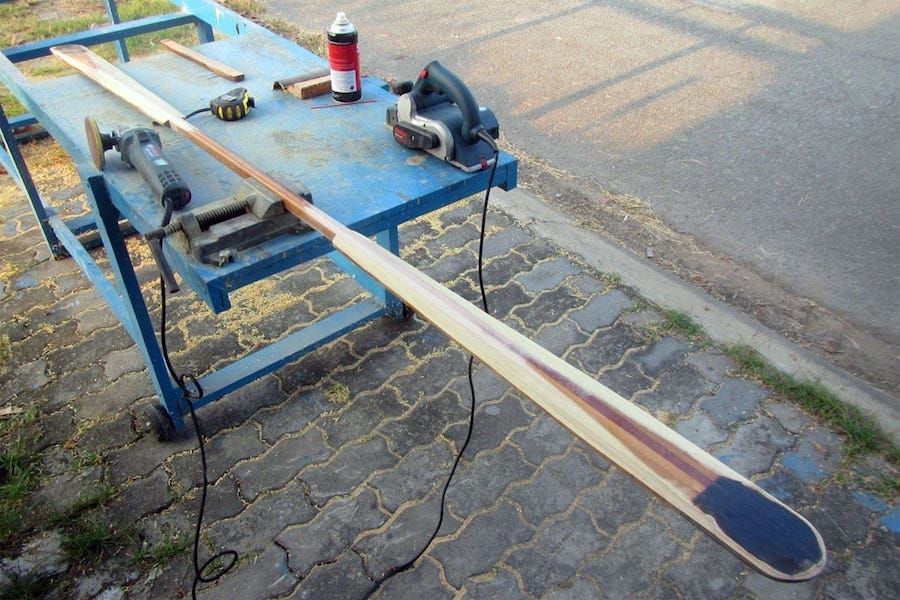
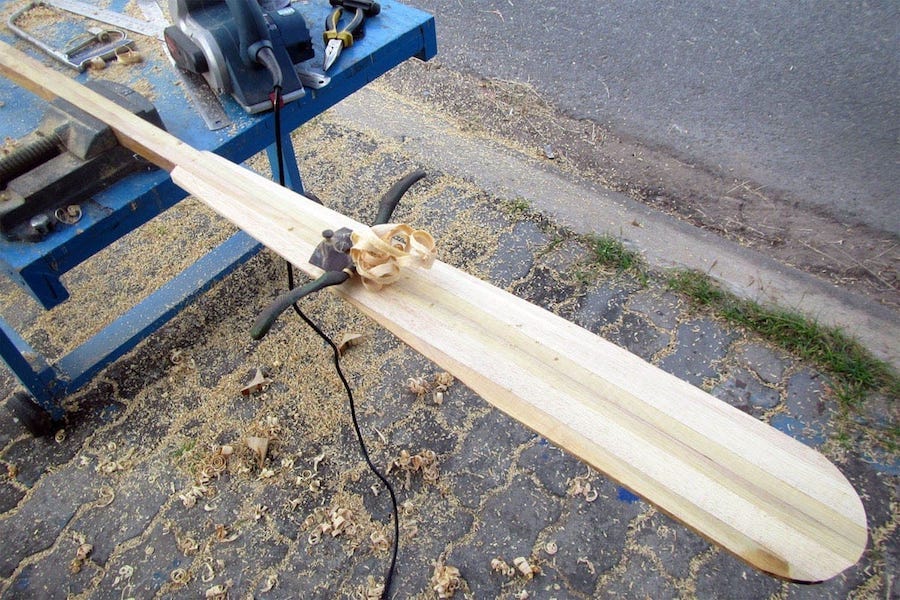
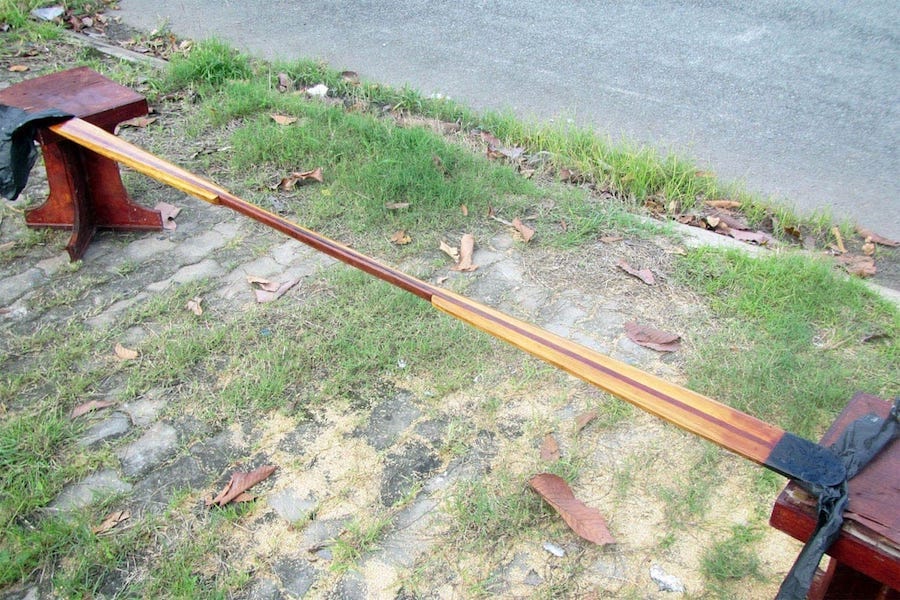
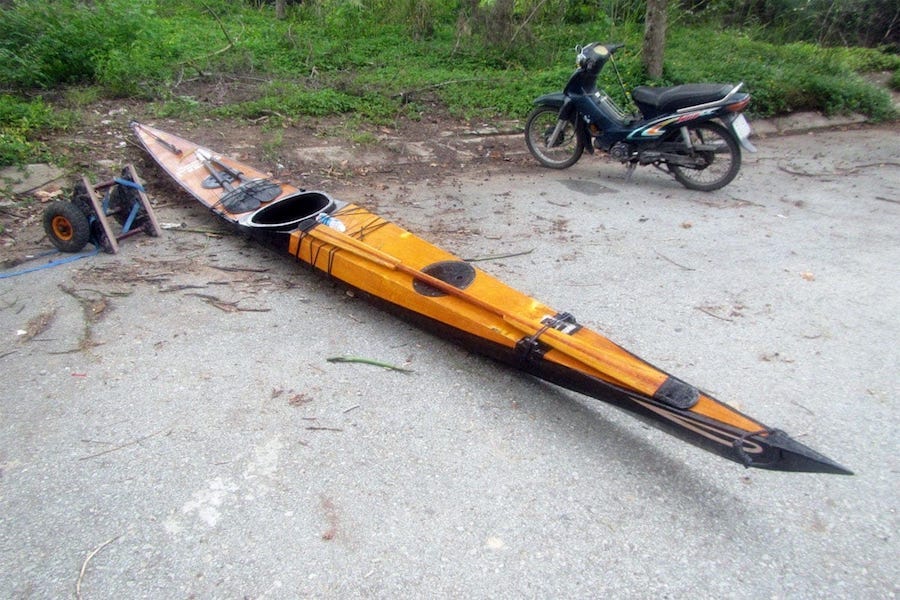
Tôi đóng 1 chiếc xe đẩy (cart) mới, nhẹ hơn, buộc vào phía sau thuyền. Chiếc xe cũng đã được tính toán để có thể tháo rời thành 3 mảnh, xếp vào trong khoang khi cần. Khi đi dọc bờ biển thì không cần thiết lắm, nhưng trong những chuyến vượt biển xa, chiếc xe sẽ được xếp gọn vào trong khoang, cải thiện tính ổn định và an toàn của kayak. Nói kỹ hơn về chiếc xe đẩy, đây là một công cụ không thể thiếu, thuỷ triều sông Cửu Long khi dâng, khi cạn chênh nhau hàng cây số, cần có chiếc xe để kéo thuyền lên bờ, vào sâu trong đất liền, kiếm chỗ cắm trại tiện nghi và an toàn cho một đêm nghỉ ngơi đầy đủ, và hạ thuỷ chiếc thuyền trở lại sáng ngày hôm sau.

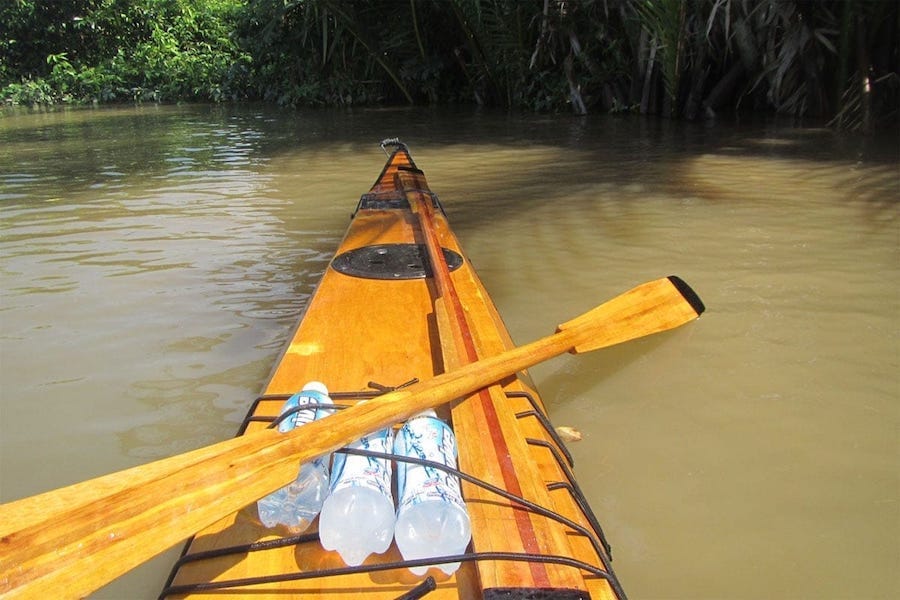
Đã có một số sai lầm khi đóng cái xe đẩy mới, nhẹ và gọn hơn này, và nó để lại hậu quả kinh khủng. Cũng bởi tôi “tham” 1 chuyến hành trình tiện nghi hơn năm trước, nên đã chất lên thuyền khá nhiều đồ ăn nước uống, kể cả 1 kg chanh & 1 kg đường để làm nước giải khát cho cái hành trình vào dịp cao điểm nắng nóng này. Mùa mưa đã chính thức bắt đầu, nhưng gió Nam vẫn còn đang yếu, dông gió chỉ hơi nhỏ, không có gì đáng ngại. Nhưng lại phạm sai lầm khi không theo thói quen (bắt đầu hành trình vào dịp trăng tròn) thuỷ triều ngày hôm đó biên độ có hệ số (tidal coefficient) khoảng 109, một giá trị rất cao (cao nhất max = 120).

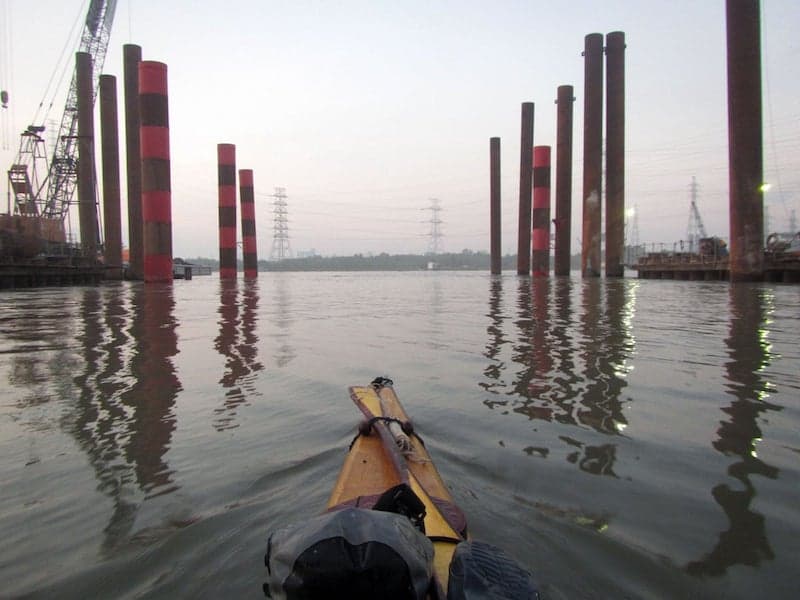
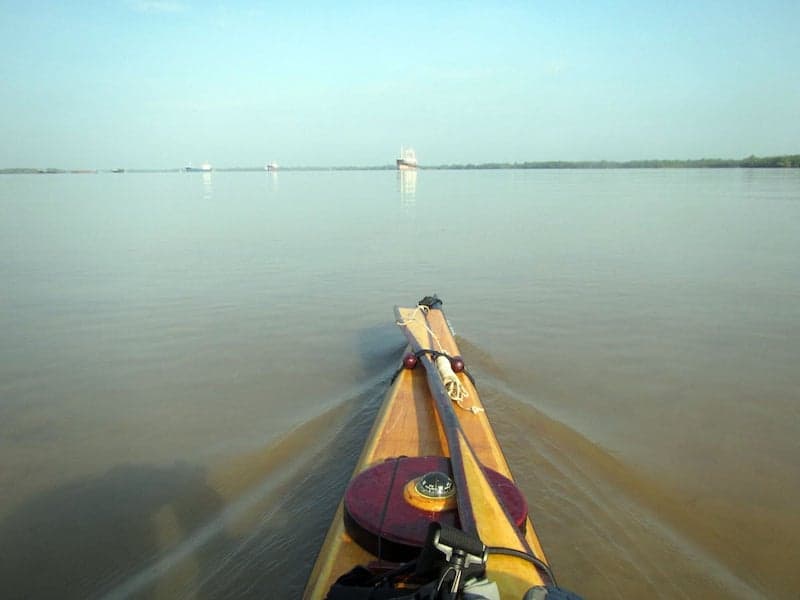
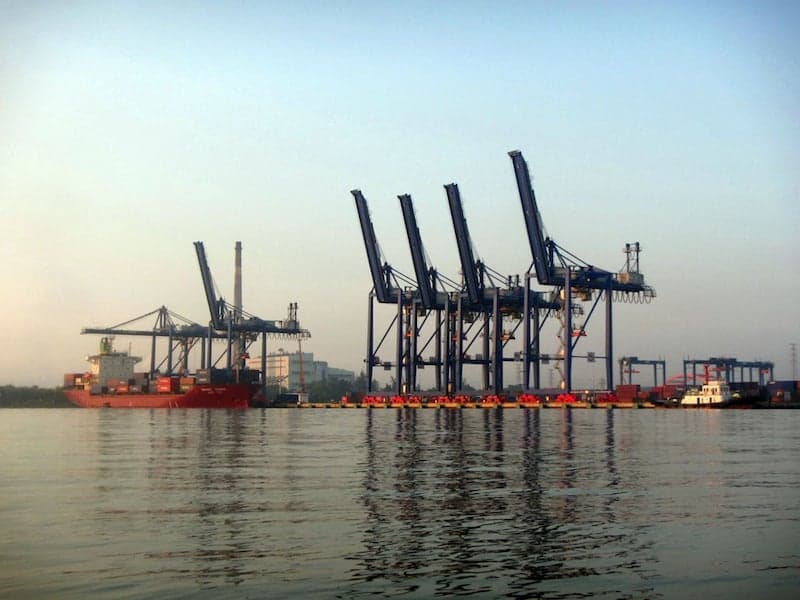
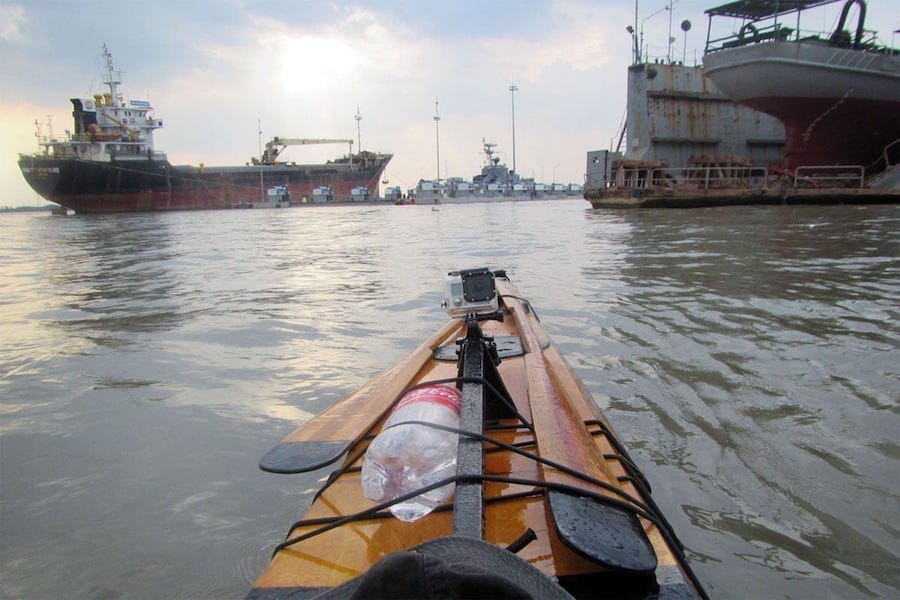
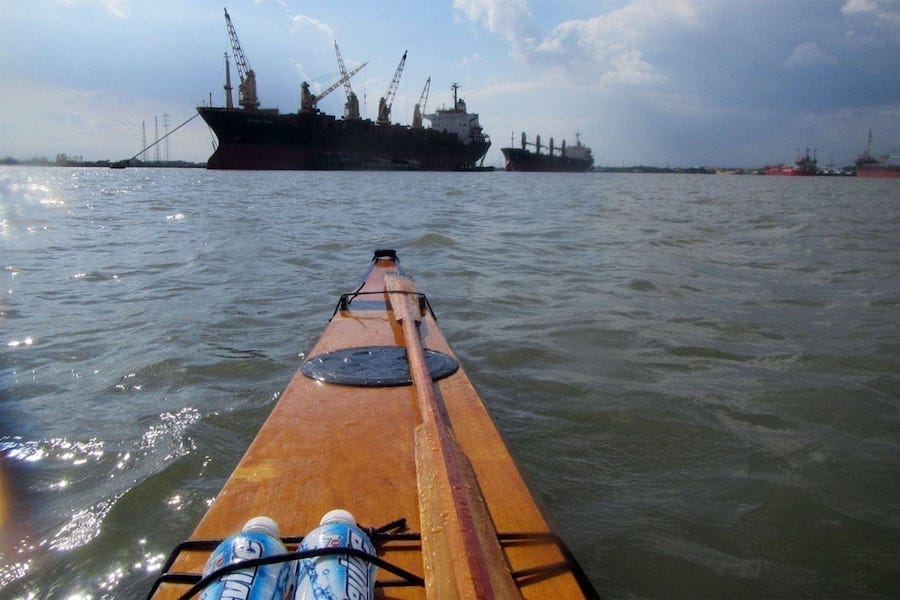
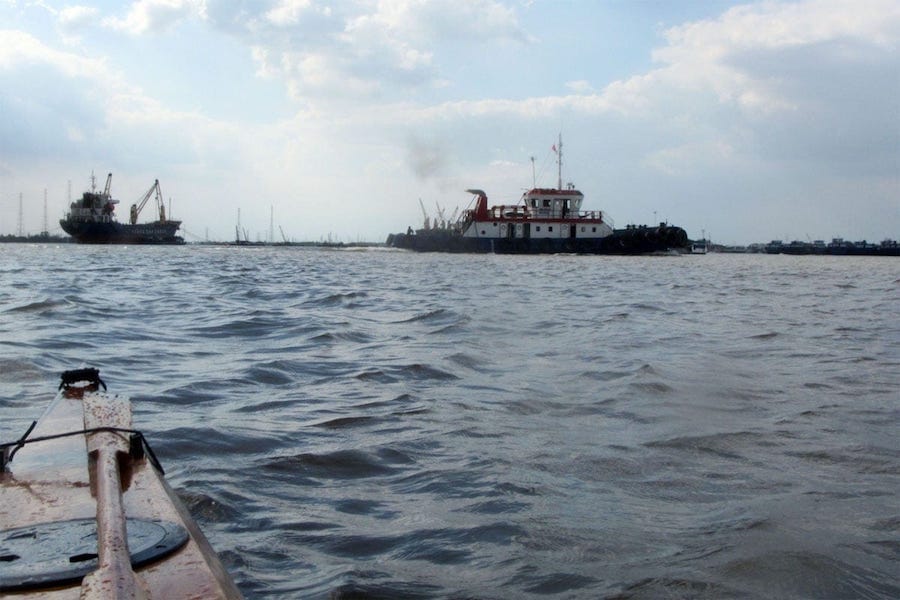
Đã dự tính trong đầu 1 hành trình an toàn hơn, có tính trải nghiệm nhiều hơn hành trình năm ngoái (năm ngoái dường như là một cuộc dạo chơi điên rồ và liều lĩnh), nhưng phải nói sự chuẩn bị thể lực năm nay không được tốt bằng, và một số bài học rút ra từ hành trình năm ngoái không được áp dụng đúng cho lắm! Khởi hành từ 5h sáng, xuôi từ Nhà Bè, qua cảng Hiệp Phước, ngã 3 sông Soài Rạp – Vàm Cỏ, xuống đến Vàm Láng diễn ra suôn sẻ, thuyền đi rất nhanh và êm, chưa đến 11h trưa là tôi đã qua cảng cá Vàm Láng, tổng cộng khoảng 44 km trong vòng chưa đến 6h. Dừng ăn trưa ở đây trước khi tiếp tục hành trình.

Từ Vàm Láng đến Tân Thành (điểm cắm trại dự tính cho ngày đầu tiên) chỉ còn khoảng 12 km, đang vui mừng nghĩ rằng sẽ hoàn thành ngày đầu tiên không lâu nữa, thì thuỷ triều lên, gió và sóng cũng mạnh dần lên khoảng 2, 3 feet. Trực giác đầu tiên là đoạn hành trình này giống hệt đoạn vượt cửa Trần Đề năm ngoái, thuỷ triều dâng với một sức mạnh khó có thể tượng tượng, vận tốc nước trên 5 kmph, cộng thêm với gió và sóng ngược chiều. Tính tổng hoà các yếu tố, dù cố gắng rất lớn, vận tốc đi được < 2 kmph. Kinh nghiệm nếu gặp tình huống này là nên kiếm chỗ nghỉ ngơi, đợi chừng vài ba tiếng cho cái cao trào khó khăn qua đi rồi mới tiếp tục.

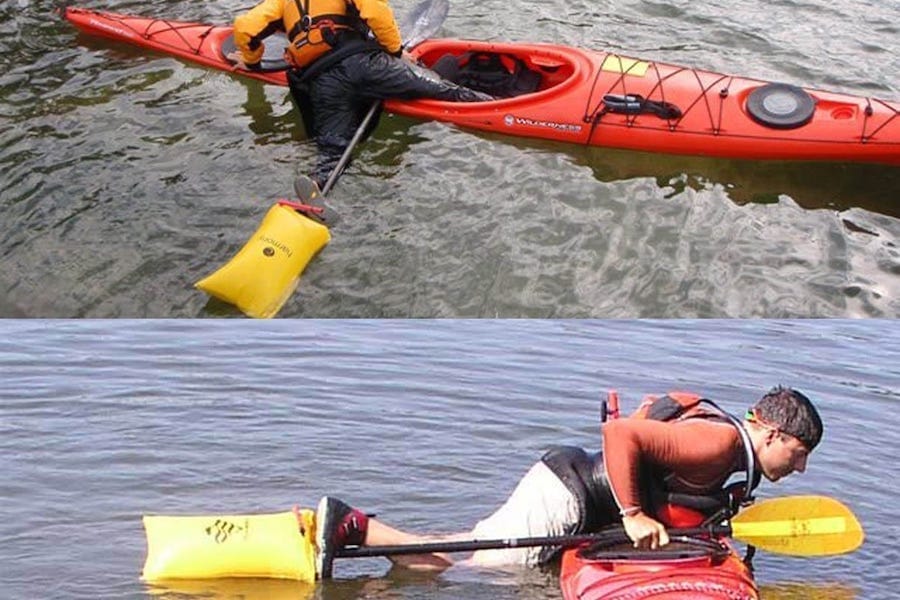
Bởi chẳng ích gì nếu tiếp tục chèo với tốc độ rùa bò và hao sức như thế. Nhưng cái sự hăng hái buổi sáng còn vương vất lại khiến tôi tiếp tục chèo thêm 5, 6 km trong vòng hơn 3 tiếng, khá là mệt mỏi. Trong quãng thời gian này, thuyền lật (capsize) 2 lần. Phải nói rõ là việc lật thuyền (capsize) với kayak không phải là điều gì tệ hại như với các loại thuyền khác. Kayak được chế tạo và trang bị để capsize và recover. Lần capsize thứ nhất, tôi recover bằng 1 kỹ thuật “balanced brace”, thân người nằm ngang mặt nước, được đỡ cho nổi bằng chiếc áo phao, thuyền nghiêng khoảng hơn 100 độ, dùng sức của hai tay và mái chèo lật thuyền đứng trở lại.

Lần lật đầu khiến lần thứ hai đến một cách dễ dàng và bất ngờ hơn (vì lẻ một số nước đã vào bên trong khoang, khiến thuyền trở nên nặng hơn). Một con sóng chỉ chừng 1m lật thuyền, đánh tôi văng ra khỏi xuồng, không phản ứng kịp. Lóp ngóp bật cái công tắc điện chạy máy bơm rồi leo vào thuyền trở lại, tiếp tục chèo đi. Nhưng lực chèo khá nặng (do thuyền đã vào nước), nên quyết định dừng cái “thử nghiệm” về cái khả năng an toàn của thuyền ở đây, dừng lại đúng ở điểm cắm trại năm ngoái dưới chân một con đê biển! Kiểm tra sau đó cho thấy tất cả khoang thuyền ngập đầy nước, và như thế chứng tỏ độ ổn định của Serene – 2 tốt hơn tôi dự kiến.

Và điều đó cũng chứng tỏ toàn bộ hệ thống pin, điện, máy bơm, dù ngập hoàn toàn nhiều giờ liền trong nước biển vẫn hoạt động tốt, hộp chứa pin kín nước tuyệt đối, không có một vụ đoản mạch hay cháy nổ nào xảy ra! Kết thúc ngày chèo thuyền đầu tiên khoảng hơn 3h chiều một cách đầy vui vẻ và hài lòng, nếu không có một sự cố ngay sau đó! Trong lúc bỏ thuyền lên xe đẩy và kéo lên bờ, chiếc xe đẩy gãy một bên bánh! Không thể tiếp tục hành trình mà thiếu cái xe đẩy này, như đã nói trên, cần phải có cái xe để vận chuyển chiếc xuồng từ mép nước sâu vài km vào trong bờ và ngược lại… tôi quyết định huỷ hành trình ngay tại đây!

Thất vọng và chán nản vô hạn, chẳng thiết nấu cơm ăn, cắm lều, ăn vài lát bánh mì và đồ hộp! Ngồi hồi lâu bên bờ biển, ngắm những ánh sao lung linh của một đêm không trăng. Những vì sao à, các người lấp lánh, phong phú và hấp dẫn thật đấy! Nhưng sự phong phú của các người cũng không thể nào so được với sự phong phú đầy mầu sắc của tâm hồn tôi đâu! Nhiều suy nghĩ miên man rồi chìm vào giấc ngủ. Sáng hôm sau, cố tình ngủ nướng đến hơn 9h sáng, đợi cho thuỷ triều lên để diễn lại cái kinh nghiệm ngày hôm qua. Bỏ bớt một số đồ ăn nước uống cho nhẹ thuyền, chèo hơn 6 km còn lại đến Tân Thành trong thuỷ triều đang lên.

Trên đường đi, cố tình lật thuyền 6, 7 lần nữa để thực tập kỹ năng “balanced brace” cho kỹ càng hơn, chẳng mấy khi rơi được vào tình huống thuỷ triều và sóng gió khó khăn như thế này! Học thêm được một số kinh nghiệm về lập lịch hành trình và xử lý tình huống dọc đường. Nếu không vì chiếc xe đẩy hỏng thì có lẽ tôi đã tiếp tục hành trình, chấp nhận học thêm một số kinh nghiệm “xương máu” dọc đường đi, để hiểu thêm về dông tố, về sóng gió, thuỷ triều… chẳng có bài học nào mà không phải trả giá. Lên bờ ở Tân Thành, chỉ mất chừng 30 phút để kiếm chiếc xe tải, chở thuyền về lại Nhà Bè, Sài Gòn, kết thúc một hành trình “chết yểu”!

serene – 2, part 7

I’ve been thinking about kayak hatches over and over again. Starting from the very early days with my plywood hatches (in Hello World – 2, 3) which are obviously not watertight, to the Beckson hatches on my Serene – 1 kayak. The Beckson is very good, watertight and even air tight, but sadly that’s only true in ideal conditions. In reality, in multiple days trip, when mud and sand has get into, it would leak by a small amount.

The Beckson is not ideal hatch for kayak in my idea (for other purposes, it may be ok). The reason is that the hatches are built flushed with the mounting surface, and some inner elements are even recessed… When the water washes over (as always happened to the very low freeboard of a sea kayak), and when the O – rings are not properly lubricated, or when there’re some mud, sand inside the joints, water would leak in.

That’s why I decided to build my own hatches for this Serene – 2 new kayak. The idea is really simple: the hatches are raised a few centimeters above the mounting surface, and even when the seals are not too tight, that would suffice to keep most of the water out. Examine many sea kayak hatch designs, I’ve found out that simple thing, that the hatches should be raised (not flushed or recessed) above the deck.

1st image: cutting thin (2.5 mm) wooden strips used to build the hatches. 2nd, 3nd images: the 3 MDF templates for hatch building: the rear, the front and the day hatch, sizes in diameter: 30, 25 and 20 cm respectively. 4th image: building the hatches’ coaming with thin wooden strips around the templates, each coaming consists of 2 layers of strips which bend easily around without cracks and without the need for steaming.

serene – 1, part 30

Images below, 1st: the parts of the signal – light mast, 2nd: the signal – light mast (with the tubular radar reflector inside) in its erected position, 3rd: retracted position on the aft deck, 4th: the red – blinking signal light. I would install a small strap near the mast head to mount the GoPro camera. For the mast base joint on the deck, I was searching for a Rosette clamp (Vietnamese: ngàm hoa thị), so that the mast could be rotated around, but can’t find one, so I use this instead.

Last image below: the IC-M25 VHF radio used in conjunction with the radar reflector to avoid collision with big ships, it’s better to have a channel of communication with vessels around you and a way to ask for help when needed. The radio floats on water, it has about 11 hours of battery, and best of all, could be charged via a USB cable (that means it could be charged by a smart phone power bank). There’s another very important use of the radio: to listen to the broadcasted weather news.

I also hoist a tiny Vietnamese flag on the signal mast, not because I like hoisting color, but it’s good to gain some sympathy from the Vietnamese border guard or maritime police along my paddling way. That’s about all I could do for my Serene – 1 kayak, preparing it for my next trip (that gonna be a long trip). Of course I have lots of other ideas on kayak building and equipments, but that would be reserved for my next boat, Serene – 2, which I’m gonna work on its design soon in the upcoming time.

Serene – 1 p1
Serene – 1 p2
Serene – 1 p3
Serene – 1 p4

The other day, I took Serene – 1 out to test paddling at full load, 16 bottle of water containing 1.5 liter each, so about 24 kg in total. Though the boat is a bit heavier to paddle, it becomes very stable at its nominal (designed) load. That made me feel very pleased and confident!

The boat could probably take a bit more, about 25 ~ 30 kg of load I guess. Since I designed it as a very lightweight sea kayak, I’m now having some headaches in loading it with appropriate food, drink and gears for my up coming trip (would tell about that in my next posts).

serene – 1, part 29

Next is the paddle float used to assist kayak reentry. Often we’ve seen experienced kayakers performing some kinds of rolling, but for most people, that could only be done with an empty boat. When it’s fully loaded for long journey, it’s almost impossible to roll that heavy hull. The most practical way is, of course, just climb in via the aft deck. My paddle float is just a supermarket plastic bag, I hate needle and thread things, but some little tailoring work would be needed to turn a bag into the float.

It’s just a quick job stuffing the bag with Polyurethane foam. The float is made such that it could be quickly attached (and detached) to one end of the paddle to assist boarding the kayak from water. One of the most important equipments for a cruising kayak is… a radar reflector. Here I should emphasize its importance a hundreds times, as with experiences gained in my previous paddling trips, your kayak is just so small compared to those huge freighters, looks like just a peanut shell in the sea.

And without a radar reflector, I’m sure that you would probably not be seen from above those high ship bridges. And as a big ship is approaching you, the situation is really critical: to be seen or to be sunk. Having a reflector would boost your boat’s radar signature, and it works best in combination with a marine handheld radio. My radar reflector would have a tubular form, erected on the aft deck, and it functions also as a signal light mast, with a red – blinking light attached to the top.

Serene – 1 p1
Serene – 1 p2
Serene – 1 p3
Serene – 1 p4

The elements of the radar reflector are made from thin steel plates, welded together to create some prism shapes. 8 pieces like that would be put inside a PVC tube (the signal light mast), which create an object with a radar – cross – section of about 1.4 m2 (estimated).

The ugly part about a home – made radar reflector is that you have no way to tell if this equipment works well, how big your boat would appear on those big freighters’ radar screens. But it’s better to have something, hoping that it should work, rather than having nothing at all.

serene – 1, part 28

Iam in the progress of preparing for my next trips… so some more add – ons for my Serene – 1 kayak is a must. First is a deck mount compass. I’ve been long wanting a good compass with built – in LED lighting, for paddling at night, but that would require some kind of 12 or 24 Volt DC electric input, which my kayak doesn’t have at the moment. So I came up with a simpler compass available within my local market, and would just use a small flashlight to illuminate the compass instead.

Next is building a “cup” to hold the compass, which would then be mounted, recessively, onto the front deck of my kayak. I use a thin strip of oak veneer to build the cup, turn it two rounds around the compass (with Titebond – 2 glue in between), then add the plywood top and bottom parts. The whole thing would be reinforced with some fillet at the jointing edges, then a layer of glass. It requires some handiness to build the “compass cup”, as its size is quite small and my hands are big and clumsy!

I hate having to punch a hole into my kayak, but it need to be done to fit the compass holder in place. That’s quite straightforward the job, cutting a round hole some distance in front of the cockpit, just before the bungee lines, gluing the compass holder with some epoxy, then some little painting outside. Et voila, here it is, the compass in its working position, it looks so great! And as they usually say: May your anchor be tight, your cork be loose, your rum be spiced, and your compass be true!

Serene – 1 p1
Serene – 1 p2
Serene – 1 p3
Serene – 1 p4

It’s not immediately obvious for me to see why this compass dial (the compass rose) is reversed, looking from above, it’s flipped so that the North becomes South, East becomes West. It took me some minutes to understand the rationale behind that “weird” fact.

Cause in most cases, the boat handler would be sitting, looking forward, so the indicated direction facing him is actually the heading (bearing) of the boat’ stern (not the boat’s bow). Flipping the compass rose would give a correct and convenient reading for the sailor.

serene – 1, part 27

Final entry of the Serene – 1 series. There wouldn’t be any major updates, add – ons for the kayak since most everything is completed, and I need to shift my times and efforts into some higher – priority tasks. In a sense, an important milestone has been reached, the designing, building and equipping of my newest beloved kayak. A fascinating process at the beginning of which, I didn’t even think I could make it, and I didn’t know where it would lead to, a nice useful watercraft, or… a disaster!

Serene – 1 is the best kayak of mine until now, outperforms all others in term of performance, lightweight and agile, pretty much fast, with some sacrifice in primary stability. Yet, it is not without some weak points that could be further improved, and that would be the concerns of my next boat project (still have no plan for that at the moment). I’d tried to get out with the best design, the best building as I could, learning lots of new things about a hull’s hydrostatics and hydrodynamics along the way.

But let me make a clear point about this, even the best cruising hull, the best equipments won’t improve your mileage by 15 ~ 20 percent, for a whole – day paddling. After all, it’s you, your horse – power output, your determination and physical endurance, which are the factors that could make a key difference. To be honest, sometimes, I have a strange self – satirising feeling that I’m quite like Popeye, the Sailor man cartoon character, especially before embarking on some longer journey!

Serene – 1 p1
Serene – 1 p2
Serene – 1 p3
Serene – 1 p4

Where to go from here, now!? I have so many ideas on boat and boat – building, so much that I fear that I wouldn’t have enough time to carry them out all. But sometimes, I should be pleased with what I’m having, me, a nice little boat, and the immense water space to indulge myself in!

Time on water is the time well spent, constant hard struggles, always keep a cautious eye on wave, wind and weather, be prepared for bad things, and reserve the other eye to enjoy the many different shades, different faces of the water. That’s truly serene for my mind then!

serene – 1, part 26

Contrary to my initial thinkings, the second Greenland paddle has proved to be the most satisfactory. Despite its short length (190 cm), I’ve found it the best balance between length, blades’ width, weight and force. And that’s explainable, cause I have small arms and quite a short arm span, in body building, could be called a “bottom – heavy” type, my upper part is not too strongly built, unlike the lower part. And that has some advantages as well as some disadvantages in kayak paddling.

I could often balance the boat better in shaking situations, compared to the “top – heavy” type, but also, I usually find myself understrength when prolonged heavy paddling is required. Overall, I’m very pleased with my new pair of Greenland paddles, especially the second one. And that’s an attractive appearance, my boat with the two paddles, all of one same nice wooden style! On my paddling route, I usually meet and have some talks with the captain of a 2000 – ton dry – cargo vessel named UT Glory.

He proposed buying my kayak, and before I could make a polite refusal, he insisted: you know, price is not the problem!. Well, at least someone who really want to have a nice little boat like her that much! It takes some moments choosing the right words to answer him, that I won’t gonna sell her, Serene – 1, my self – designed, self – built boat! And for sure, he wouldn’t be able to find anyone who could produce just a simple, hand – crafted kayak in Vietnam though, as far as I know.

Serene – 1 p1
Serene – 1 p2
Serene – 1 p3
Serene – 1 p4

Apart from some plastic, fiberglass kayaks used for “tourist attraction”, kayaking as a real hobby in Vietnam is virtually non – existent. That explains why the kayak – building, kayak market in VN is virtually zero, though designing, building one is not any big thing, I would say. Why so!?

Frankly speaking, I think VNese is busy drinking and talking bullshit! Seriously speaking, I think VNese has salt in their mouths, but no salt in their blood! Truly speaking, I won’t hope they would do anything besides trying to cheat someone for some dirty purposes! That’s all facts!

serene – 1, part 25

Having gained some know – hows from my first Greenland paddle, I proceed to making the second one. This is not a “storm paddle” as mentioned in the previous post, but rather just an auxiliary, backup one. It would be shorter (190 cm), and wider (10.5 cm), as my first one, though suitable for long range paddling, lacks the force needed to compete against strong current and wind. I think it’s wiser to have a pair of paddles to compensate each other (and stop using the plastic one completely).

But first, I need to reshape my first paddle a bit, to make it even lighter, and turn the cross – sections from “rounded – rectangles” into real flat – ovals. The blades are still quite thick, especially at the edges, and they’re making quite some noises when entering the water. A good paddle should make as little sound as possible, so that the water birds wouldn’t fly away until you’d approached them within 4, 5 meters or so. Well, those lovely water birds, an interesting story I would tell in another post.

5th image below: using a spokeshave to carve the edges (the rougher job is done with the machine planer already). I’d turned to love this tool, it removes wood easily and nicely. As I’m gaining more experiences with wood working, I feel more confident and rely more on the manual tools, as they allow me to do the finer jobs. 6th image: the pair of paddles, they’re just a little bit heavier than the plastic paddle, but feel like firm enough for hard uses though! Now ready for the glassing and painting tasks!

Serene – 1 p1
Serene – 1 p2
Serene – 1 p3
Serene – 1 p4

For true wild birds, it’s hard to approach them within 10 meters without signaling them on your presence. But for those “half – civilized” birds around my area, they only fly away when I’m just 3, 4 meters apart. That implies some things on the city’s noise – pollution, I would suggest.

8th image: the blades’ tips get one layer of 6 – oz glassing on each side (which cover about 20 cm of blade length). Some light painting still needed to really finish them though, to protect the epoxy resin from UV! I’m eager to try out the two paddles in action in the next couples of day!

serene – 1, part 24

First two images below: the paddle takes its final shape, it is quite light indeed. Next I would glass the two blades’ tips to strengthen them a bit to avoid cracks in collisions, then some little thinned epoxy, then paint the whole thing with the same kind of PU used for the boat. Less is more is the “principle of operation” of a Greenland paddle (compared to a wing paddle), but it would take times to really accomplish that. A completely different toy, and quite a separate way of using!

The next couple of weeks, I would just re – train myself with the new paddle. It’s quite a different style, the thinner blades allow movements very closed to the boat’s body, they enters water in almost a vertical manner. It takes time to suppress old habits, find out the most efficient way and make the most out of this newest toy! I would use this and the old paddle in parallel, at least in a ‘transitional time’, a second “storm paddle” is in plan, but only after I’m well – versed with this new one!

Initial testings prove the efficiency of the Greenland paddle, at normal cruising paddling pace, there’s no noticeable difference in speed, while it’s more lightweight and ‘handy’ to operate. And my boat proceeds with much more balance and hence, tracks better with this new ‘propeller’. I would trim the blades shorter (and also make it thinner at places), 210 cm is still quite long, I guess the final length would be somewhere between 200 ~ 205 cm, but only trials would tell the final, ideal fit.

Serene – 1 p1
Serene – 1 p2
Serene – 1 p3
Serene – 1 p4

I still need to test the new paddle more, to know if it could totally replace the wing paddle. In specific, I’m still worrying about its capability to provide enough force against strong head wind or other adversary conditions. Its efficiency under normal cruising situations is out of question.

My new paddle is light and firm, much more dependable compared to my previous one. And it is made of wood, looks better, not that ugly plastic outlook anymore. This one, when pulled hard through water, produces a mild vibrating sound, like a musical instrument, really interesting to hear!

serene – 1, part 23

The spray skirt works very well as anticipated: tight fit with the boat and my body, easy to snap onto the cockpit coaming, flexible enough for some torso rotation and other paddling movements. The velcro stickers seal the water well, and two pockets could hold the camera, and some other miscellaneous things. At least, it’s much better than my previously – bought skirt, which is of quite an amateurish design. Next is the important job of building a wooden Greenland paddle.

The rationale of a Greenland paddle, as I understand, is that: the smaller blades put less strain onto your arms (while propelling the boat at a slightly slower speed compared to the larger wing paddle), and at the end of a long paddling day, you would end up covering almost the same distance, with less fatigue sustained, and this is specially true for lighter boats like Serene – 1. At least that’s my theory, and let see how this would turn out in practice. Well, to really know, you need to build one and test.

I start by jointing thin (1.5 cm) strips of wood to form the paddle, which would have the length of 210 cm, 75 cm for each blade and 60 cm for the loom. I choose to joint wood instead of starting from a single big piece, (it depends on the specific situation), but sometimes, glued wood is stronger, consider the strength of epoxy. The blade would be 8.5 cm wide, and the loom would be slightly oval in cross section: 3.3 x 2.8 cm. Next comes the job of meticulously carving down to the final desired shape.

Serene – 1 p1
Serene – 1 p2
Serene – 1 p3
Serene – 1 p4

The Bosch machine planer is very useful, most jobs could be done handily with it, I only need to use the hand planer on the edges. Much wood is removed, the paddle is quite light now. For a paddle, weight and balance is important, I check the object balance from time to time while working.

The plastic – blades, aluminum shaft paddle I’ve been using for a long time is kind of… a toy paddle, it’s very fragile, I’ve always been worrying about breaking it in some power actions. But it is super super light. Need to finish and see how this Greenland paddle would prove himself in practice!

serene – 1, part 22

One of the things I’ve been concerning about since start designing the kayak is the spray skirt. The skirt follows a cockpit that has an unconventional size and shape, and after quite some searching on the internet, I couldn’t find a vendor who could supply an already – made spray skirt that fits my size. I could, of course, have one built on custom order, that is I would need to give them the exact drawing of the cockpit, that would involve many steps back and forth, and an expensive process too.

I decided to make one my own, everything needed is already available in my workshop: some nylon fabric (the one used for thick raincoat), bungee cords, needle and thread… My sewing skill has always been terribly miserable, but the first step is done, with acceptable quality. Not a “spray skirt” yet, rather a “spray deck” covering the cockpit. Next would be sewing in the tube that goes around your waist which could be fastened with velcro tapes. Jack – of – all – trades is the sailor, isn’t he!?

7th, 8th images: the tube stitched, an elliptical tunnel that goes around my waist, 36 x 28 cm in dimensions. By now, the spray skirt is almost completed, it fits the boat and my body very well, just gonna add 2 pockets on the two sides. If look into details, one would see the very rough, clumsy seam lines, cause I’m not really familiar with those needle and thread jobs (I broke 3 needles while sewing!). Anyhow, I’d got it done, and it should fullfill the important functionalities of a spray skirt!

Serene – 1 p1
Serene – 1 p2
Serene – 1 p3
Serene – 1 p4

One of the advantages of D.I.Y is that things could be made to suit your very own needs, e.g: my spray skirt would have a belt fastened with velcro tapes, matching my waist closely, and two small pockets on the sides to hold miscellaneous things very much needed once under way.

Made of nylon fabric, the skirt is not as good as professional neoprene – built one, however, that would be suffice to do the job of keeping the water out, in rain or in heavy sea, but surely wouldn’t be suitable for rolling actions. Btw, I can’t find retail – selling neoprene here in Saigon anyhow.

serene – 1, part 21

It’s good to see every parts of the boat work as intended. The hatches are completely watertight. When I left the hull out under afternoon sunlight for an hour for it to dry, the air inside warms up and expands, when I open the hatches, I can hear the sound of escaping air. That confirms not only the hatches, but the whole hull is airtight, and so they are obviously watertight. Then carrying gears inside could be housed with minimum protection against water (e.g: some normal plastic bags).

For the last two weeks, I only tested the boat on flat water, small river branches which are calm most of the time. Next would be some longer and rougher paddling. Been too busy lately and couldn’t keep up the planned pace of at least 40 km per week, and so my endurance has been falling drastically! Also, I’m quite lazy at video shooting and editing, after all, you can’t make it as good as a professional cameraman, and upto one point, you don’t see a necessity for much showing off any more.

Sometimes, I wish I could just put everything aside, pick up the paddle and go, go light and go now! Nothing comparable to the paddling experiences, you and only you in the wild, and you don’t have to depend much on those delicate electronics to have a joyful journey, they’re just some more burdens. So maybe I my next trip, I would just leave the GoPro at home, a single small still – camera is stilled needed though. 4th image below: can only be happy when in open air and on bobbing water!

Serene – 1 p1
Serene – 1 p2
Serene – 1 p3
Serene – 1 p4

With that “go light” determination in mind, all next fittings, equipments for the kayak would be kept to the minimum and simplest possible. The boat is now lightweight enough, I don’t need to carry the kayak cart along my trips anymore. If required, I would just port the boat on my back.

There’ll be no seat, just a small block of foam used as the back rest. Also no signal pole, just some head – mounted lights I guess. No marine compass fit on deck as originally planned, I would just use the Garmin instead (plus a tiny hand – held magnetic compass as backup).

serene – 1, part 20

The more I paddle, the more I’m familiar with my new kayak, and the more I feel pleased with her. Maybe on my next boat, I should have the following motto boldly engraved on: built like a gun, run like a bullet!! Been quite occupied with my works recently, so for now, I won’t put an emphasis on carrying out the next phases of the project yet, just casual paddling here and there a couples of weeks, to get to know more about the boat, and to enjoy the rainy season at its climax.

One minor problem with kayak at this beam, I realized, is that just a small shift in weight could make a directional deviation, it is not a problem with the boat’s structure itself, but with the motion of your body in action. Especially on long paddling, my lower body part becomes stressful and tired long before the upper part, so the need for frequent changes in sitting positions, and hence the effects on directional stability. I guess my lower body part needs some further exercising too.

I like making some short sprints with the boat, it takes up momentum easily, just after a few strokes, and makes it very straight on effort, or to see her gently riding down the waves, just like an Andalusian in dressage equestrianship! Well, when I really have some free time, I think I should build a standard K1 hull, to experience that extreme Olympic racing form, and to better understand the correlations between lines, speed and stabilities, and also for some practicing on flat water.

Serene – 1 p1
Serene – 1 p2
Serene – 1 p3
Serene – 1 p4

In my opinion, a problem with most commercially – available kayaks is that, the cockpits are usually placed too far aft. It’s easy to understand the reason, cause weights of paddlers are variable, they are not fixed. It’s better for the producers to make some ‘reservations’…

to place the cockpit a bit further aft, so that the boat could be trimmed rearward for heavier paddlers. And trimming rearward is wiser for most kayaks, which usually have a Swede form. For a self – designed boat like Serene – 1, it can be tailored to suit your very own measures.

serene – 1, part 19, trial

Made several more ‘sorties’ with Serene – 1 the last week, and her name is Serene, isn’t it!? I’m now quite comfortable with her motion, especially her primary stability. The secondary stability comes to assure the initial lesser – secured feeling, though the marginal limit of which is still the subject of more testing. Windage is barely noticeable in most cases. It takes some practices for cockpit entry and exit, the small size would only have benefits once going to the rougher sea.

Speed measured in several hours of paddling averages out in the [7 ~ 7.5] kmph range, that’s good! But please note that the conditions are mostly flat water with some winds, and it’s not a measure for whole – day paddling in true sea environment yet. In fact, I would be very happy to have my whole day sustained speed around 6 kmph, cause it’s very hard to keep up the same constant horse – power output at the end of 12 hours or more paddling session. Still lots of spaces for improving.

I’m not done with my testings yet. It takes time to adapt my paddling habits to the new boat, and to find out the best way to propel her. For example, the very narrow beam, in addition to the low seat, require much a shorter paddle. My standard 2.22 m paddle suddenly becomes too long, it sweeps far apart from the kayak body, and hence has some negative impacts on directional stability. I’m planning to build some Greenland – style paddles in the upcoming phases of the project.

Serene – 1 p1
Serene – 1 p2
Serene – 1 p3
Serene – 1 p4

As noticed in previous post, the kayak becomes more stable when has some water in her hold, as she becomes heavier toward the designed displacement at 95 kg. It doesn’t mean however, that water should be used as ballast for such small watercrafts (bottled water is fine I think).

I would spend the next month trialling the boat in various other conditions, e.g: carrying different amounts of load, heavy load in rough water… to find out if she is really suitable for the course of “about – a – week – long” trips. Day after day, step by step nearer to being far away!

serene – 1, part 18, launch

The final boat weighs at 21 kg (7th image), a bit heavier than my expectation (I was adding more materials in the later phases of building when thought that it’s already light enough, and the two plastic Beckson hatches add an additional 1 kg). But anyhow, that’s fine still, I can comfortably transport it on my shoulders for considerable distance at that mass. Looking top down, the boat is slim and slender exactly like a bamboo leaf! Last image: me porting the kayak to water…

I took the boat to my routine 20 km paddling route today, having just one word to say: EXCELLENT! It rains heavily 2/3 of the route, quite strong wind at times, but small waves, relatively calm water. The first thing to recognize is the (predicted) low initial stability, took some times to get familiar with that. A novice paddler could be probably frightened in my boat though. The kayak does not track as straight as Hello World – 3, and I need to deploy the skeg 1/4 down for most of the time.

Velocity sees a very good improve, I finished the route in 2 hour 50 minutes, compared to the 3 hour 30 minutes best time of Hello World – 3 on that same route, with quite a weak tide today. However, this is only initial measures, I need to thoroughly trial the kayak in many other routes and conditions to have some precise comments, e.g: with this narrow beam of 45 cm, I would certainly need a shorter paddle. Would post some paddling pictures and videos once I’m done with the testings.

Serene – 1 p1
Serene – 1 p2
Serene – 1 p3
Serene – 1 p4

With this narrow boat, the steadiness of your own body in motion is important. Hence, it does require some practices to completely handle the boat. For the moment, it’s too early to say about the kayak stability, especially that I haven’t had the chances to test it in rougher conditions.

However, my observations during the strong wind & some waves, the boat handles nicely. I feel it’s more stable in waves than on flat water. When rain’s flooded about 6, 7 cm, it becomes even more stable, cause the kayak is approaching its nominal (designed) capacity.

serene – 1, part 17

Some final jobs required to complete the boat: slight sanding here and there on the deck, some decorations, all in white vinyl decals, then the final coat of transparent PU paint on deck. For decorations, there’ll be certainly the inevitable part, the Vietnamese boat eyes, the boat name and some texts stating the owner’s contact information. I’ll keep these to the fewest possible, standing from a functional point of view, and avoid any elaborate decorations, at least for now.

3rd, 4th images: the decals in places, the boat’s eyes, name and contact information. This kayak has bigger eyes compared to those of my previous boats, as for it to see and travel wider, further! Btw, Vietnamese is not the only people traditionally to have eyes on boats, but while others infrequently have eyes as decorative items, 99% of Vietnamese boats has eyes as an indispensable part, a kind of ancient belief that boats are living creatures, who have eyes and souls.

It took several more hours to install all the bungee lines, boat pulling knots at two ends (I just used a variation of the hangman knot) and skeg control. 5rd image below: the skeg control line offset – ed to starboard side, right after the cockpit, hold down by a cleat, for easier handling, and also for not interfering with the rear hatch. 6th image: the skeg blade in its maximum extending position. Now just wait for the paint to completely cure, and for the favorable tide to christen and launch the boat!

Serene – 1 p1
Serene – 1 p2
Serene – 1 p3
Serene – 1 p4

The very small fraction of Vietnamese boats which doesn’t have eyes are of foreign immigrants (e.g: Chinese, Khmer…) who had settled in Vietnam long ago. Eyes have different patterns, by looking at their shapes, I can tell from which province of Vietnam does the boat come from.

Serene – 1 building takes less than 2 months to complete, not everything is as perfect as I was expecting, but the boat overall quality is much more satisfying compared to my previous boats. Not going to water yet, but its firm and compact body gives me a very pleasant feeling.

serene – 1, part 16

Fitting the Beckson hatches, fore and aft, is quite straight – forward and just takes about half an hour or so. The hatches are glued with silicone sealant, then screwed to the deck. I also applied a silicone – based mold – release spraying agent as lubricant, which secures a very fine and watertight fit. With these Becksons, I won’t have to worry about water leaking anymore, and even that the gears carried inside (e.g: electronics) don’t need to be packed in waterproof bags.

4th, 5th images below: the cockpit and some other parts on the deck painted. I decided to increase the amount of color pigment to turn the dark brown color into almost black to match that of the Beckson hatches. 6th image: I repaint the deck vs hull jointing line as the previous is quite ragged cause I used the wrong type of duct tape (which lets the paint leak underneath). In this Serene – 1, I don’t “cut corner” anymore, when something’s not right, I redo it until it’s good enough!

7th, 8th images: the hull painted, the dark brown color has become almost black now. I use a foam roller to quickly make the first layer of paint, then use a brush to apply the second (and last). It’s smooth enough, don’t have to sand & repaint another time as in my last boat. At this point, the boat is technically ready for water already, but yet some more painting and fitting jobs needed on the deck. Tell myself to be patient, I can’t even just wait for the paint to dry out in this moment!

Serene – 1 p1
Serene – 1 p2
Serene – 1 p3
Serene – 1 p4

Well, some plastic parts on a wooden boat doesn’t look very attractive to some eyes, and initially, I’d preferred wooden hatches too, but such thing leaks no matter how good you make it. In my last trip to Đồng Hoà, I had to stop twice to drain water out when it has filled more than 1/3 of my boat.

So safety is the primary concern over aesthetics. One who’s paddled in rough conditions would understand the very fearsome instability of a boat half – filled with water, not only it’s more heavy to paddle, the whole thing becomes a very thrilling acrobatic game indeed.

serene – 1, part 15

Apply a very thin epoxy fill – coat to completely cover the fiberglass fabric weaves, then peel off the duct tapes (together with the excess glass) with a sharp knife. The hull is then exposed to sunlight for the epoxy to completely cure, before given a very light sanding in prepare for painting. I paused for a few moments to watch her lines, well, with the singular exception of the “man – of – war”, all boats is always referred to as “she / her”, there must have been a reason for that, right!?

Next come the job of installing some miscellaneous deck hardwares, the deck plate to seal off the skeg box, two small wood blocks acting like tiny cleats to hold the skeg control line… Some more unnamed works needed before the deck could be painted. You can also notice from the images that the deck has received another layer of thinned epoxy (mixed with color pigment). I was thinking over about the color scheme, but found out that it’s best to just have wooden colors on a boat.

7th, 8th images: using duct tapes to mask the areas out for painting. The cockpit would be painted first in dark brown color, like the hull, as well as some other parts on deck. After some simplest decorations go in, the deck and hull would be coated with transparent PU, just one layer on top and two at the bottom. After that is the final fitting (hatches, lashing lines, skeg control) and the boat would be ready for water, seems like I can’t wait anymore for it, to try out the boat this weekend!

Serene – 1 p1
Serene – 1 p2
Serene – 1 p3
Serene – 1 p4

A bit off topic about the connotation of concepts… (in addition to polyurethane vs PU in the previous post) in Vietnamese the terms: áo ấm (warm jacket) and áo lạnh (cold jacket) vaguely refer to one same thing. In English, a wet suit and a dry suit are two different things!

Reflected by the language, the Vietnamese are usually narrow – minded, they don’t take concepts into the very detailed, they don’t see things from different angles. They only see what’s immediately closed to them. As such, they’re easily tricked into seeing only what they / others want to see!

serene – 1, part 14

Some tweaks here and there to smoothen the jointing edges between the hull and deck, putty – seal the bulkheads to the deck, then some slight overall fairing and sanding before putting on the final layer of fiberglass to the bottom part. The glass will marginally wrap over the deck (about 1 inch of overlapping) to strengthen and completely seal the joint. Deck would have no fiberglass on the external side, and would only be clear – coated with thinned epoxy and polyurethane (PU) paint.

4th image below: the deck thoroughly sanded with 100 grit paper, it looks quite fine now! In my previous boats, I was usually over sanding, with multiple grit – levels applied, and lots of efforts too. But now, I’d realized that I actually don’t need a furniture – grade finish (and I couldn’t do it as nice as a professional woodworker nevertheless). After all, a boat is a functional (not a show – case) object with lots of hard and harsh uses. A too perfect finish wouldn’t be of any practical good!

5th image: the deck has been stained with thinned epoxy mixed with color pigment (yellowish wooden color). The white duct tapes mark the area of wrapping when glassing the bottom. 6th, 7th images: glassing the hull exterior and wrap the fiberglass an inch over the deck. I used exactly 300 gram of epoxy mixed with dark brown wooden color pigment. A lesson learnt from the previous boat: use lighter colors for the wood to appear natural, too strong, deep colors look very… ‘artificial’.

Serene – 1 p1
Serene – 1 p2
Serene – 1 p3
Serene – 1 p4

About polyurethane (PU) paint: it’s a broad category of paint with different sub – types and applications, but in Vietnam, the term is narrowly and misleadingly meant to be one used for (semi – clear color) wood – surface finish only, as people is only familiar with that widespread use.

So if you want to see other types of the paint, say: Polyurethane, don’t say PU! As the vendors will assume you know nothing about it, and by telling the chemical formula, you would be given more choices, don’t say PU, or you would be wrongly given the interior / inferior furniture finish!

serene – 1, part 13

Carved and installed two wood blocks at the two ends to drill holes for the pulling knots (to further save weight, I won’t pour epoxy into the two tips, just the wood blocks with some sealing putty), sanding the cockpit coaming, glassing the lashing lines’ anchor points built into the hull, some more miscellaneous jobs before I can dry – fitting the hull and deck together. In the next couple of days, we’ll see the boat in its final shape! First two images below: inside and outside of the anchor points.

Cut a slot in the aft deck for the skeg box to get through, then the hull and deck are ready to be jointed together, with just some epoxy (not putty) applied to the edges. The two ends, bow and stern, fit well, I just need duct tapes to press them together. The mid section requires some fastening as the plywood bent and and does not offer a perfect match. Nevertheless, the overall process is smoother compared to my previous boats, and I’m so happy to see the kayak taking on the designed shape!

I spent times going around and around the boat, watching the fruit of my efforts! The hull shape looks very fine to me, the deck shape is quite crude indeed (not as cursive and fine as that of Hello World – 3, since the deck was drawn to be easy to build). But in essence, the lines, size, weight… all gives me a very comfortable and manageable feeling! Just a few more weeks from now and the kayak would be ready for her new life on water, can’t wait any more for that!

Serene – 1 p1
Serene – 1 p2
Serene – 1 p3
Serene – 1 p4

With a flat deck, the kayak wouldn’t be particularly easy to roll, as once ‘turtled’, the deck becomes the bottom, and flat bottom is quite stable and difficult to turn over. So rolling is not a strong point of this design apparently, nor I did had rolling intention in mind!

Admittedly, I haven’t learned and practiced the Eskimo rolling techniques, and I couldn’t do it whatsoever, since my previous boats are too big and too heavy for me to roll. The techniques are in my (long – term) TODO list anyhow, at some points, I will try to master them!