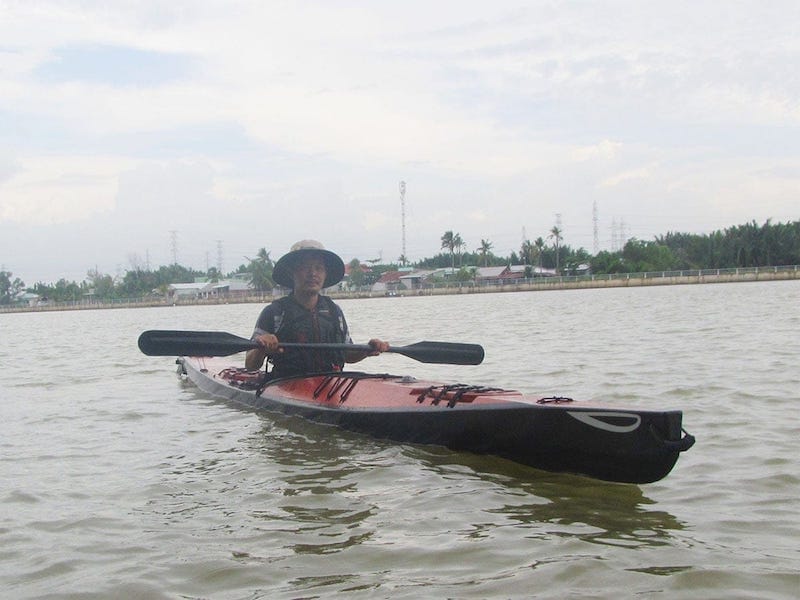
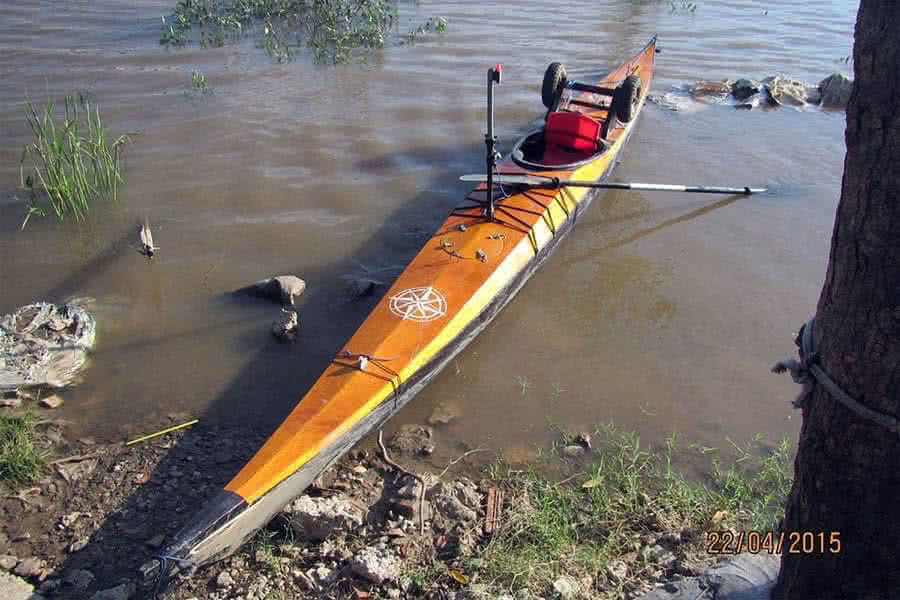
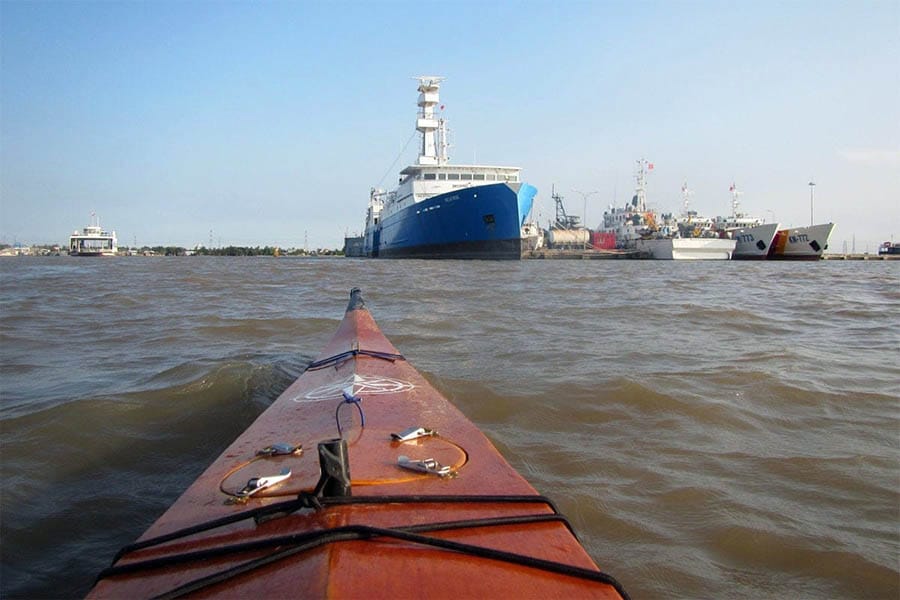
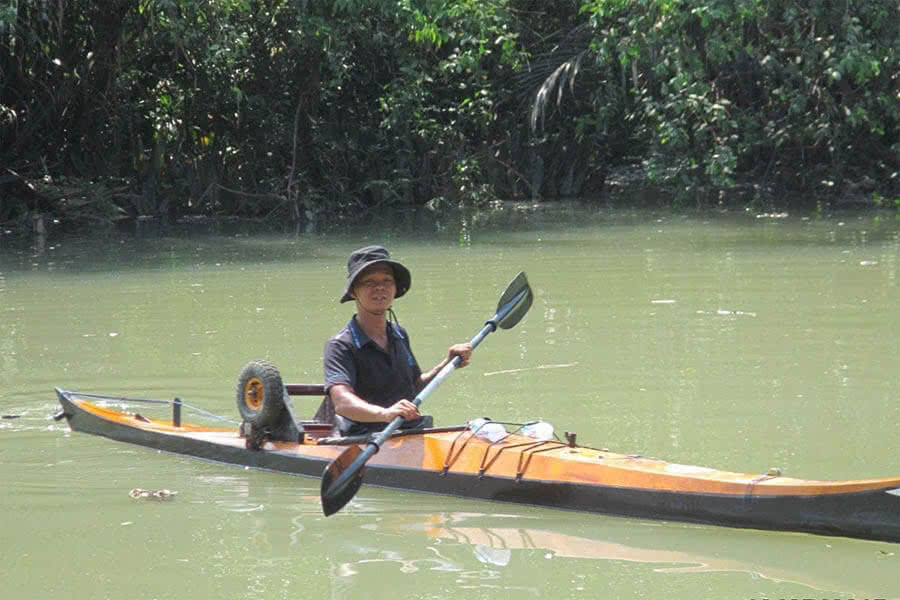
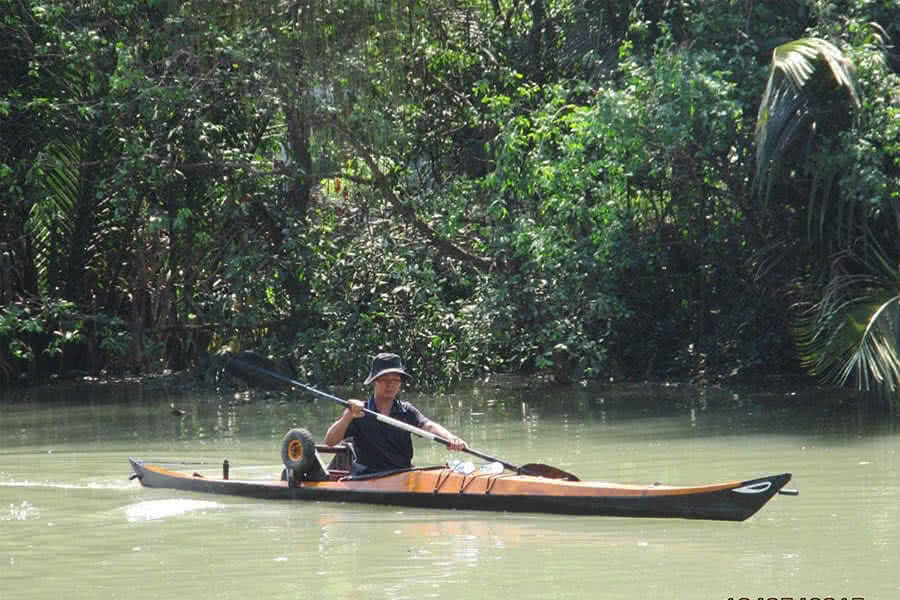
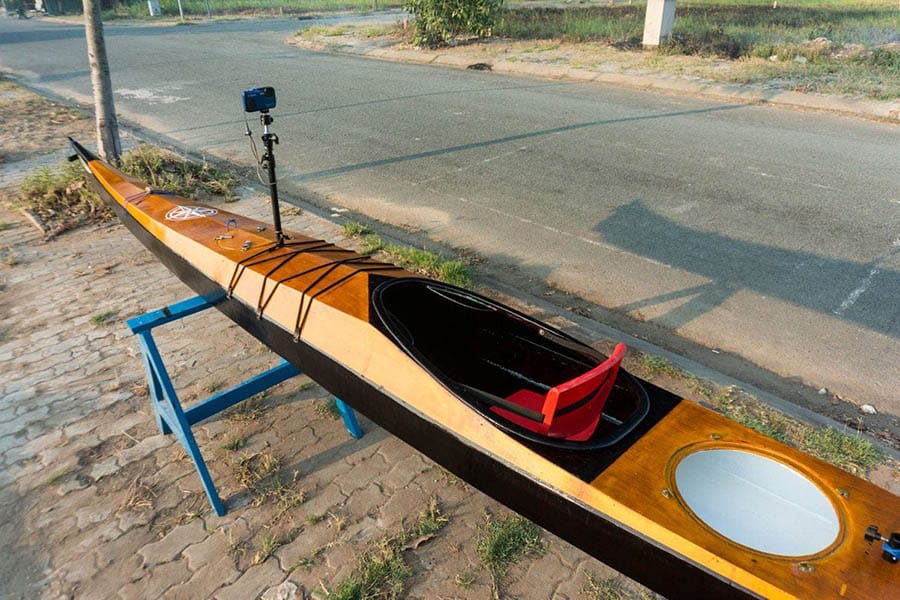
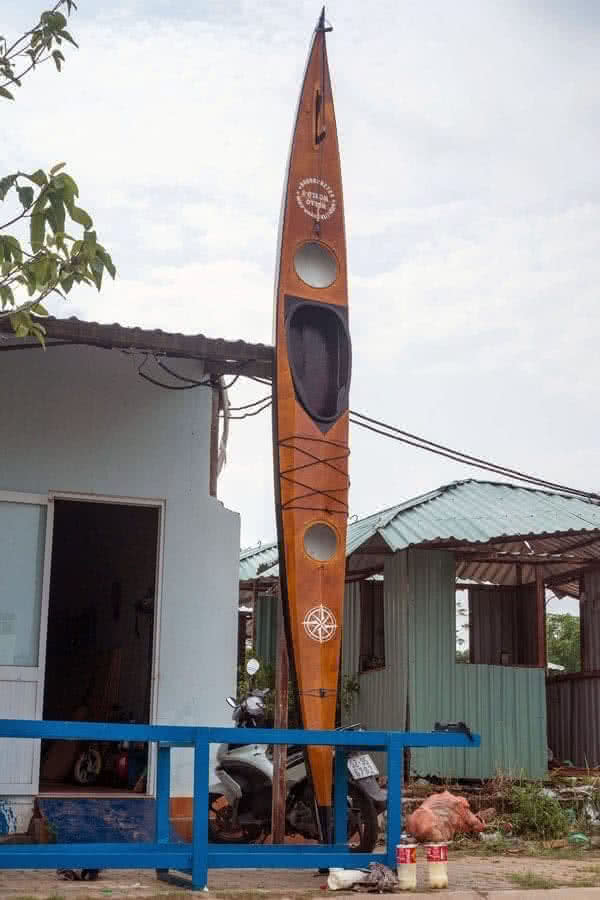
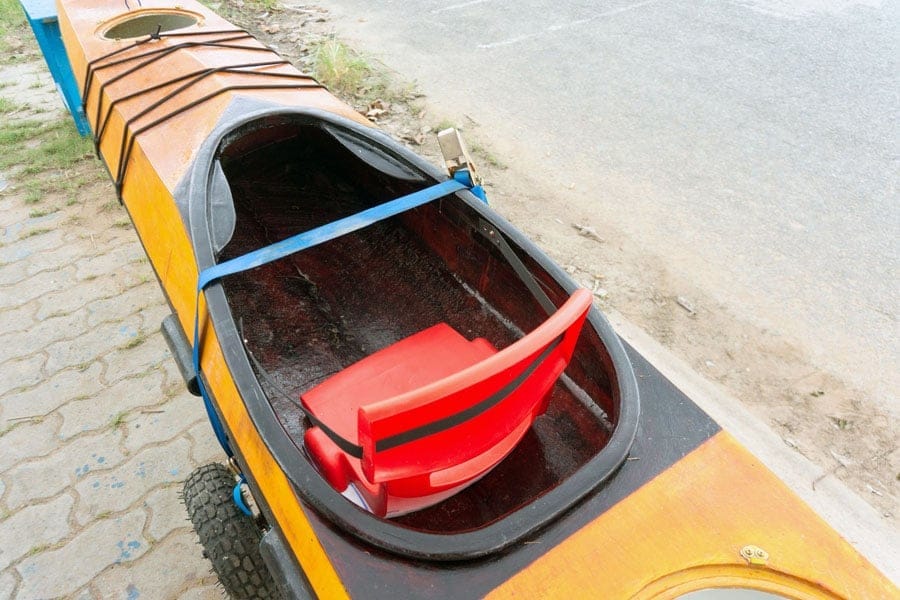
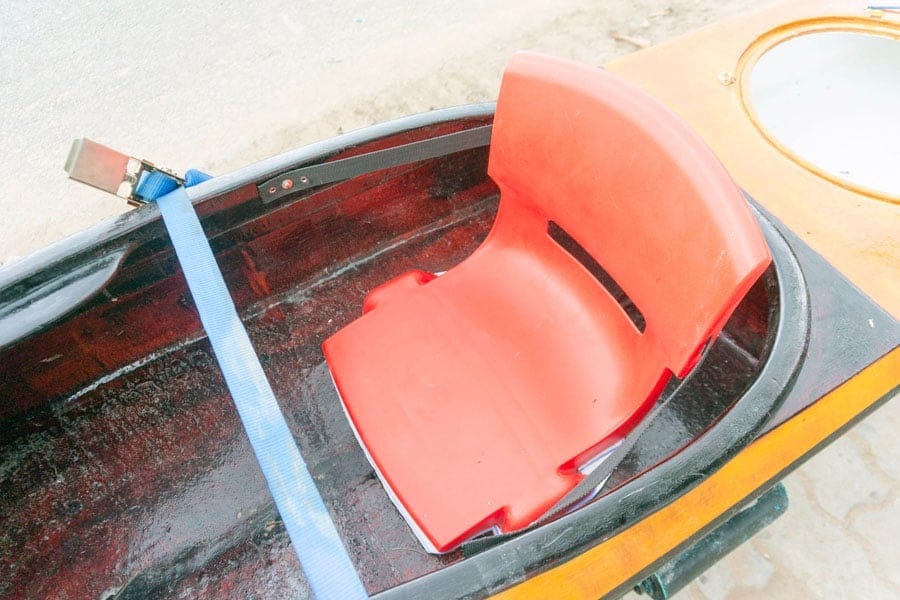
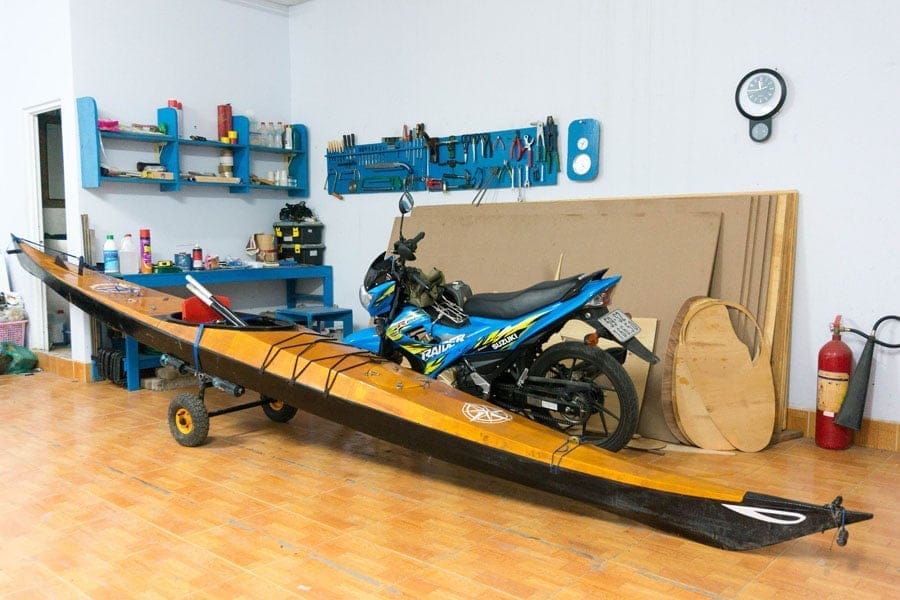
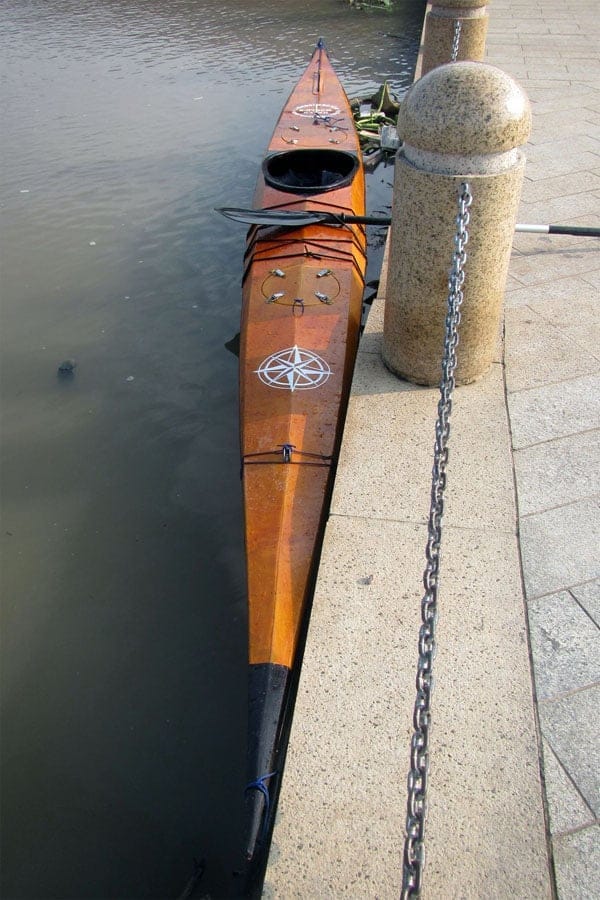
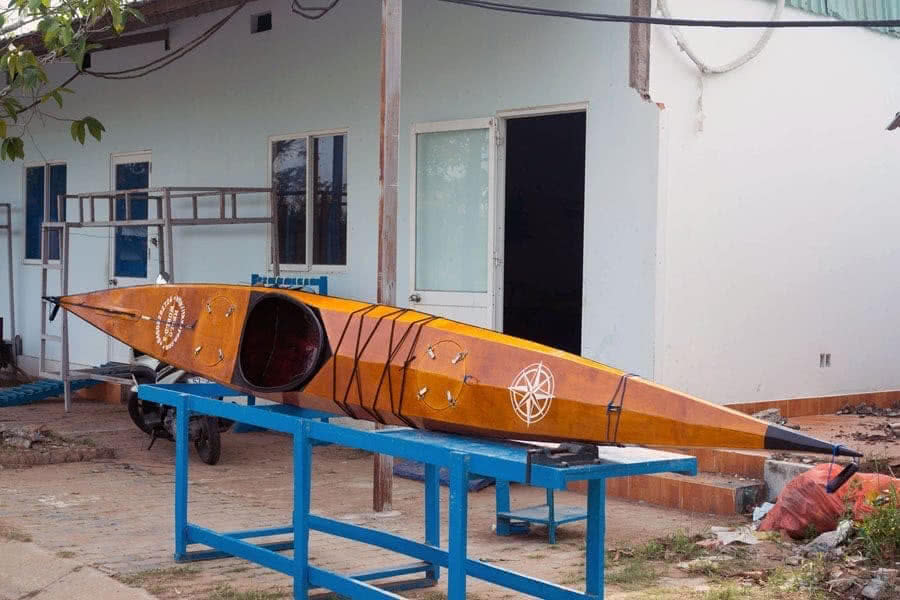
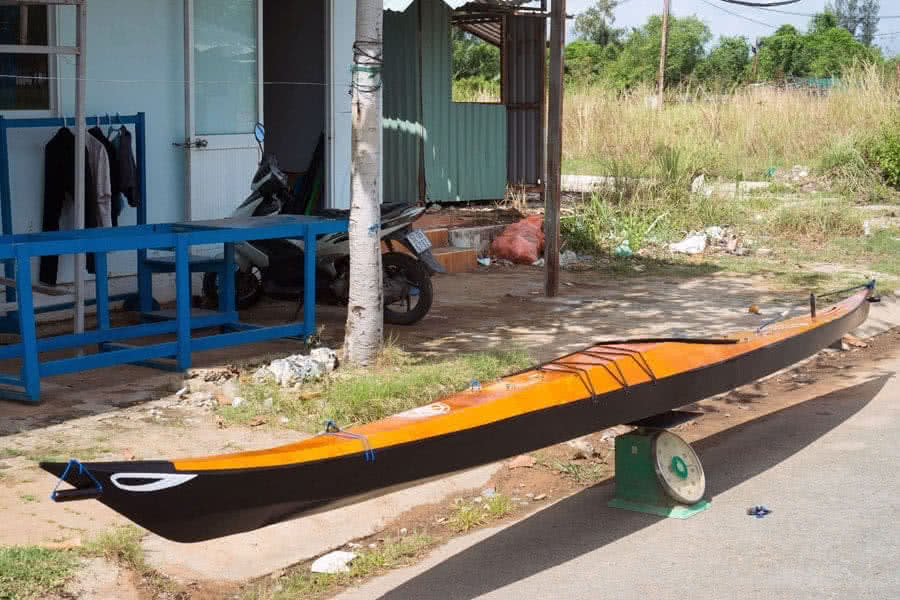
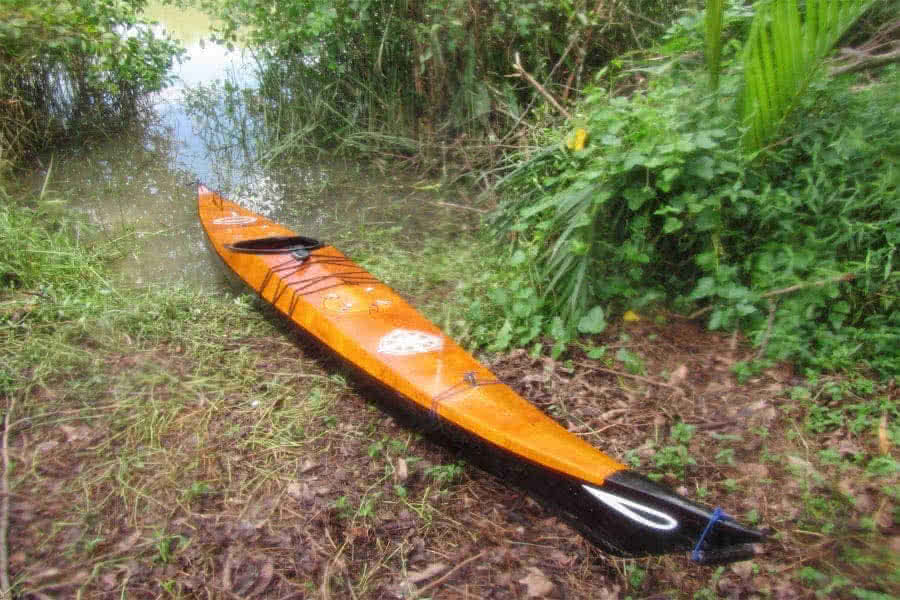
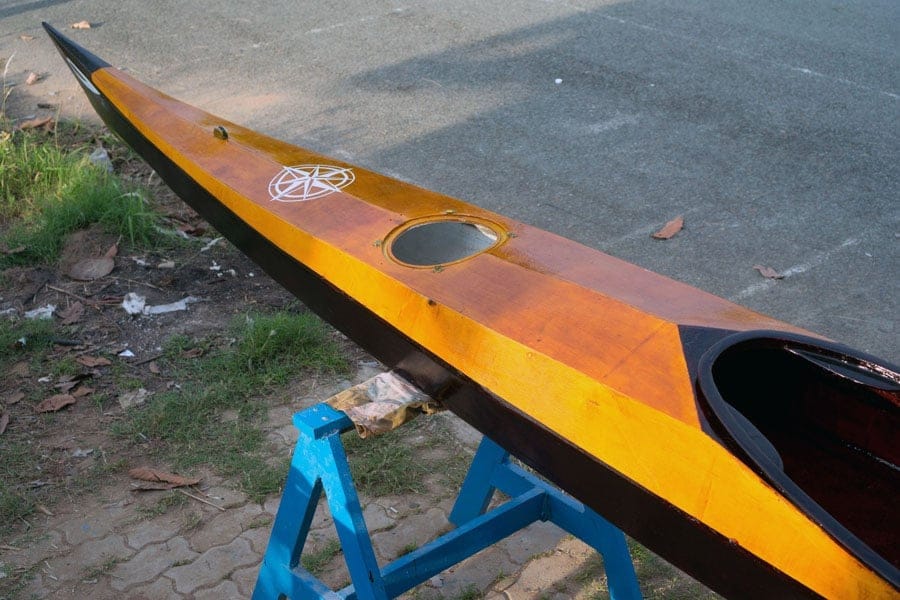
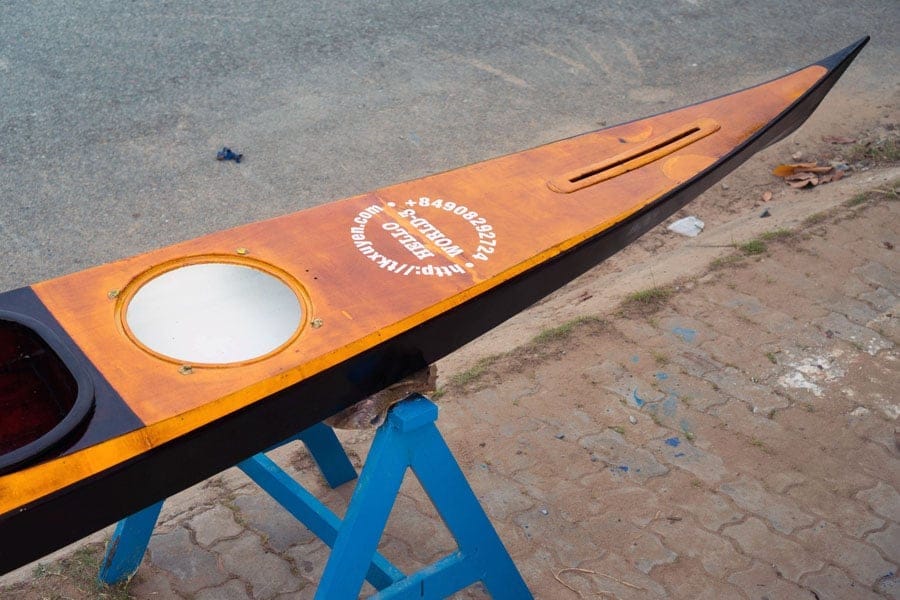
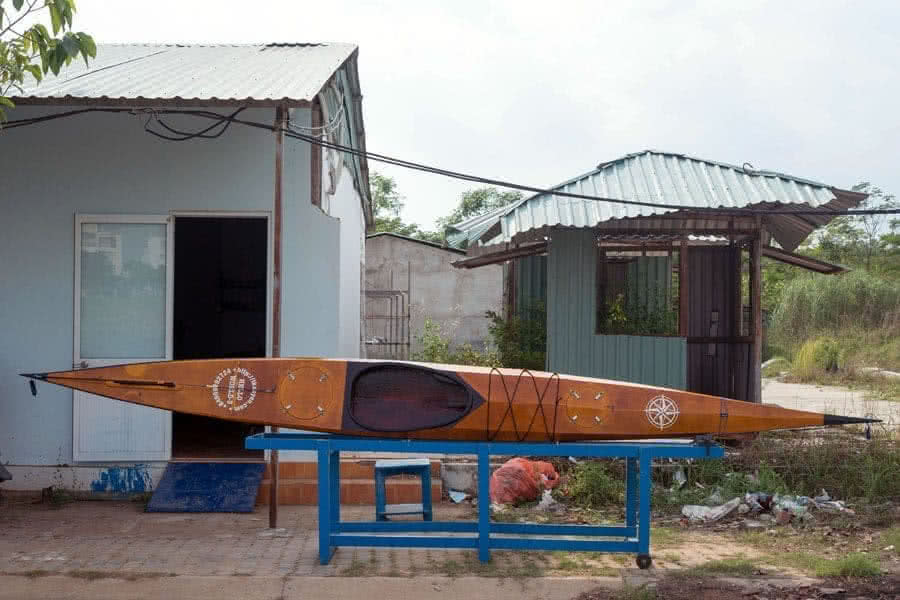
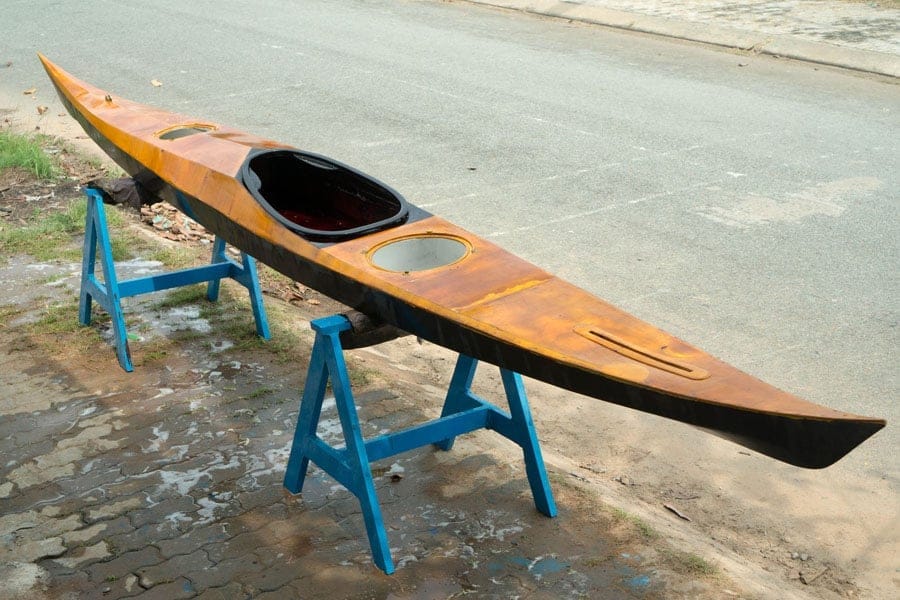
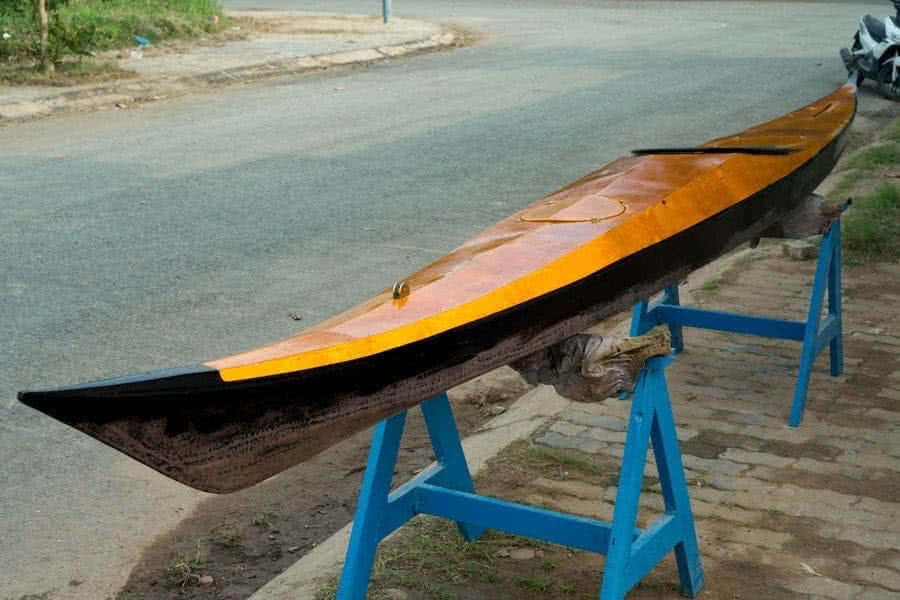
serene – 3 vs. hello world – 3

short paddling around with a friend, with Serene – 3 and Hello World – 3 along side each other. Hello World – 3 is more stable but slower, Serene – 3 is, by design, more nimble. For a very long time, I was just paddling alone and didn’t have a chance to observe my own boats in actions, very good feelings to see them from a 2nd person perspective!

hello world – 3, part 27

onna end the series on my Hello World – 3 kayak building & fitting here with some comments on the design. It is an excellent boat in almost every aspects. The outlook is beautiful and attractive, extremely good stabilities (both primary and secondary), good tracking capability, and turning is easy with some slight edging. The hull shape is good for surfing too, it goes into turbulences, water or wind, with great confidence. And it is roomy, having lots of space for gear storage on longer trips.

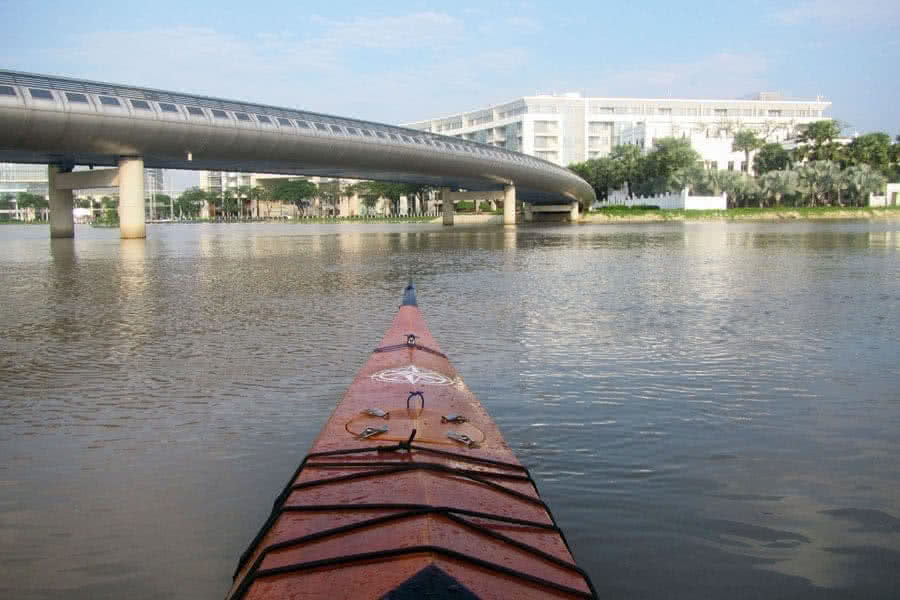
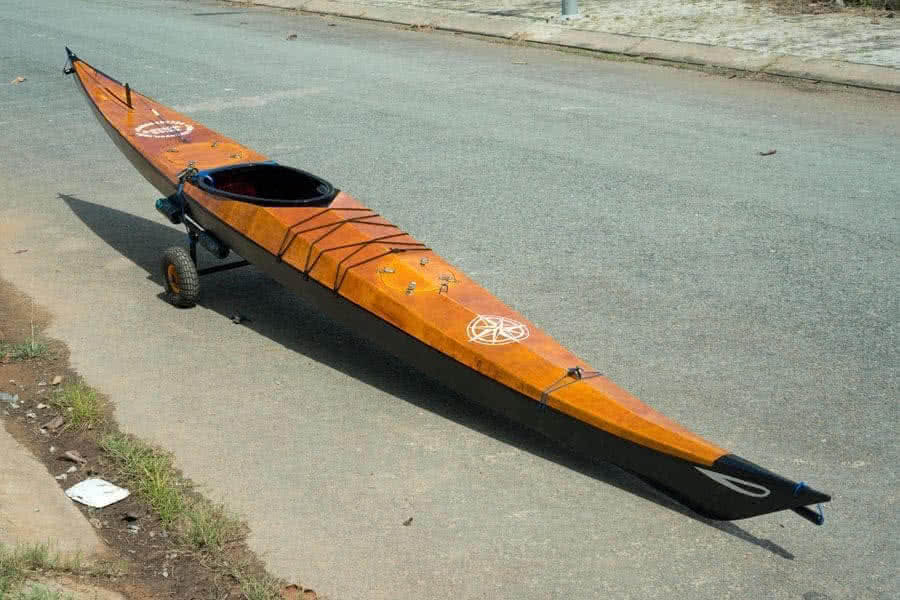
On another side, the boat is more suitable for bolder paddlers, in order to sustain a higher speed. Me, at 64 kg, belong to the medium – low paddler group. With my inexperiences (still) in building, boat weight is quite large. Everything put together, my whole day sustainable speed with HW – 3 is bounded into the [6.2 ~ 6.5] kmph range, a bit behind my expectation. Of course, my expectation is of my own, some goals set and to be reached, not something to blame on the kayak design.

And maybe my physical excercising has not been hard enough too! Like I’d mentioned earlier, boats are like shoes, you try until you find something that fits your needs, and also like shoes, owning 4, 5 pairs or more is just quite normal for an average person nowadays 😀. Looking back on all my building and boating experiences, the last 2 years is, anyhow a short period of time, for a life – time hobby. I’m still at the beginning of the road, there’re lots of things to be learned and to be accomplished!

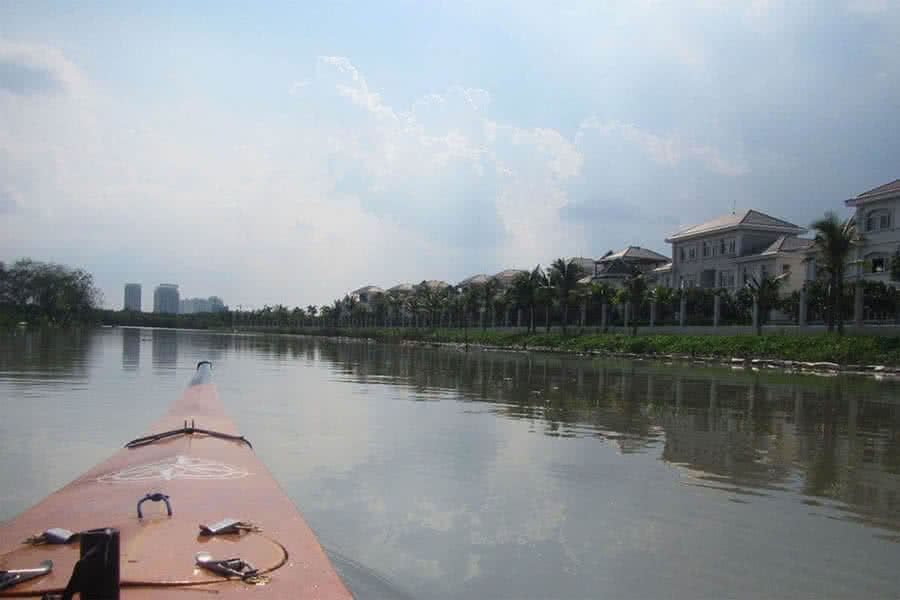
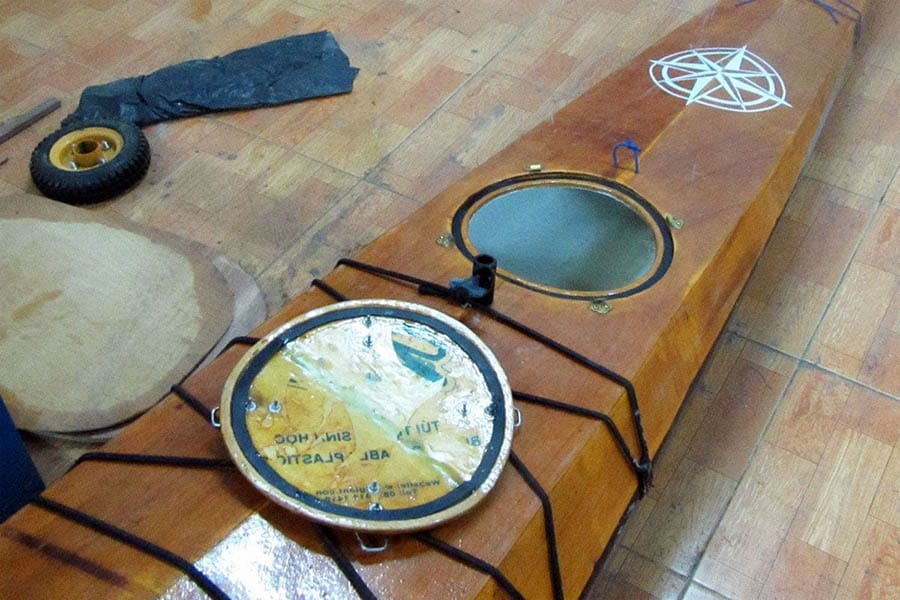
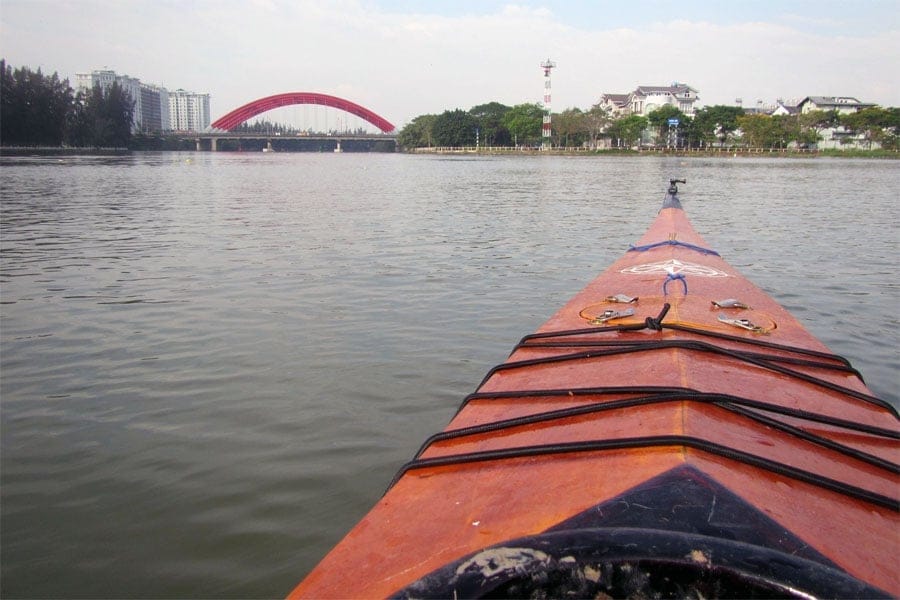
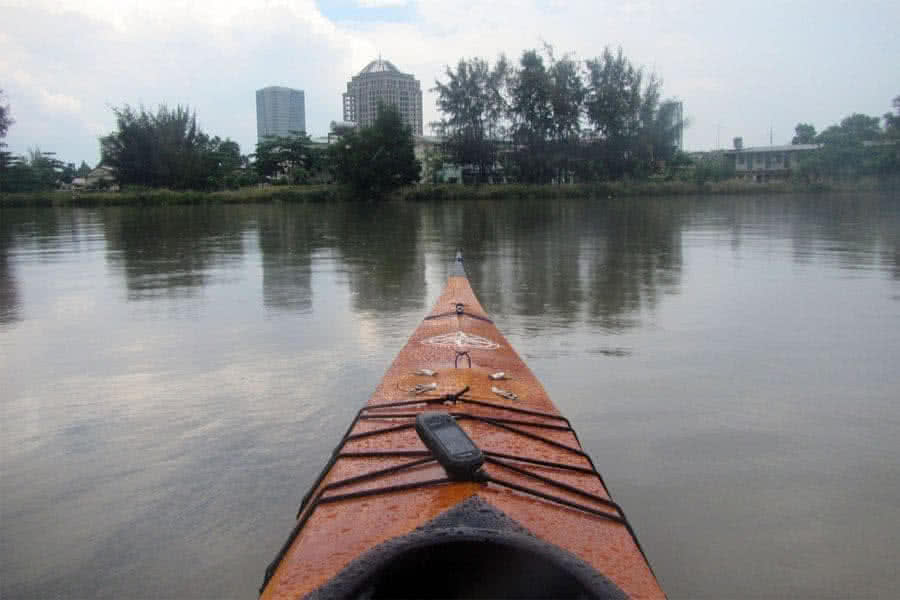
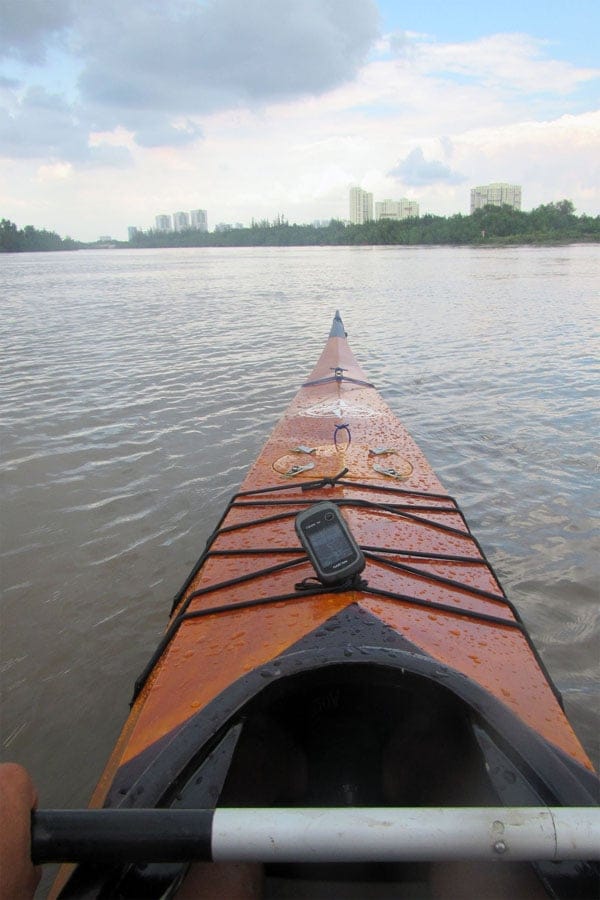
Lots of things happened during that less than 2 years time period, at the beginning of which I even can’t tell the (now – obvious) differences between a kayak and a canoe, I didn’t know how to operate a hammer or a block plane, never done any woodworking before (as well as any other real ‘manual’ labour). Started from the most primitive A, B, C… sometimes I’d wished I didn’t have to do everything the hard way like that. Well, things gradually unfold, like the sceneries ahead of your kayak! 😀

hello world – 3, part 26

he other day, I was conducting some re – entry tests: supposed that you’re thrown out of the boat by waves, and you need to climb in again, pump the water out to continue paddling before another wave hits you. But the hatches leak so much that re – entry is very difficult, the harder the next tries, as the kayak continues to take water in, it becomes heavy and unstable. This is very dangerous, imagine if this happens on open sea, and I would never want to be in an… “Abandon ship” situation.

I ordered some Beckson deck plates (plus other things) from Amazon.com as a fix to the hatch leaking problem. But it took forever for the ordered packages to be delivered, first from Amazon to a friend in the U.S, then from him to Saigon (some goods can not be shipped directly to Vietnam, so you have to make it via a “freight – forwarder”). Can’t wait the progress, I decided to try another solution: install some rubber washers and tighten the locks to help sealing the hatch better. It works quite well indeed.

The packages arrive today finally! But 2 Beckson screw – in deck plates would be used for the next boat instead, as I’m satisfied with the leaking problem now. Also arrived are some rolls of 2″ – width fiberglass tape, those would be very useful for my next builds, and a spray skirt. A spray skirt is absolutely important for kayaking in rougher conditions. It recalls to me that I was really risking (and was lucky too) when paddling to Vũng Tàu last year with no working water pump, and no spray skirt.

Below are a couple of shots showing the spray skirt in action. On calm rivers and canals, it’s not of pretty much usefulness, but it would become critically important once you enter the steep estuary and coastal sea areas. Also showed is the beautiful lines of my HW – 3, people is all taking photographs or shooting video on the kayak when encountered along my paddling routes these days! Despite some building faults here and there, she looks so gorgeous, almost sexy, doesn’t she!? 😀

hello world – 3, part 25

pdates after updates, Hello World – 3 has become quite heavy indeed, now around 30 kg, too heavy to be handled on my back for long distance. Weight has been one of my weakest point in boat building, I’ve always had fears that the boat will not be strong enough, so put more and more materials in, that results into a much heavier boat than originally speculated 😢. This is the most important thing to be improved in my next build (projected to be toward the third quarter of this year).

Want it or not, HW – 3 is my main boat for now, though quite heavy, it’s strong and has the best performance characteristics among my boats. And I’m gonna have some more preparations for my upcoming trips. I added one more mounting point for the light and camera poles, there’re one aft and one forward of the cockpit, so the camera can be mounted in different positions. Also decided that the Canon Powershot D30 would be my sole camera onboard, used for both picture and video shooting.

The Canon Powershot D30 has much better battery life compared to my GoPro Hero 3, and video quality is comparable, though video resolution is not as good. Furthermore, bringing just one camera, one kind of backup batteries would make things simpler, having less to be cared for when on the waterway. I’m not too keen on taking super fine photographs, bringing a DSLR is too bulky and risky for me, so this D30 is already good, an all – round cam: pictures, videos, and can also be used for diving.

I’ve built another cart for my kayak from cheap MDF, made water – resistant using thinned epoxy and paint, it’s smaller and lighter compared to the previous one (which was made of iron tubes). And I reused the two big air – filled tires, you know how it is pulling a heavy load with small solid wheels on a ‘sinking’ sandy beach. There’re some stuffs I originally planned for my kayak, but they turned out to be very troublesome when faced reality. Among such things are the hatches, simply put: they leak too much!

hello world – 3, part 24

ast batch of updates for my kayak before Tết (Lunar new year), a detachable and retractable light (and camera) pole. At a bicycle accessories shop, I found a small signal light which uses solar cell (about 3 square inches in area). Testing the LED torch showed that after being fully charged, it could continuously blink for two nights, more than enough to be used for the boat. It has 4 blinking modes, which could be changed by a switch located behind.

The light is small, lightweight and most importantly, doesn’t need a separated battery since it uses solar energy (that means: less thing to be cared for in a journey). The pole, in its retracted position, is high enough for the signal light to be visible from other vessels on water. When the GoPro is in used, the pole is extended about one foot higher so that the camera could get a better view ahead of the boat. And the whole thing could be used, as a… selfie stick when needed.

Screw off the pole from the connecting dock bolted down to the aft deck, attach my other Canon D30 camera to the end, then I have a selfie stick in hand. Well, I’ve been concentrating more on boats and paddling, not the photography things, but it’s better being able to capture the beautiful scenes along the paddling way anyhow. There’re still many things to be done for the kayak, but that would be until the next year. For now, just more and more paddling, 25 km every 2, 3 days or so.

May the new year comes for me with more will and determination to reach my dream target. The more I understand about the task, the more challenging I’ve realized how it would be, for now, I’m not sure still if I could make it: lots of practicing and preparing, a huge deed of efforts and endurance required to make that 300 km (6 ~ 7 days or more) journey. May the new year comes with more internal calm and balance, for me to live wholly in this simplicity and purposefulness.

hello world – 3, part 23

ade some more miscellaneous improves to my HW – 3 kayak… First is filling the two boat’s ends with Polyurethane foam. For an example of how PU foam works, see a demo video here. It takes just a few minutes for the mixed – two components to expand into a closed – cell (water proof), somewhat rigid structure. The foam I bought is exactly the one used for refrigerators’ insulation (see the 2nd image below, two bottles containing two components called: Polyol and MDI).

The foam adds about 600 ~ 700 grams to the boat’s weight, it fills about 1 meter of boat length at both two ends, occupying a total volume of about 60 liters (estimated). This is just an act of precaution, as in the worse case should the boat cracks, or if there’re holes punched into the hull, the whole boat could be flooded, but it will still stay afloat. I erect the kayak upright, pouring the mixed PU foam through the hatch, wait for 15 minutes, then repeat the same thing for the other end.

Instead of making a complex foam seat as I originally planned (which could be very time consuming cause it requires creating a mould), I chose to install instead the simplest thing that works. Bought a small plastic kid seat, cut the four legs away. A strap line helps holding the seat in place (bolted to the cockpit coaming) and supports its back. The size of the kid seat is about right, not too small for a comfortable ride, and not too big so that a spray skirt could be deployed later.

This season, Christmas, Gregorian New Year until Lunar New Year (about 1.5 month from now) the city is decorated with all kinds of lighting, creating splendid sceneries. I’ll try to have some night paddling to capture those colorful moments. With the overpopulation situation in Sài gòn becoming worse and worse day after day, I dare not step into the urban districts these days anymore, viewing the city from above the water seems to be a very nice alternative option to me! 😀

hello world – 3, part 22

aving made some more thorough testing, I’m now feeling very pleased with the new boat and its build quality. After several 20 ~ 25 km paddling trips, I think I can average out at 7 kmph for extended time (5, 6 hours) and probably longer with more endurance exercising. That’s still not up to my expectation yet, but about speed, on the internet, you can hardly find trustable reporting on kayak and its paddler’s abilities, some boating information is purely… bloating!

At some points, due to the lack of correct information, I did have some illusions on paddling speed. But now I definitely know that a typical good sea kayak has the average, sustainable speed in the 7 ~ 7.5 kmph range. Beyond that would be the domain of racing kayak or surfski, which could step into the 8 ~ 9 kmph range, the best of which could not reach too far beyond 9 kmph. And that probably would be the target of my next build, though currently I have no plan for it yet.

Unlike HW – 2, I feel very comfortable to paddle HW – 3 into the wind. The hull pierces waves nicely, and I think the boat would surf well also. Haven’t had the chance to trial the kayak in big standing waves, but in some lesser situations, I’d noticed that the boat rides waves in style, with very little drifting, shaking. That’s a characteristic very much needed when I would leave the relatively – calm rivers to go into the much more choppy areas of coastal sea and large estuaries.

It’s approaching year end and I’ve got lots of other stuffs to do, so there won’t be any big updates to the kayak until next year. It’s a real pleasure when on rivers, people was asking where I bought the boat from, and when I told them that I built it myself, none believes it 😀! This season, day temperature is dropping below 25°C (that’s already called “cool” for a tropical Saigon), good for going paddling indeed. Some video shots to show the boat, captured with my GoPro mounted at bow.

hello world – 3, part 21, mise à l’eau

roudly present the new – kid – on – the – block, the flagship to join my armada 😬! The first image below: the boat and her quite – satisfied builder / owner! 😀 Today is launch day (the French phase mise à l’eau simply means: put to water), I tested the kayak for a short trip of about 15 km. The first thing to notice when sit in and start some paddling strokes is that the boat has extremely good primary and secondary stabilities, unlike my previous HW – 2.

All boating measures is relative, and you trial to find out what works for you. HW – 3 has very good stabilities, or at least I’ve get used to those not – as – good of HW – 2. The boat tracks very well, I could have the skeg completed retracted on somewhat calm water. The turning radius is still large, not something abnormal for kayak of this length, the boat behaves nicely and responses well to my edged turning actions. I have nothing to complain about its tracking and turning capabilities.

Speed sees a good improve, I can easily average out at 7.5 kmph (flat water, measured in 2 hours), about 1/4 better compared to that of HW – 2, well for sure HW – 2 is only a 14 footer. Actually, I was expecting a greater improve in speed (about 1/3, not 1/4). Anyhow, I need to get familiarized with the new boat, and to figure out the exact measuring numbers. Also I noticed that the boat is a bit heavier at stern, the lowest point of the bow sometimes pops out above the waterline.

That suggests me to shift the weight balance toward the bow a bit (e.g: arranging the carrying load), to gain the waterline length a little longer, to improve speed further. Well, the next couples of weeks is just paddling and paddling, to improve my endurance (I’ve been having little practices for the last two months). I would need to make some longer trips (about 20 ~ 25 km each) to get known to her, the new boat, and to see how she would behave in rougher water and weather conditions.

hello world – 3, part 20

hen all the vinyl decals are in place, I started varnishing the deck. A note about vinyl stickers, which I can have them cut at a local shop for a cheap price. The last time, I designed all with Photoshop, then export to EPS format. Unfortunately, Corel Draw does not understand that EPS very well. Corel is usually the software used to operate the vinyl cutter machine: the vector editing program just “print” the designs to the vinyl cutter, which handles all “drawing” (cutting).

This time, I thought of a new way, I used Photoshop to design all the graphics, and export them to large black & white images (PNG). Then in Corel, I used the “Trace Bitmap” feature to try converting those bitmap data into vectors, which usually works very well for B & W (2 colors) images, then have them cut by the vinyl cutter. At least for some simple graphics such as logos, short texts… this way works well enough, and I don’t have to spend time learning more about using Corel Draw.

The deck varnishing went on smoothly, with the lessons learnt from varnishing the hull. The 4th, 5th images below: installing the skeg, the bungee cord pulling the skeg toward the stern, and the paracord holding the skeg in place toward the cockpit. Note that I attached the bungee and the paracord directly to each other, so that the thin skeg blade won’t withstand the tension of those pulling lines, it just follows the control. Note also the 5 knots used as 5 levels of skeg lowering & raising.

Install the fore deck lashing bungee lines, attach the two grab handles and it’s done! Some may have noticed that the cockpit doesn’t have the cheek plates and the seat, but I’ll keep it simple for now. I’m used to sitting just on bare wood, with no back rest, even on prolonged trip, that’s fine for me. Well, the boat is now ready for some “technical trials” 😀, to see how it behaves on water. There’s still a long way equipping it for real voyages, but that would be later. Now, to the water! 😀

hello world – 3, part 19

oday, I sanded the hull slightly, to partly remove the previous unsuccessful varnishing. Then I painted the contour line where the deck and hull meet before proceed on re – varnishing the bottom again. Images below: using duct tape to mask the line, the result is quite eye – pleasing, the line helps better hiding the imperfect deck & hull joining, it create an “optical illusion” that the joining is smooth. Next is to varnish the whole boat external sides, hull and deck.

By “varnish”, I mean layers of transparent two – parts PU paint over the surfaces. (In Vietnamese, the word “varnish” still refers to the old – day, alcohol – based finishing agent which used to be popular, but largely forgotten nowadays). The varnishing need to be done quickly, as it’s less than a few minutes before the PU set, brush one small area at a time, proceed on, don’t look back to correct previous mistakes. I find a normal painting brush more suitable than a foam roller for this kind of job.

At this point, I made a hard decision to abandon all planned decorations. Initially I’d intended to do some inlays: veneer and mother – of – pearl. But doing so will take a considerable amount of time, which I don’t really have in the coming months, it’s approaching year end and there’re lots of other things to be done. Wood inlays requires skills and patience. I’d thought I could do it with some practices, and I’m not going to rush the boat to water. But now, just some simple vinyl decals instead.

It’s something about balance… an elaborately decorated boat is beautiful to look, but maybe I just need a good, nice boat to play on water. Admittedly, there’s an urge going to water in me, after almost 2 months working on this HW – 3. So, I just put a compass rose pattern on the forward deck, plus the boat name and some owner’s information on aft deck, and of course the boat’s eyes at bow, that would finish my minimum decoration plan to proceed on to the next step.