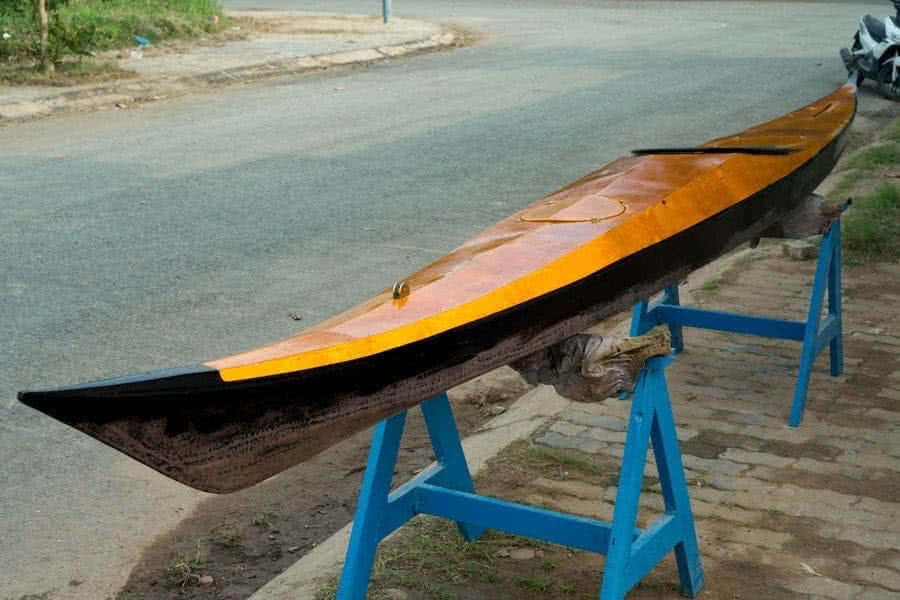
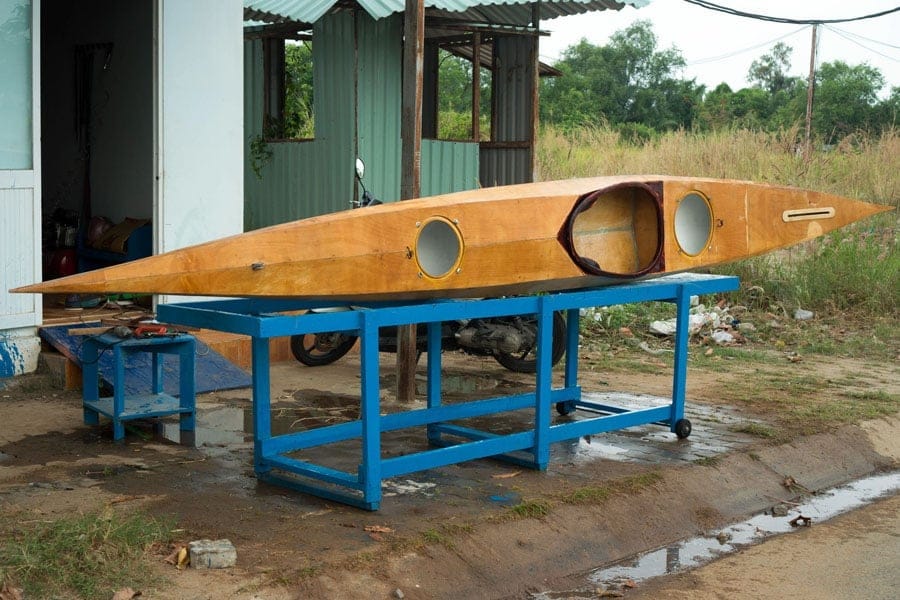
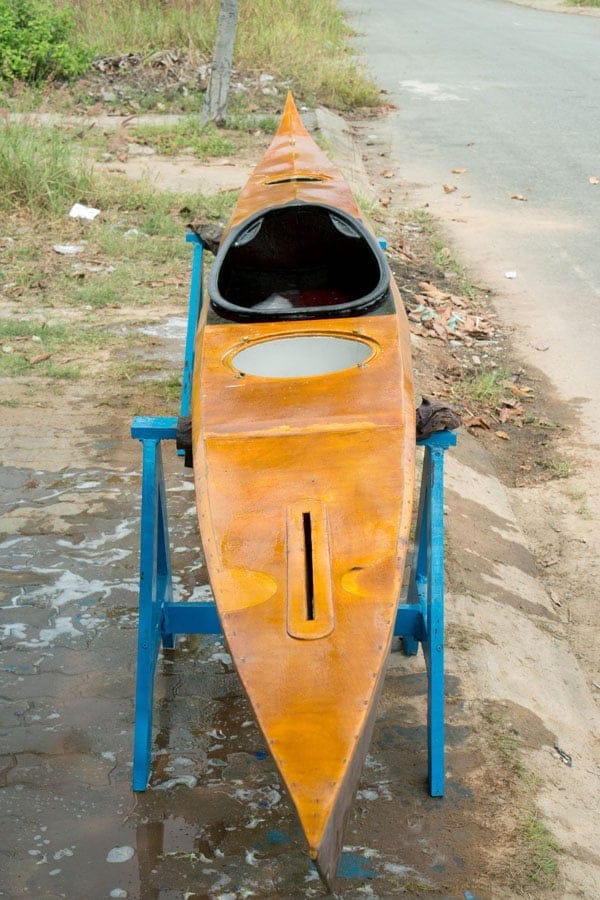
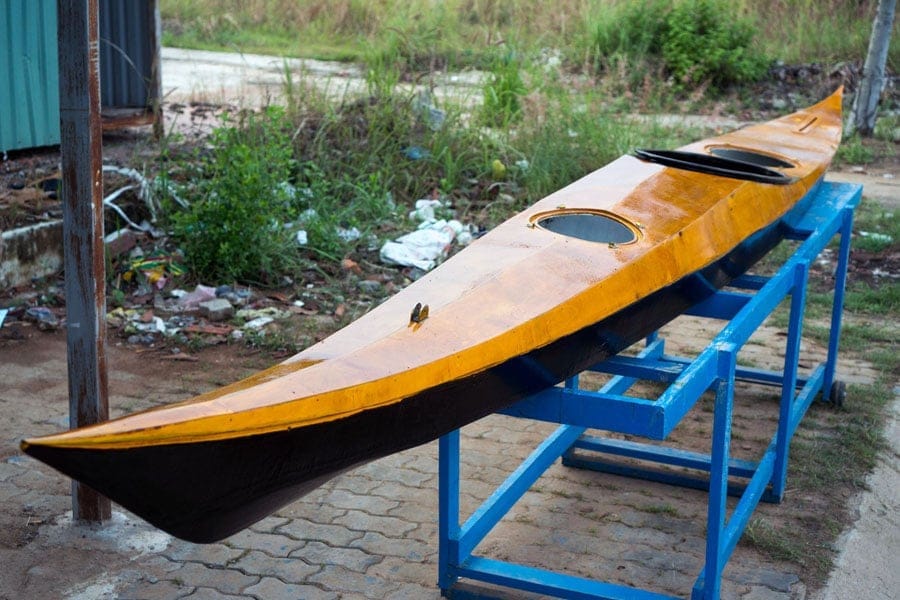
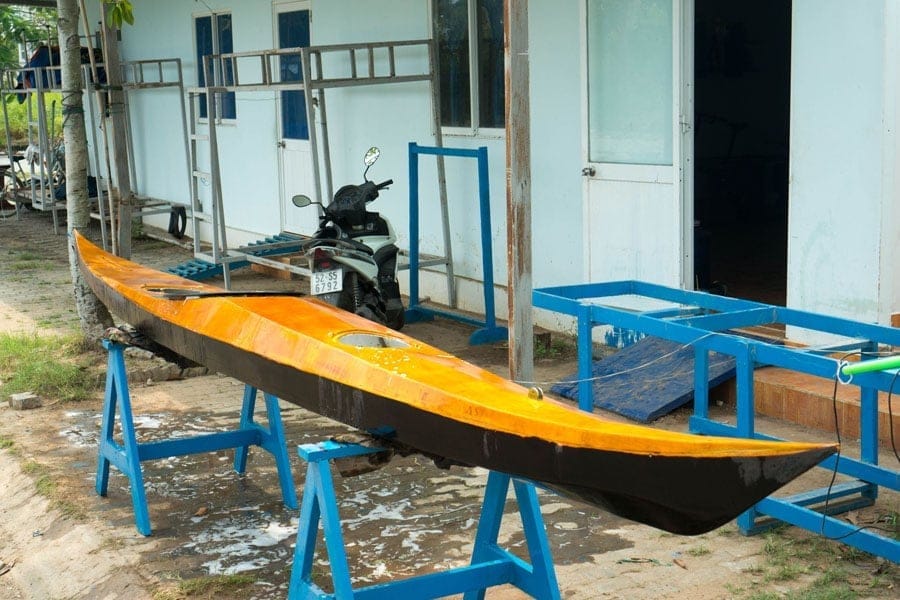
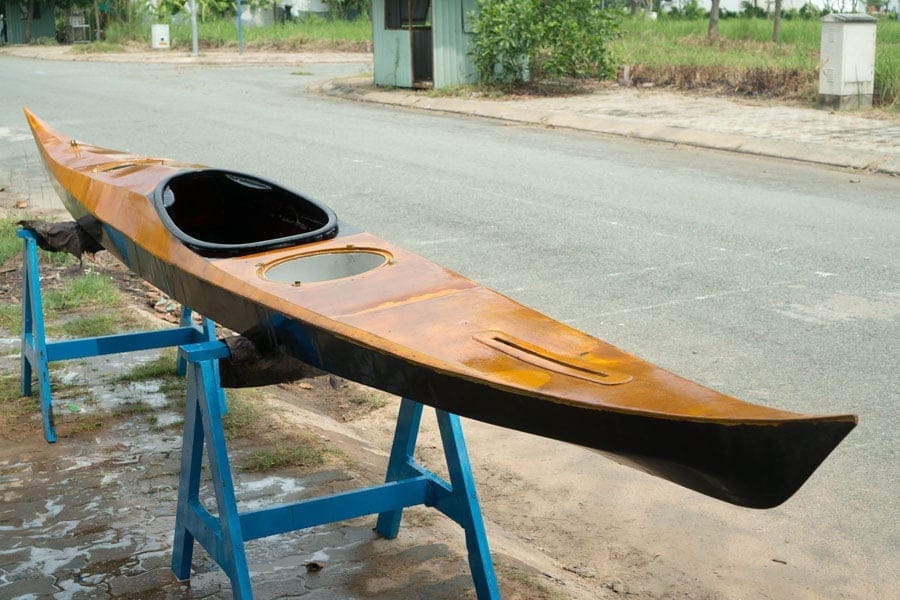
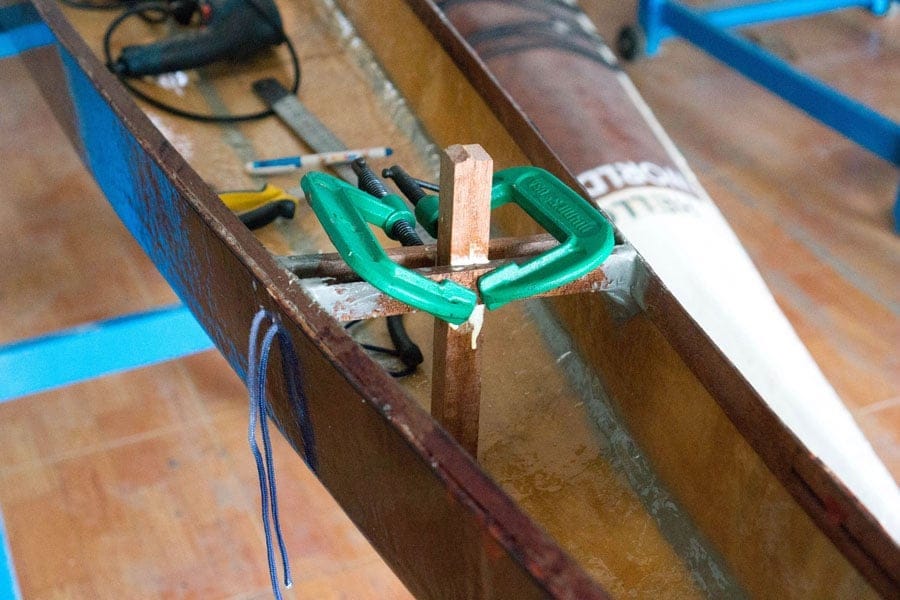
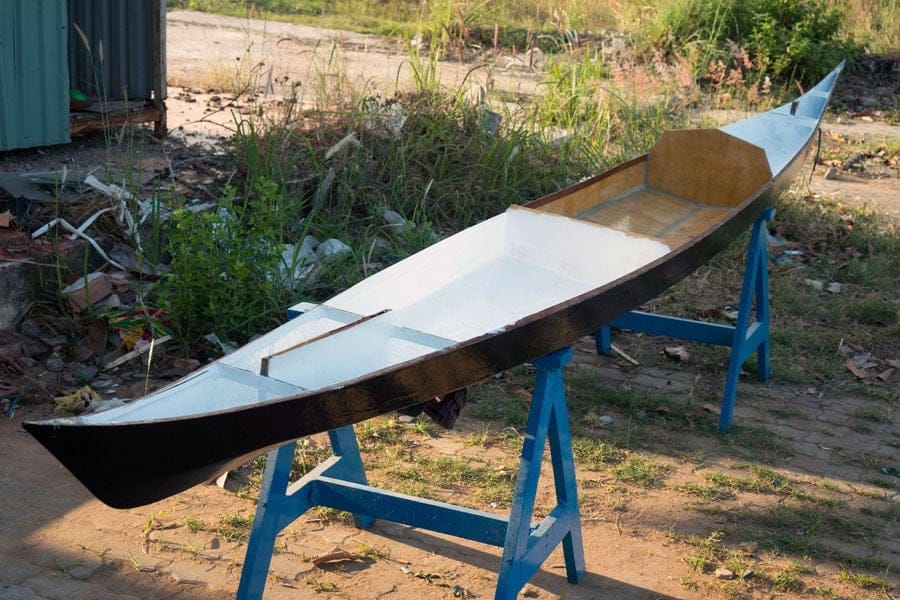
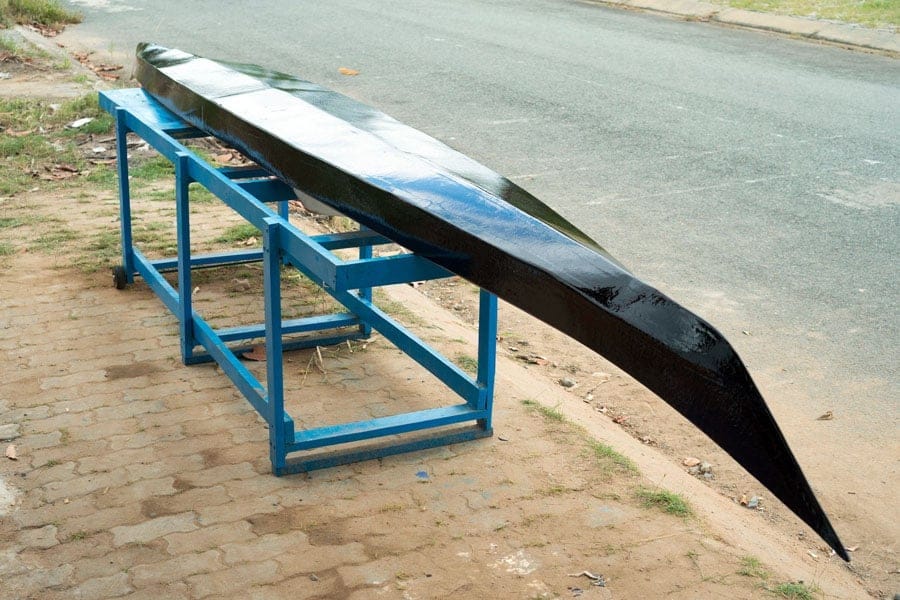
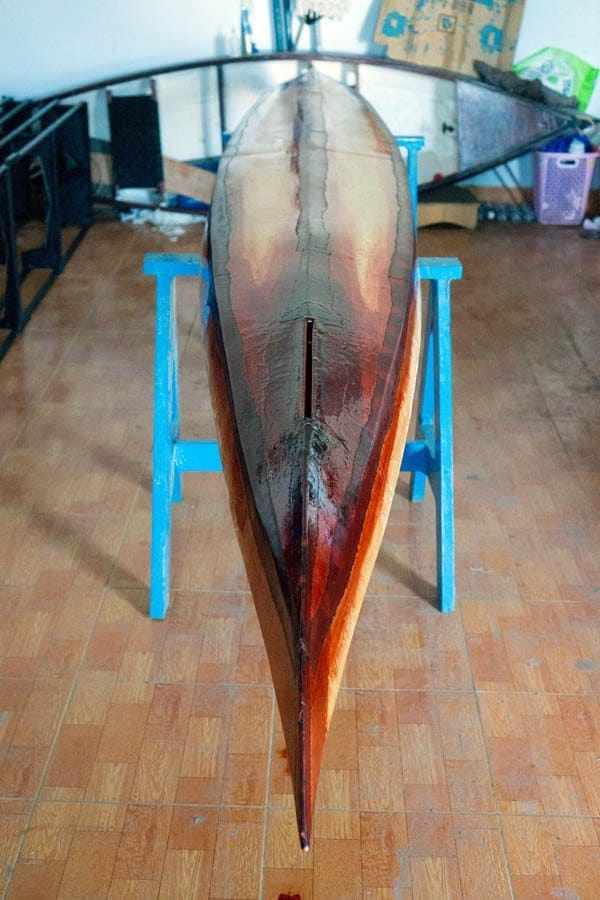
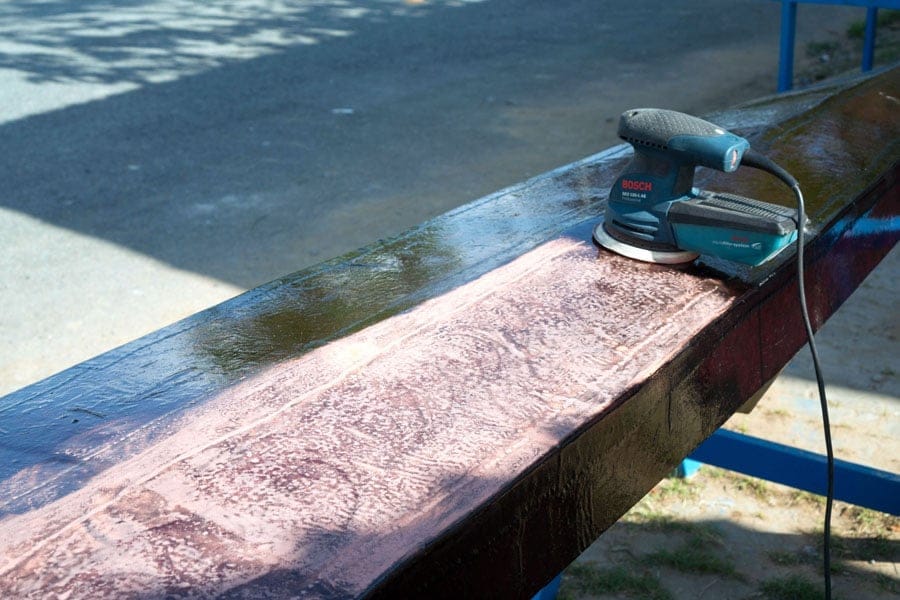
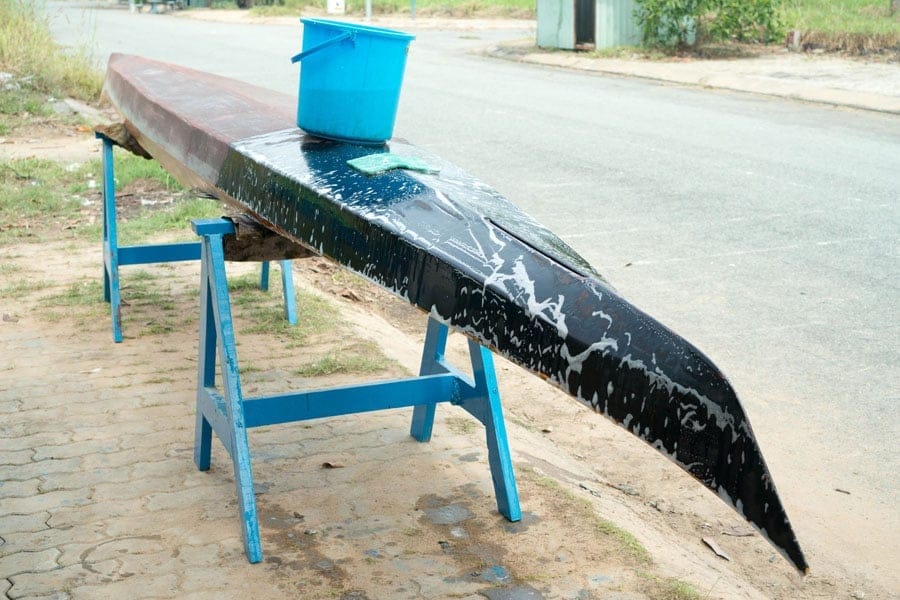
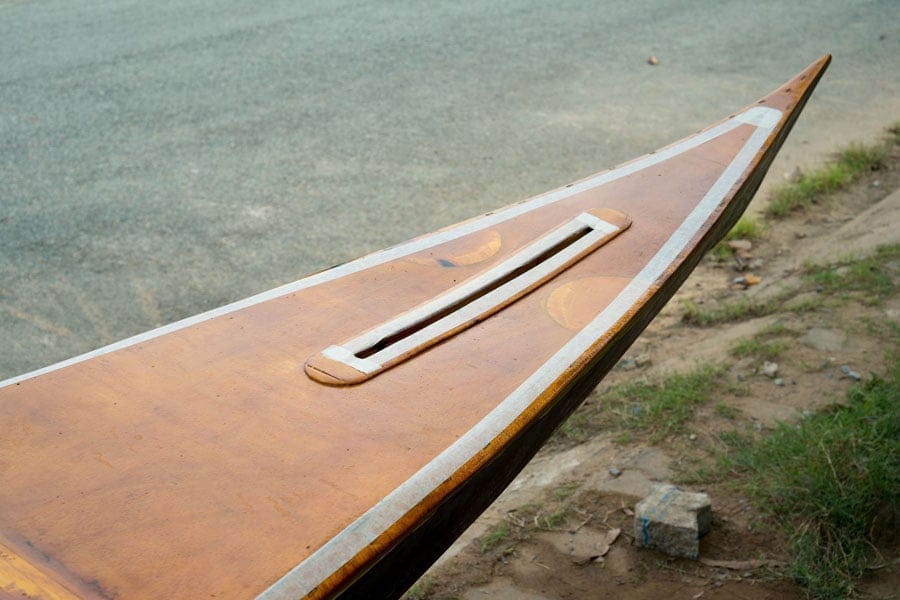
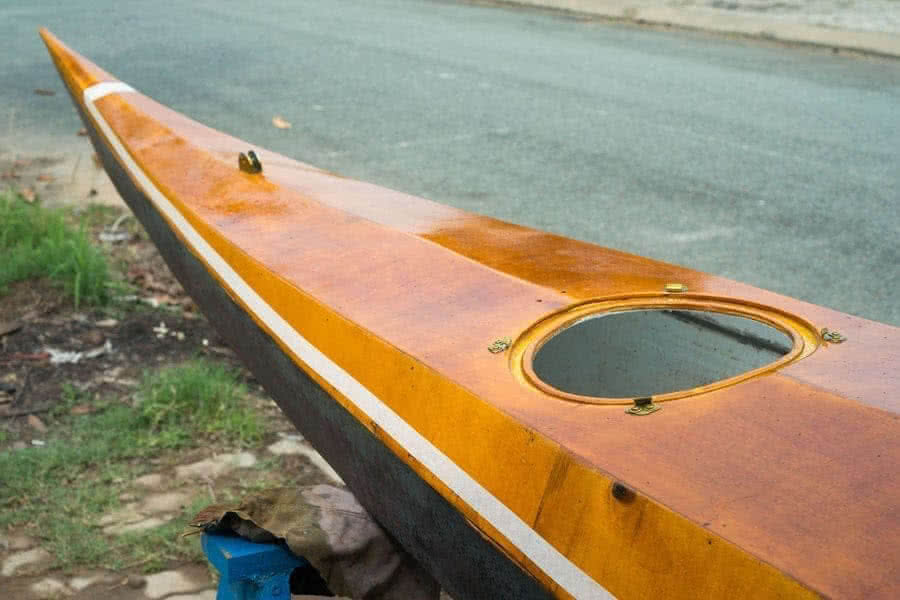
hello world – 3, part 19

oday, I sanded the hull slightly, to partly remove the previous unsuccessful varnishing. Then I painted the contour line where the deck and hull meet before proceed on re – varnishing the bottom again. Images below: using duct tape to mask the line, the result is quite eye – pleasing, the line helps better hiding the imperfect deck & hull joining, it create an “optical illusion” that the joining is smooth. Next is to varnish the whole boat external sides, hull and deck.

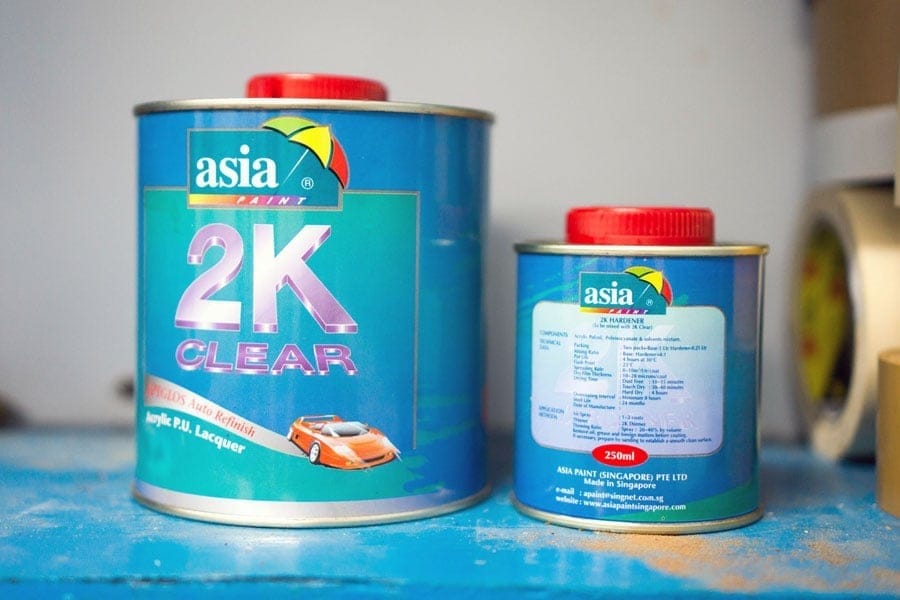
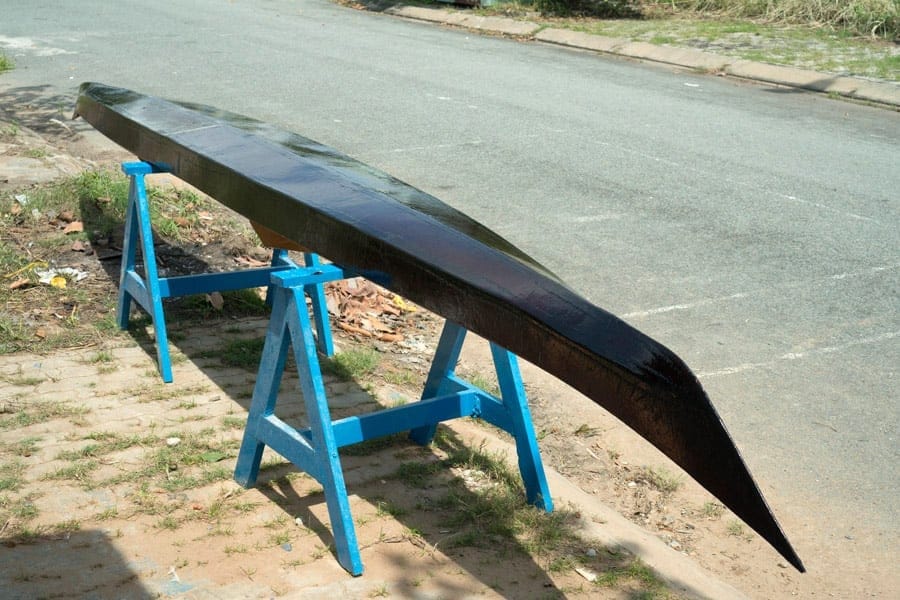
By “varnish”, I mean layers of transparent two – parts PU paint over the surfaces. (In Vietnamese, the word “varnish” still refers to the old – day, alcohol – based finishing agent which used to be popular, but largely forgotten nowadays). The varnishing need to be done quickly, as it’s less than a few minutes before the PU set, brush one small area at a time, proceed on, don’t look back to correct previous mistakes. I find a normal painting brush more suitable than a foam roller for this kind of job.

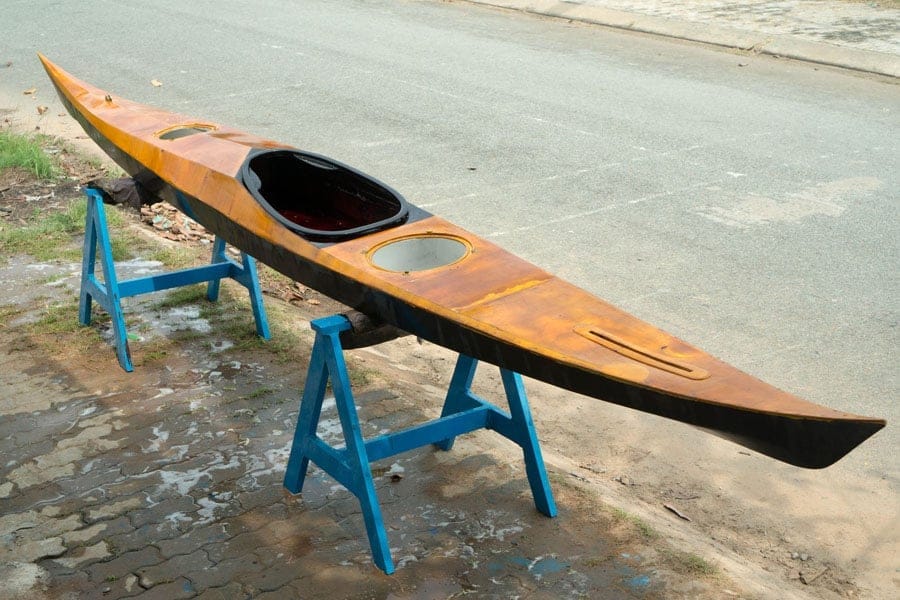
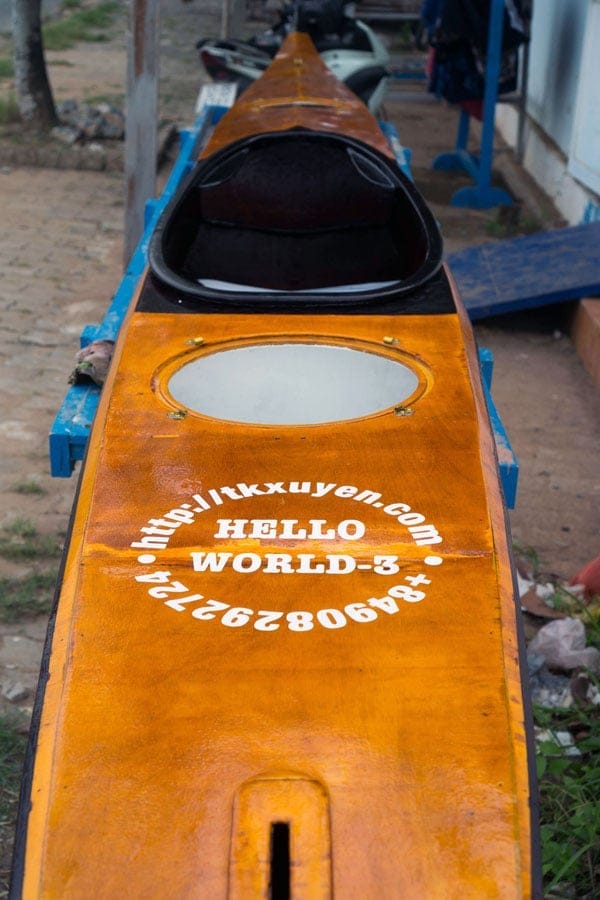
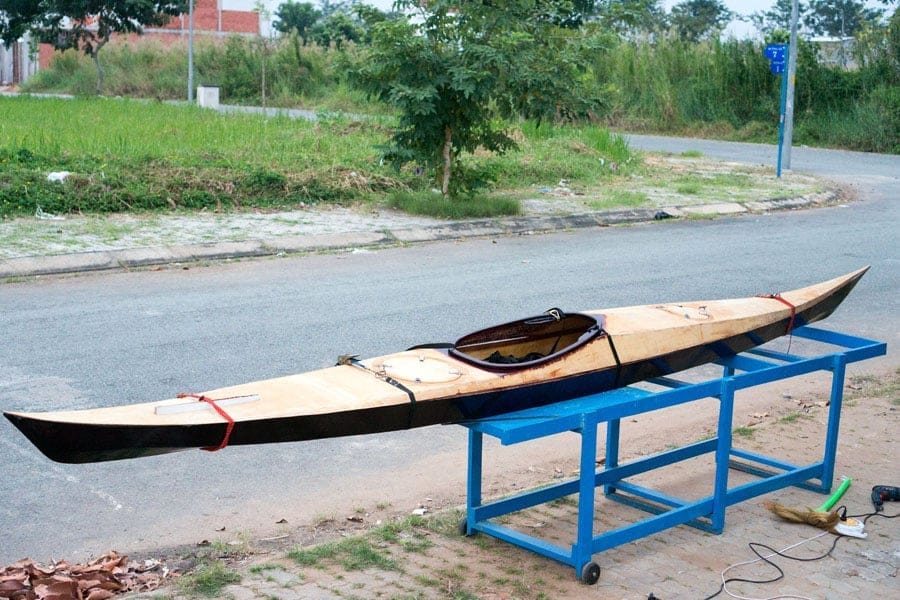
At this point, I made a hard decision to abandon all planned decorations. Initially I’d intended to do some inlays: veneer and mother – of – pearl. But doing so will take a considerable amount of time, which I don’t really have in the coming months, it’s approaching year end and there’re lots of other things to be done. Wood inlays requires skills and patience. I’d thought I could do it with some practices, and I’m not going to rush the boat to water. But now, just some simple vinyl decals instead.

It’s something about balance… an elaborately decorated boat is beautiful to look, but maybe I just need a good, nice boat to play on water. Admittedly, there’s an urge going to water in me, after almost 2 months working on this HW – 3. So, I just put a compass rose pattern on the forward deck, plus the boat name and some owner’s information on aft deck, and of course the boat’s eyes at bow, that would finish my minimum decoration plan to proceed on to the next step.

hello world – 3, part 18

anding, sanding and sanding… lots of sanding required to finish working on the deck, the cockpit, the hatches and other parts. Also, the bottom paint is not up to the quality: the puce color is too dark, and the gloss is not good enough (the 2K paint I use dries out too fast, many of the times, the roller becomes very sticky and hence doesn’t make a smooth surface). Thus I would need also to sand the bottom down again and apply another layer of clear top coat.

But first, I would need to slightly sand the cockpit coaming and paint the whole cockpit in puce color. Like before, I just use transparent PU paint manually mixed with some color pigments. In the same way, I would paint the whole deck, but use another yellowish wooden color pigment instead. Well, after all, I want to show off some wooden colors, if it’s just some pure black, white, blue, green… it must have been much easier. The results… once again, are not totally satisfying! 😢

The deck looks dark and a bit… dirty. Painting has always been my weakest point in the whole boat building process, partly because I can’t find really good painting products here in Saigon, partly because my skills on the painting part are not good indeed. Yet worst, painting and varnishing are the steps that decide how your boat would finally look, they define the beauty of the watercraft, few would notice details in boat structure or construction. I’m feeling a bit upset!

Well, the boat appearance now is not as nice as I was expecting, to be honest, and it’s too late to correct the made mistakes. This would have another side effect: all decorations would be reduced to the minimum, partly because I would have little free time the coming months, and also, to simplify some up – coming tasks. Saying to myself: this gonna be not a furniture going to water anymore, but a nice – to – paddle, sturdy – built and trust – worthy boat instead!

hello world – 3, part 17

oining the hull and deck, now comes the time the boat “transforms” into its final shape! 😀 I used lots of fastening lines to press fitting the two halves, after sticking some putty along the inwales. The B5 epoxy mentioned earlier is very slow in curing, so I had plenty of time to work on the joining. The bow fits perfectly, I could just use some duct tapes to hold the deck down. Toward the stern is not as good, and I had to use the compress – air gun to help nailing together the two parts.

The mast base sticks well to the cross – shape structure underneath, now wait for several hours for the putty to harden. The bevelled inwales make small “gutters” with the deck, I utilize this fact to slant the boat a bit, then use a small medical syringe to pump epoxy along, the epoxy flows and fills the remaining gap, securing a tight fit. Then I erect the boat upright and pour epoxy into the two ends. Next would be glueing the bulkheads to deck, that would finalize the hull & deck linkage.

Look at the last image below, the boat has not taken on its final appearance yet, but the shape looks so gorgeous, doesn’t it!? 😀 A long, slender shape that promises greater velocity and reduced paddling effort. Also, I finished the skeg box installation by glueing it to the deck. In the 6th image, you can see the through hull, through deck well housing the skeg blade, which will be controlled by a bungee cord tied to the stern, and a paracord line toward the cockpit.

Weight once again exceed my initial estimation, it’s a bit heavy now, but if it stays under 30 kg, that would be fine for me. I would go with a sturdy boat on long journeys, rather than a light, but fragile one. The boat is almost operational at this stage, just install the skeg and it’s ready to go! Well, to be precise, it’s just ready for some “technical trials”, there’s still a lot of things to do: finishing, fitting, accessories, other equipments, etc… Consider to be half way through my Hello World – 3 planning.

hello world – 3, part 16

inishing works on the mast base. Although sail is something not included in this “version” (intended to be installed sometime next year), the mast base need to be ready for now, before the deck and hull are joined together, or else it would be very difficult to work on later. It takes me lots of time shopping around to find the appropriate hardwares to be used as the mast base, and I found some good ones, all made of stainless steel (shown in the 3rd image below).

There’s absolutely no kayak accessories store of any kind in Vietnam whatsoever, so by “kayak hardwares”, I mean I was seeking for something that can be equivalently used on a kayak. Also, it’s very hard to find the parts, cause there’s no common “terminologies” used to name them. When I want to find something, I usually go to the vendors with a picture of the thing I want to have, and they would come out with something similar, that’s how the communications go on!

For the mast base, I glued a small wooden plate under the deck, right at the base position. The base is then bolted down through deck onto this plate, which in turn, glued to a supporting cross – shape structure linking deck with hull. That would be strong enough to withstand the mast and its sail. The mast would be stepped, and rotatable on the base, with four stays to hold it upright. Well, sail when you can, paddle when you must sounds to be very pleasing on my future journeys. 😀

I covered the hull and deck’s internal sides with a thin layer of white paint. With bright white color, it’s easier to find things in the storage compartments. Then I slightly sanded and painted the bottom with two layer of transparent paint mixed with the puce pigment. A few more miscellaneous jobs needed before the two halves could be joined together. The 5th image below: test fitting the hull and deck, check fitness and some small adjustments here and there.

hello world – 3, part 15

ontinue to work on the hatches… In my thinking, using the hasp locks is a nice way to hold down the hatches: secured and easy lock / unlock, tight fit, no hassle of lines or bungee cords. But still I have a little concern that those small metal parts could affect the operation of the magnetic compass, which would be mounted nearby. But most good modern compass nowadays should probably resist well to those small ferromagnetic interferences.

Initially, I intended to install three locks per hatch, but after some considerations, I installed four. With three locks, only one failure could easily let the hatch open, while with four, it would take at least two failed locks to make the hatch unsecured. It takes me a few hours to check fitting the hatches’ grooves, then using 3mm – diameter bolts to nail down all the parts (all is made of stainless steel). The result is quite pleasing: all hatches is tightly fitted and well secured.

Next, I make some slots to install the rigging. These are intended for some “heavy – duty” lashing used for the sail. The idea is simple, but it took me some times to figure out how it works: drilling two small holes near each other, then pull a short piece of plastic tube through those holes, then fill the inside with epoxy putty (the tube is waxed to prevent it sticking to the putty). When the epoxy cures, pull the tube out, that would leave behind a “tunnel” to push your lashing line through.

I make only four “anchor points” like this, as it require some “strong holdings” to rig the mast and sail. The other deck riggings, I would just use some screws, bolts and bungee cords. I would try to keep the deck rigging to minimum, no perimeter lines, as I don’t feel very comfortable with a cluttered deck with too much lines and cords and other hardwares, the sail plan would add a bunch of them in addition later on. Also, I don’t really want to punch too many holes through the hull anyhow.

hello world – 3, part 14

roceed on making the aft and forward hatches. I’ve changed my mind to make those hatches as simple as possible: all will be flush – deck, rounded hatches hold down by some hasp locks. (The plan proposes making a twist – lock one for the aft hatch, but that would take considerable effort to get done right). Also, I’ve decided to move the forward hatch further aft, to get the deck space to install some sailing hardwares (compass, blocks, cleats…) later on.

I’ve cut some plywood rings: one spacer ring, one lip ring, and two groove rings (to prevent water leaking in) for each hatch. The forward hatch is quite small indeed, 22 cm in diameter, and 34 cm for the aft hatch. Actually, I prefer shapes that can be geometrically defined, so abandon the egg – shape forward hatch as proposed by the plan. Next would be the simple task of glueing them together. Also, I’ve cut a slot on the aft deck section to get the skeg box through.

After glueing the hatch lips to the hull, I put small fillet lines at the seams before glassing the internal side of the lips. Then I apply several layers of penetrating epoxy (epoxy thinned with xylene) onto the hatches’ rings, grooves… before applying another layer of un – thinned epoxy, then would come the painting in a later phase. All these parts could easily wear out after some times of use, so they need some special cares. Then come the hasp locks, four locks per hatch.

I was thinking over about the use of hasp locks. Usually, on sea kayaks, they avoid metal part, cause it could get corroded by salt water. But good metal part plus proper maintenance can prolong the service life to years, before it can be replaced. The only problem with these locks is that putting them on deck could cause you some small injuries in self – rescue actions, e.g: if you’re thrown out of the boat in heavy sea, the locks could scratch your skin when trying to get in again.

hello world – 3, part 13

inished most jobs needed on the hull part, next come the deck part, which has even more things to do. First is the cockpit’s coaming. With Hello World – 2, it was intended to be a river kayak, so I made the cockpit very spacious to allow a comfortable seat. A sea kayak has a much tighter cockpit, to prevent water pouring in, with the coaming to fit a spray skirt, the thigh braces, the cheek plates… It’s less comfortable, but it just has to be like that, a “keyhole cockpit”.

I cut 5 rings of plywood, then join together to make the coaming. The upper 2 layers will be the coaming lip, and the next 3 layers as the coaming riser. Here, I choose an approach which differs from the plan’s suggestion (using a thin wall of plywood placed vertically as the coaming riser seems too fragile to me). I used the Dremel tool to bevel the edges, so that glassing would be easier later, but also the bevelled edges create more space to fill the putty in when joining the coaming to deck.

The plywood pieces are so delicate until they’re joined together into a rigid ring. I recall when first ordered the 5 mm plywood sheets for HW – 1 & 2, they’re actually measured at 5.3 mm. This time, I ordered 4 mm sheets, but they turned out to be 3.75 mm indeed when I checked with a thickness gauge. Once again, no standard can be assured or trusted here in Vietnam, and lots of cares, compensations and adjustments have to be made, if you want your quality under control 😢.

The coaming is then glued to the deck, with putty filled at the seam line. The edges are bevelled so well that glassing is easy and smooth. I apply the same kind of epoxy mixed with color pigment, wait for it to cure, then slightly sand it, then apply another fill coat. The cockpit coaming now is ready for painting. There’s quite some epoxy messing around, even though I’ve used duct tape to mask, cause I still can’t find a good type of duct tape that won’t let epoxy & paint leaking through yet.

hello world – 3, part 12

ecided to try a new technique when glassing the hull’s external side. I add some color pigment into the epoxy used for glassing (and later, also to the transparent paint when painting the bottom). The pigment I used has a dark brown with a bit of reddish wooden shade. If this technique works, then the lower part of the boat will have a very deep brown and reddish, semi – opaque, lacquer like finish. And if the technique fails, I’ll paint the bottom in black.

My idea is to contrast the hull with the deck: deck will have a brighter light yellow wooden color, and hence the whole boat would have a wooden outlook, especially the upper part. But it’s too early to say at the moment, I don’t have too many choices on the painting products (e.g: wood stain) available for wood working here in Saigon. Like the internal side, I glass the seams with 6 cm – width bands of bias – cut fiberglass, before glassing the whole bottom, all with epoxy mixed with the pigment.

The result is not totally satisfactory, but quite acceptable, the dark puce (a little bit too dark), lacquer – like shade is pleasing, at least to my eyes. Wooden working boats in Vietnam until today are usually oiled (not painted) in this color, it creates an “endurance feeling”. I applied one layer of epoxy fill – coat, then sanded the hull thoroughly with 80 grit sand paper and my random orbital sander, then applied another thin layer of epoxy fill – coat, lightly sanded again at 120 grit.

Next would come two layers of transparent paint mixed with that same color pigment. I’d lost all my confidence with most painting products I could find here, my previous experiments with painting in HW – 1 & 2 were not satisfying at all. That’s why I came up with the decision to use color pigment in epoxy, then use a kind of good top coat called: 2K gloss, it’s transparent, when mix with a dark pigment, it can offer a good protection to the epoxy layers underneath!

hello world – 3, part 11

ontinue to work on the skeg… but something I want to tell, not directly related to boat building though. A few days ago, I had a dream, a strange thing cause I often have good sleep and rarely have dream: a private house, a reading cabinet with lots of books, I found a small notebook hand – written in French, black ink, and annotated in Chinese, blue ink. I was skimming through the first few pages, which have drawings on boat construction, then I woke up.

Can’t remember much of the dream, except for a boat silhouette on the first page, a big phrase as notebook title: Jiang Long, and smaller Chinese annotated text underneath: 降龙 (Vietnamese phonetic transcription: Giáng Long), obviously it’s the boat name which means: a descending dragon. Well, strange enough, at least I’ve never thought of such a ‘flowery’ boat name. What a pity that the dream was just a hint and didn’t tell me more on boat construction though! 😀

Let quit all night dreams and day dreaming 😀, and let get back to work now! The Dremel Multi tool comes with a ton of accessories, including a router base with some miniature router bits, small enough to operate well within the 10 mm gap of the skeg box. I use a small round bit to bevel the edge of the skeg box before glassing (glass doesn’t like sharp edges though). Then I carefully apply a layer of glass over the edge. The skeg box job is properly executed and looks really great!

Some more miscellaneous tasks before moving to the next step: sanding the hull and deck’s external sides, adding two more thwarts at the bow (to better match the hull’s curve with that of the deck, for later, it’s gonna be easier to join the two parts). Thwarts at the bow would also help supporting the mast base, but for now, I have not yet come up with a good idea on how to implement the mast base yet. Just leave it there to a later phase, and go back to the thinking box!

hello world – 3, part 10

ext comes in the skeg, a critical element of any serious kayak (you can go without a rudder, but better have a skeg for troublesome water and weather). The region I go paddling is extremely muddy, mud frequently gets into the skeg box and jams it, so I need a design that is as convenient for maintenance and repair as possible. After lots of thinking, I come up with the idea of an L – shaped skeg placed in a through hull, through deck well, controlled by a line and bungee cord.

This way, cleaning up and maintenance could be done with ease. I also make an extra skeg blade, carried with the boat, so that if the main skeg brokes, it can be replaced in the field with minimum tools. This is a lesson learnt from Hello World – 2, where the skeg, though functional, it’s often jammed and can’t be controlled while you’re already on the water. This is very important since you would be going virtually nowhere with lots of weathercrocking and without a working skeg.

I use my MultiMaster oscillating tool to cut the slot for installing the skeg box, which does the job nicely and cleanly (the tool is my only “Made – in – Germany” one, hence expensive, the others are all made in Malaysia, China). The box will be clamped between two small thwarts bridging the port and starboard inwales. Then I putty – fill the inner joints, then apply one layer of glass over them. The harder part would be glassing the outer bottom joint, which has to be done very precisely and carefully!

I made the skeg blade extra large, approximately 16 x 38 cm, the previous one of Hello World – 2 (14 x 32 cm) didn’t seem to be large enough, the boat still “shakes” a bit in turbulent water. More over, my plan is to equip HW – 3 with some kind of sail at one point in the future, so hoping that a larger skeg would provide more lateral force to counter balance the pulling force of the wind, in a relative sense, similar to a sailboat’s centerboard, but placed much furthur aft.