
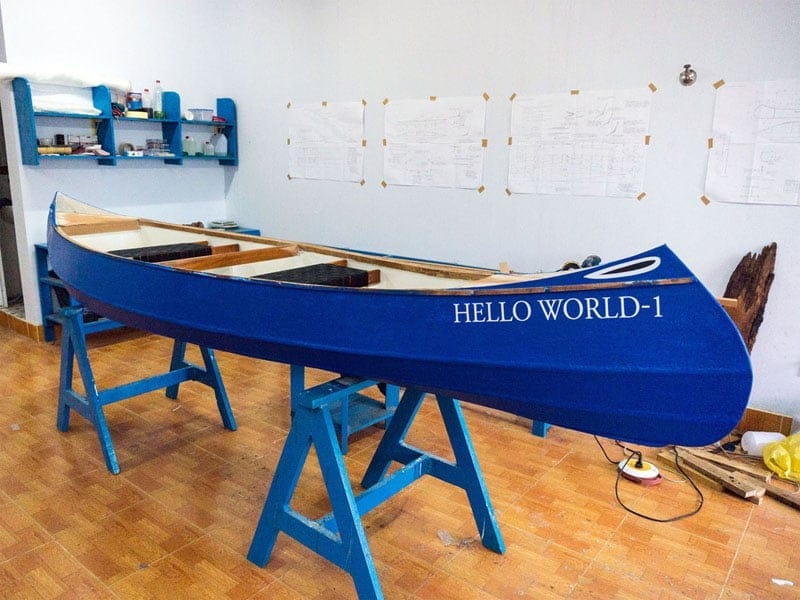
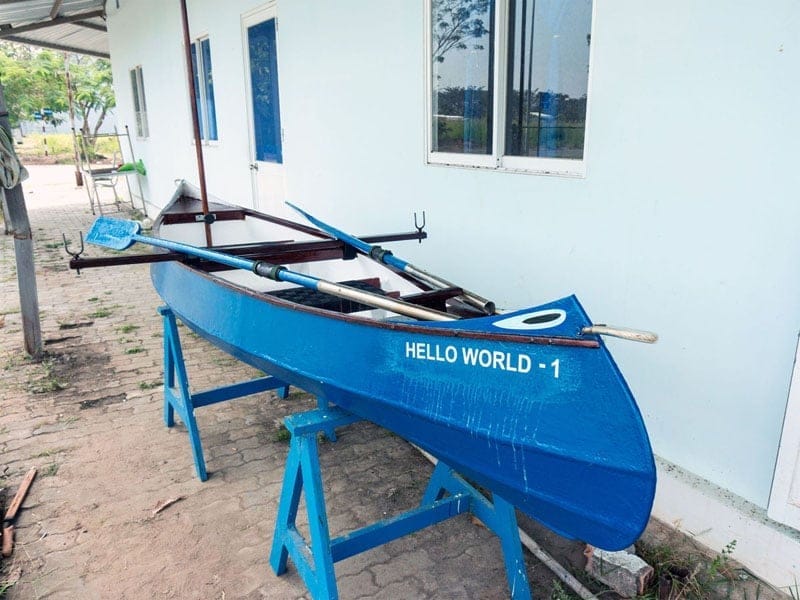
My first boat project now officially starts! I’ve been thinking about building my own boat for a very long time, but still couldn’t arrange for it. Now, just have to stop daydreaming about “the ultimately – beautiful watercraft of my life” and roll up my sleeves. Given my poor woodworking skill set, after lots of consideration, I’d decided to start with a simple design and construction method, a 12 feet (3.66 m) Selway Fisher’s Asymmetric Baby Raven, intended to be my general purpose / fishing canoe with the given name: Hello World – 1. In the upcoming blog entries, I will try to keep a log on the building progress, expected to finish within a month or so, cause I would mostly work at weekends, and some limited hours in the weekdays.
1. PREPARATION
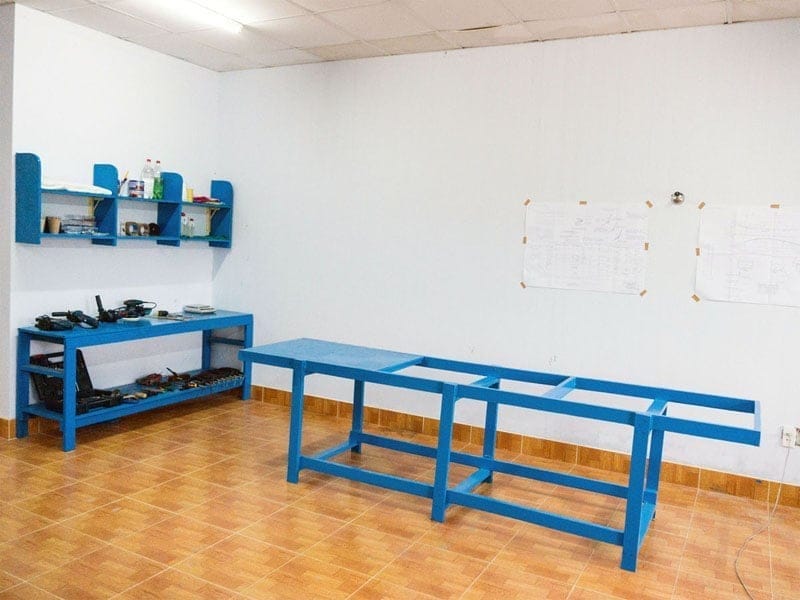
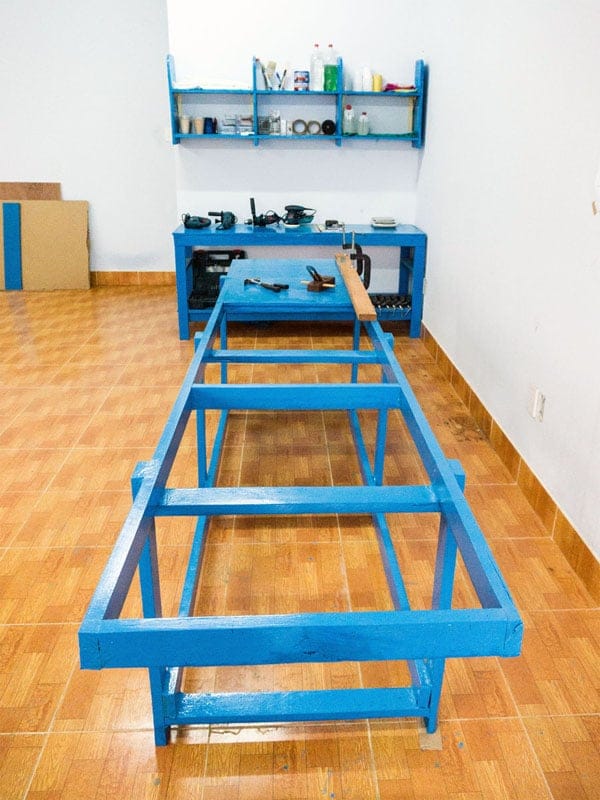
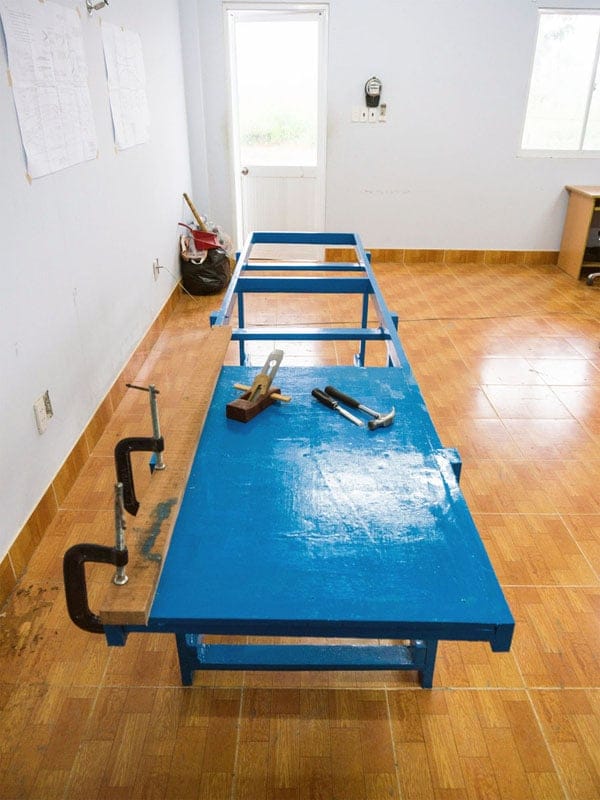
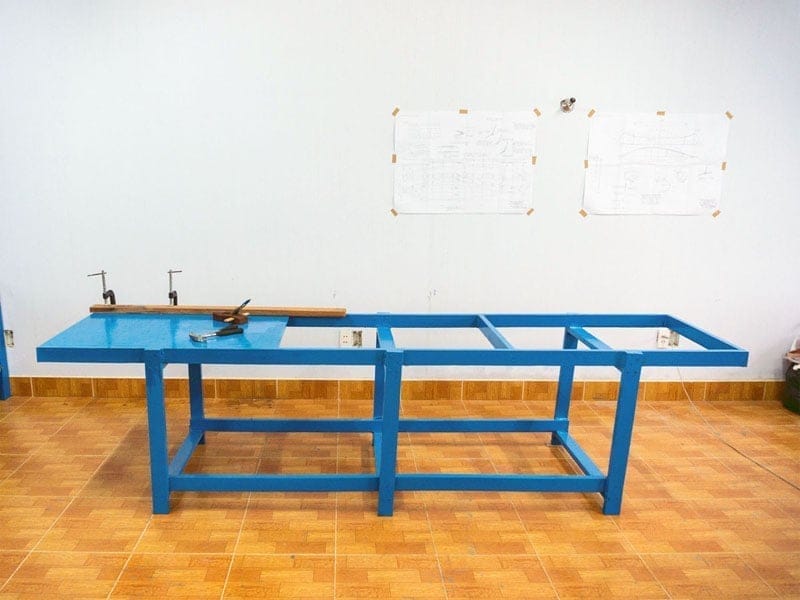
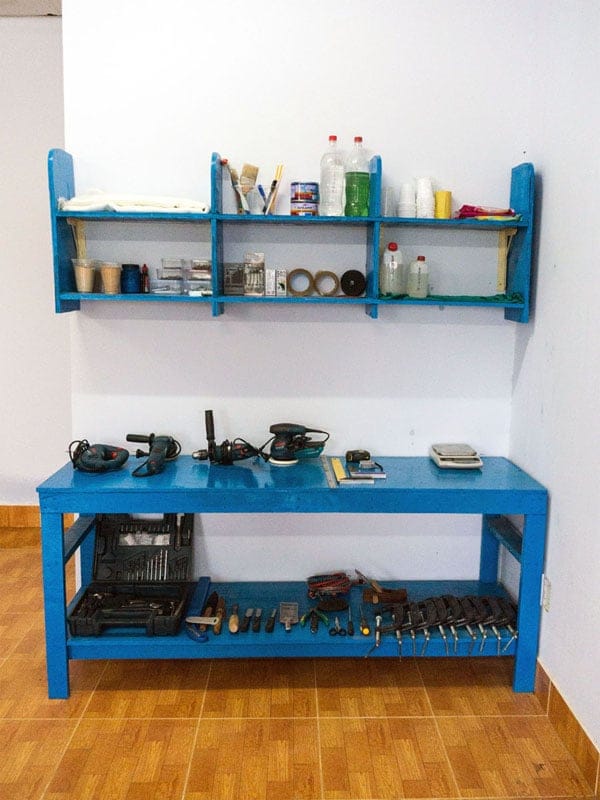
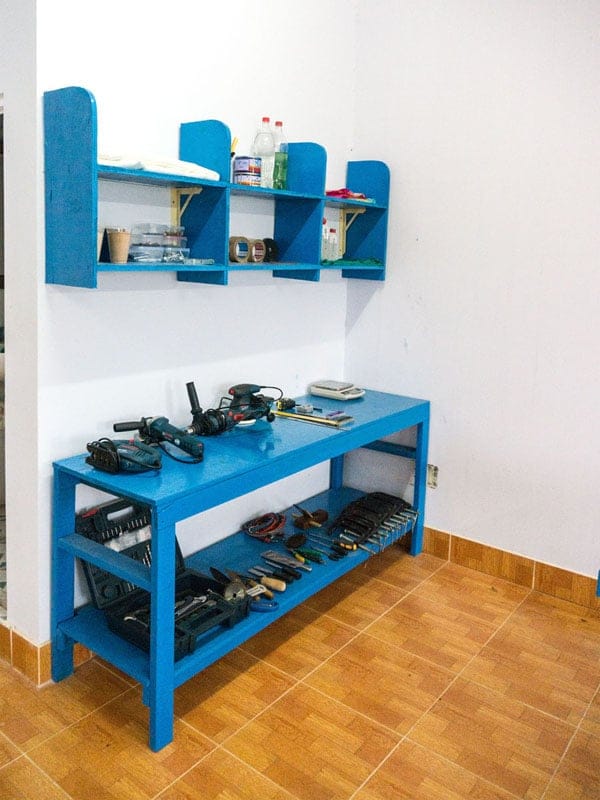
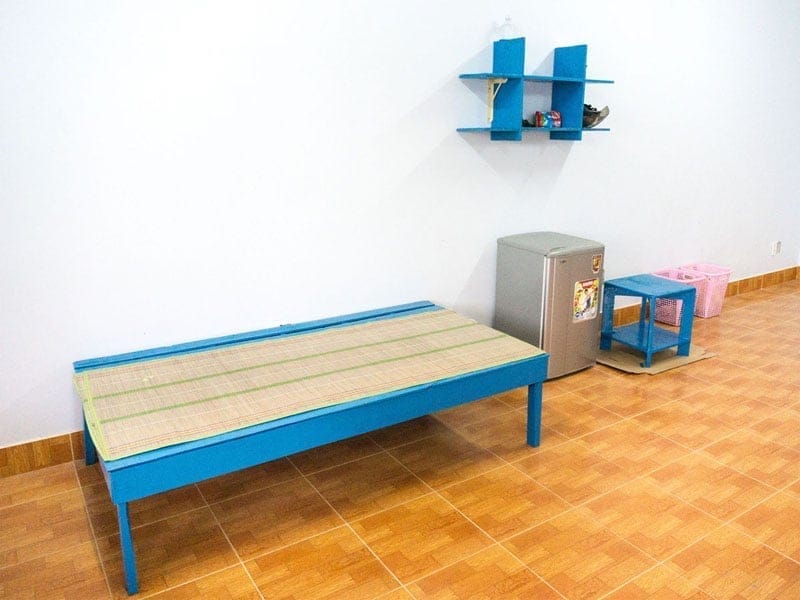
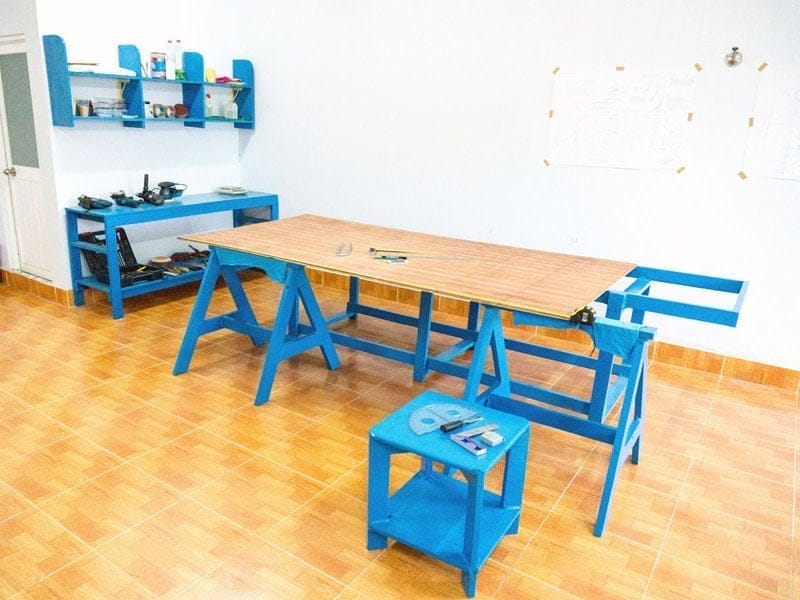
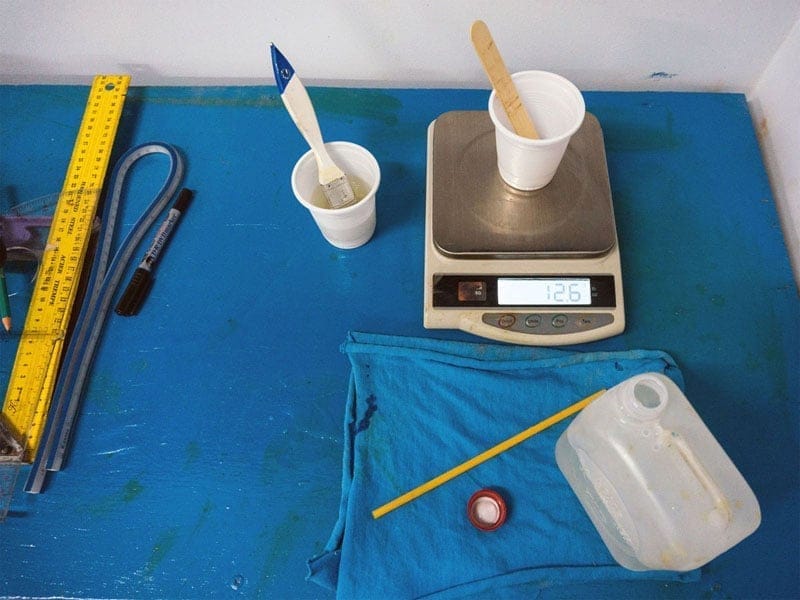
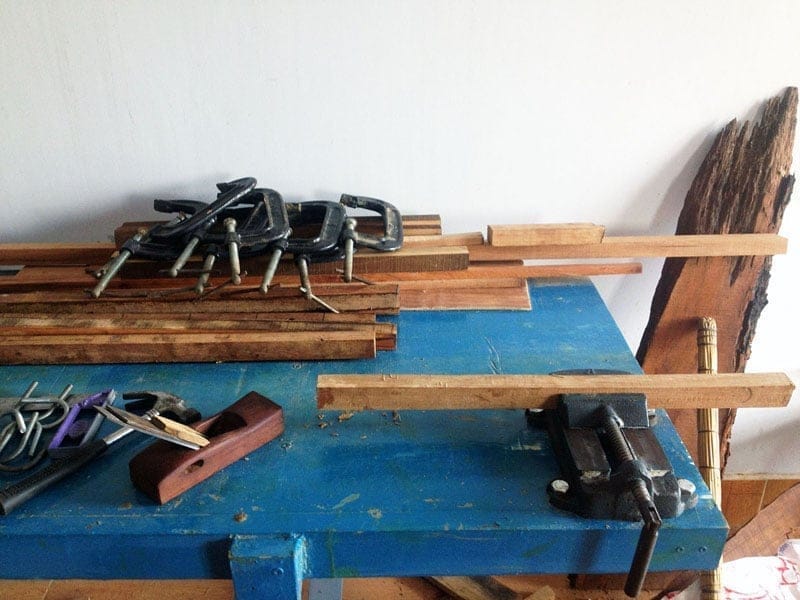
It took almost 3 weeks to make all necessary preparations: building myself a table and a shelf to store tools and materials, a simple workbench to work with the boat on. Also, I built a bed, a smaller shelf and a chair, all of the simplest kinds, as household objects. That is to get myself familiarised with woodworking, gain some experiences with wood, epoxy, fiberglass fabric… There were lots of new stuffs for me, whose hands have rarely touched those kinds of job before. Anyhow, my small workshop setup is now basically completed: hand saw and power jig saw, a drill kit, random orbital sander, a disc cutter, hand plane, chisels, clamps, pincer… paint, brushes… I even have a small electronic scale to help epoxy resin mixing more accurate.

2. CUT
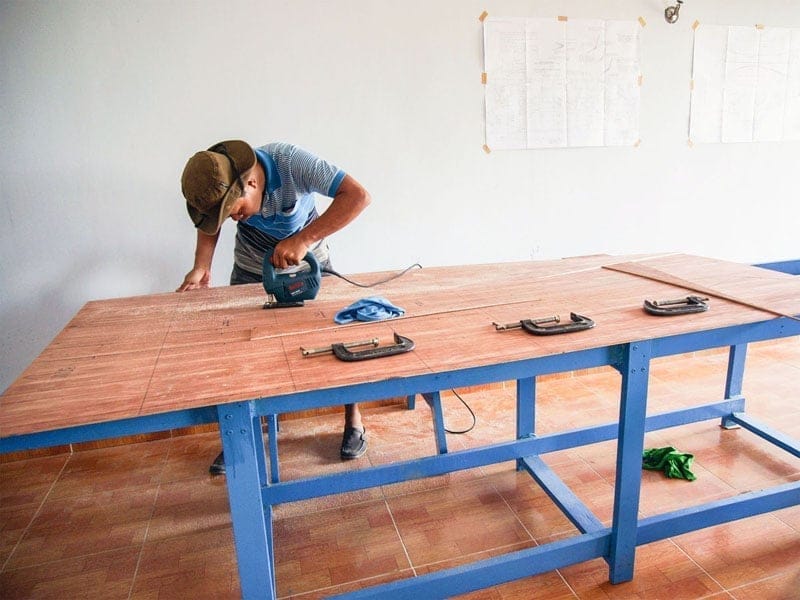
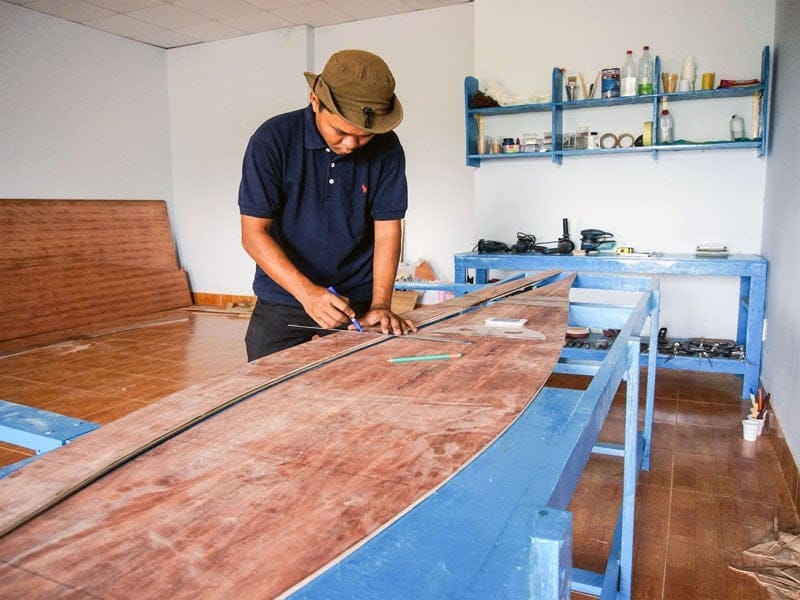
It’s easy to find exterior – grade plywood to WBR (Water and Boil Proof) standard, but it’s hard to find really – good exterior – grade, not to mention marine – grade ones. First, many of the so called “water resistant plywood” out there in Vietnam market use melamine, not the superior phenolic glue. Second, most of them are laminated from cheap poplar veneers, the best I can find so far are those with interleaved layers of poplar & tropical hardwood veneers, usually marketed as: meranti or okoume, but I guess they’re just other tropical hardwood equivalences. Today, the ordered 5mm – thick plywood sheets have arrived. As usually said: measure twice, cut once
, I proceed slowly & carefully to this initial stage of the canoe.

3. JOIN
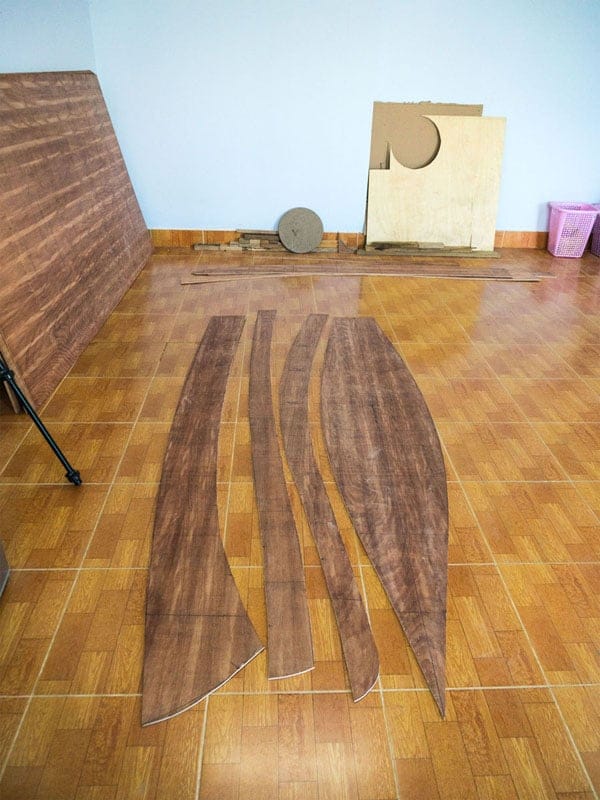
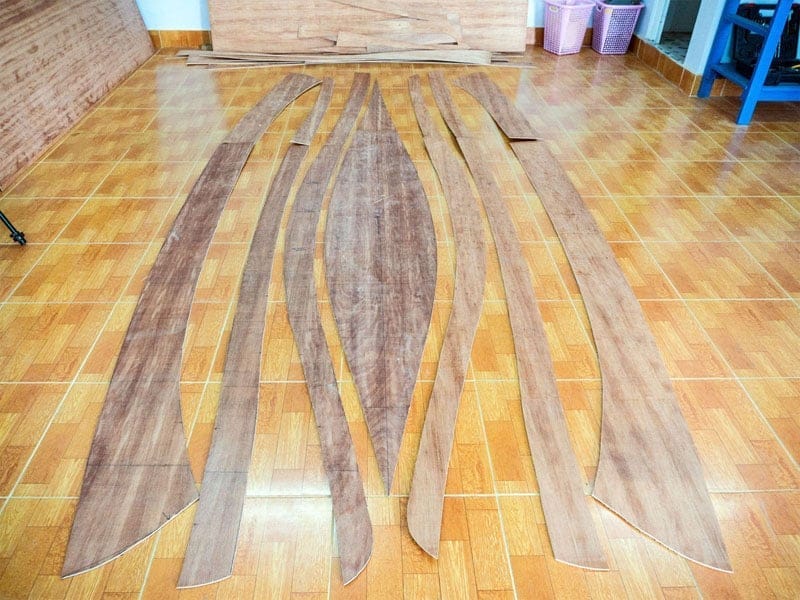
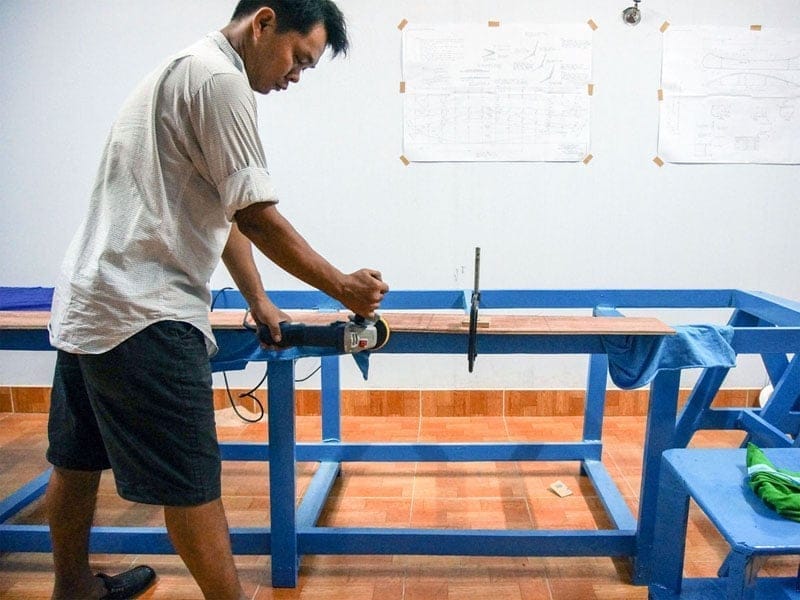
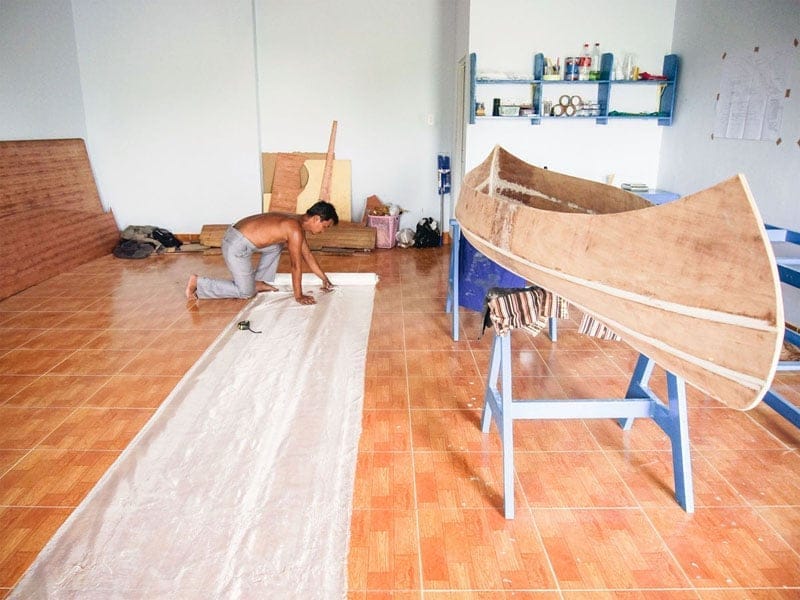
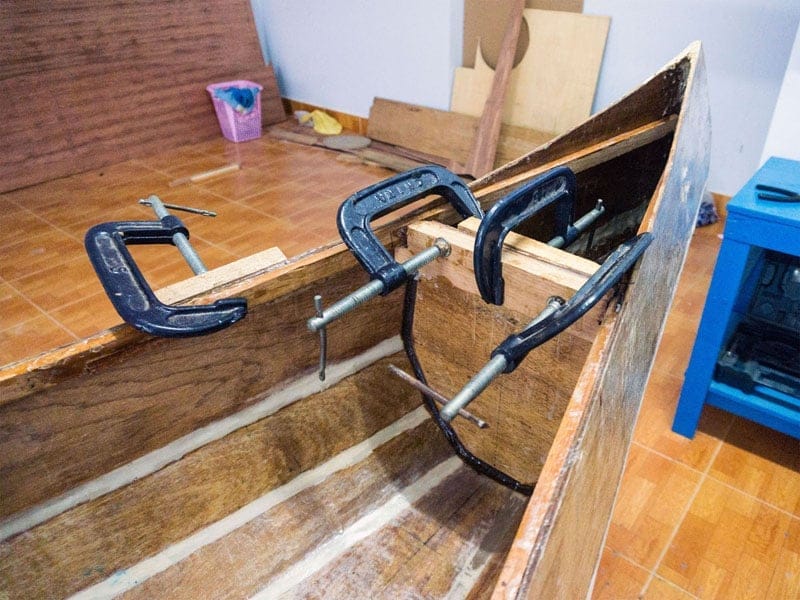
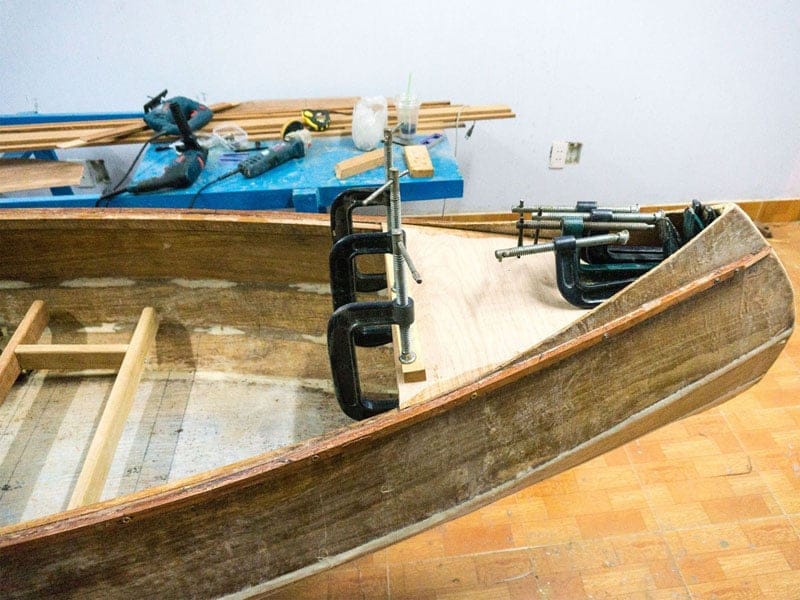
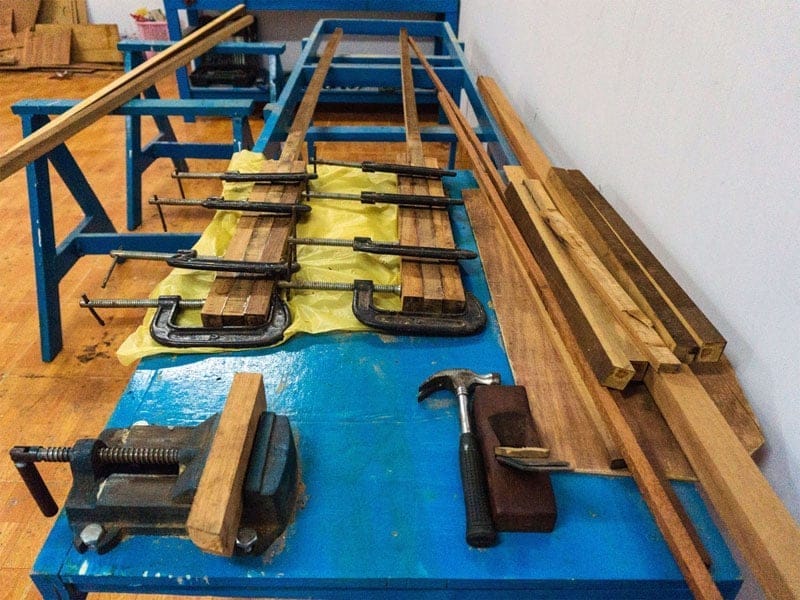
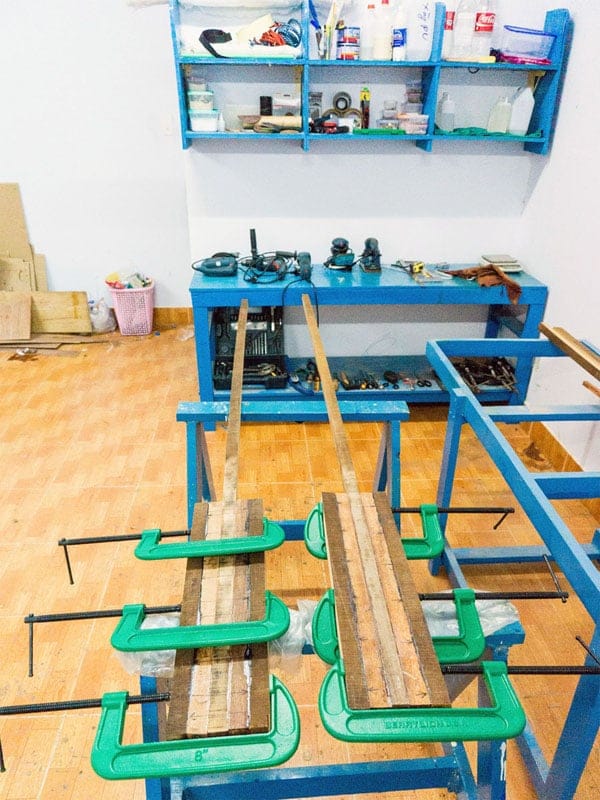
I was too busy during this week to actually got any boating bit done, need to get all the cutting and joining jobs finished this weekend… Finally, the complete set of planks is cut out. Before joining, all bilges need to be trimmed down to the precise shapes. I clamped each pair of port and starboard bilges together, then used an angle grinder to trim the edges and smoothen the curves. Since the plywood sheet has length of 2,440 mm, they need to be joined to the 3,660 mm length of the canoe. Bilges are screwed down to a piece of wood to fix the position, a layer of bin bag is placed in between to prevent the wood from sticking together. Then I epoxy the fiberglass pieces until they’re completely wet out to form simple butt joints which get the jobs done.

I was having quite lots of work, those coding stuffs, and suddenly I recall a popular joke of the IT field: Question: how many software engineers does it take to change a light bulb? Answer: none, it’s a hardware problem!
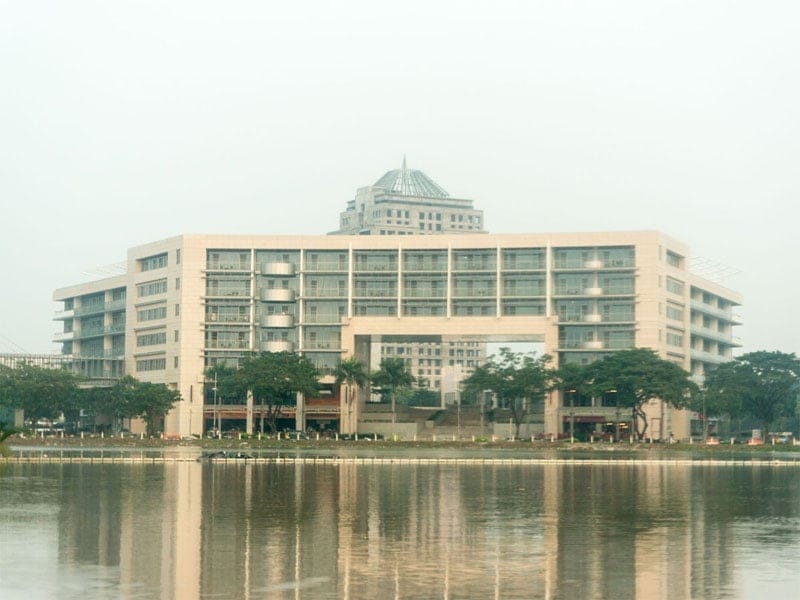
. Plus the burden of many nameless tasks of the canoe building, sometimes I feel a bit tired. But occasionally on the way back to my workshop, I stop on the bridge, look out the wide scenes on the river. Boats of all kinds and sizes come and go, waves gently flapping the banks, the tide quietly rises and lowers, and the breezes murmur into my ears a long – forgotten melody: Moon river, wider than a mile, I’m crossing you in style, some day…
And I felt that, the rivers are calling me… To the next steps of the boat project!
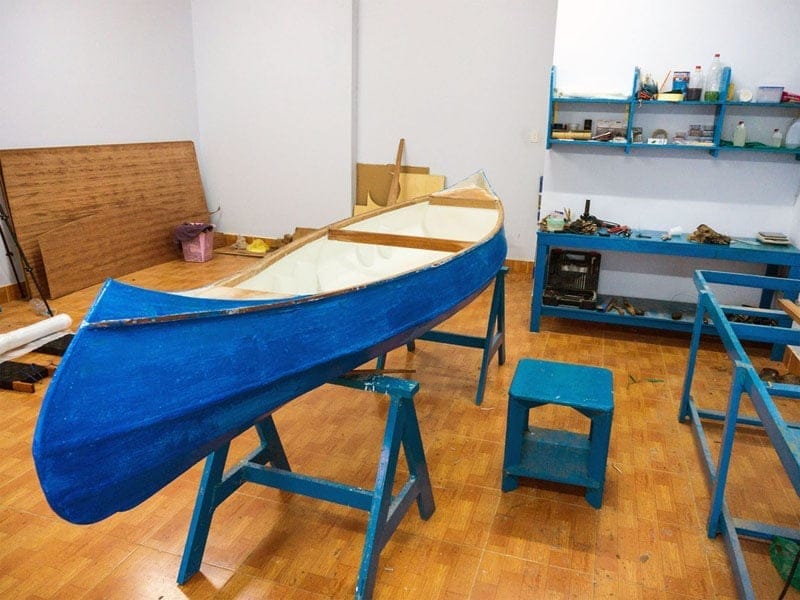
4. STITCH
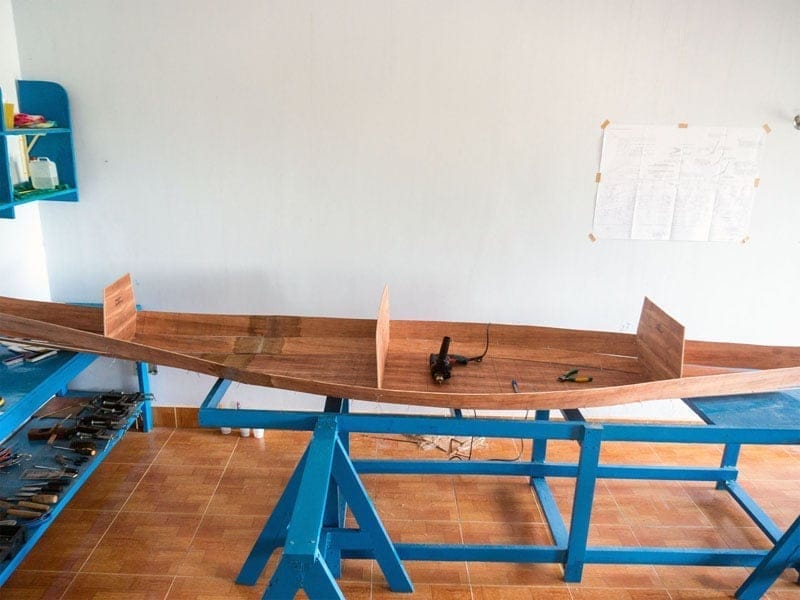


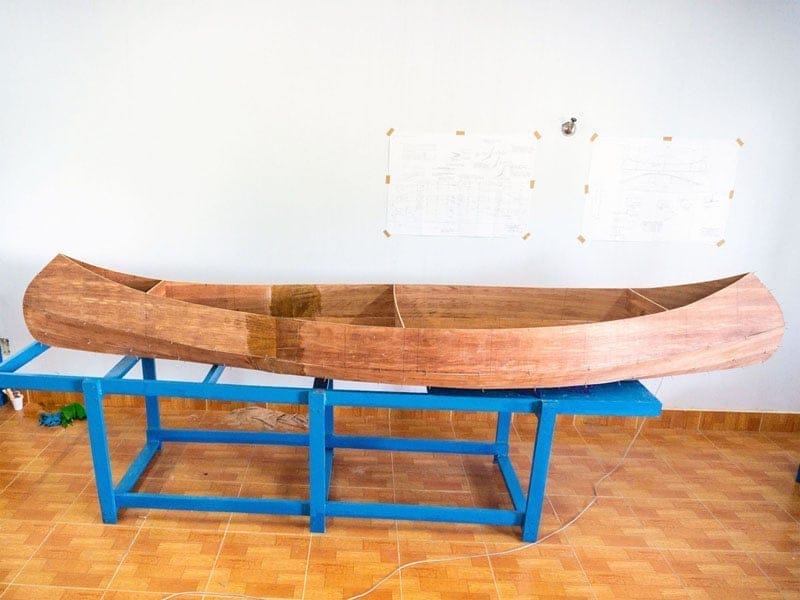
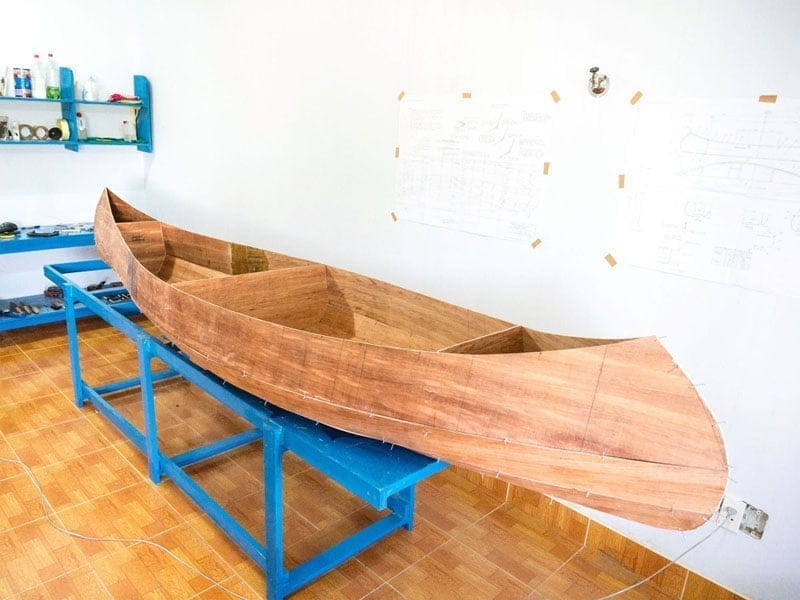
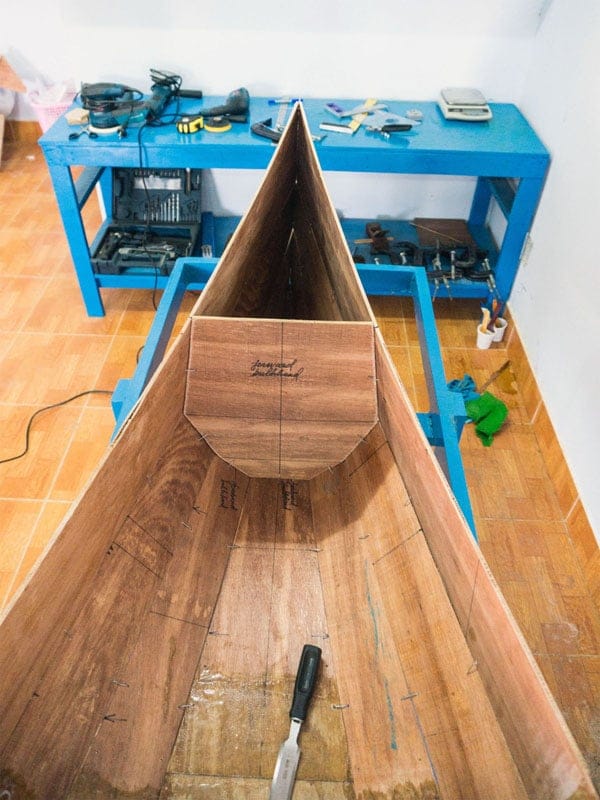
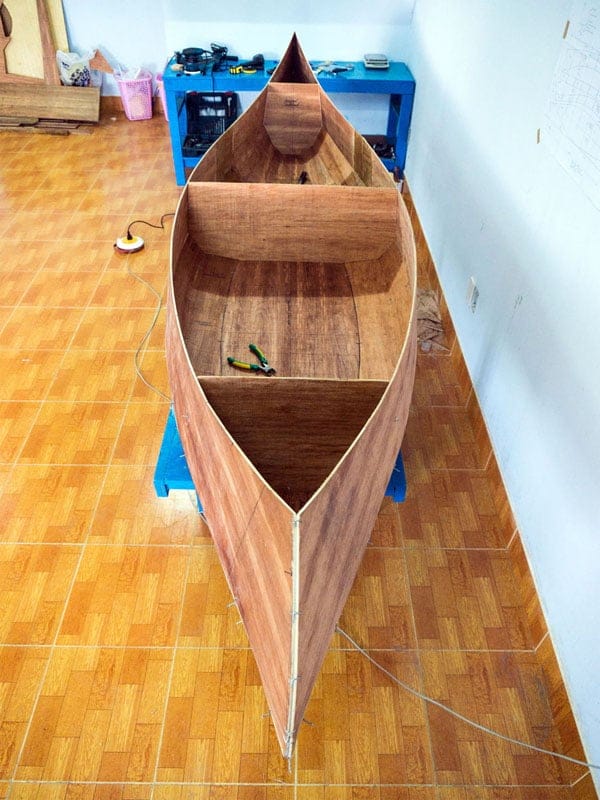
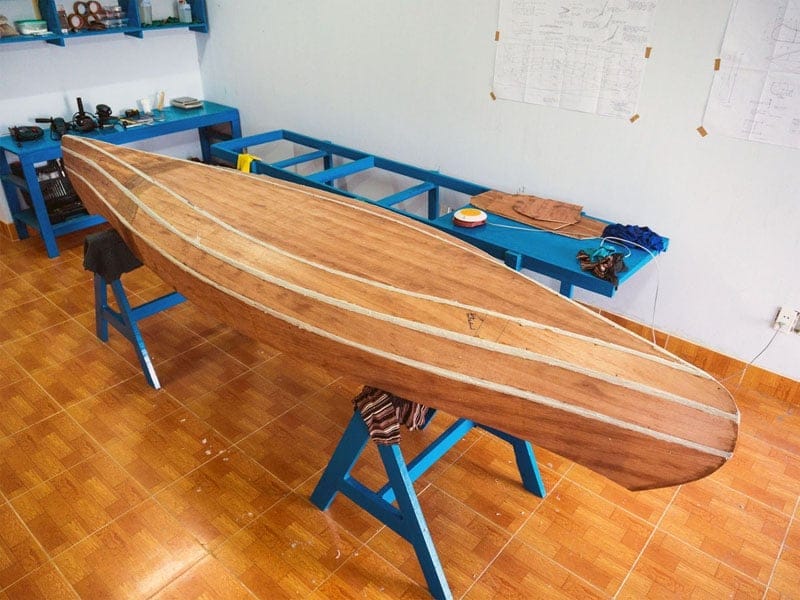
This gonna be a fun part cause it resembles a kid’s game when he/she just cuts pieces of paper and stitches them together with glue. Forming the boat hull from plywood planks is much the same way, on a larger scale, hence the boat construction method named: stitch and glue. Starting from the center bilge, I drill 2.5 mm holes at 22 ~ 24 cm intervals to stitch the next 2 pairs of bilges together using short pieces of steel wire. Then I fit the forward and aft bulkheads, also the center mold, then stitch the final upper bilges. Let take a look at this photo album to see in details, how, in just a couple of hours, the hull gradually takes shape. It’s really fascinating to have completed this step, it produces the first impression on how my canoe would eventually look like!
5. GLUE
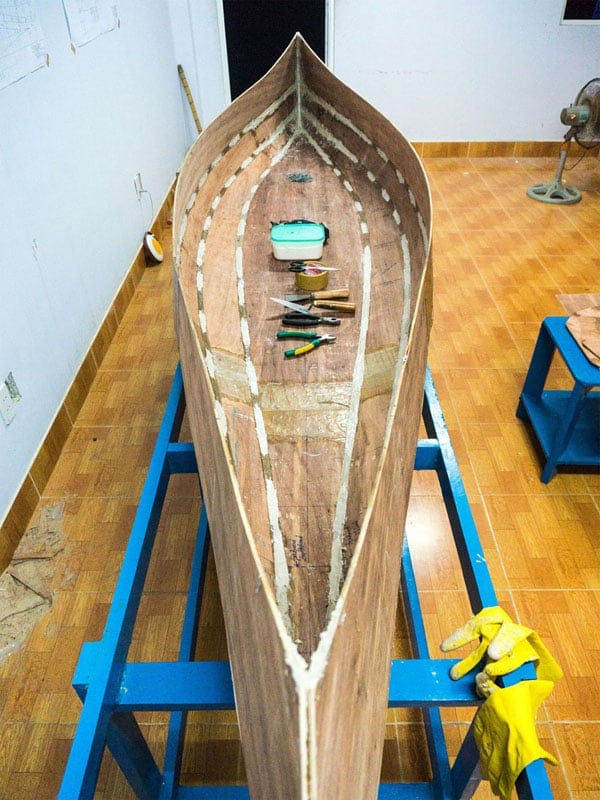
The bilges are just temporarily hold in place by steel wires, next is to permanently glue the seams with thickened epoxy. I used a mixture of silica and wood flour (the collected sanding dust) to thicken epoxy, then apply to the seams with a small masonry trowel. The two sides of a seam are covered with duct tape in advance so that epoxy won’t mess around, and duct tape is removed when epoxy half cures, leaving a clean fillet line. The next steps are glueing the bow and stern sections, cutting steel wires, filling remaining empty slots, then turning the hull over and do the same thing on the exterior side. There’s actually not much work, but it require leaving epoxy overnight for it to completely cure before glueing more, it gonna take the next few days to finish this step.


6. SANDING
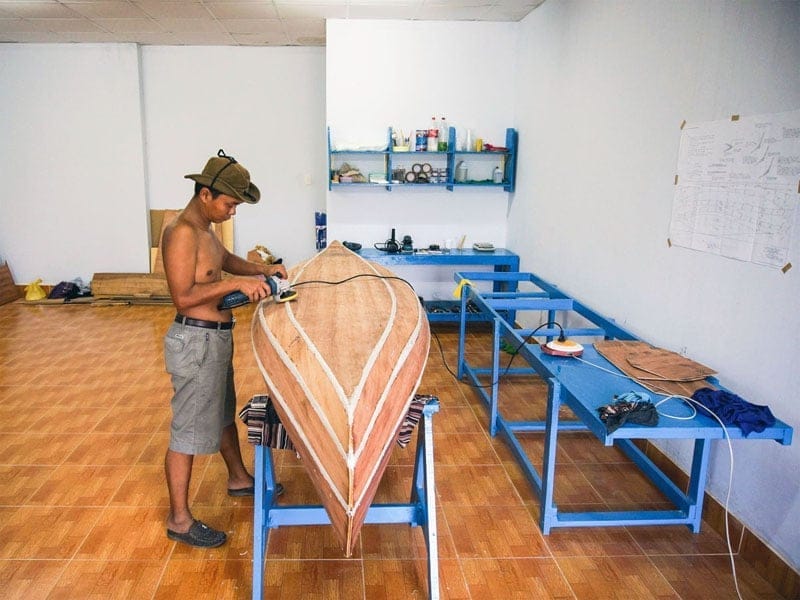
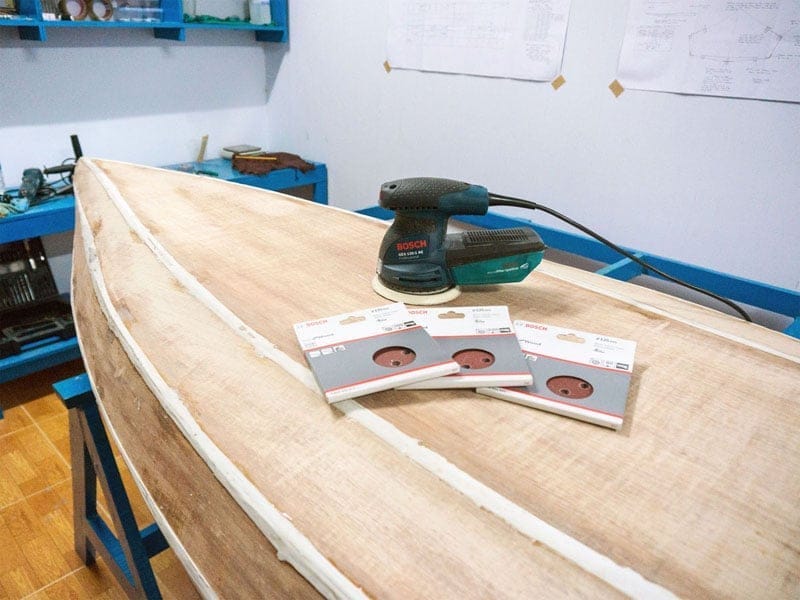
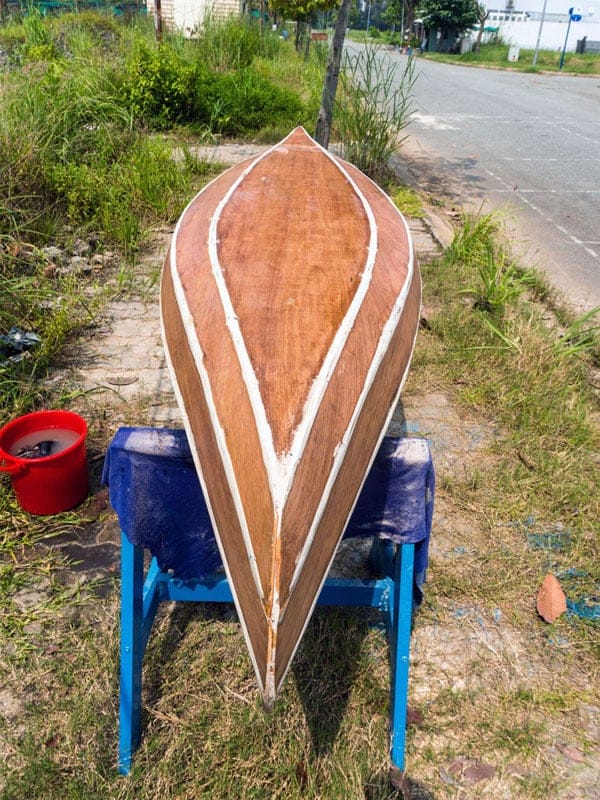
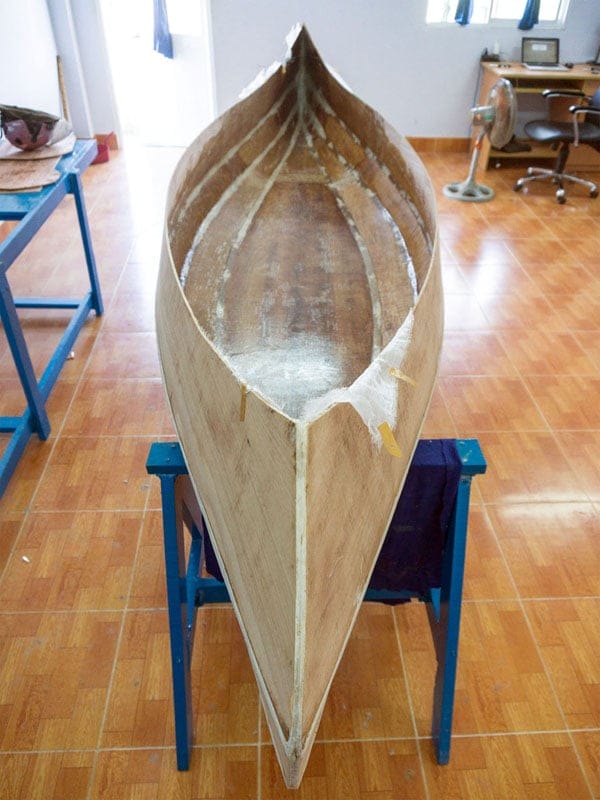
Now the labour – intensive task of sanding (even with the help of power tools). But first, I would need to fair the seams’ fillet curves a bit with the angle grinder using 60 grit sand paper. Then fill all drilled holes left by the steel wires, then proceed with the random orbital sander through 3 levels of fineness: 80, 100 and 120 grit. Since the glueing was a bit messy, it puts more work into this step, to really smoothen surfaces before being able to move to the next step. Sand the hull, wipe out all dust, sand again with finer sand paper, repeat 3 times and for both outside and inside, that means: lots of work, given that next week would be a busy week for me with my job! But those “gorgeous curves” gave me lots of joy and encouragement on the to – be – finished – product!

Having worked with epoxy resin when setting up the workshop, I’ve gained some experiences with it. When mixing component A & B together, the pot time is so short in tropical climate, as the rule states that: reaction time is reduced by half when room temperature increased by 10° Celsius, I usually have less than 3, 4 minutes before it hardens. The average day temperature in Saigon this season is around 33° ~ 36°, it makes a tedious task working with epoxy, quite many times did the mixed epoxy burn hot into smoke before I can use it all. Epoxy also exhibits the characteristic of a “chain reaction”: it easily burns hot when the mixing weigh exceeds a “critical mass” of just 30 grams or so (depending on temperature), forcing me to mix into smaller batches.
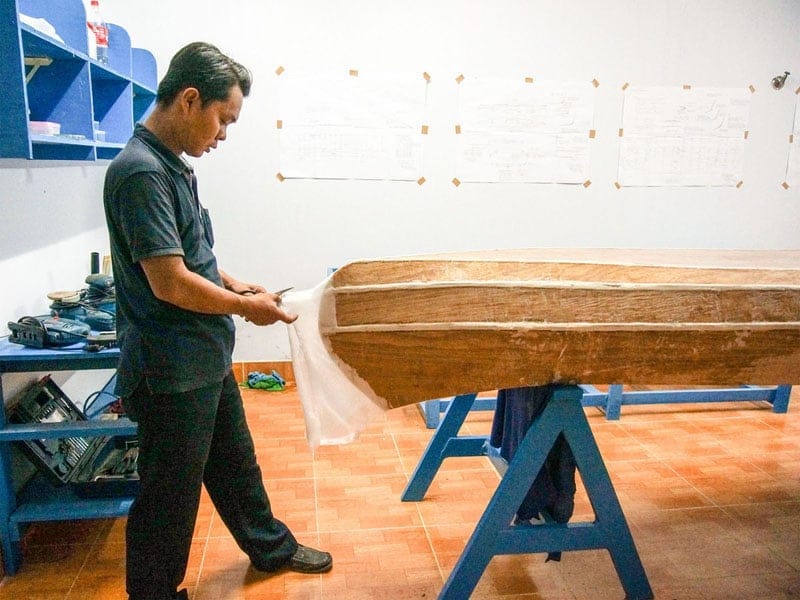
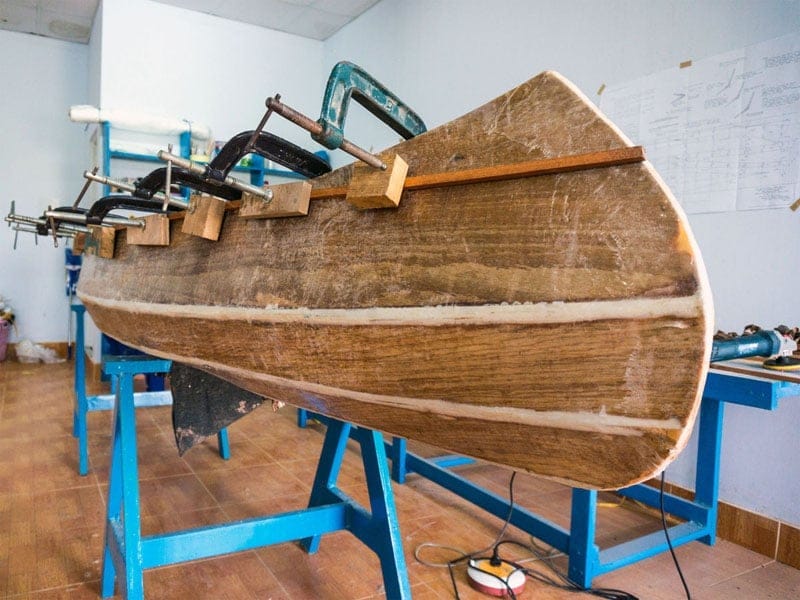
7. GLASSING
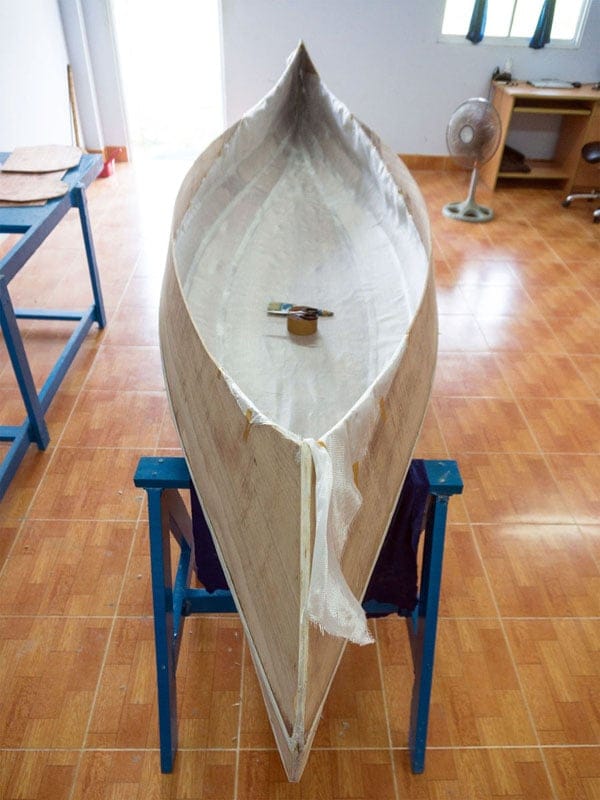

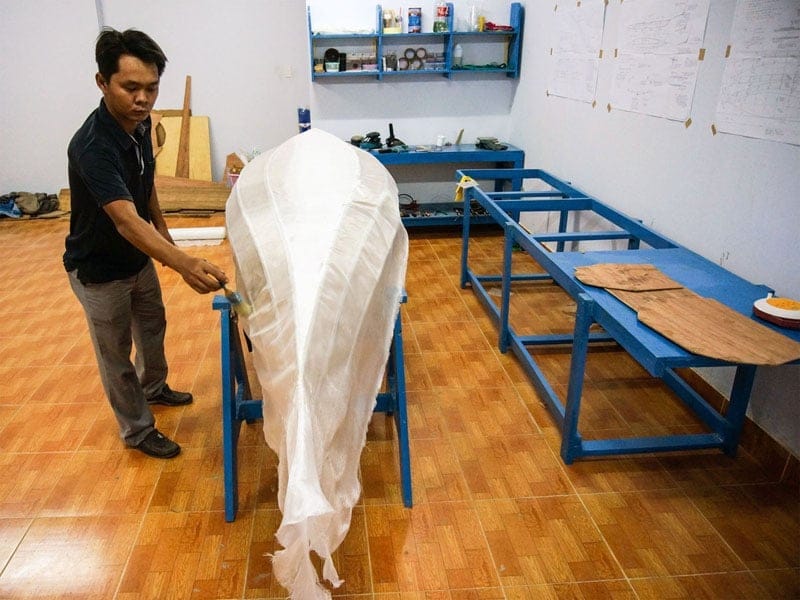
Finally, I devised a trick to cope with the situation: before mixing, I put the components A & B into the fridge for an hour, to cool them down and lengthen reaction time, giving me more time and flexibility. Also, I would glass at night to avoid the higher day temperature. For the fiberglass fabric, I can only find cloth of 1m width at the moment, not enough to cover the whole beam, but decided to proceed with it anyhow. The missing part will be left as is for the interior, and will be covered by other fiberglass pieces for the exterior. Though glassing would add about 2 ~ 2.5 kg to the final boat weight (just estimate, I use 6 oz, or 200 gram/m2 cloth), it would re – enforce the hull with more stiffness, anyhow this is my first build and rigidity is a bigger concern over weight.


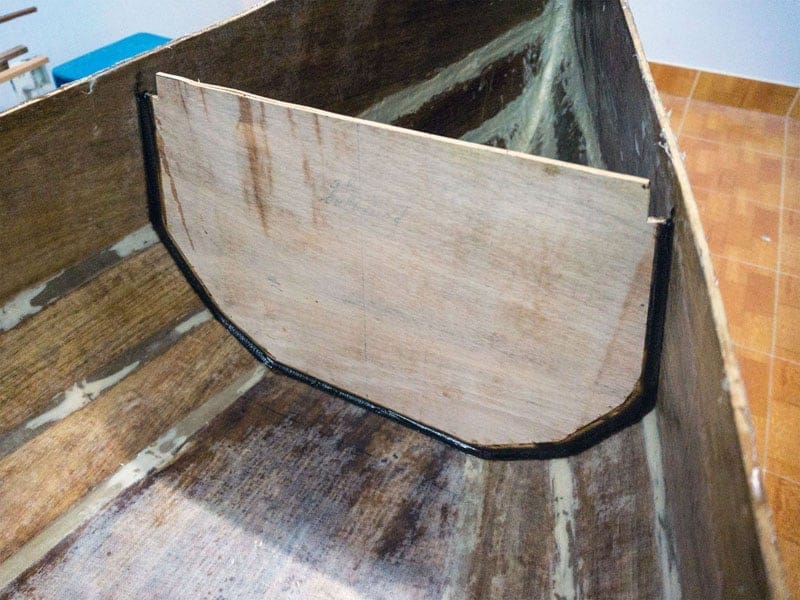
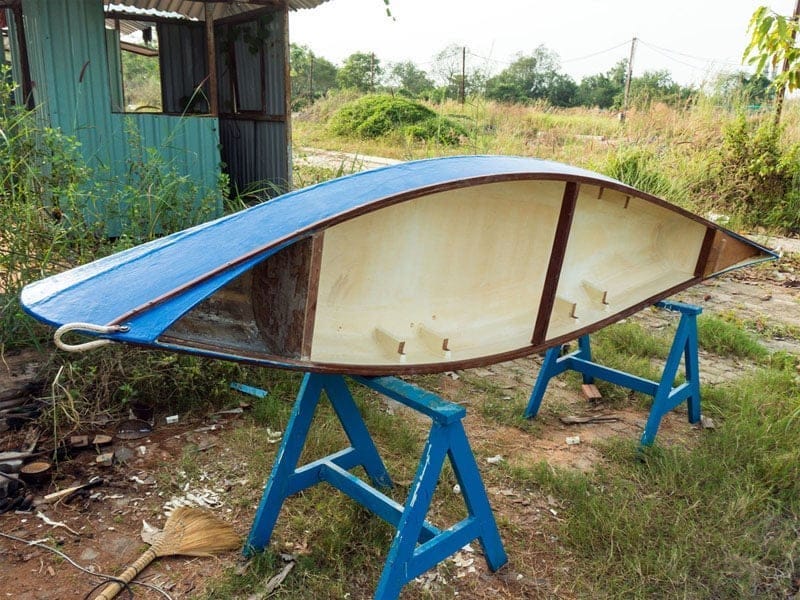
8. FITTING
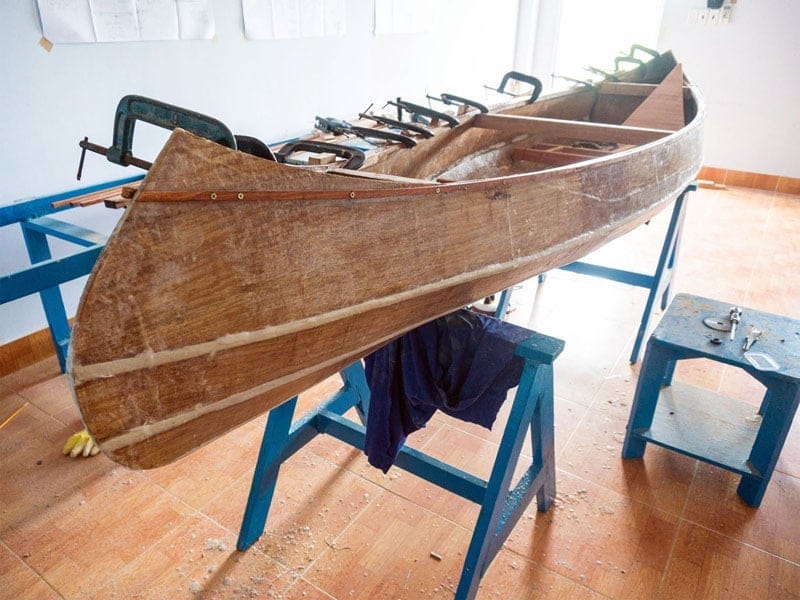
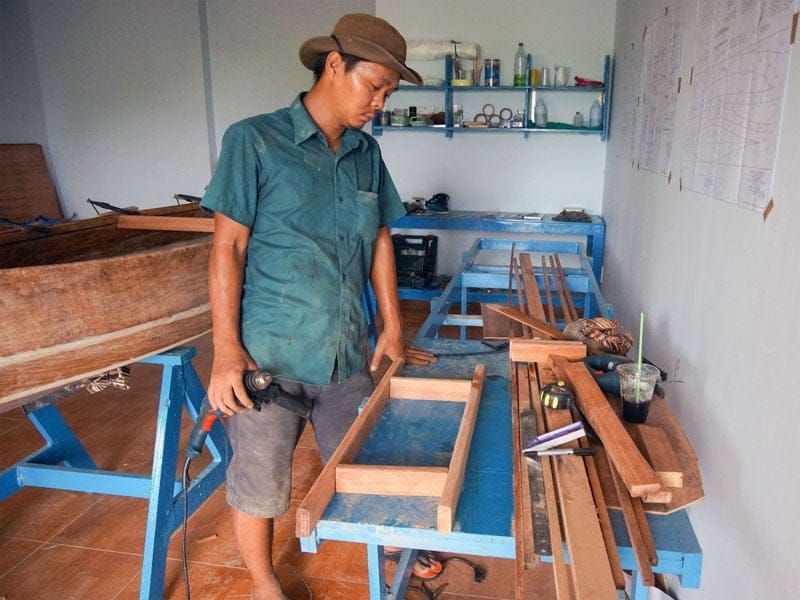
The hull is now completed, the next step involves many small works that help building up the boat structurally: fit the forward and aft bulkheads (I decided to seal the water – tight compartments permanently and not to use hatches for later maintenance), fit the inner gunwales, fit the forward and aft thwarts, then fit the outer gunwales, then fit three bottom runners (to protect the boat when touching ground), and some other miscellaneous works. It seems there’s alway more effort and time spent in each step than I originally planned, partly because I’m an inexperience first – time boat – builder, partly cause I want to do it carefully to learn and improve my skills. It’s just like when you go on long – range paddling: don’t think about the destination, concentrate on each steps!
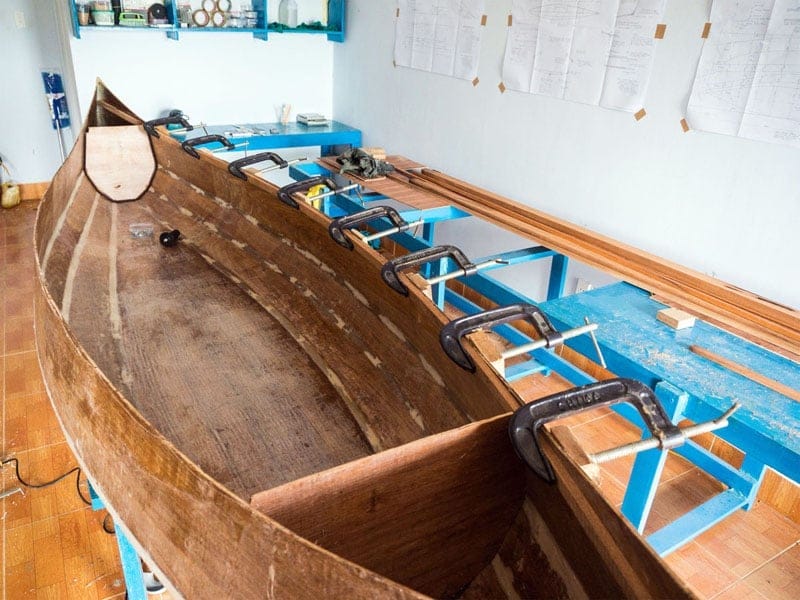
9. MORE FITTING
For the gunwales, thwarts, seats… I chose a very hard and heavy tropical wood, Vietnamese name: căm xe (Xylia xylocarpa) and the choice was not quite right. Having density at 1.15 (1150 kg/m3), the wood is too hard to bend into desired shapes, it’s even hard to saw or to chisel. I was thinking of setting up boiling devices to steam and bend the wood, but it requires much more effort, so finally I decided simply to compromise and change the design: instead of “flush decks” at bow and aft, I lower them a bit to fit with the “sunken” gunwales. Also, I’m worrying that this wood would add much more weight into the boat. On the plus side, hard wood makes the boat more sturdy, and if done right, its grain and colour would be very nice after varnishing.
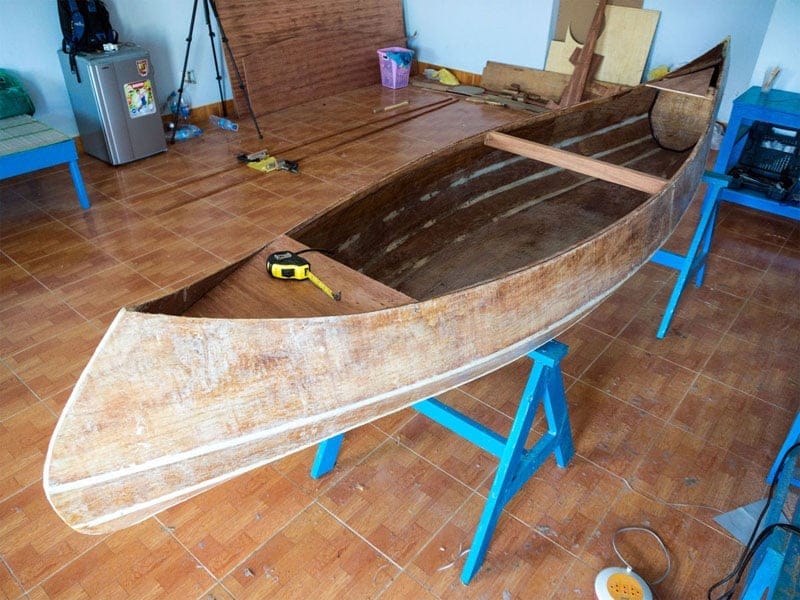
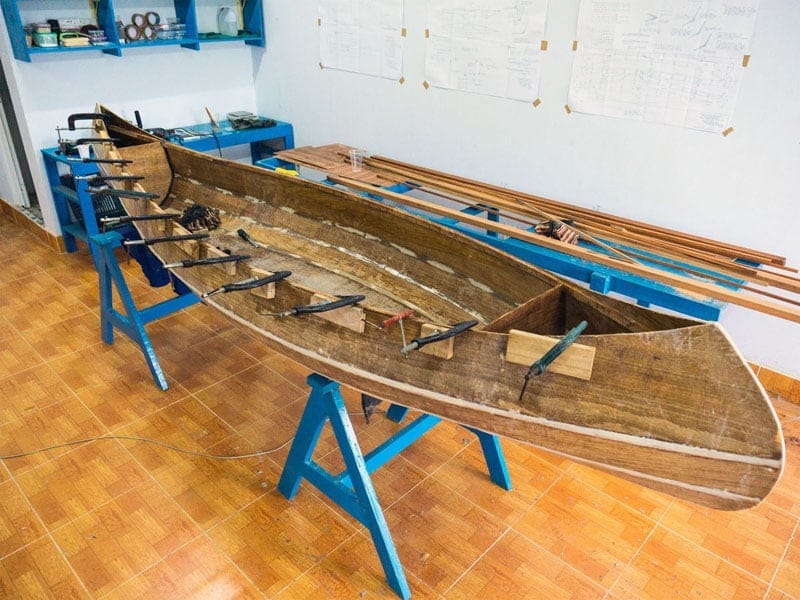
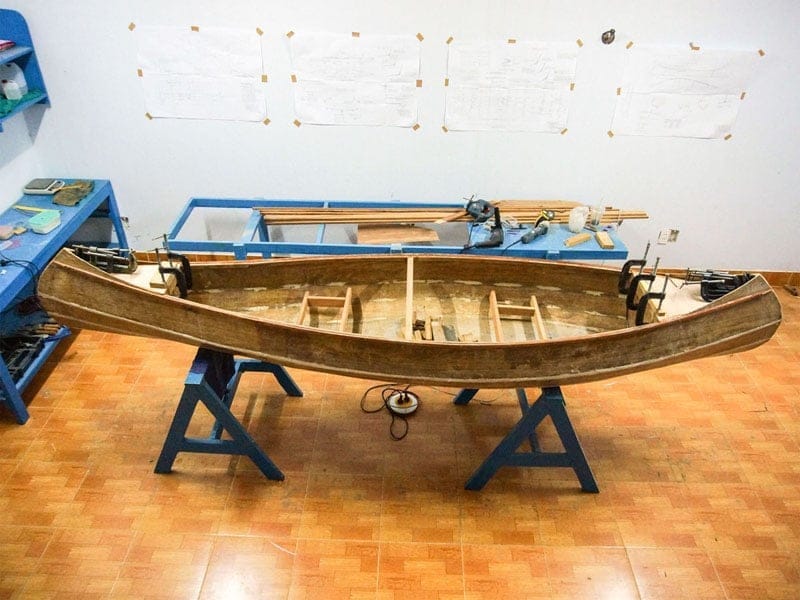
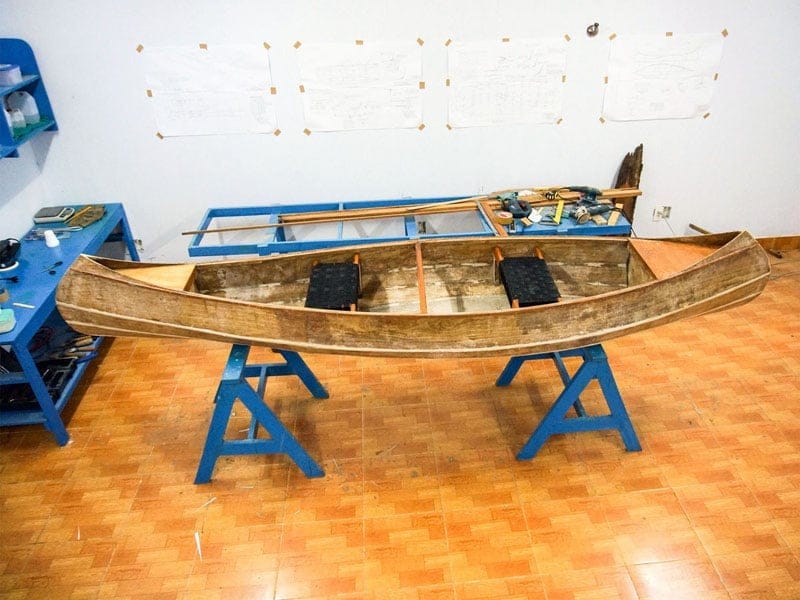
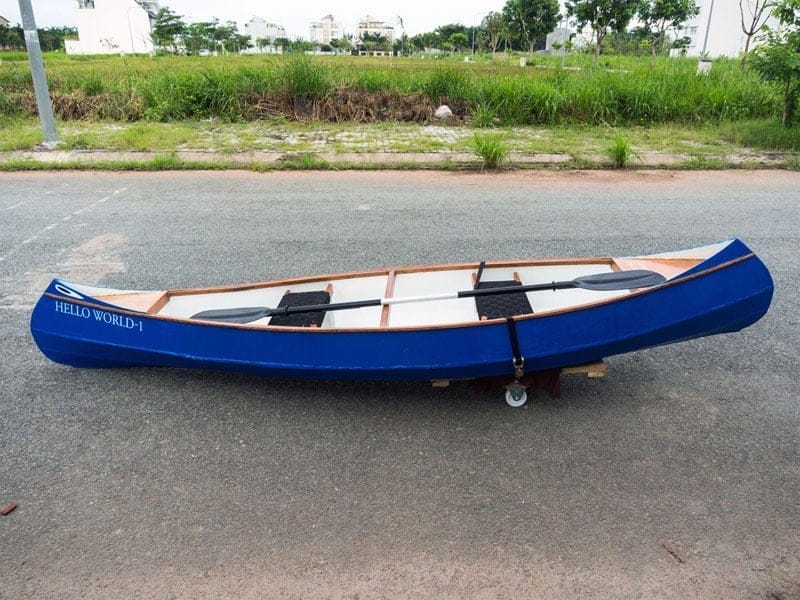
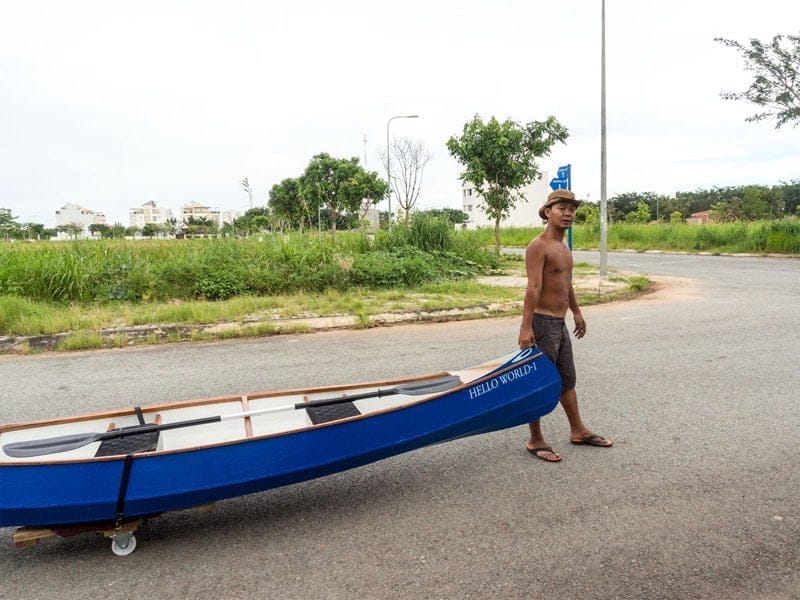
The canoe construction has reached about 3/4 of the overall progress, but there’s still much work ahead. Lots of small errors and mistakes made here and there, lots of lessons learned, but I’m happy to see the general status of the canoe standing well. Since I’ve put more materials (epoxy, fiberglass, hard wood…) into the boat, its final weight might far exceed the projected 20 kg, but that’s not very important anyhow. If it’s too heavy to be easily carried on one’s back, I’ll make a simple carriage to help moving the thing (with my bicycle) around then! Although designed to be mostly a solo canoe, for now I see it can easily accommodate two persons and some little gears, making it a nice weekend fishing canoe very soon in the next 10 days or so!
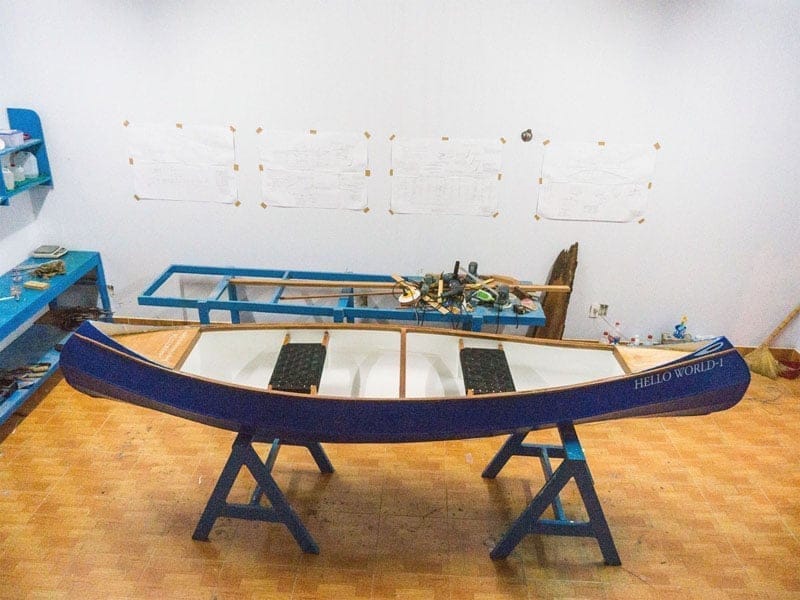
10. SEATS

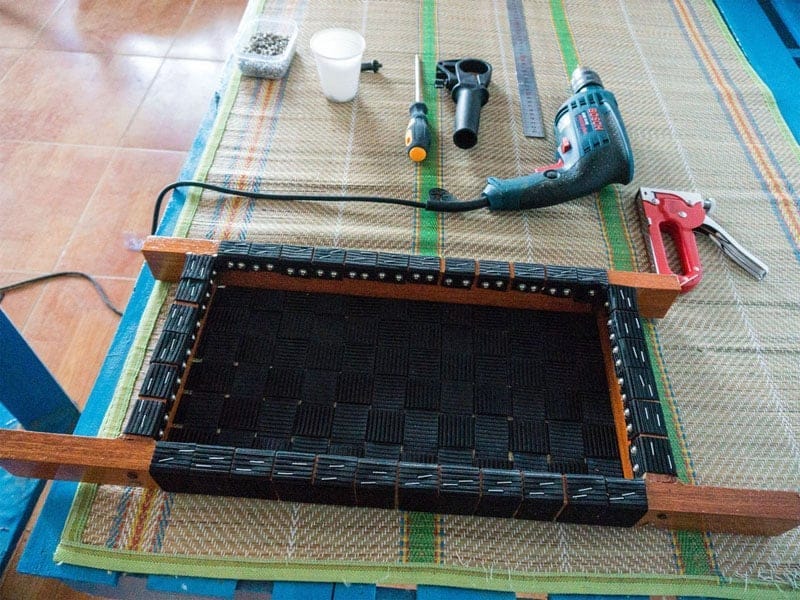
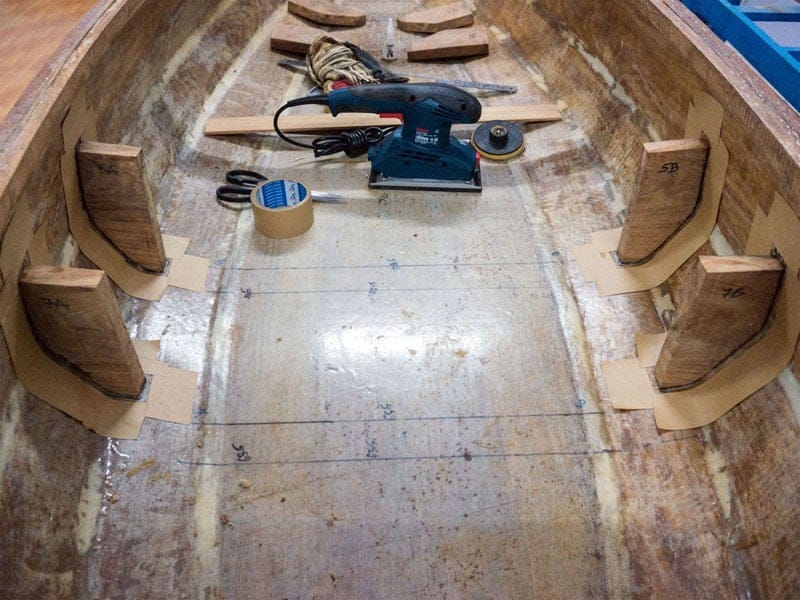
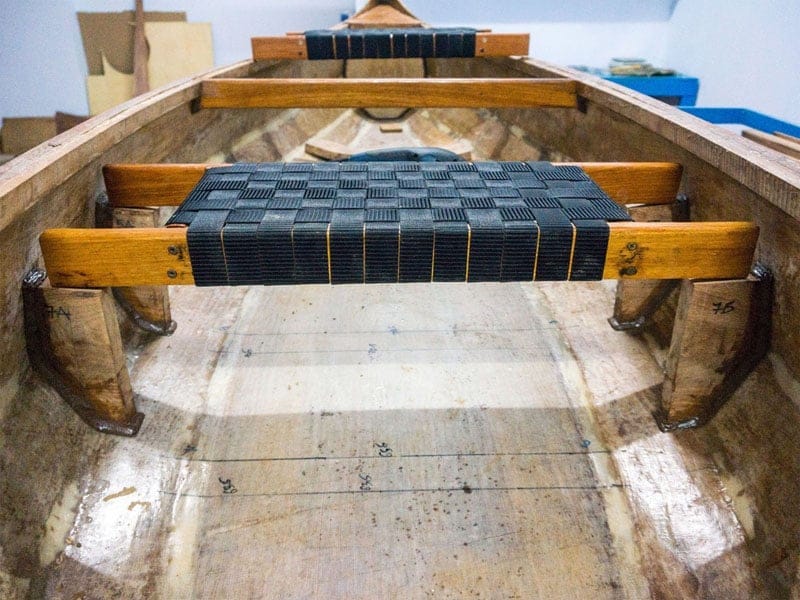
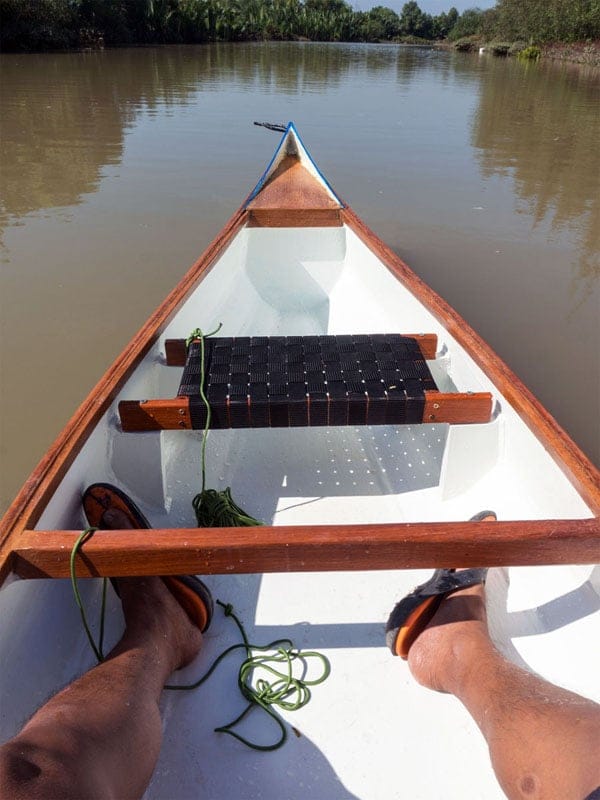
One of the most important things when go paddling for extended time is… the seat. If you spend several hours mostly with your upper body in action while the lower part doesn’t move much, you’ll understand why a comfortable seat is very much needed. I’m gonna install two seats, to prepare the boat in tandem configuration. Usually, seats are just mounted (hang) against a single bilge, but I think that installation is too weak. Instead, I will make 4 legs to support a seat, each leg also serves to link 3 bilges together, hence strengthen the boat overall rigidity. It could take some times to cut and install the 8 legs into the correct shapes and positions, but if done properly, the boat structural strength would be much improved, that’s worth the efforts.

11. PAINT
Next comes the job of painting… Unlike old – day, one – part paint, which is simple to use, today two – part PU (polyurethanes) offers superior properties, but is more complex to work with. First I would need to sand the hull at 120 grit in preparation, then apply two layers of primer, sanding after each layer (150 & 180 grit), then apply two other layers of main coats, then briefly sanding again at 240 grit, finally a topcoat of gloss. In total: 5 layers of paint and 4 times of sanding are required for the interior and exterior, a huge pile of work. I allocate 5 days just for this painting job! Actually, I don’t expect a really fine, shiny finish, and the topcoat would only be semi – gloss (or even satin – gloss), it just need to be smooth, that’s already good enough for me.


12. FINISH
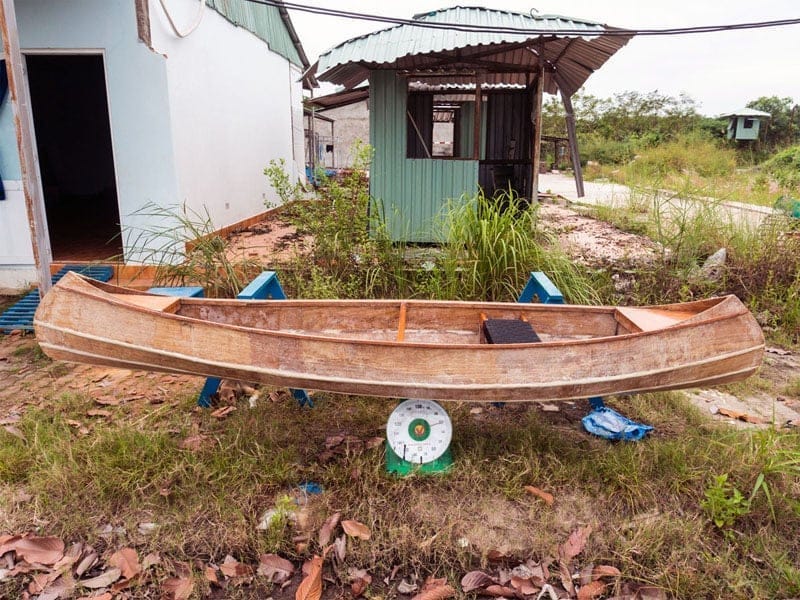
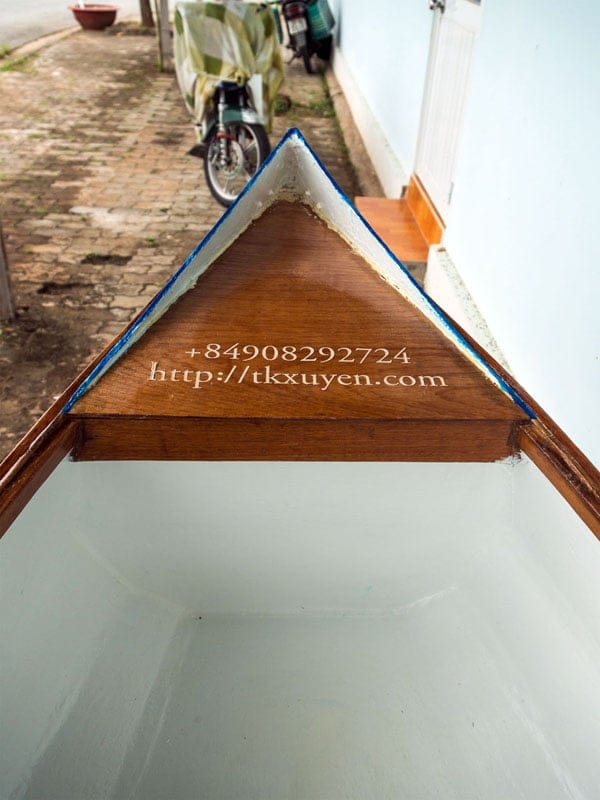
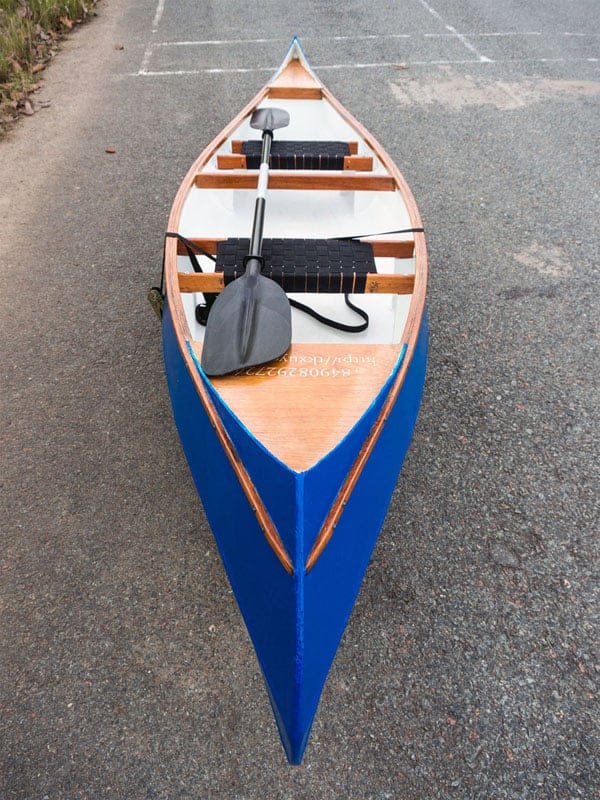
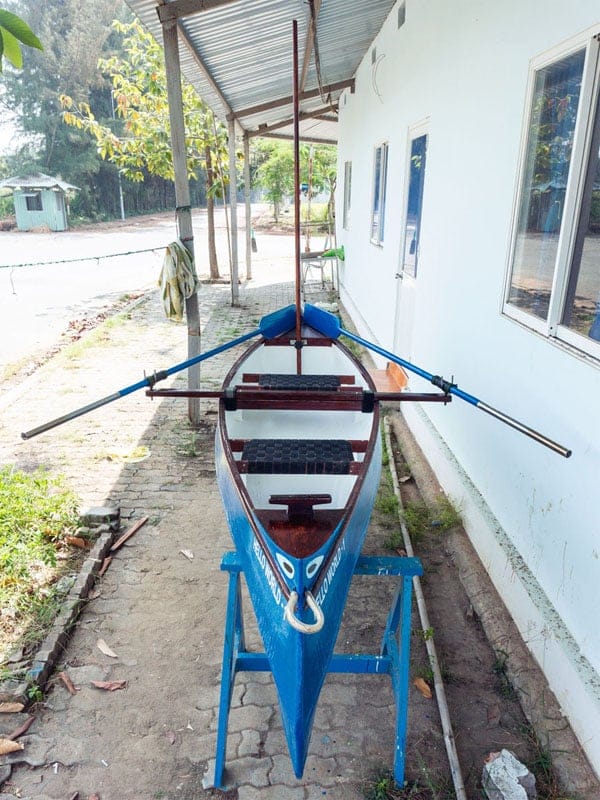
There’re still many small jobs that need to be done to finish the canoe: polish and varnish the naked wooden parts, cut and stick the decal decorations (boat name, owner’s contact information and especially the boat eyes, an intrinsic part of Vietnamese boats); apply the topcoat (a semi – gloss on top of the decals to protect them from the weather), adjust and fit the two seats, fit two handles at two ends to help lifting the boat… and some other miscellaneous items (styrofoam fenders…) I intend to build also a simple trailer (some wooden planks with two small wheels) to reduce the burden of moving a 35 kg mass on longer distances. Thinking like if I can wait one and a half month to get the boat done, I can wait a few more days to go paddling in it!

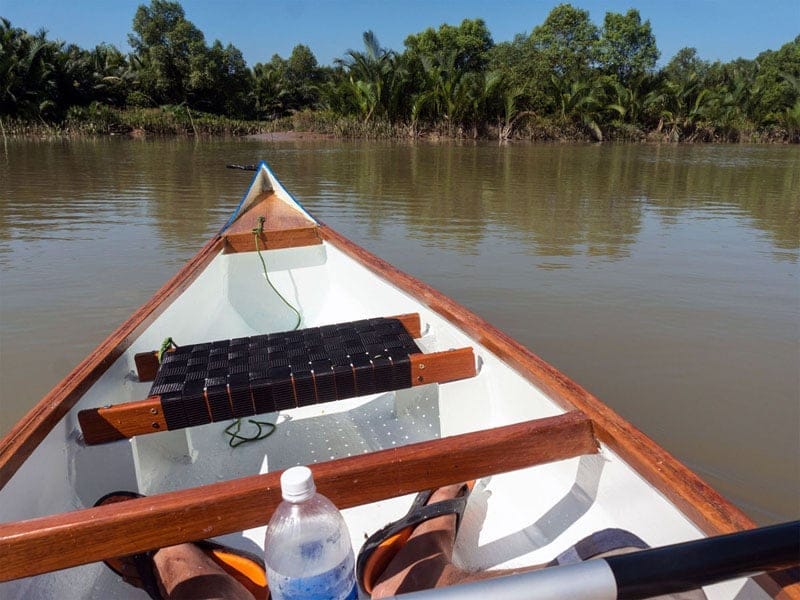
I was choosing a good day, and also waiting for the tide (it’s just after full moon and the water is low still), time seemed to be so long. Finally, christened, trialled the boat, and started its maiden voyage, all in this same day! First impressions: the boat is very agile, good speed, better than the plastic boats I used. It’s a real pleasure once you ride into, and the boat gets momentum after just a few paddling strokes, the feeling was light and firm. It tracks very straight, perhaps even too straight. On the minus sides: the canoe’s fat hull makes the turning angle a bit wide (it’s a bit difficult to turn quickly), and it’s somewhat shaky at times, probably because the seats are too high, maybe I should cut the seats’ legs down a bit to lower the center of gravity (or maybe not).
13. TRIALS

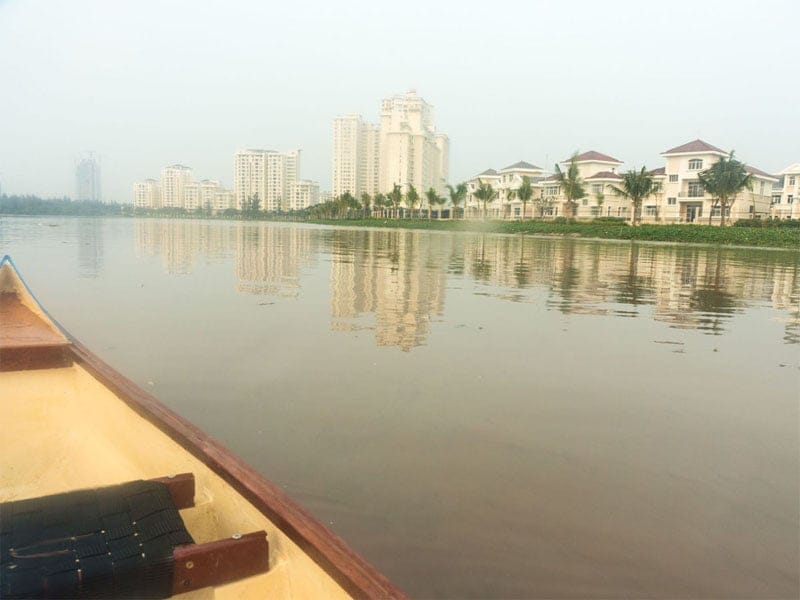
Some photos for now, would post in – action videos once I finish trialling more thoroughly on longer distances… The last several days, I’ve finished two additional testings: one 10km run and another 15km run. Overall, I’m very pleased with the canoe’s performance. The sustained speed is improved by a small margin, from 5 km/h to about 5.5 ~ 6 km/h, but the paddling effort seems to be much less, I don’t feel that tired like with those plastic boats. The windage is good, given that the boat tends to keep straight very well, once it gets momentum, it doesn’t drift much under unfavourable wind. The rolling motion can be unpleasant for novice paddlers, but I’m ok with that still, actually I prefer to have some little shaking, after all, it’s not flat land, it’s bobbing water!
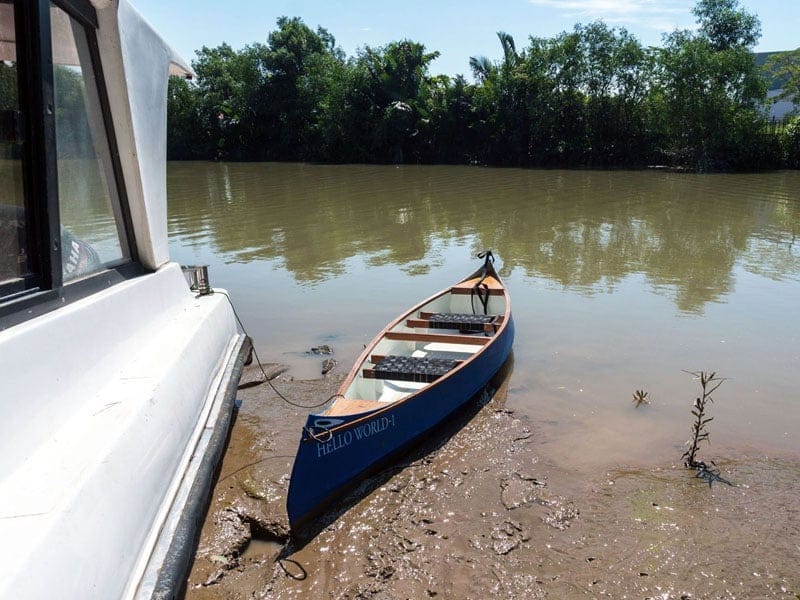

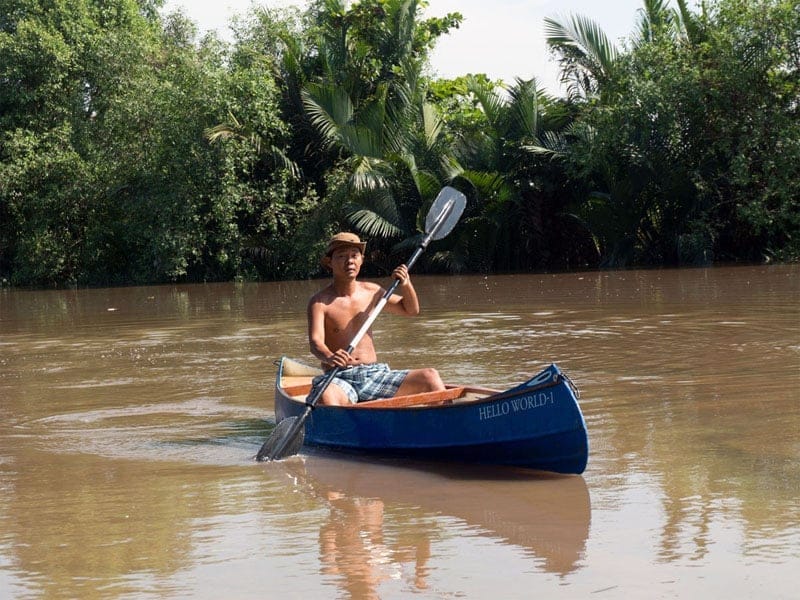
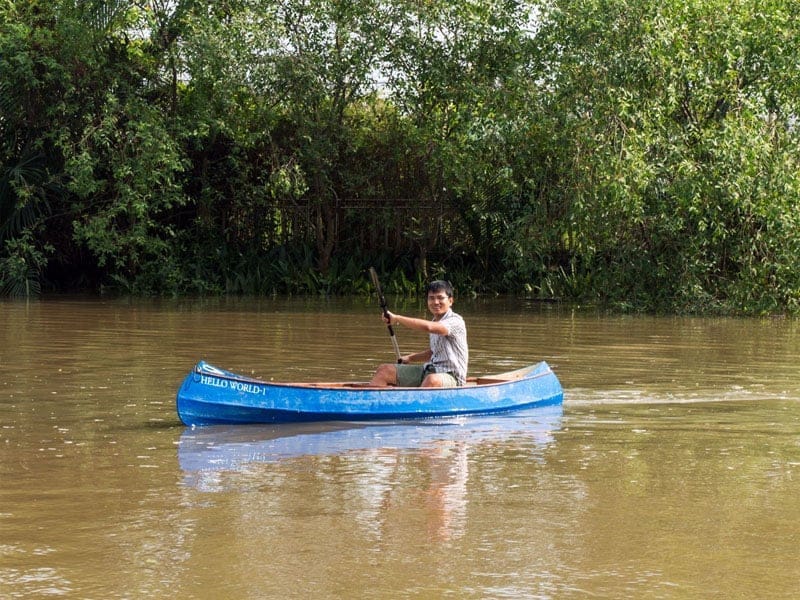
Some very beautiful scenes captured when trialling my new canoe. It rains sometimes, but the sky was clear was bright. Waterways in this region have lots of traffic, high buildings along the riverside, many activities afloat, most people I met was opened and friendly. And everyone was asking from where I bought such a nice and handy boat! And many ones who patiently spends hours along the banks for casual fishing look at me with envious eyes! It is pure pleasure to enjoy the river in many of its status: tranquil, wavy, windy, sunny, rainy… all within one same day, and it is even more pleasant to enjoy all those things in a built – by – your – own – hands boat! Well… every journey begins with a single step
… consider this first step successfully done!
Today, I tested the canoe in tandem configuration, and I must admit, it’s a failure! The only point that I’m pleased with is that the boat is still very light and agile with two paddling hands, it’s very quick to get momentum, velocity is very good, and there’s less effort needed to propel the boat to optimal cruising speed. Things to be improved in tandem configuration: 1. distance between two seats is too tight, the paddles can collide if two hands are not paddling in sync; 2. the canoe rolls a lot, to the point of instability, the only cause is that seats are mounted too high. It’s a dilemma, I don’t really want to lower the seats, they make comfortable positions and reduce paddling effort. I’m considering possible fixes to this problem and would update the canoe in the upcoming weeks.


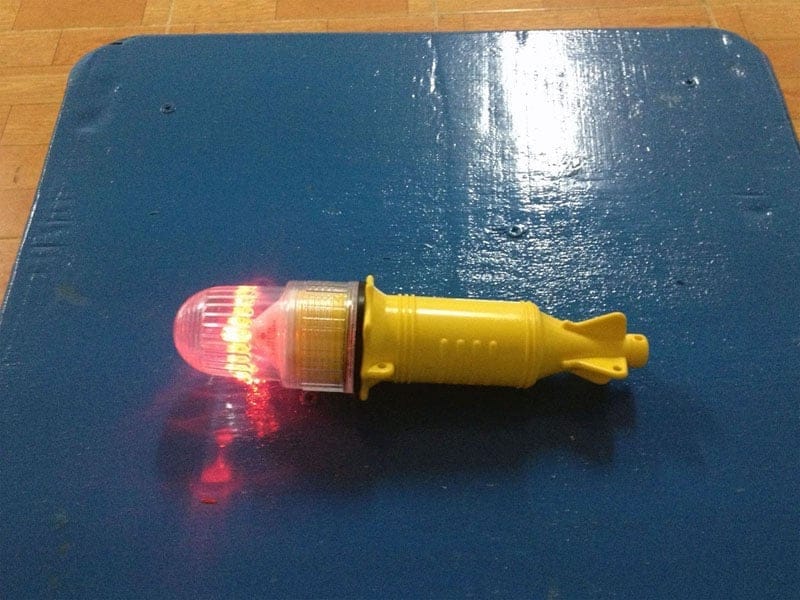
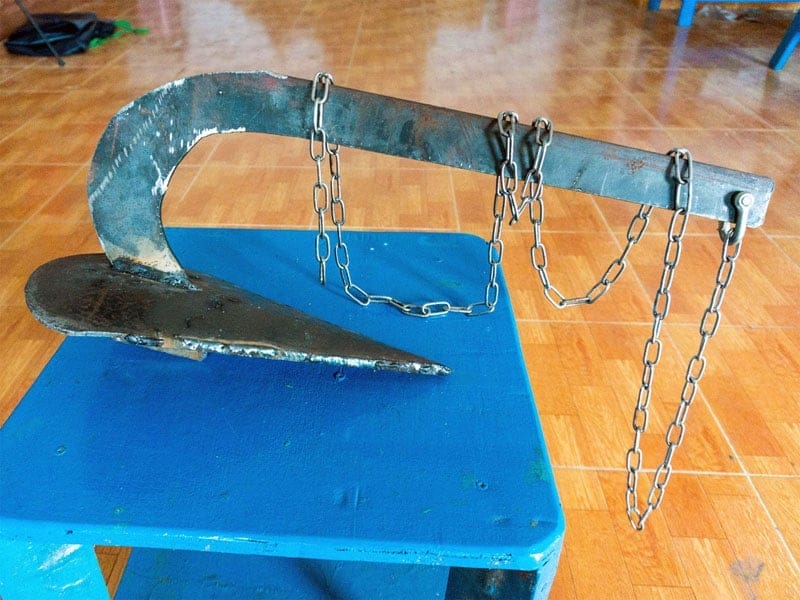
Hello World – 1 has been finished, and trials showed it’s an excellent boat for solo paddling, but there’s still much work to be done to make full use of the canoe. Various miscellaneous things: a raincoat protect the hull from weather at docking, a pole to push the canoe forward in shallow water, also to mount a signal light for occasional night going, an apparent wind indicator (wind vane) to better observe wind condition, a hand pump to drain water out when it rains, an anchor to allow going fishing anywhere on the rivers around my area without having to find a tree or a buoy to attach the canoe to… Most important of all, I want to make a rowing kit: an outrigger with two flotation units to help stabilising the boat, and two long oars.
14. ACCESSORIES

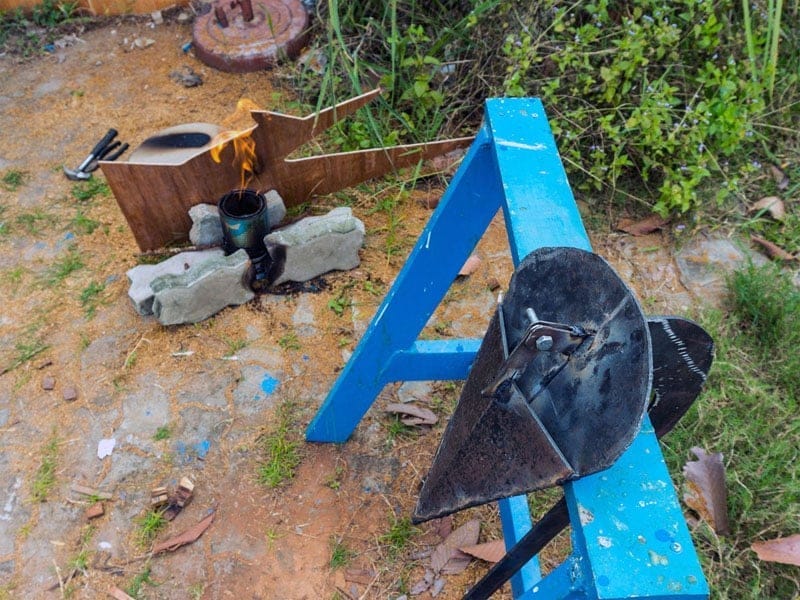
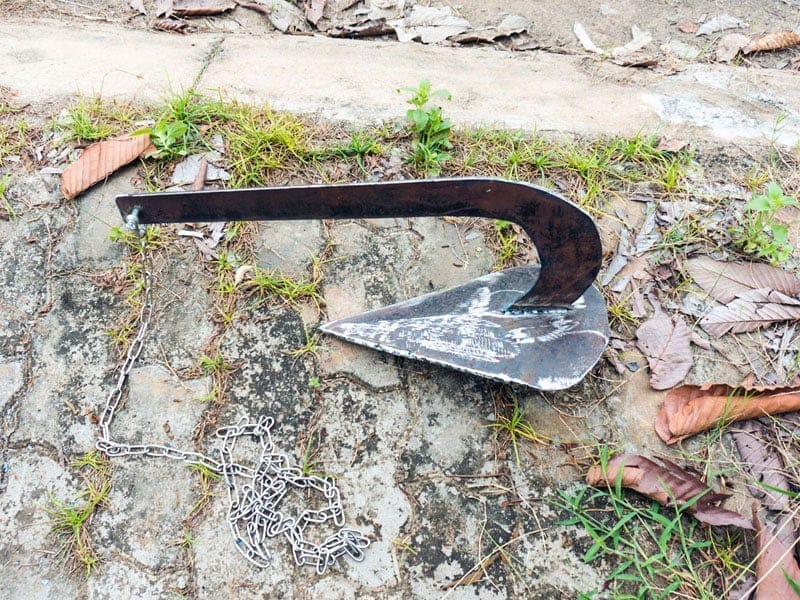
It could take a couple of weeks to finish everything, since I’ve just started the design, with some undecided considerations still. Slowly I would got each items done, first is the spade – shape anchor, I casted 1.5 kg of lead into the hollow space underneath, to concentrate weight into the tip (the anchor is a bit oversize and overweight for such a small canoe, some wrong calculation, but I would use it anyhow). 2 meters of steel chain, plus about 30 meters of rope will be enough for an anchorage almost anywhere around my area. There’s still lots of works to be done, with possible more delay (the holidays: Christmas, New Year… are approaching near). Meanwhile paddling is still my main pastime in a fresh morning, or in a calm sunset, any day in the week.
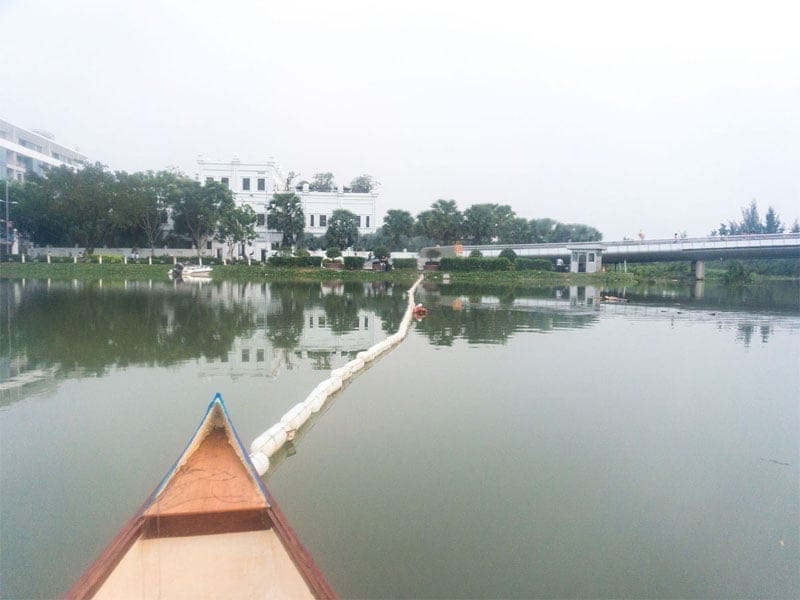
For the past few days, I really enjoy night paddling: familiar enough with the region to navigate in the dark, northern wind has cool down the nocturnal temperature considerably, and houses, buildings along the rivers’ banks have been decorated with all kind of colourful LED and neon lights for Christmas and New Year holidays, creating picturesque and splendid sceneries. I was paddling among a dark, silent, wide space, only the marvellous lighting and the stars above the sky. Unfortunately, my GoPro camera is not very good at shooting in low – light environment, I would try to post another video soon anyhow, just to show how beautiful our city is this season, especially in these specific places: Crescent lake (hồ Bán Nguyệt) and Starlight bridge (cầu Ánh Sao).
The more paddling I was practising, the more do I realise how much boating (and paddling, rowing, sailing…) resembles life, it’s a microcosm, a metaphor for our lives, for the struggles and enjoyments we make. Any destination is just a temporary target, as life is a long journey on which we struggle to make the next leap, reaching the next milestone, while trying to enjoy the scenes on the way. And that’s why we should take our thinking, our words, our intentions, our jobs… seriously, just to make the journey a more lovely, pleasant promenade. Well, that’s enough of philosophy, I need to stop dreaming here and return to the actual works, refine my calculations, sharpen my skills, lots of things to be done in the up – coming year, year of the horse.

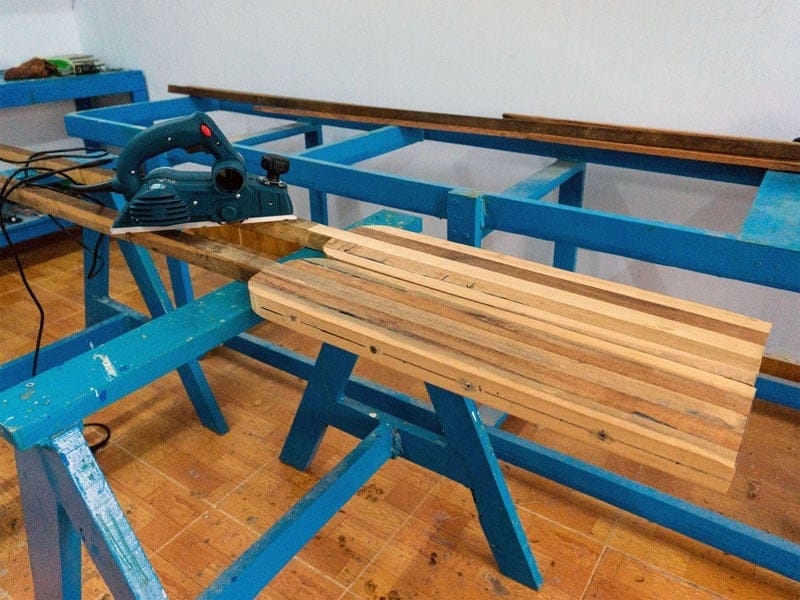
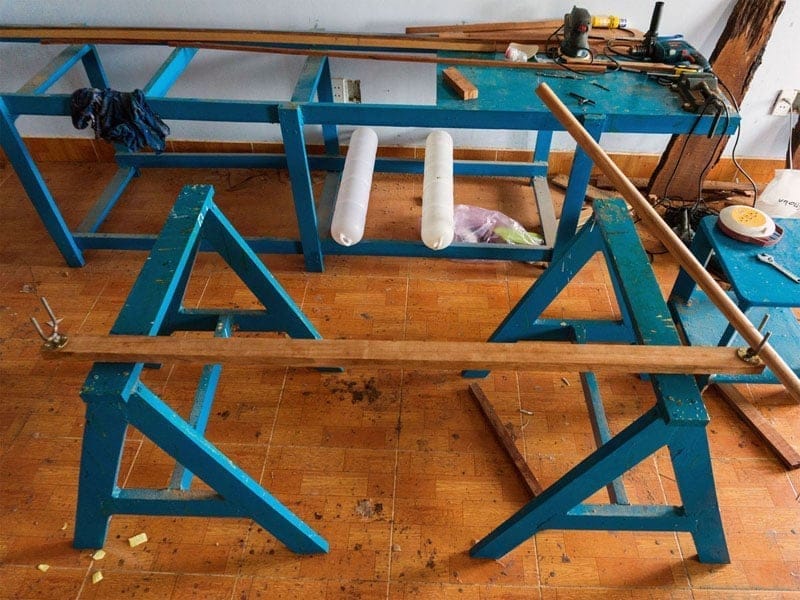
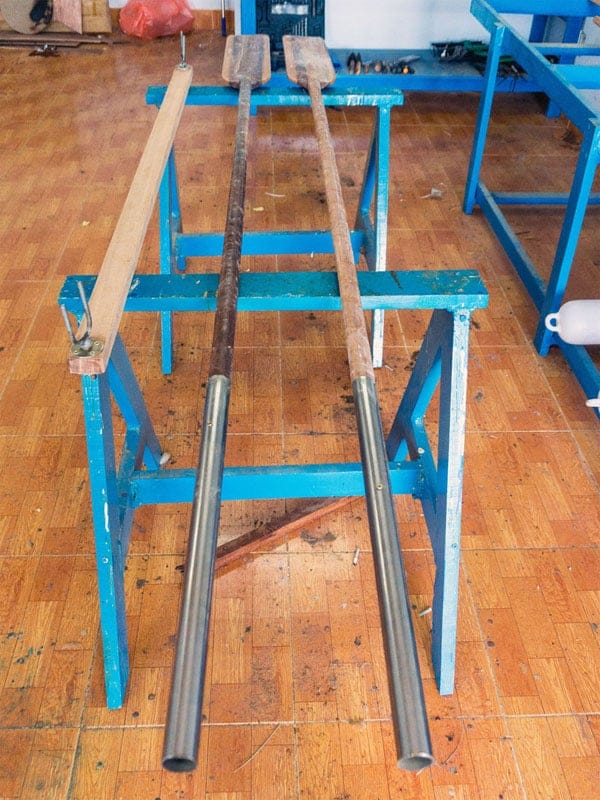
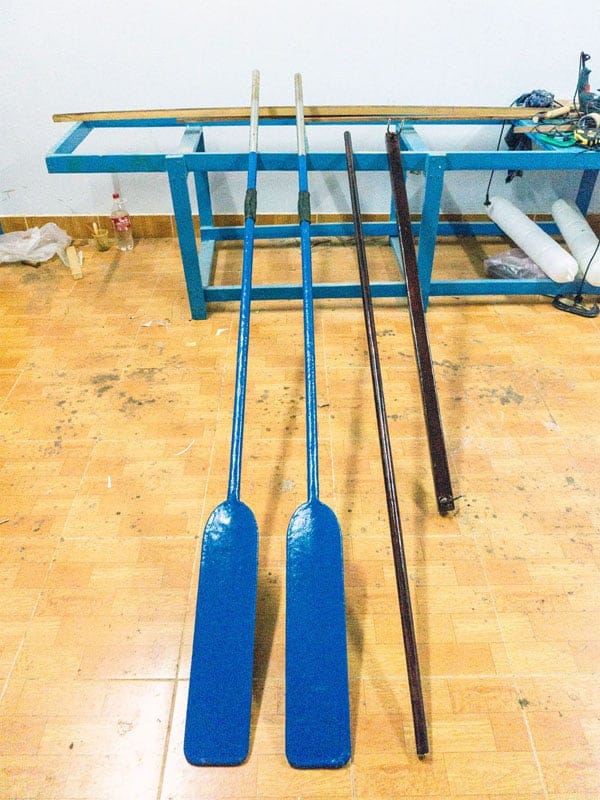
Boating progress has been poor lately… But really I’m interested in experimenting with rowing, a another mean of propelling the boat besides paddling. Rowing can help building your muscles in a different way, it can produce more torque to push the canoe forward under unfavourable wind and current conditions, it should also increase sustainable speed significantly, furthermore, it’s good for long – range tandem trips: with two hands aboard, ones can take turn to row and to rest. First, I make a pair of 8 feet oars: 5 planks of wood is glued and screwed together to form the oar’s handle and blade. Next is scraping and planing them into their final shapes using my new, very useful tool: a power planer. Then the 4 feet 8 inches outrigger and flotations.
15. ROWING KIT
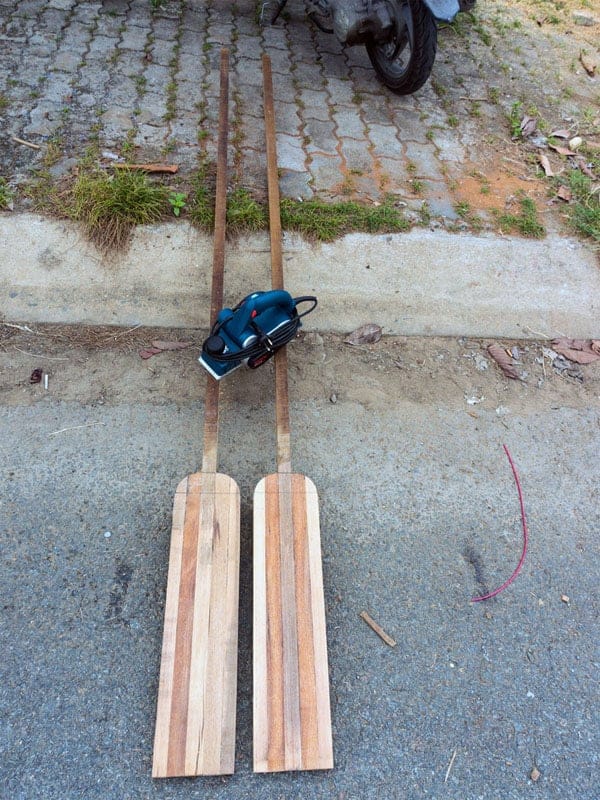
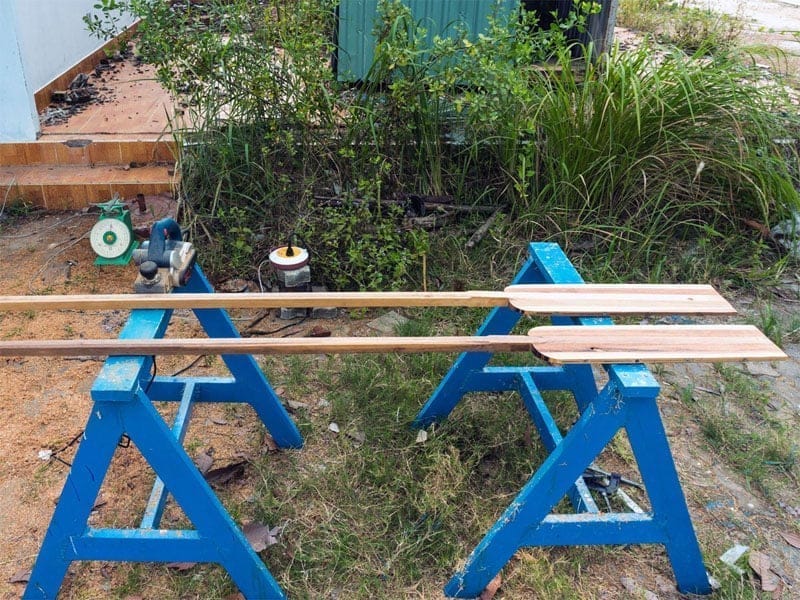
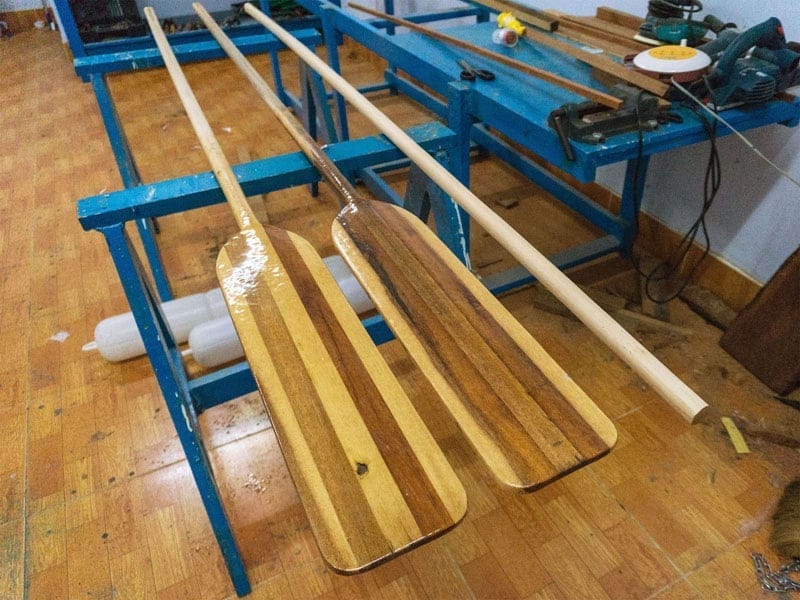
For the oars, I use a lighter wood, Vietnamese name: thao lao (Lagerstroemia calyculata Kurz); the white, fine grain wood traditionally used for building paddle, oar and rudder. Having density at about 0.9 (900 kg/m3), the wood is not as heavy and hard as căm xe (Xylia xylocarpa), but resists better to water. The oars handles’ ends would be attached with short aluminium tubes, which serve two purposes: 1. lengthen the oars to the full length of 2.4m (8 feet) and 2. the hollow tubes will be casted with about 1.5kg of lead each, to better balance the oars once they’re put onto the oarlocks, and hence reduce rowing effort. I’d also decided to use ready – made plastic fishing buoys for flotations, to make the outrigger construction simpler and easier.
Today, I took Hello World – 1 to dry dock for inspection, maintenance and more fitting. After almost 2 months on open water and under direct sunlight, mistakes in the building phase have been shown: 2, 3 small cracks on the outer fiberglass and epoxy layer at bottom aft, water has leaked into the aft watertight compartment (about a gallon), and the paint has been scratched at places… I should have taken more care on the canoe’s storage and usage. Now I need to make some repairs: find the seal the leaks, repaint some small areas, lower the seats to improve stability, before being able to fit the rowing kit and other miscellaneous accessories: cleat and anchor, the light pole… It could take the next 2, 3 days to finish all these things!

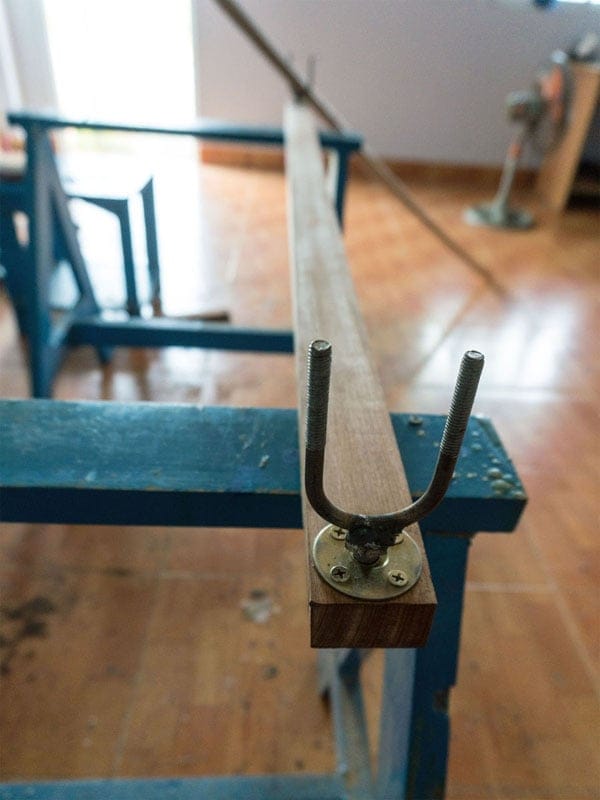
Today, we tested the preliminary rowing kit, the result is very unsatisfactory, but somewhat encouraging still. I’ll need to rethink about the designs, various flaws are spotted and to be rectified: the oars are too long and heavy, the oar locks are placed too low that they limit the rowing movements, flotations are not done yet… The only promising thing is that speed would surely get a huge improve, we was expecting to be able to sustain somewhere around 5, 6 knots (9 ~ 11 km/h), a great advantage (compared to paddling) for long – range cruising. But that would be the jobs of the coming (Lunar) new year, for now, all boating works will be temporarily suspended, as I’ve already got in my TODO list many other stuffs which have higher priority.
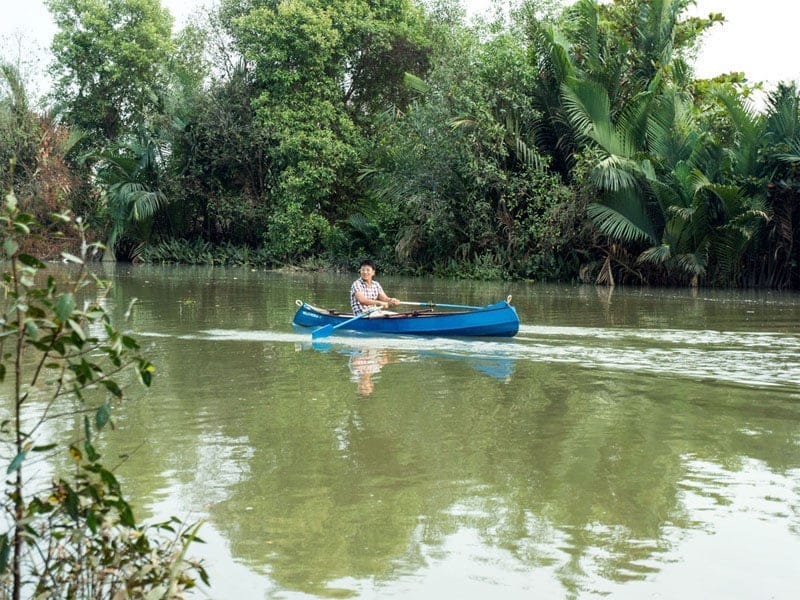
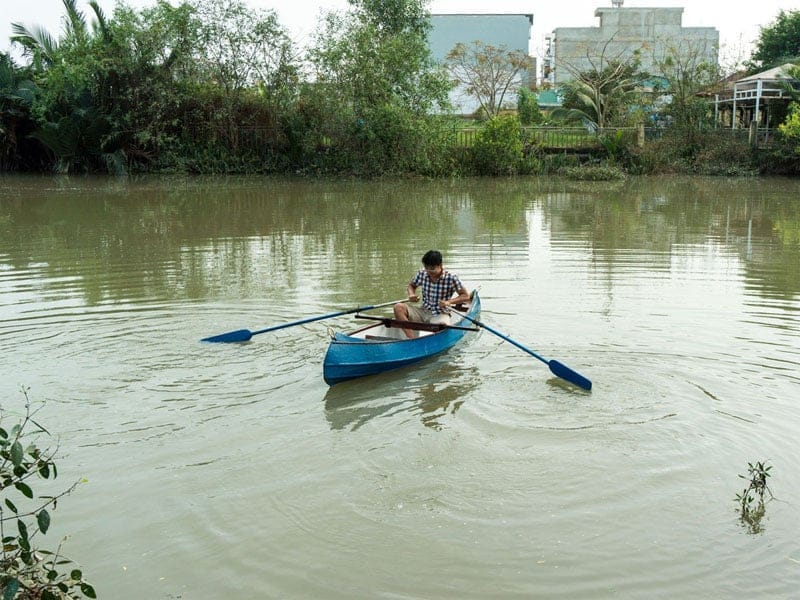


PHOTO ALBUMS
For more details, see a complete photo building log in the two albums below:

