Có mấy vấn đề về “thiết kế thuyền” từ xưa đến giờ không nói, vì biết nói ra cũng không có ai chia xẻ. Nhân tiện nói ra đây để khuyến khích, nếu ai đó đi vào “thiết kế thuyền”, vâng, chữ dùng quá là to, thực ra nó cũng đơn giản, chẳng có gì lớn lao. “Thuyền” ở đây hiểu là dạng recreational boat nhỏ chứ không nói về ship, ship chắc chắn là có nhiều chuyện phức tạp.
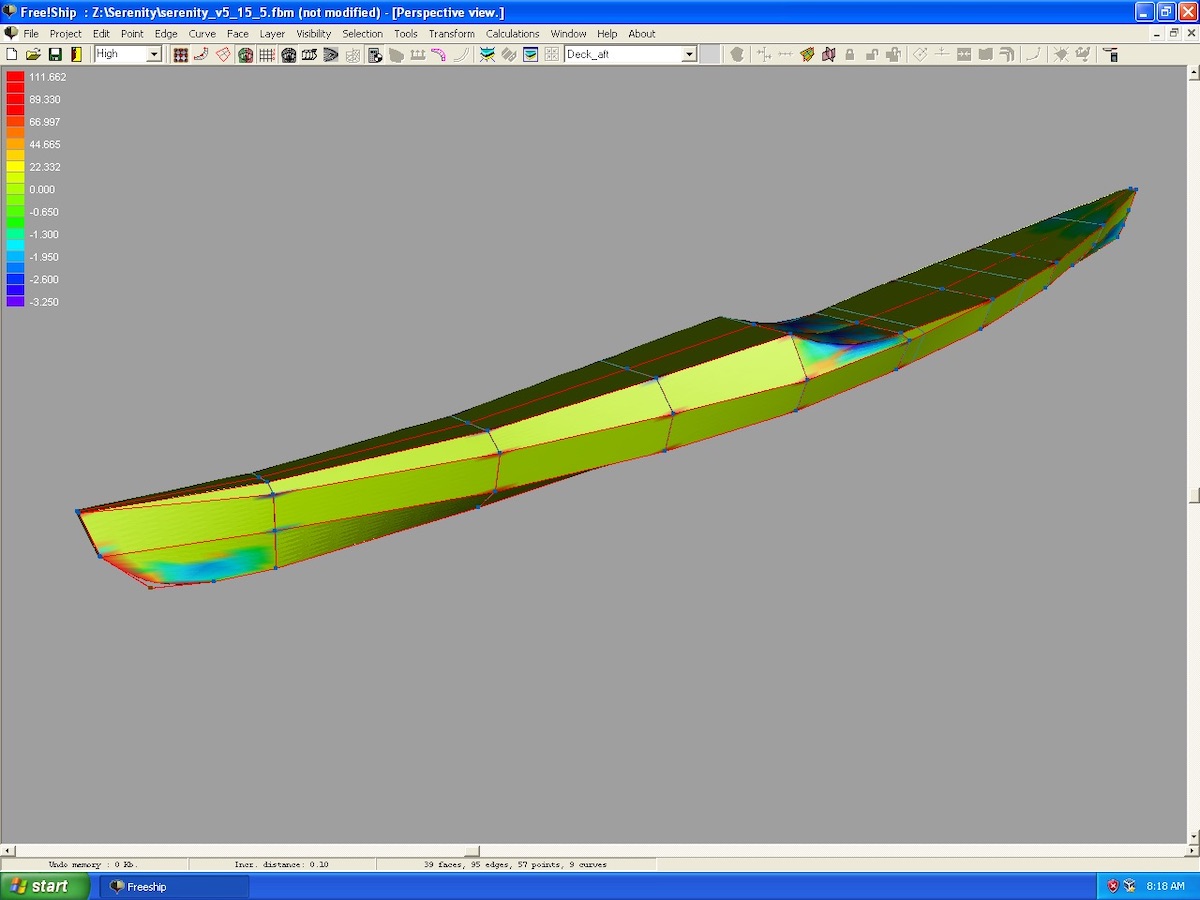
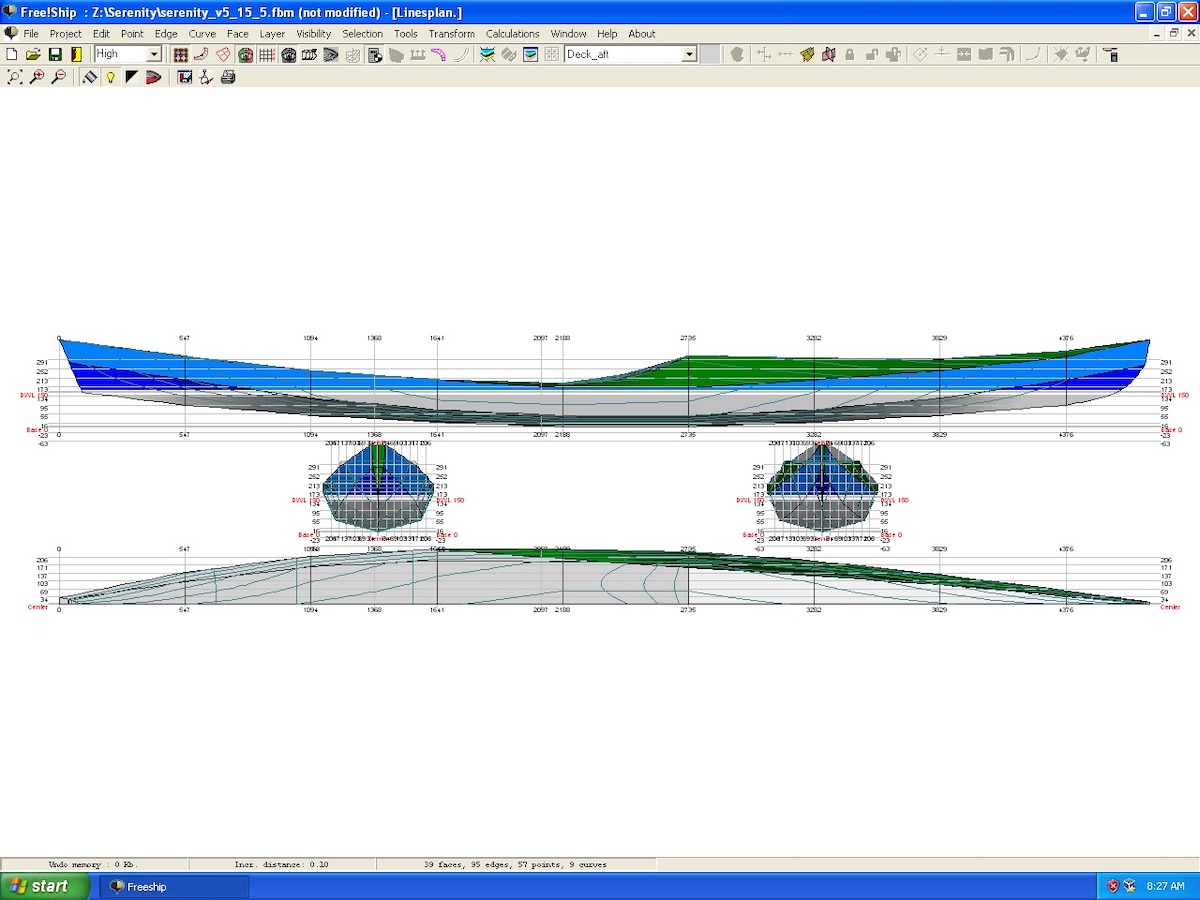
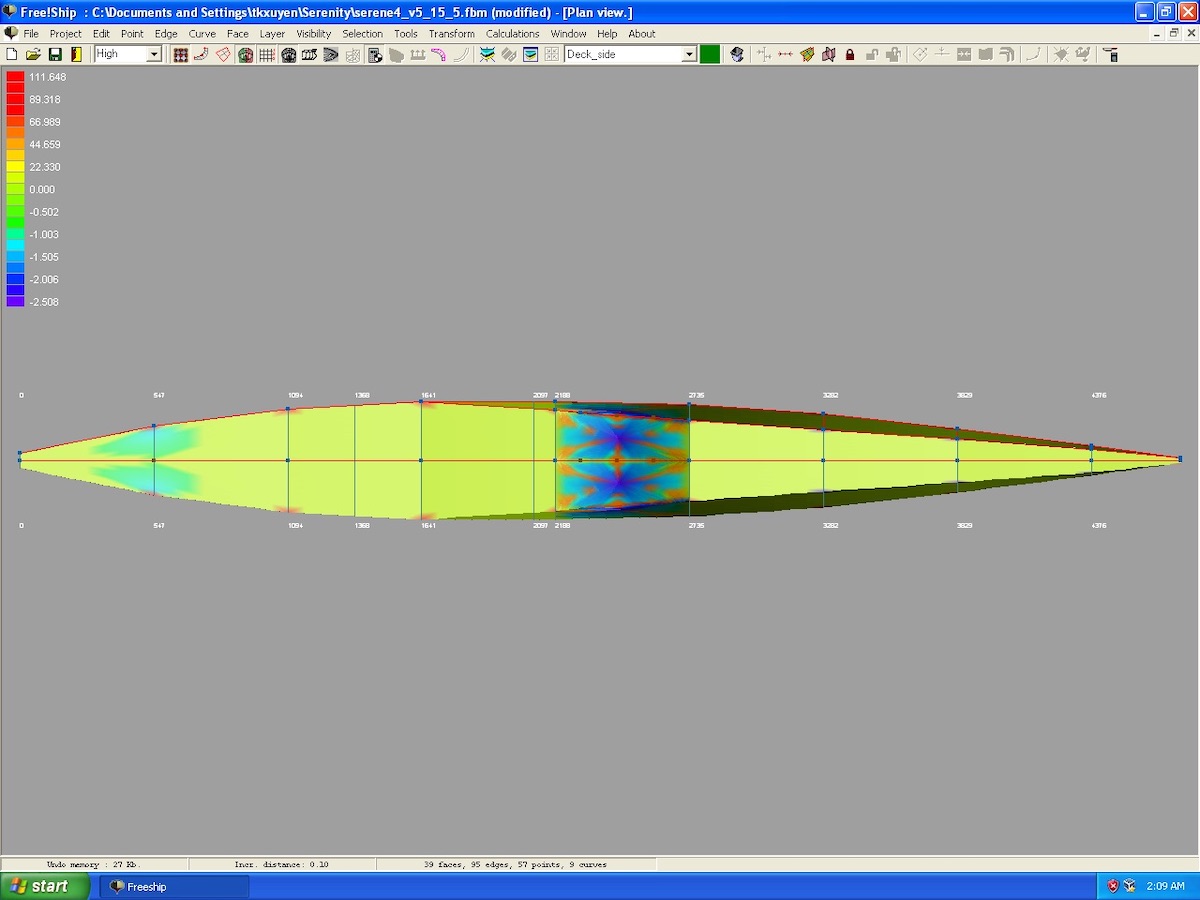
Đầu tiên hết là về phần mềm Free!Ship, đây là một phần mềm open-source gốc từ Nga, rất dể học và sử dụng, viết bằng ngôn ngữ Delphi. Vâng, cái anh Nga là chúa trùm chơi trò “cộng sản chủ nghĩa”, nếu không có những kiến thức về “thiết kế thuyền” đóng gói trong cái phần mềm này thì còn lâu chúng ta mới tiếp cận được cách làm, dù chỉ là ở mức độ sơ đẳng…
Kế đến là mấy độ đo (measure) vật lý: Cp (prismatic coefficient), Cb (block coefficient), Cm, Cw, Kmt, S, LCB, LCF, etc… Cần có thời gian để hiểu các độ đo này, và biết được tại sao Cb < 0.3 thì thuyền sẽ khó giữ hướng đi thẳng, cần phải lắp thêm rudder hay skeg, tại sao Cp < 0.5 thì thuyền hiệu quả ở tốc độ thấp, nhưng sẽ hao tốn nhiều năng lượng ở tốc độ cao, etc...
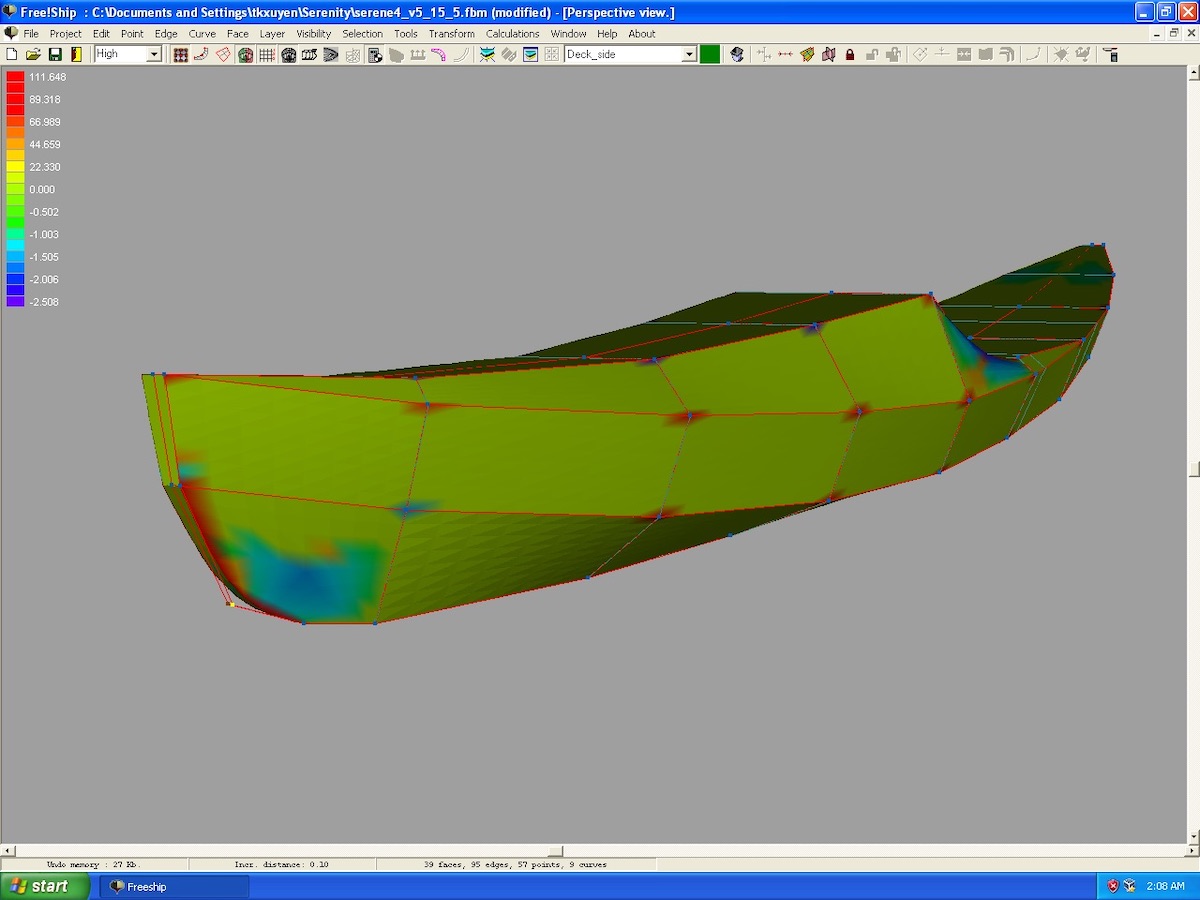
Tiếp đến là độ ổn định tĩnh & động (static & dynamic stabilities), tại sao 1 số chiếc xuồng đi vững trên nước êm, ra đến vùng sóng gió lại lắc mạnh, và tại sao 1 số chiếc mới ngồi lên có cảm giác “bất ổn” nhưng ở trong sóng to gió lớn lại thấy “êm”. Xuồng làm cho khách du lịch đều là dạng đầu, còn dân “chuyên nghiệp” lại thích dạng sau, tất cả đơn thuần chỉ là vật lý!
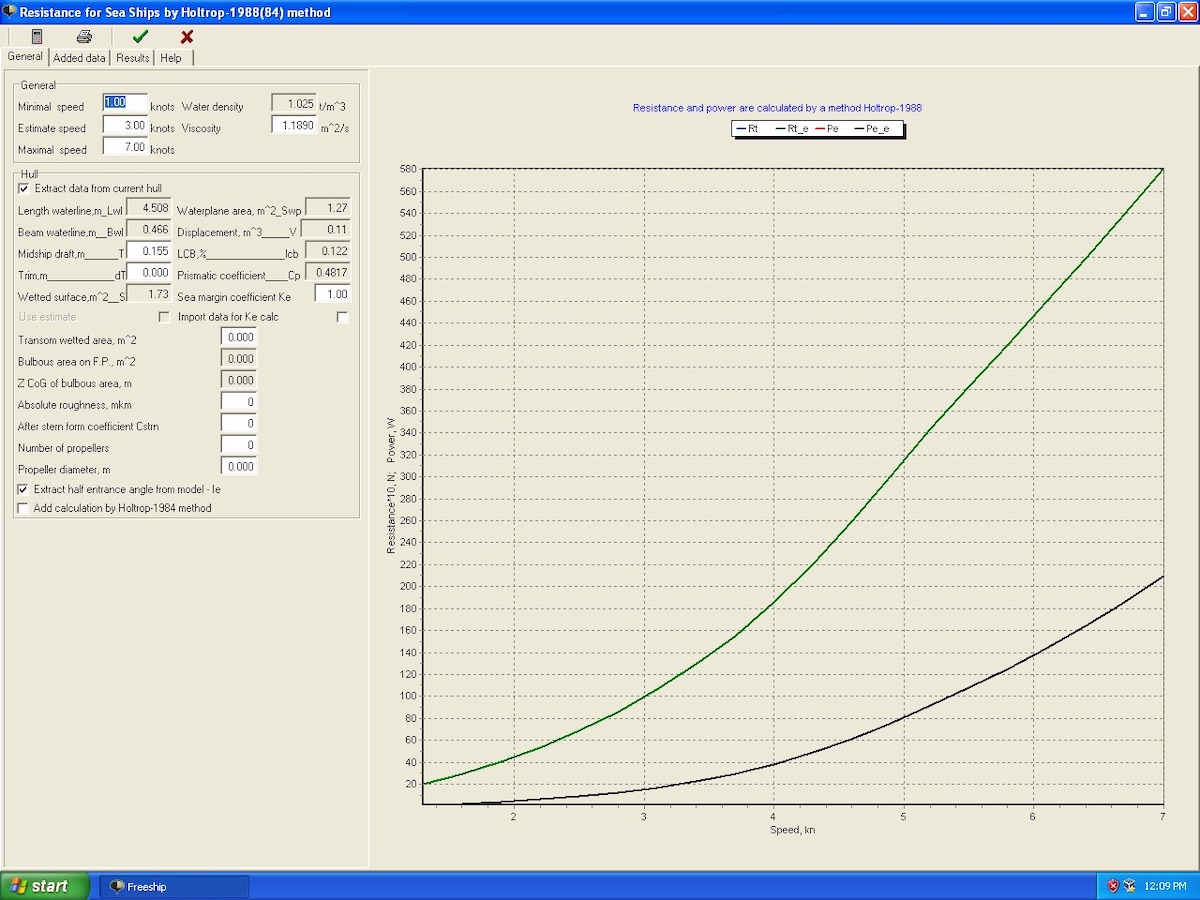
Cuối cùng là sức cản nước (resistance), phần mềm có thể tính ra lực cản là bao nhiêu. Ví dụ như ở 3 knot là 8 Newton, ở 4 knot là 15 Newton, và tính ra được công hao tốn, ví dụ như 1 người chèo bình thường thì công sinh ra ở trong khoảng 50 ~ 100 Watt. Với khả năng tập luyện thể chất như vậy, như vậy thì bạn có thể chèo tốt ở tốc độ nào, trong bao lâu, etc…