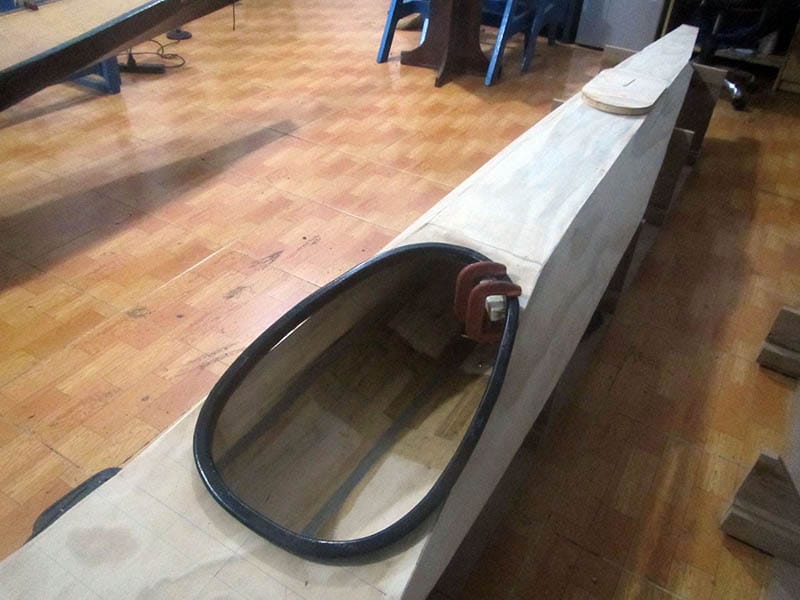
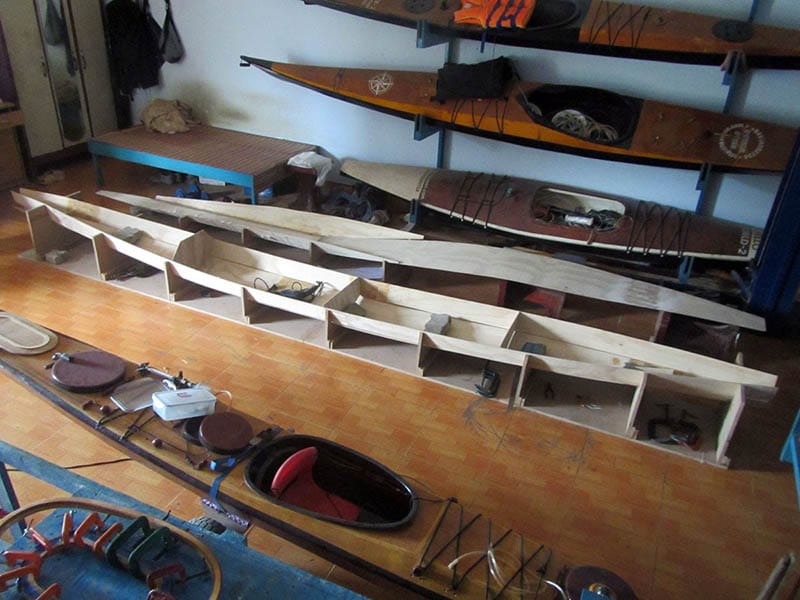
 ull and deck parts are basically stitched and glued, those two halves of a peanut shell. But that’s only a basic milestone, lots of jobs required still to make this shell functional. I continue to build the hatches and cockpit coaming, and various other accessories. 3rd image: the cockpit coaming glued in, stained with epoxy filled with black color pigment, later on, some layers of transparent PU paint would make the finish. While the cockpit is easy, it’s a bit more complicated for the hatches.
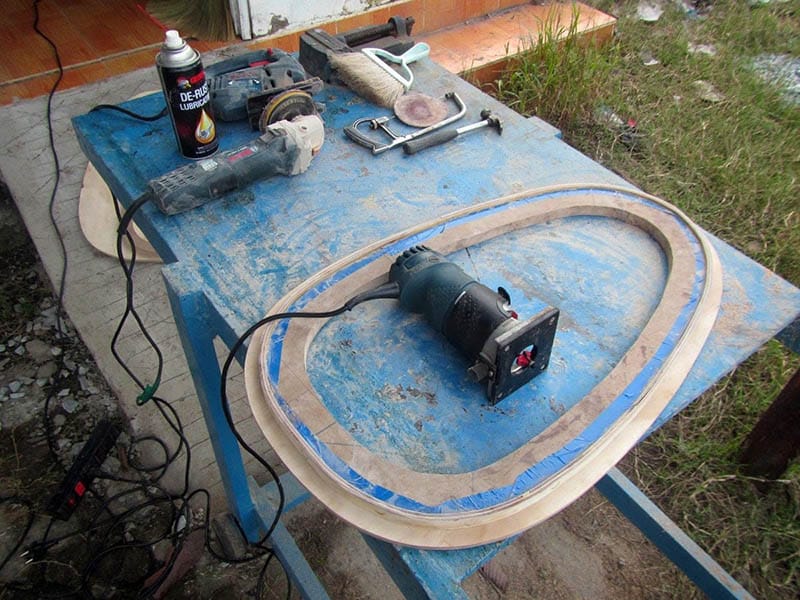
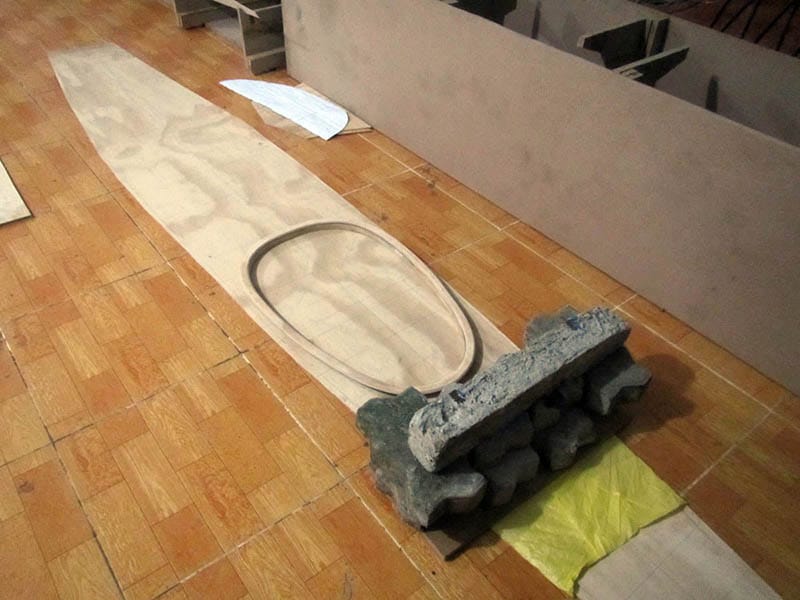
Both two hatches is of the same shape and size, for the sake of easy constructing (the hatches and their silicone gaskets). The forward hatch is built recessively into the deck, not only to keep a flushed, flat deck, but also simply because the hatch size is a few centimeters larger than the deck’s top, it needs to sink down to fit. It’s a bit tricky to build the recess, so I decide to get along with a rectangular approach (it’s much easier to build, though a circular one would certainly looks much better).
The aft hatch raises about 1 inch from the deck, not too high to interfere with reentry climb – in actions. I would try a new idea for hatch locking, something that’s easy to operate and tight enough (offer some pressure down) to secure the hatches in places and help with waterproofness. Hatches and hatch locks have been causing my headache for long, but it seems, the best solution is indeed simple, I wonder why my common – sense has not come up with it in the first place.
 ừ Vladimir đến Vladimir, 100 năm (1917 – 2017) Vladimir đầu là Vladimir Ilyich, Vladimir sau là Vladimir Vladimirovich! 😅 Cách đặt tên của người Nga có chỗ khác biệt với phương Tây, ngoài họ (như Ulyanov) và tên (như Vladimir), tên đầy đủ của người Nga còn chèn thêm tên của bố – patronymic ở giữa, như trường hợp của Lenin là: Vladimir Ilyich Ulyanov.
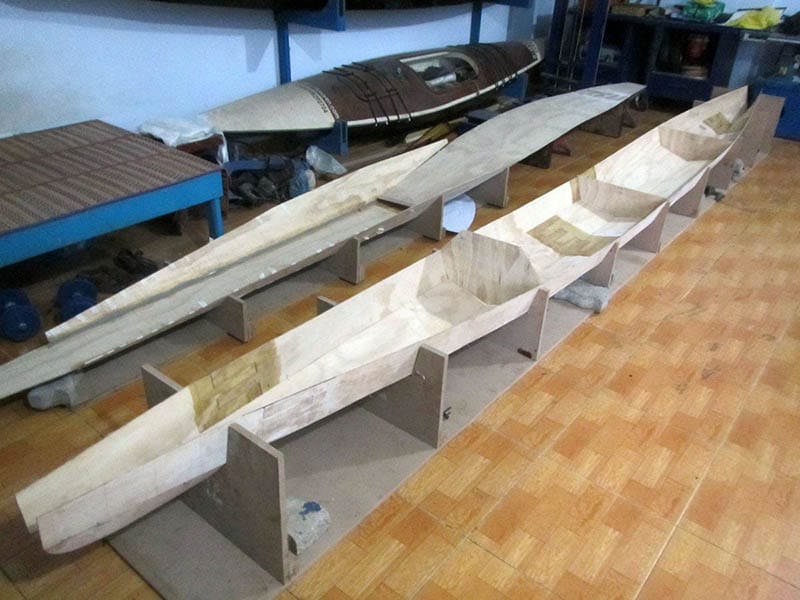


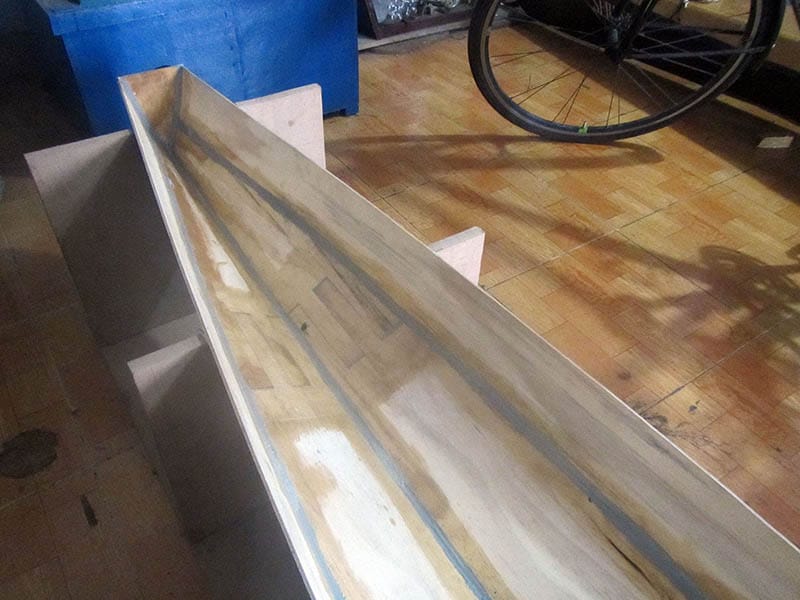
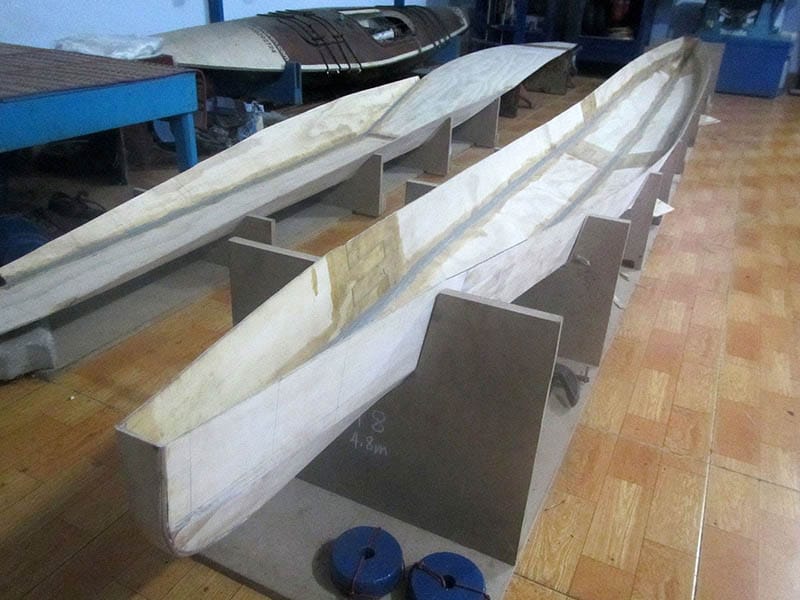
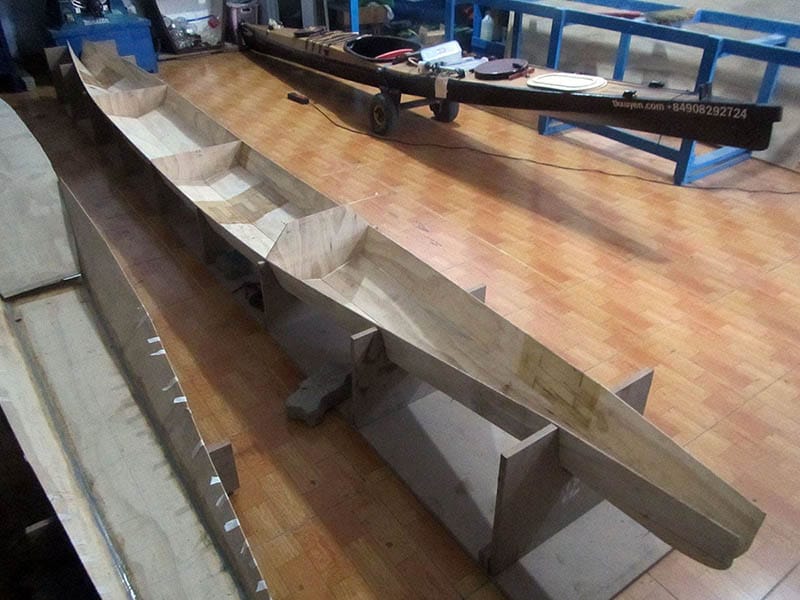
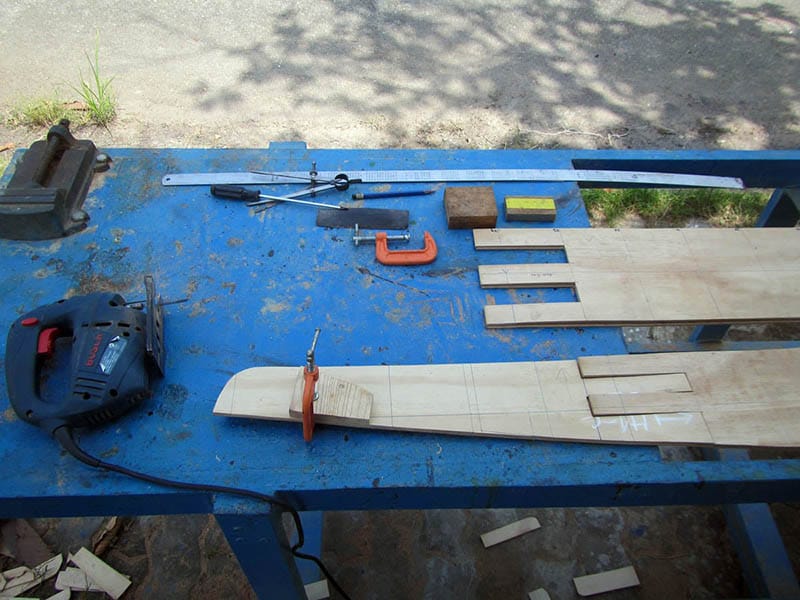
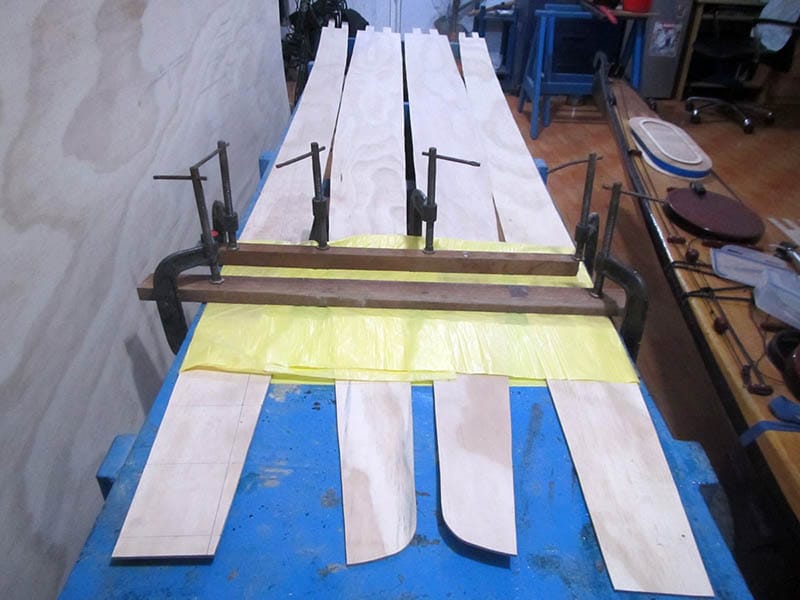
 took great care in aligning a bilge’s parts, to make sure the final piece would come exactly to it designed shape, and to make sure the port and starboard bilges are identical, or else, the boat would have a twisted hull. All joints is slightly sanded, and applied a layer of glass on the internal side. Next come the job of putting everything together using a combination of fastening wires, super glue and duct tape. Having experiences from previous boat, I used very little steel wires this time.
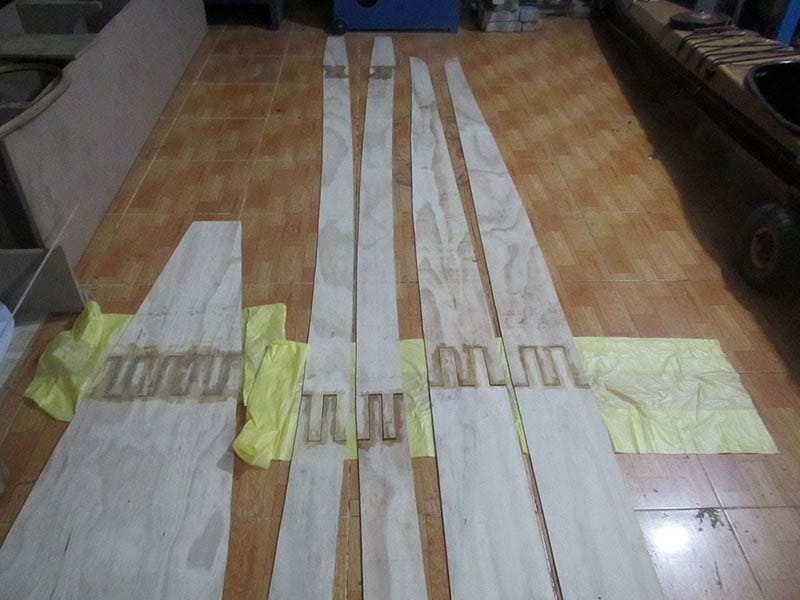
 ài trăm năm trước, Marx đã vẽ ra một cơn “ác mộng” về cuộc sống dưới chế độ TBCN, nơi mọi thứ sản xuất ra là để mua bán, đổi chác. Năng lực sáng tạo của con người bị biến thành một thứ hàng hoá. Sản phẩm và người làm ra sản phẩm rút cuộc cũng đều là một thứ hàng hoá, và cuộc sống hàng ngày bị biến thành một vòng xoáy bất tận.
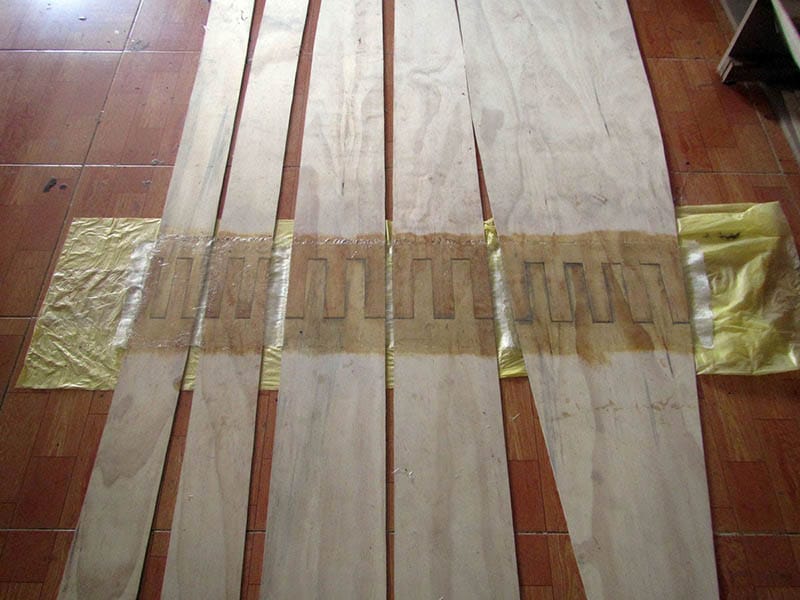
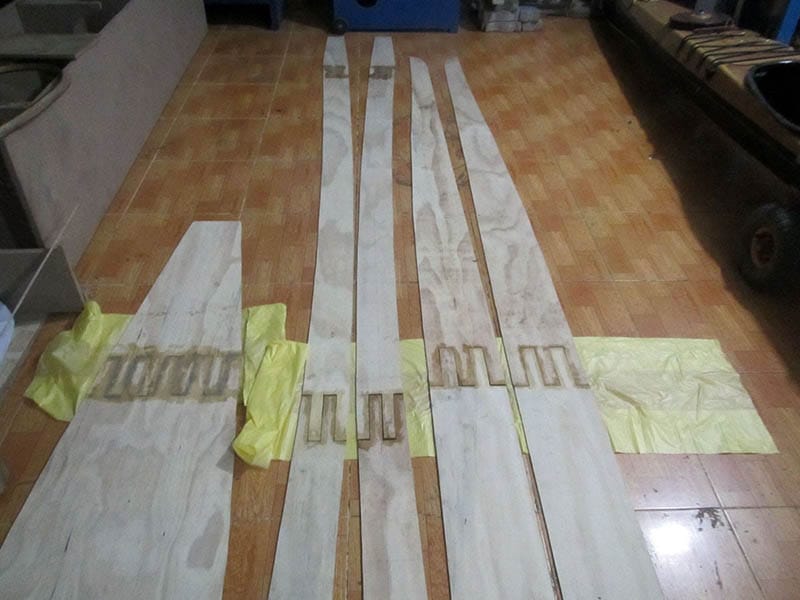
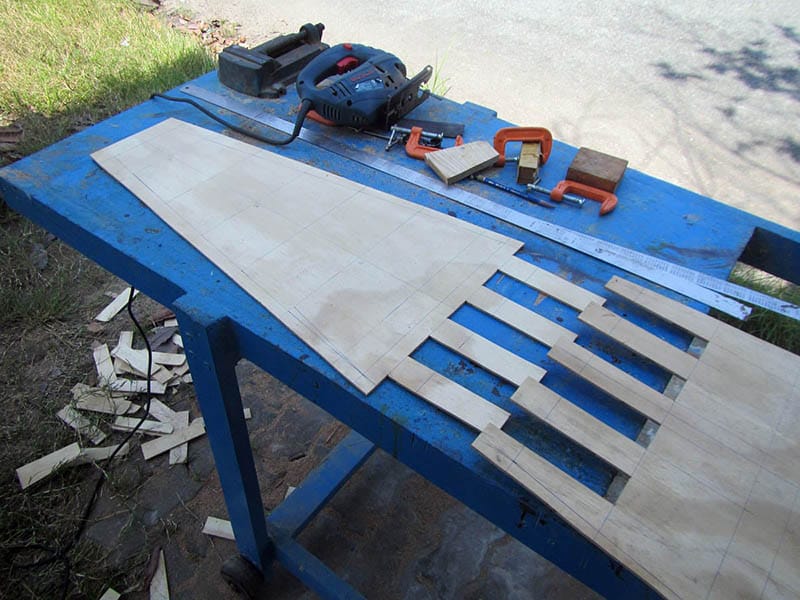
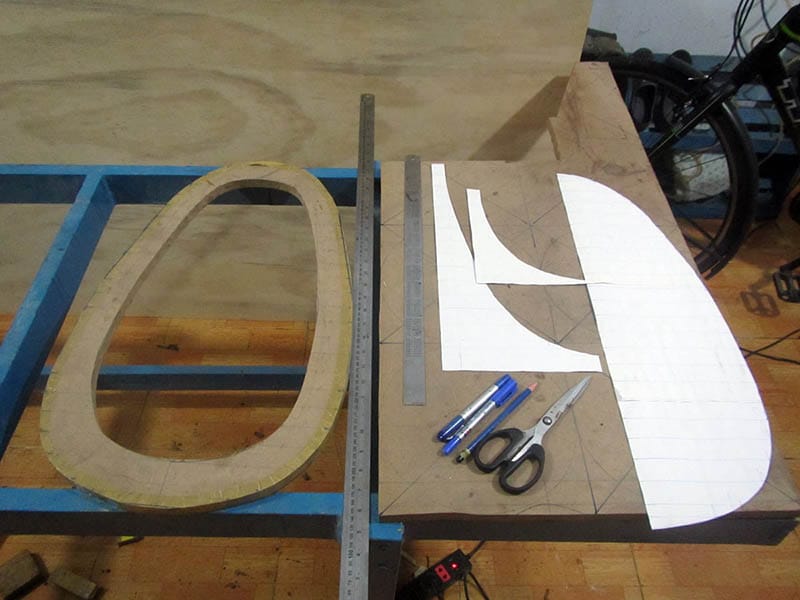
 ext is jointing the plywood pieces: 8 joints for the hull, and just 1 for the deck, to form the bilges that would build up into the boat shape. For the 2 pairs of hull’s bilges, I flip one pair by 180 degree when drawing on the boards, so that to distribute the joints at different places across the boat length, and not to concentrate too much joints into one proximity. That old boatbuilding carpenter’s trick is not completely necessary with modern building techniques, but it’s nice to do so anyway.
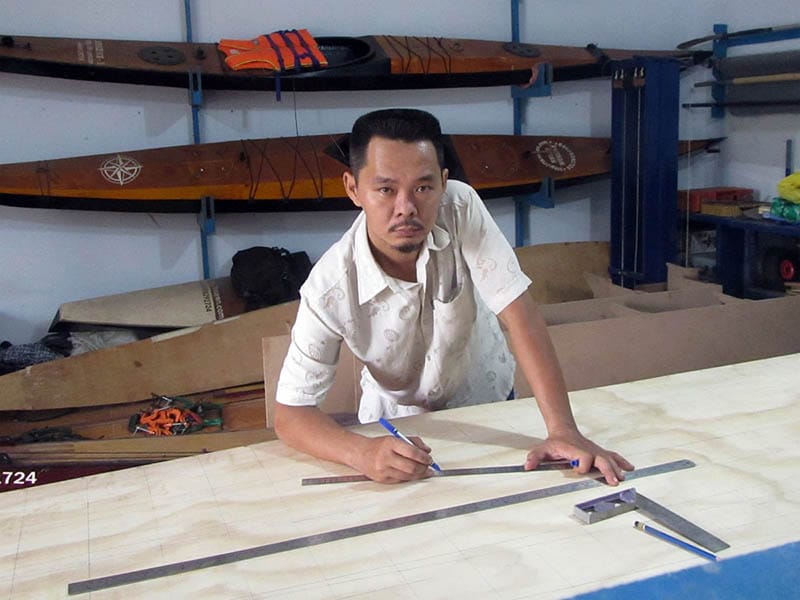

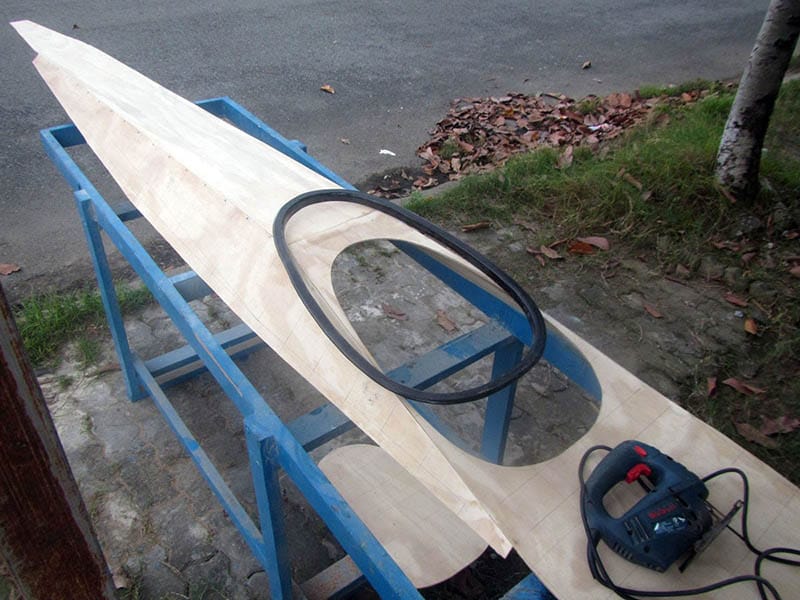
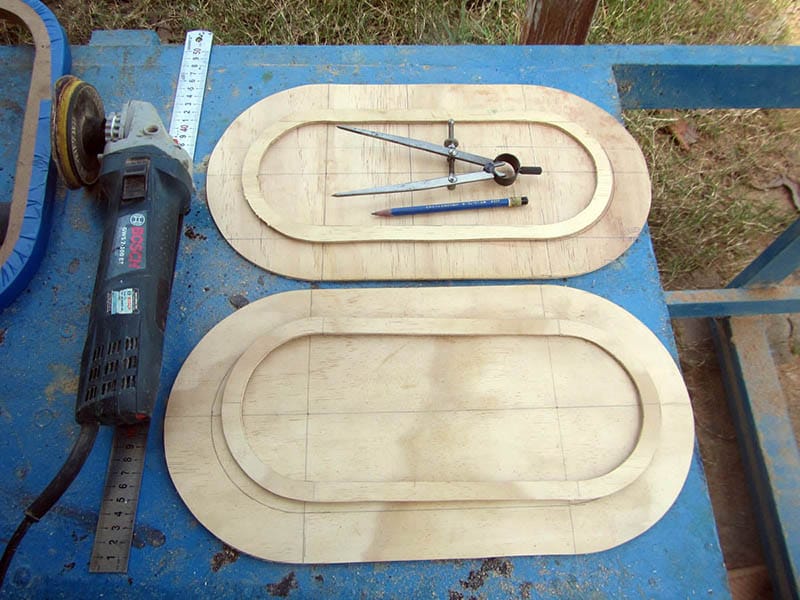
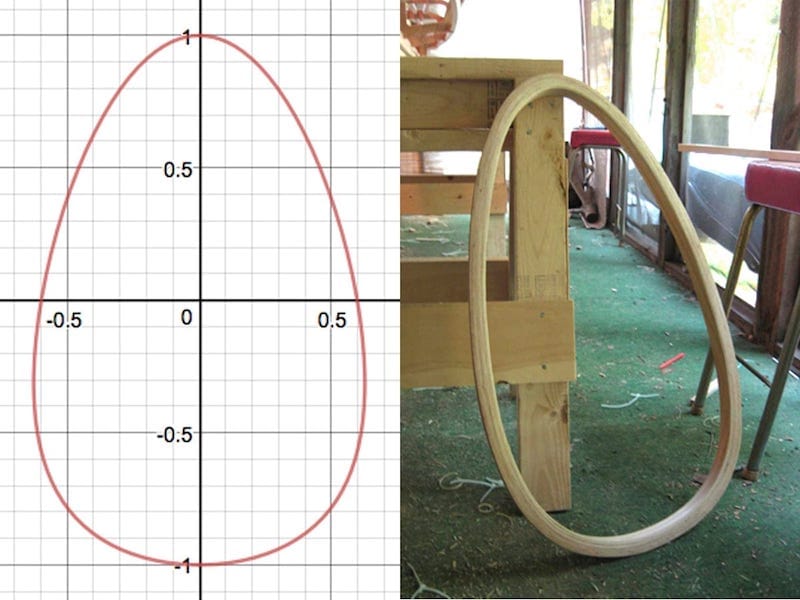
 ver the years of designing and building wooden kayak, often a recurring question comes to my mind: how can we precisely construct a kayak cockpit shape in a mathematical way. Today, I spent 30 minutes to figure out the problem, it turned out to be quite easy indeed. But first of all, there are so many different shapes for cockpits, and everyone may have his / her own preference on how it should look like. Here I try to plot a shape that is most suited to my eyes, and closed to what’s usually called “an ocean cockpit” found on Greenland kayaks.
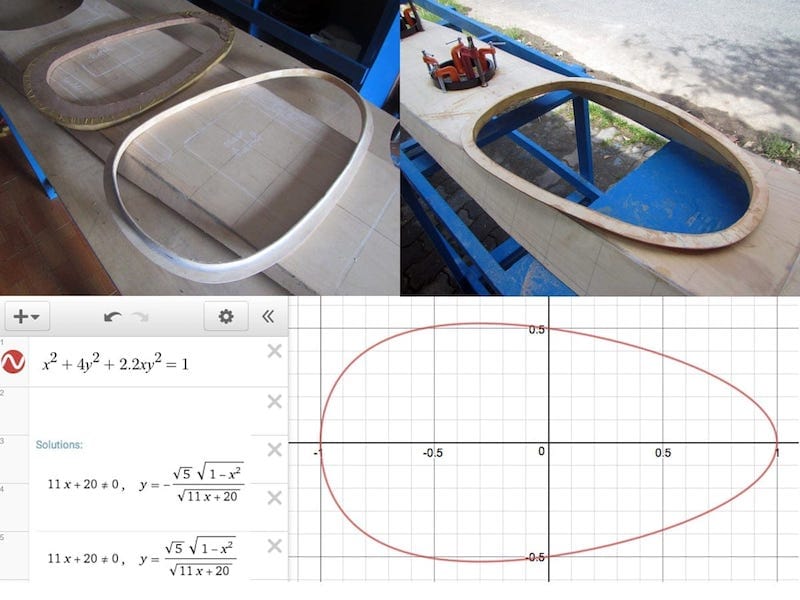
 i cũng biết bài hát xưa như trái đất này, nhưng mấy người biết nó nói về cái gì!? “The final count down” – lệnh đếm ngược: 9, 8, 7… 3, 2, 1… Preliminary stage, Intermediate, Main, Lift – off… đọc lời bài hát sẽ rõ, ngồi trên hàng trăm tấn thuốc nổ, trong một tích tắc là đi vào lịch sử (hoặc trở về với cát bụi) 😅