12 angry men


ne of the films I’ve really enjoyed recently, having some free times during the new year holiday to “re – master” some classics. Yes, it is truly a classical master – piece! Off 95 minutes of the picture, almost 90 min is spent in just a single room, with 12 men discussing, arguing, debating… There’s not even a single frame for flashbacks, visualizations or imagined scenes or such things, a 2 – hour continuous hard talk between 12 jurors of a trial’s jury, to decide in a murder case whether a boy is guilty or not.

Although some scenarios in the film are quite predictable, and some details are somewhat illogical (those that could hardly occur in real world), the fascinating part of the film is about the diversity of the jury board: 12 men from different backgrounds, ages, professions… different personalities, their logic systems, their value scales… and their prejudices. Some just doesn’t care, some is more or less “a yes man”, flipping sides at any times, some just want to kill the boy cause he grew up in slum, and slum is where crime was born…

Only one man has the braveness that leads him (and later the whole board) to the truth! The film gets to the core of the American juridical system, and helps explaining why the country has a strong democracy: democratic is built upon the votes (decision making) of a mass, it’s the quality, the responsibility of the mass that decide outcomes. The film also helps explaining why in some countries, dictatorship is the only thing that’s possible. That is, eventually, people get the ruling system, the kind of government they’ve wanted!

bánh chưng

ọi năm, đa số những đồ ăn Tết đều do trong nhà tự làm: bánh, mứt các loại, nem chả, rượu… ngày trước có những năm trong nhà tự làm đến cả chục loại bánh mứt khác nhau, hai ba loại rượu! Thật không có dịp nào để thể hiện khả năng DIY (Do It Yourself) như là dịp Tết!

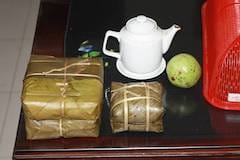
Nhưng càng năm càng bớt dần, với tất cả mọi người, thời gian càng lúc càng ít lại. Thế nên Tết nhứt cũng bớt về số lượng, bớt luôn cả sự cầu kỳ, những năm gần đây thì chỉ còn làm tượng trưng vài loại. Nhưng cũng mất hẳn một ngày gói và nấu bánh chưng, bánh làm theo kiểu Huế, bé tí ti vừa đủ cho một người trong một lần ăn, kích cỡ mỗi cạnh vào khoảng 10 cm.

Ở Huế có những nhà thậm chí còn làm nhỏ hơn, chỉ khoảng 8cm. Có thể so sánh với cặp bánh chưng làm theo kích thước điển hình kiểu miền Bắc do nhà bên cạnh làm tặng (16 ~ 17 cm). Đem cặp bánh nhà làm tặng đáp lễ thì hẳn người ta sẽ ngạc nhiên phải biết! Bánh chưng làm kiểu miền Nam thậm chí còn có thể to hơn đến 20 ~ 22 cm.

vectorial

The classical SVG example rendered using a thin OpenVG layer on top of OpenGL (or Quartz) on a Mac. This is also to say goodbye to the old Lunar year (year of the tiger) that is ending!

inished with my survey on vectorial graphics, in details, about rendering SVG using Quartz, OpenGL (ES) on Mac, iOS and some Android flatforms. I’d had the chances to systematize more my knowledge on vectorial: path, stroke, anti – aliasing, solid, gradient and pattern fill, etc… Todays, people’s all talking about 3D, OpenGL, DirectX, etc… While few mentions much about 2D stuffs, I’ve traced back some historical evolution paths, since I believe that it’s through history would we understand technologies.

In the beginning, there was… PostScript

It was John Warnock who kindled the idea, he joined Xerox in 1978 and an early version of PostScript (named InterPress) became the language to drive a laser printer. Laser printer was then a revolutionary device, which offers extraordinary graphics compared to the capability of dot or matrix printers. Warnock left and founded Adobe in 1982, the company that produced well – known graphics softwares including Illustrator, king of the vectorial editors.

Then there was DPS, PDF and Quartz

But it was Steve Job who realized the superiority of PostScript and urged John Warnock to popularize it. When Steve Jobs left Apple and started NeXT, he co – developed with Adobe DPS – Display PostScript, a derivative of PostScript – the language that drives the NeXT computer’s graphics system. When Steve has got back to Apple, DPS then evolved into what is now known as PDF, and Quartz is the C binding that bridges traditional Unix programmers to the Mac graphics world.

The X window system

The X’s designers also started with a PostScript RedBook in hand. But due to various reasons including the lack of in – depth consensus about vectorial, X maintains until now low level of PostScript support. The X server can only handle basic PostScript commands (it can’t even draw splines). X took a hybrid approach using both vectorial and raster – based solutions to the problem. Also the Unix root has an impact: X is the only true client/server windowing system to the current day.

Until now, the NeXT computer remains an idealistic symbol, pure vectorial remains a pursuit, perhaps for higher – standard devices, such as with this Backbone:

Backbone is an attempt (our attempt) at creating a Really Good Desktop. The metric we use for “Really Good” is our own. In short, to us, to carry on the NeXTSTEP® and OPENSTEP® spirit!

The Windows’ GDI

Born to be the youngest of all graphics systems, GDI learns nothing from it predecessors. Neither it is device and resolution independent (like Macs) nor a true client/server system (like X). GDI sticks to screen and the pixel unit with quite a lot implementation flaws. These flaws won’t become obvious until we come to serious editing, publishing and printing: text documents and graphics designs would never has the on – screen – display and printing qualities we would expect, though various 3rd party softwares would come to rescue somewhat the situations.

Then, things change with time

The 2D graphics systems on Mac, Windows, Unix… all has different origins, and all targets different real – world problem domains. All has hardware acceleration to various levels and qualities, and it’s hard to compare them in some cases. To the present day, no system is known to keep the original idealistic model that uses pure PostScript: X has been mixed from the beginning, Mac & iOS have switched to raster to some extent, GDI is essentially pixel – based. Then come the wind of change! It would be another story, another evolution path, but today, 3D hardwares has become quite popular with reasonable prices. It’s counter – intuitive to treat 2D as a separate part from 3D, and the trend is merging 2D to become a subset of 3D rendering. However, the process hasn’t been very easy, it would take some more time to reach maturity:

  • WPF (Windows Presentation Foundation): first came with Windows Vista, GDI now runs as part of DirectX 3D rendering environment. Vista was not a success indeed!

  • QuartzGL: Quartz2D runs on top of OpenGL since OS X 10.2 (Jaguar). However, QuartzGL is not enabled by default even in the current version (10.6 – Snow Leopard) since it’s still quite buggy.

  • GLX & AIGLX: both has some implementation problems and is competing to each other to become the official 3D extension for X.

Taken an arbitrary GDI’s API (such as MoveTo, LineTo…) we can see the parameters’ type is integer, which is in reality the pixel unit. The Quartz’s counterparts are always in float, a virtual unit so that the APIs can be device and resolution independent.

The so called “GDI printer” is actually a bitmap device, it lacks a PostScript interpreter and hence need to be attached to a computer to do the actual computing. Reason is obvious: cheapness, adding a PostScript interpreter would significantly raise the cost!

jingle hell

First, it’s Jabber, then the open standard XMPP, then libjingle (the thing behind GTalk and several other VoIP applications). An essential part of VoIP, VPN, P2P technologies is ICE (Interactive Connectivity Establishment), techniques that help computers behind routers connect to each other…

ow it’s Christmas time, but this has nothing to do with Xmas except the name: LIBJINGLE. For a long time, I’ve been trying to expose one of my home servers to the Internet. Normally, you’d just need to setup dynamic DNS to update the router IP address and NAT (Network Address Translation) to forward one port onto the server. Unfortunately, my ADSL router is a special (hardware / firmware) version OEM-ed by Comtrend to FPT (the local ISP), and no matter how I configure, NAT is simply forbidden. I’ve tried various techniques to punch holes (TCP, UDP) through NAT, such as this pwnat, a trick to fool the router using ICMP echo packet. However, due to different router implementation & configuration, no technique is known to work in 100% of the cases, as pointed out in this paper.

The NAT traversal problem repeats itself in various applications: VoIP, P2P network, VPN (Virtual Private Network), networking for games… Current technologies take a dual approach in solving this: a certain kind of ICE (Interactive Connectivity Establishment) when two peers can directly connect to each other, or a central server in between in case the routers forbid it all. Such as with libjingle, Google Talk servers are used in case a direct connection can not be made. Remember the Skype’s global disconnect problem lately? It’s the same sort of problem with ‘central servers’. With these knowledge in hands, it’s turned out that setting up a VPN to access my home servers from anywhere is quite easy as follow.

Build libjingle and fwd (a simple wrapper around libjingle). Building libjingle on Debian is a nightmare (yes, it’s a real nightmare, libjingle 0.4 has a nasty code base). It took me a whole day, and after changing several dozens of places in libjingle’s code, I got it compiled and run correctly (please refer to this post for some initial building instructions). Once the transportation channel has been established with libjingle, a SSH tunnel is setup to forward a port on your roaming laptop to the SSHD port (22) on the home server:

# on a server inside your home network, this will forward
# port 2222 to port 22 of another machine (‘buffalo’)
./fwd -u account@gmail.com -p password 2222:buffalo:22

# on your laptop from anywhere on the Internet, almost
# the same command, but the -L option for client mode
./fwd -u account@gmail.com -p password -L 2222:buffalo:22

# then connecting to the ‘buffalo’ box is just setting up
# a SSH session, thus a SSH tunnel inside another SSH tunnel
ssh root@localhost -p 2222

The technique works flawlessly, I can now access my home VPN from anywhere. Basically you’re inside a VPN now, so various setups at home would transparently work (strictly speaking, this is still not real VPN as TCP, UDP broadcasting may not work, but most regular connections would). Next, I proceed to exposing some of my home services onto the outside world. Again SSH proves to be such a very very powerful tool as you can build SSH tunnel inside another tunnel, which can be nested for several layers (ssh is actually means ssshhh! – sign used to signal lowering one’s voice I think):

File sharing

SFTP (Secured File Transfer Protocol) is built on top of SSH, and SFTP is native to any Linux (for Windows, we could use WinSCP, and for Mac is Cyberduck). Just connect to one end of the tunnel like with SSH (localhost:2222) and on the other end of the (nested) tunnels, we get access to the whole file system.

Subversion

SSH is built-in into SVN (I often use SVN by command line rather than WebDAV). Something like: svn co svn+ssh2222://user@localhost/svn/project would do the job, where ssh2222 is defined in your subversion’s configuration file (under the [tunnels] section) as: ssh -p 2222, this instructs the secured shell to connect to the host, then call the ad-hoc svnserve instead of a real web server.

Web Proxy

This is very useful since if helps surfing the Internet securely while you’re in public. After setting up Squid web proxy on the same server, the command: ssh -N -L 8080:localhost:8888 root@localhost -p 2222 tells SSH to forward the local port 8080 to the proxy port 8888, then pointing Firefox at localhost:8080 would secure our traffic more than enough (2 levels of nested tunnels and 2 levels of port-forwarding).

Music streaming

I use this to casually enjoy my music collections while not at home. Install FireFly (formerly mt-daapd) music streaming server and forward the default port 3689, then I can listen my favorites songs anywhere using Rhythmbox (Linux). And since the protocol (daap) is originated from Apple, listening is also natively available on any Mac machines using iTunes.

home servers


The C-Media usb board adds a cheap (~ $5) sound solution to the Debian box, sound quality is fair enough for “ad-hoc” listening (comparable to that of AC97 on-board chip, and for serious music, there’s already the home media player).

uite a long time it takes me to finish and “stabilize” all these “home servers”… and finally here it is… On the left, you can see: #1: the 650 Watt UPS that provides about 3 hours of un – interrupted electricity for the whole system, #2: the WAP54G Access Point (hacked with OpenWRT), #3: the Comtrend ADSL router, #4: the LinkStation CHL (Debian Lenny: print server, 1T disk space for samba share, bittorrent server), #5: the LinkStation Duo (Debian Lenny: 1T of RAID-1 disk space for important data, SVN, Web, VPN servers (for remote access) and MPD music servers), #6: speakers.

All these miniature machines help streaming lossless music and HD video to the media player (LT-H90LAN – another Linux box resides in the living room). Except for the router (which is specialized hardware & firmware OEM-ed by Comtrend to FPT – the local ISP), all others devices runs Debian or another Linux variant. The total power consumption of the whole system is less than 50 Watt. Future computers would consume less than 1/10th of power compared to today’s ones… Power is the key, less power means less heat, less noise, more stable and more durable… the factors that make successful home services!

polynomial texture mapping

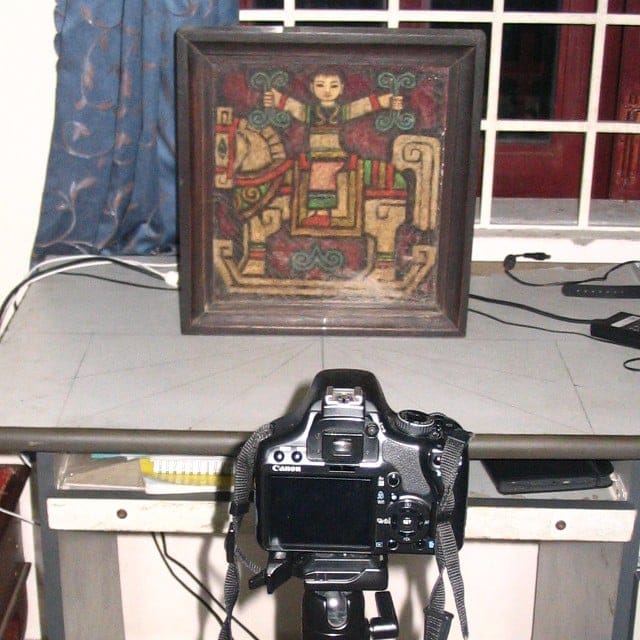
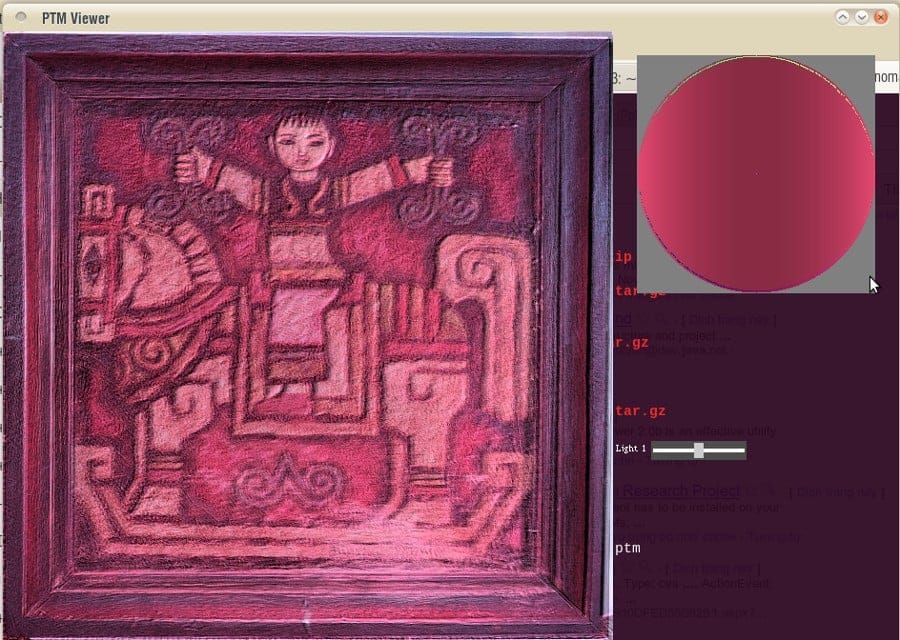
The “specimen”, an oil painting of Bửu Chỉ, the prestigious Vietnamese painter.

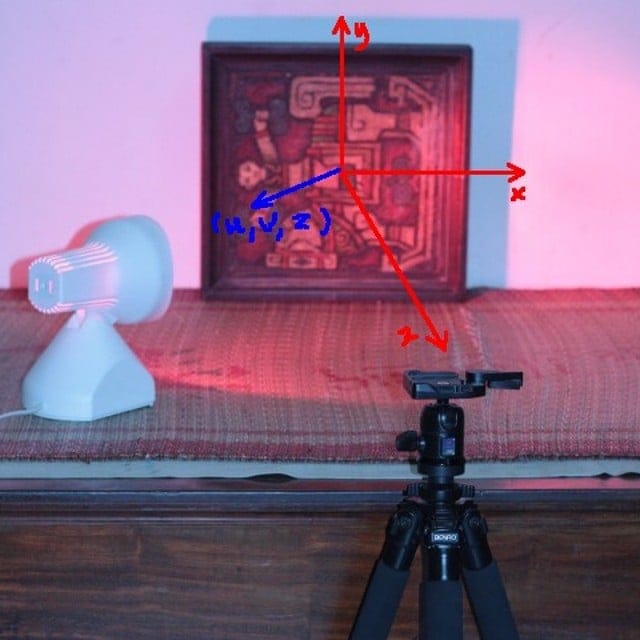
The lighting vector (u, v, z) in the (x, y, z) coordination system as showed in the image above (the “right hand rule”): origin at center of the picture, x points to the right, y points upward and z points toward the camera.

Result: the (medical) infrared light source turned out to be a very bad choice

f you’re into computer graphics, you probably could have learned about normal mapping, bump mapping… Last week, a colleague told me about Polynomial Texture Mapping, then the experiment below was what I was doing as an exercise to learn about this PTM. In essence, PTM could produce extraordinary effects due to the fact that it makes use of many lighting data collected in real – world condition (check out some examples on the HP’s PTM page).

To make a PTM (using tools from HP Lab), you would need to photograph the “specimen” under many light directions, then combine all together in one “texture” (using PTMfitter) in which pixel values are computed from the collected data (polynomial function).

Input to the PTMfitter is a file listing images and their lighting vector (u, v, z). Note that (u, v, z) must be a normalized vector although PTMfitter only uses (u, v) at the moment. (Getting PTMfitter to run under Linux is quite tricky since it’s linked against an very out – dated version of libstdc++).

12
~/ptm/ptm_11a.jpg -0.894427191 0 0.447213595
~/ptm/ptm_12a.jpg -0.707106781 0 0.707106781
~/ptm/ptm_13a.jpg -0.447213595 0 0.894427191
~/ptm/ptm_14a.jpg 0.447213595 0 0.894427191
………………………………….

Output is the .ptm file that can be viewed with PTMviewer. The effect is really impressive, much more realistic than the normal, bump mapping usually seen. Let verify the difference, here is the .ptm and the .pl files, you would need to download PTMviewer from HP Lab (there’re versions for Wins, Linux and Mac).

We can also use PTM to create the DOF (Depth of Field) effect. The vector (u, v, z) in this case is not lighting direction anymore but the focus point the camera is shooting at. This technique is quite useful since DOF is very expensive to compute in graphics application, and this gonna be my next experiment!

buffalo duo


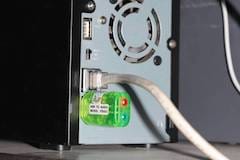
My Buffalo, a 400 MHz, power-efficient ARM system (it consumes about 17W on average). The duo: two SATA disks (1TB each) running in RAID-1 configuration. The system can also act as a print server: most cheap home laser printer are not stand-alone device (lacking PostScript capability) and need to be attached to a PC in order to print, instead we can connect printer to this Buffalo box via usb and serve printing over network.

y newest toy: a Buffalo LinkStation Duo Network Attached Storage (NAS – or a poor man’s home server). Had thought about this long ago but don’t have time till now to dig a little bit low-level to get the thing to work! Basically what I want to have is a miniature general-purpose home server, which would run continuously 24/7. But you know with the temperature and electricity conditions here in HCMC, most PC would surely break down if let running continuously for a few months. The idea is to hack this NAS device to run Debian and turn it into a hybrid system: NAS (file server, torrent, UPnP…) and a home server which would handle a little more extra tasks. I took me a whole night to figure out how to do it.

1.   Boot the device via tftp, using u-boot, the universal bootloader. We need to to erase the HDD’s partition table (with something like: dd if=/dev/zero of=/dev/sd[a/b] count=1) to force the device into tftp boot.

2.   Telnet to the device and prepare the disks: using fdisk to apply a same partition structure to both two disks (/dev/sda and /dev/sdb) with the usual Linux FS: /boot, /swap, /(root), and /data). The disk structure would appear like this:

Device Boot Start End Blocks Id System
/dev/sda1 1 6 48163 fd Linux raid
/dev/sda2 7 1200 9590805 fd Linux raid
/dev/sda4 1201 60801 478745032 85 Linux extended
/dev/sda5 1201 1329 1036161 82 Linux swap
/dev/sda6 1330 60801 477708808 fd Linux raid

3.   Setup the RAID-1 (one-to-one mirror) structure, you can see that we mirror /boot (sda1, sdb1), /(root) (sda2, sdb2), and /data (sda6, sdb6), there’s no need to mirror /swap:

mdadm –create /dev/md0 –level=1 –raid-devices=2 /dev/sda1 /dev/sdb1
mdadm –create /dev/md1 –level=1 –raid-devices=2 /dev/sda2 /dev/sdb2
mdadm –create /dev/md2 –level=1 –raid-devices=2 /dev/sda6 /dev/sdb6

4.   Install Debian (Lenny) using debootstrap, a very handy tool to install Debian directly from a repository. DeBootStrap pulls the packages over network, build a new rootfs, after chroot-ing to the newly build system, pull and build the kernel from source. After that, we can use regular Debian commands to update, configure network, add softwares, etc… After rebooting, we’d got a brand new Debian with 1TB of RAID-1 disk space, which runs flawlessly and which is ready to serve my various automation tasks!

Notes: installing Debian would void the warranty and could easily brick your device, use the information at your own risk. The steps here are just summary, there’s been various try and fail to get the thing done, e.g: we need priorly to have binutils, wget, zlib and libssl binaries for debootstrap to work (download the deb files from Lenny’s repository, extract and copy over the Buffalo), after debootstrap-ing, I forgot to set the root password, and unable to login when the machine reboot, thus having to start the whole process over again 😢. For further details, please consult the Buffalo NAS community.

UPDATE, Nov 18th, 2010

For a NAS which runs 24/7, it’s critical to monitor system status (temperature and the moving parts). I wrote this little fand script, a daemon to monitor hard disk temperature and adjust the fan’s speed accordingly. HDD’s temperature can be retrieved using smartmontools (most hard disk nowadays has S.M.A.R.T capabilities). And fan control on Buffalo LS Duo is done via the gpio module (thanks to talent hackers on the Buffalo NAS forum), something like this:

# values can be ‘off’, ‘slow’, ‘fast’ and ‘full’
$ echo ‘slow’> /proc/linkstation/gpio/fan

I’ve defined some thresholds, in a tropical country like VN, room temperature around 30° ~ 35° (Celsius) is a common thing, so if the HDD’s temperature is below 35°, we would turn off the fan. If it is between 35° ~ 40°, the fan speed would be ‘slow’, from 40° to 45°, the fan will be turned to ‘fast’, and if temperature excesses 45°, fan speed is set to ‘full’. Well, and even if 50° is reached, we would send a notification email (via sendmail) and shutdown the system. If you find it interesting, here is the fand scripts.

UPDATE, Nov 20th, 2010 (THE REAL DUO)

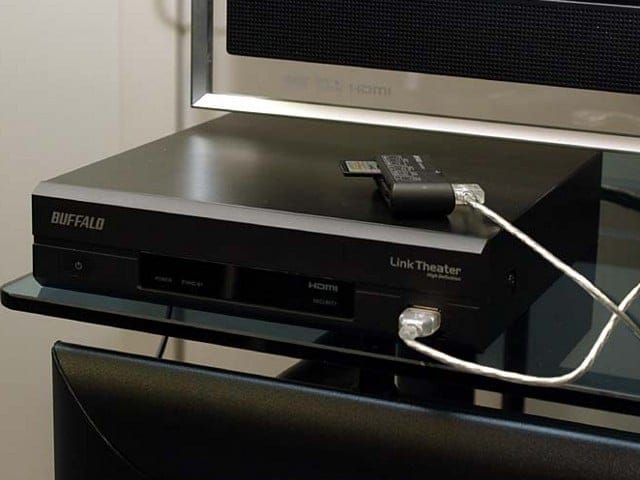
To pair with the Link-Station NAS is its cousin also from Buffalo, the Link-Theater LT-H90LAN. The LT-H90LAN reads media from Samba shares or DLNA server via LAN and is a 720p and 1080i HD-ready device. Although not Full-HD (1080p), that’s enough for my need (I don’t have a Full-HD TV in my house anyhow, maybe I’m waiting for 3D home video). It’s quite pleasing to enjoy good video quality and excellent audio in your living room, all streaming from a central NAS. The box also runs a variant of Linux (though hacking can be a pain, I would only left the device untouched for safe). This is one further step toward an all-Linux-devices home (thought I should buy an OpenMoko phone then).

kindle and feeds

fter years in IT career facing monitors, it’s now time to care a little about your eyes, and I’m now using my Kindle for reading news, documents everyday! However web browsing on Kindle is quite inconvenient, there’s of course no touch screen (imagine how touch would look like with a 3fps responsiveness display), and the 5-ways button make web pages’ navigation a kind of clumsiness! I was thinking about some form of automation, basically we would need to convert some news-feeds into Kindle’s native format (mobi) for the ease of our reading, the steps below:

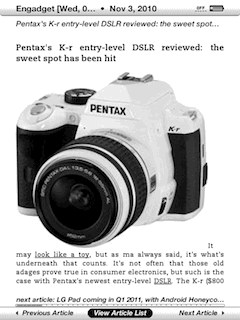
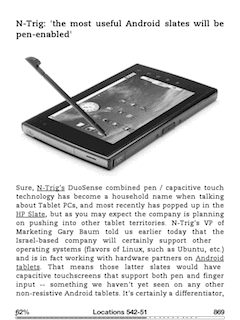
We’re going to use Calibre, the famous ebook-converting tool: sudo apt-get install calibre. Or you can install it (binary or source from) on Linux as guided here. The very nice feature of Calibre is that it can fetch news-feeds, parse and format them following a pre-defined rule-set called “recipe”, there’re hundreds of built-in recipes as well (“recipes” are actually python scripts used to parse and layout the data in html and some css). Below is how I fetch feeds from Engadget and VnExpress and convert them to .mobi, the native format that layouts very well on your Kindle:

$ ebook-convert /opt/calibre/resources/recipes/endgadget.recipe endgadget.mobi –output-profile=kindle
$ ebook-convert /opt/calibre/resources/recipes/vnexpress.recipe vnexpress.mobi –output-profile=kindle

Copy the files over your Kindle, the news feeds read out very very nice! (images on the left, click to enlarge). The next step is of course some further automation, you don’t want to do the whole thing manually everyday, do you!? All these works can be accomplished by a shell script, scheduled by crontab! Just have your home server prepare the documents and sync it to you via Dropbox, from which you can download and view on the device (Kindle naturally permits downloading .mobi documents). I’m using this way to serve myself latest news with coffee every morning!

kindle development without kdk

DK, the Kindle’s Software Development Kit has been released for quite some times but Amazon still strictly restrict accessing to it, many many software developers (like me) have registered and received no reply. It is understandable that Amazon could be skeptical on what to put on Kindle’s app store, but it should not be that conservative toward the developing community. KDK is basically just a PBP (Personal Basic Profile) J2ME (Java Micro Edition) with Amazon’s extension, a Kindle emulator, and some tools…
Having no KDK doesn’t mean that we can not develop software for Kindle! Below are my notes on building, deploying an example application for Kindle. This would make cleared the steps needed to write applications for Kindle without the KDK. Please notes: the information is collected from many different sources, jailbreaking could be considered “illegal” according to some Term Of Use. Use the information at your own risk!

1.   Jailbreaking and usbnetwork

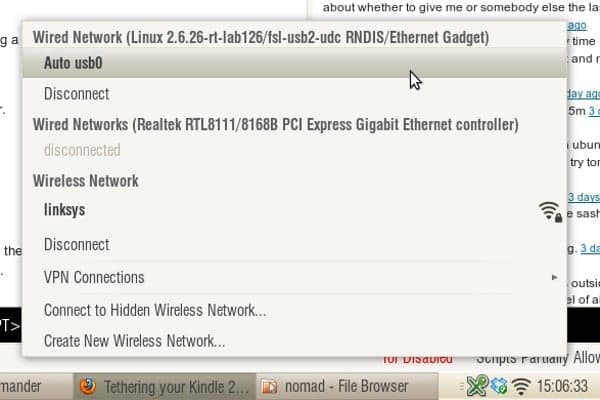
Download kindle-jailbreak and kindle-usbnetwork from here. Choose the files that is suitable for your device, e.g: for my Kindle 3 (wifi + 3G), it would be the jailbreak_0.4.N_k3g and usbnetwork_0.27.N_k3g. Copy the jailbreak_0.4.N_k3g file to your Kindle, then proceed to updating the system. The jailbreak exploits a hole in Busybox implementation to gain root access. Next, do the same thing with usbnetwork_0.27.N_k3g, which provides a secure shell via USB connection.

Launch the Search box on our Kindle, type ;debugOn, press enter to execute the command, then do the same thing with ~usbNetwork to start the sshd daemon. The default configuration would set Kindle to 192.168.2.2 and expect the connected PC to be 192.168.2.1. Now we’ve got root access and the entire FS (file system) in the palms of our hands. Spend some times exploring it, when done, put the Kindle back to normal use by issuing ~usbNetwork again, then ;debugOff.

2.   Key and file signing

This is the most important part! Kindle’s “kindlets” are exactly Java’s jar file with .azw2 extension, however, we can’t just simply copy and run it. The applet is linked against several system libraries located at: /opt/amazon/ebook/lib/Kindlet-1.1.jar and /opt/amazon/ebook/sdk/lib/*.jar (copy these files to your PC for local jar building in place of those provided by the KDK).

The .azw2 file must also be signed with 3 different keys located at: /var/local/java/keystore/developer.keystore and the security policy is defined at: /opt/amazon/ebook/security/. For more information on signing, please refer to this post. If you’re tweaking your Kindle and writing apps for it, I suggest that we would just use the signing key of Andrew de Quincey, the first one to figure out about this, so that free softwares can be easily shared among Kindle’s users.

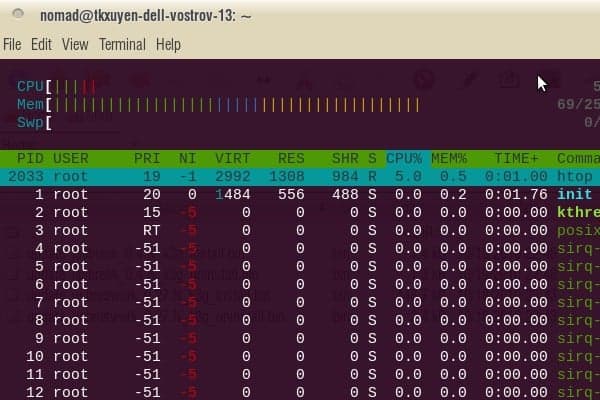
Configure the usbnetwork interface and access Kindle via sshd. Image below: the command htop running on Kindle’s ssh console.

When finished with hacking, we can un – install these two exploits to restore Kindle back to original state (and receive official updates from Amazon), but that would be after the next section, when we’d been able to deploy our own software on it!

3.   KindleGoban – an example app

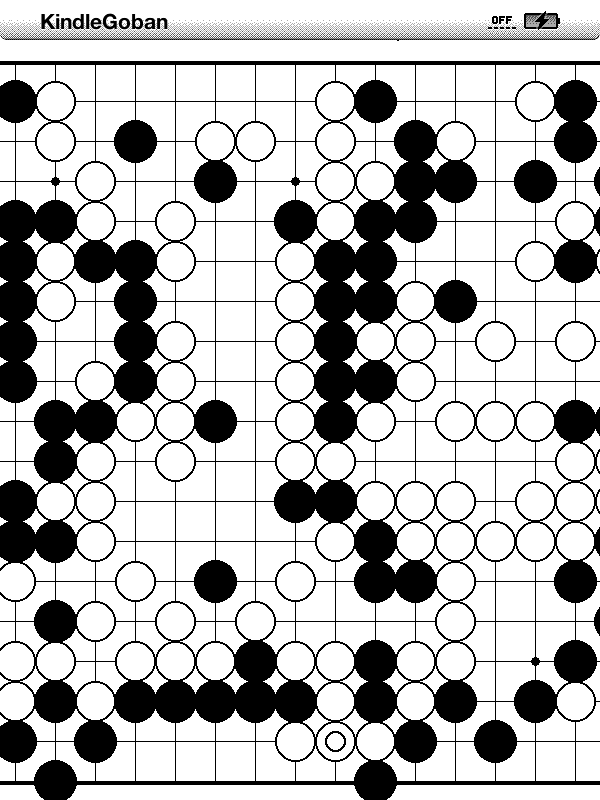
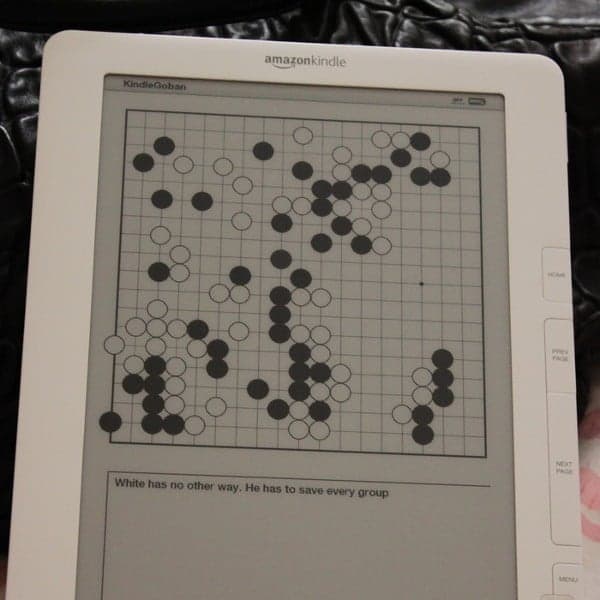
I’m going to deploy KindleGoban, a Go (weiqi) game viewer, as an example app. Adrian Petrescu, the man behind this open source game, is perhaps, an insider of Amazon’s KDK project. But technically he’s under a NDA (non disclosure agreement) and won’t be able to say anything except the publicly available information. However, he did indirectly provide valuable resources.

First, copy the developer_keystore (mentioned in #2) to your PC & Kindle (at /var/local/java/keystore/developer.keystore). Then download KindleGoban (and its dependency library KWT. Make some changes to the build.xml to include KWT (adding several widgets) and get rid of the KDK’s stuffs (which we don’t have). Then build, sign and deploy the .azw2 file to your Kindle. And there you are, a nice Go game viewer!

# first, build and sign the jar file
$ ant build.xml
$ jar cvfm KindleGoban.azw2 KindleGoban.mf bin/*
$ ./signkindlet developer_keystore KindleGoban.azw2
# copy the file over to your Kindle, also need
# to copy an example .sgf file for testing
$ scp KindleGoban.azw2 root@192.168.2.2:/mnt/us/documents

4.   Resources

This section gonna be regularly updated on the availability of documents, tools.. for development on Kindle. Please note most of these are from third – parties rather than Amazon, which are the results of hacking, reverse – engineering… and some other information indirectly available from the KDK. At the moment, we only have this official javadoc from Amazon which describes the KDK’s APIs.

  • Savory: a native ebook converting daemon for Kindle.
  • Kindle emulator: need to double check this.
  • KWT: Kindle Widget Toolkit.
  • Mangle: a manga viewer for Kindle.
  • Qindle: a Qt port for Kindle.

KindleGoban screenshots, this is, like most Kindle projects at the moment, is just starting, would expect more features in the time coming.

vietnamese dictionaries for kindle


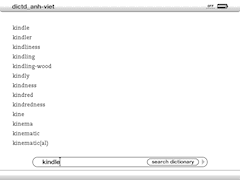
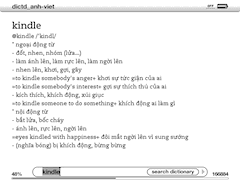
The dictionaries’ screen-shots

indle in my idea, is a very promising device, and I’m compiling, for the purposes of reading, some Vietnamese dictionaries for it. For the Chinese language, there’s no non – trivial solution at the moment, but it’s simple for the cases of English and French. Below are the steps I note down for remembering, it’s just a matter of data conversion and packaging. Non – technical readers can skip directly to step #5 below to download and use the dictionaries.

Dictionaries on Kindle have Mobipocket’s format (Amazon bought Mobipocket in 2005). The data set we’re going to use is available on StarDict in which the English ↔ Vietnamese and French ↔ Vietnamese data was originally created by the author Hồ Ngọc Đức. The data set has some minor holes and errors, but it’s the most usable set for Vietnamese at the moment (many Vietnamese softwares, websites… use this data).

1.   Download the data from StarDict, e.g: stardict-dictd_anh-viet-2.4.2.bz2. Extract it, there will be a .ifo (info) file, a .idx (index) file, and a .dz file which actually has .gz format, rename to .gz and unzip to get the real data file (.dict).

2.   Convert the data to an intermediate format, we’re going to make a tab – delimiter file. Fire – up StarDict utility: stardict-editor, jump to the 2nd tab (Decrypt), browse to the .ifo file and have it convert the data to something like: dictd_anh-viet.txt.

3.   Convert to Mobilepocket format: python tab2opt.py -utf dictd_anh-viet.txt. The python script used to convert data is available at this site and would produce a file like: dictd_anh-viet.opf.

4.   Package the final .mobi file: wine mobigen.exe dictd_anh-viet.opf. The mobigen utility is available from here, for convenient reason, I would just use this Windows’ binary via wine.

5.   Connect your Kindle using USB cable and copy the anh_viet.mobi or phap_viet.mobi files over to the ‘documents’ directory. The dictionaries should be available for use right now on Kindle’s home page. We can also set one of these to be Kindle’s default dictionary so that we can lookup words’ meanings without leaving the document we’re on!