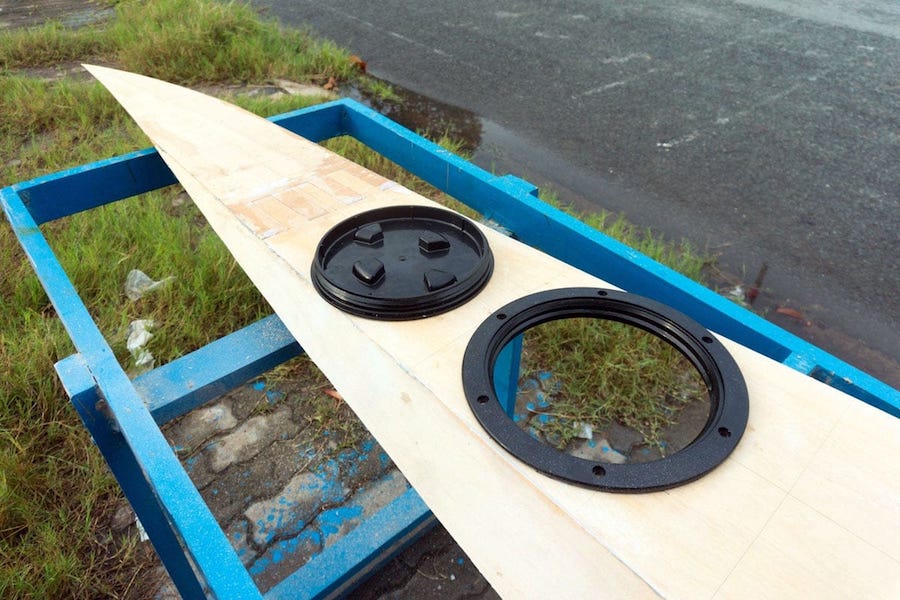
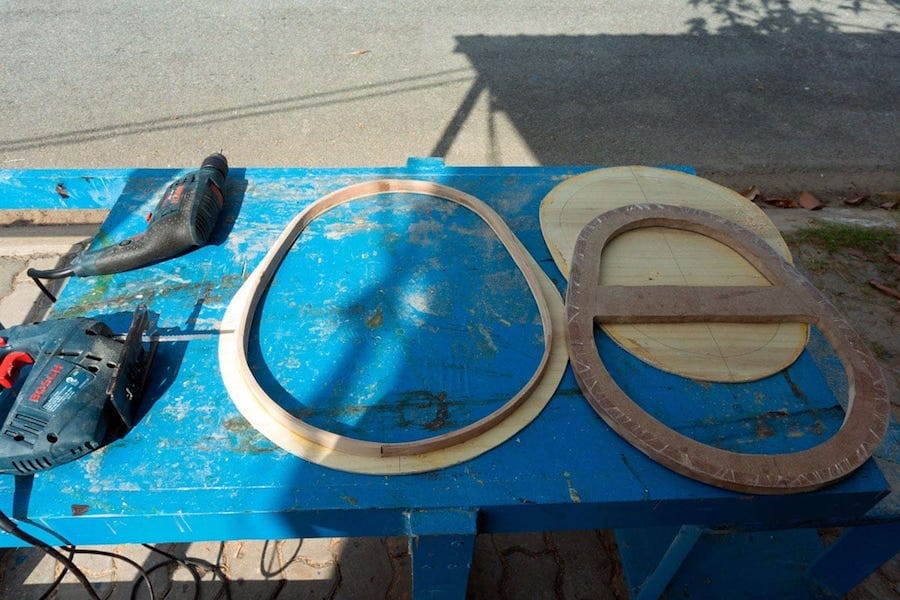
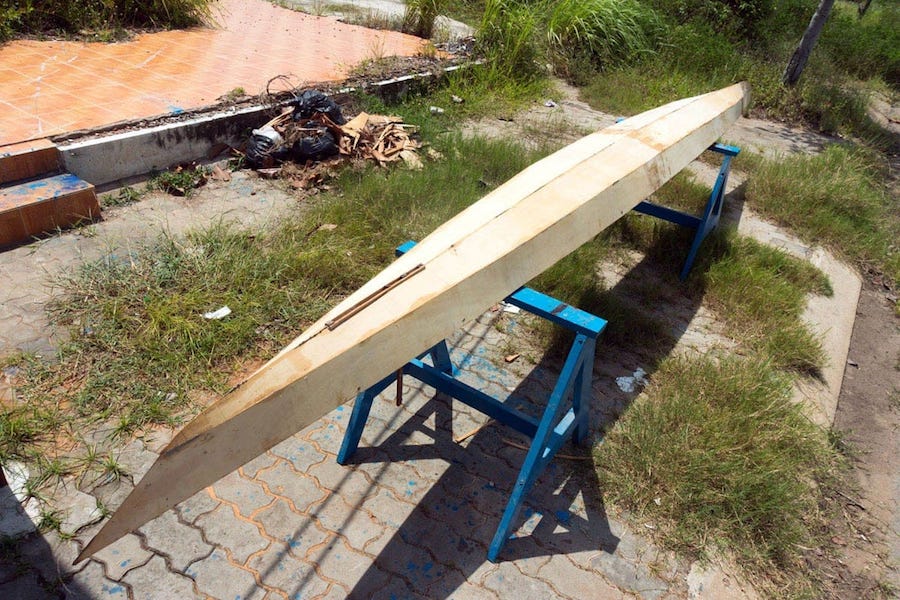
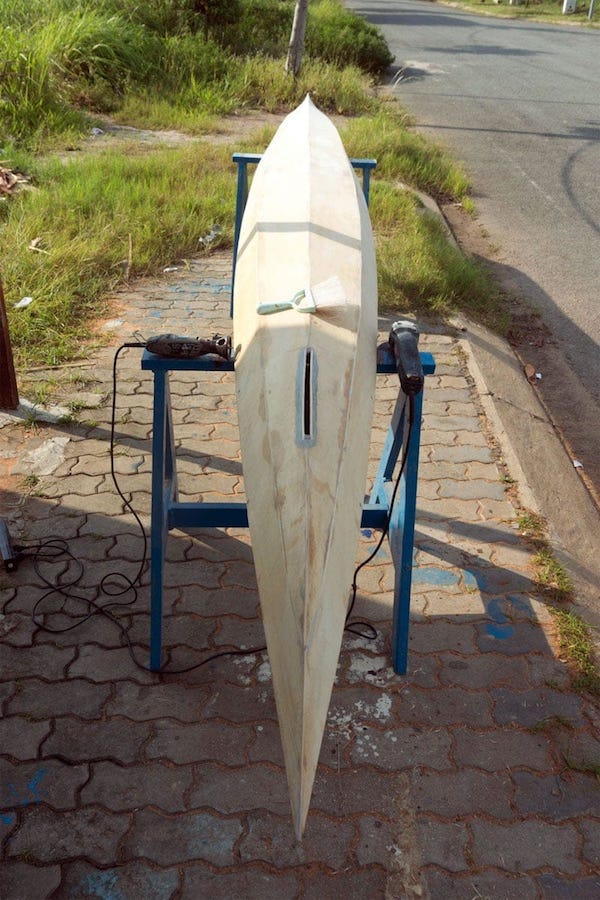
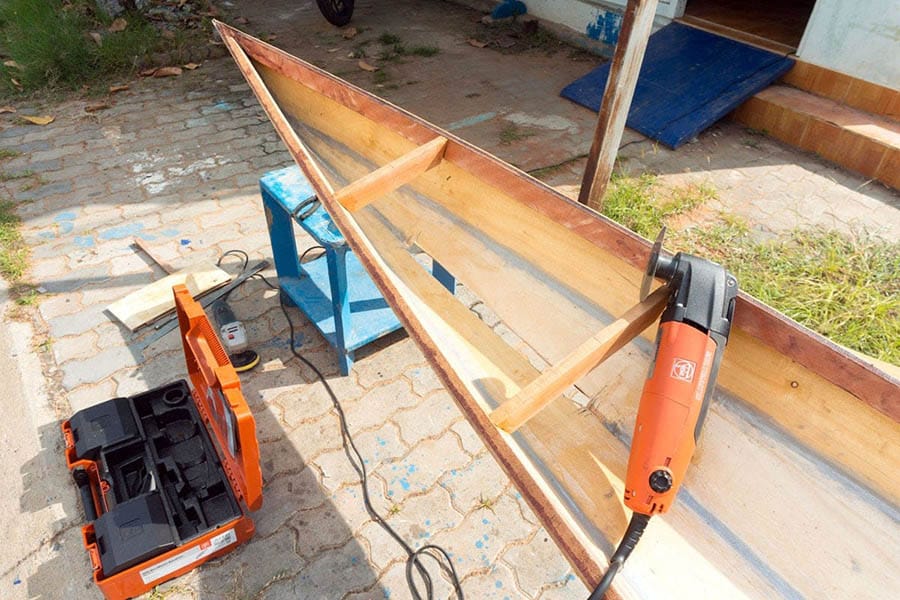
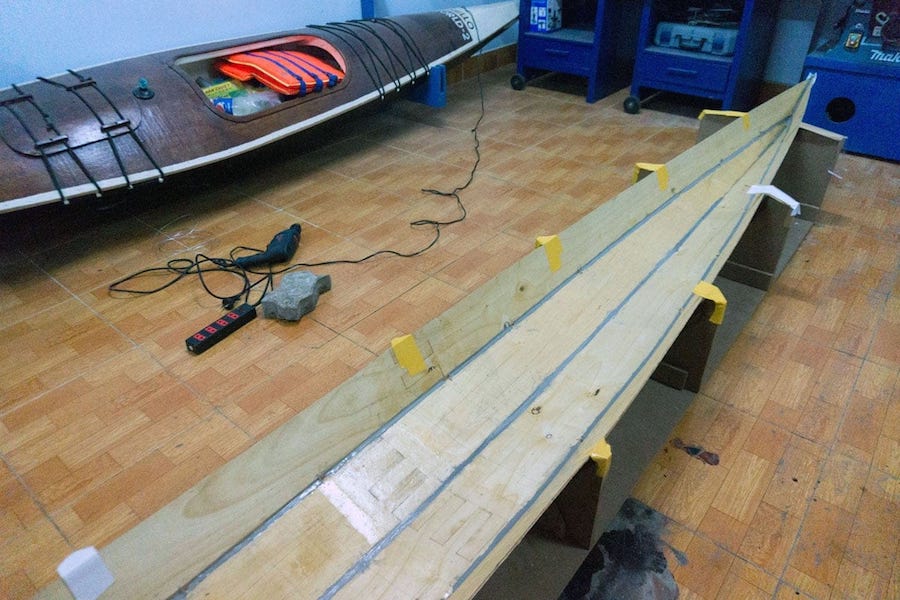
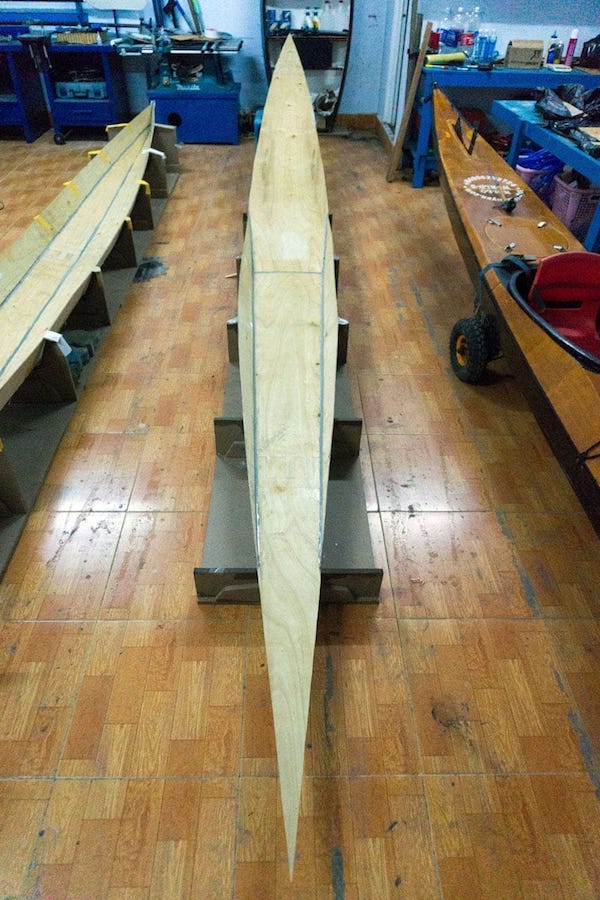
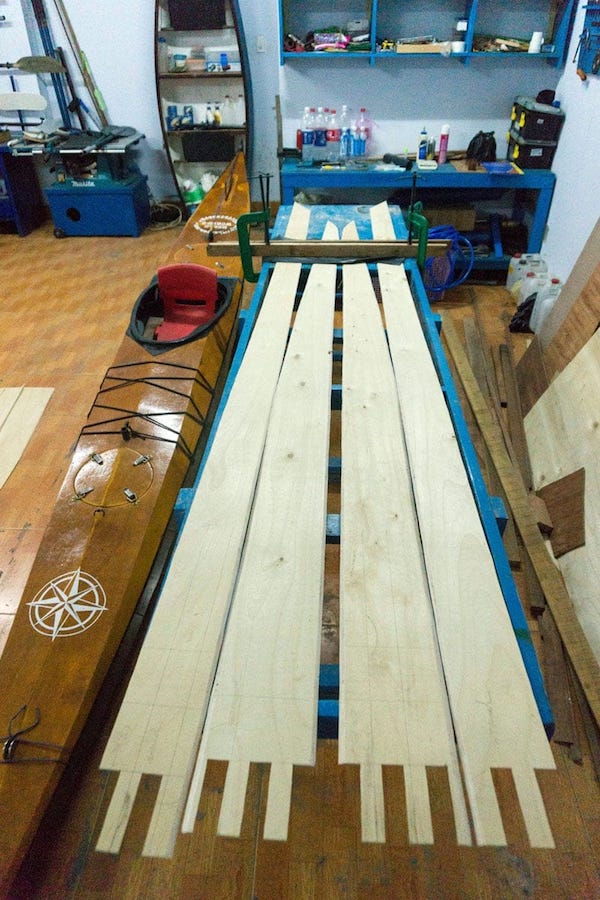
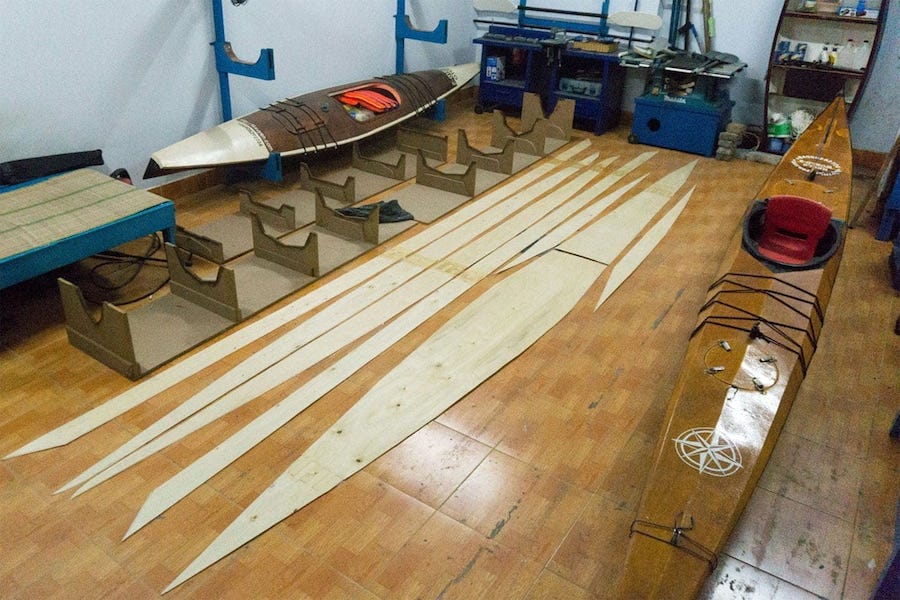
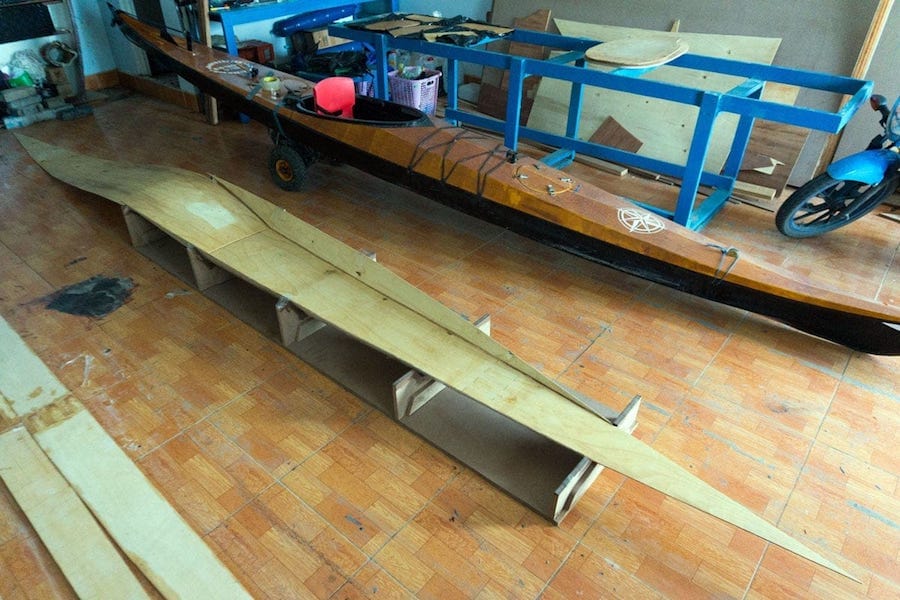
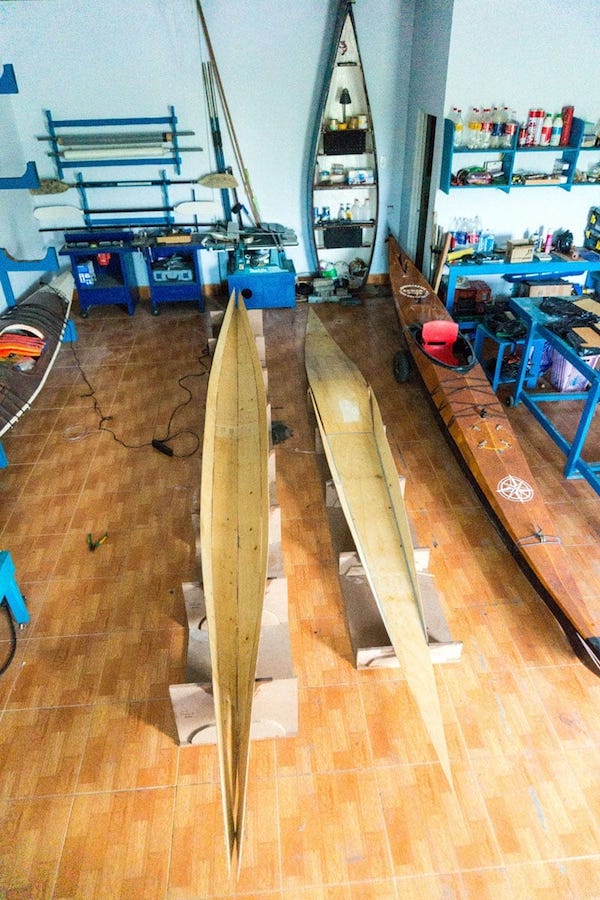
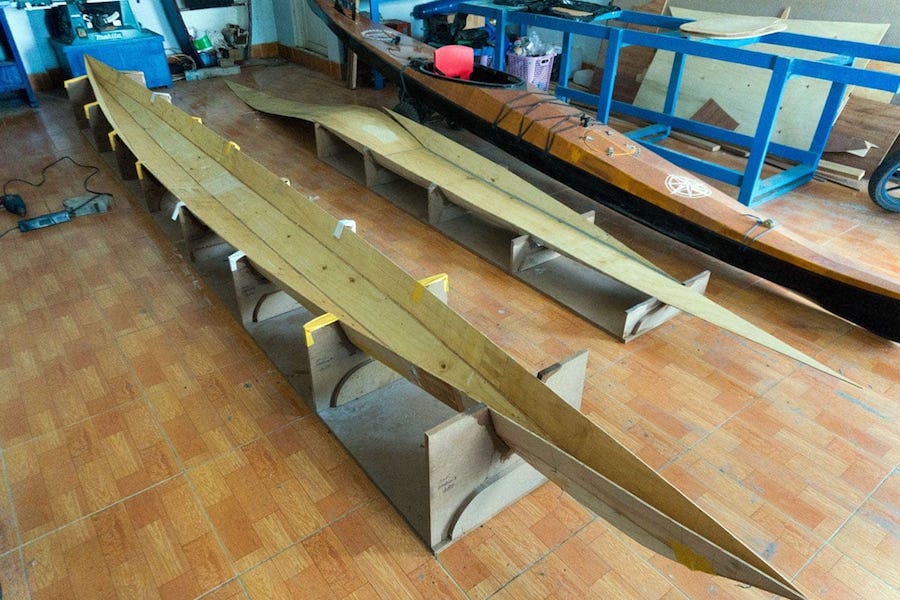
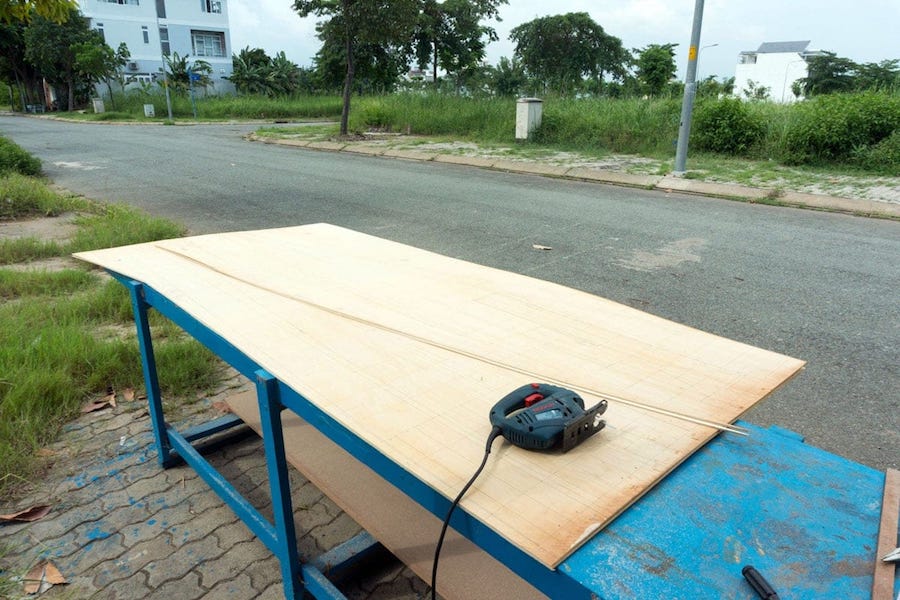
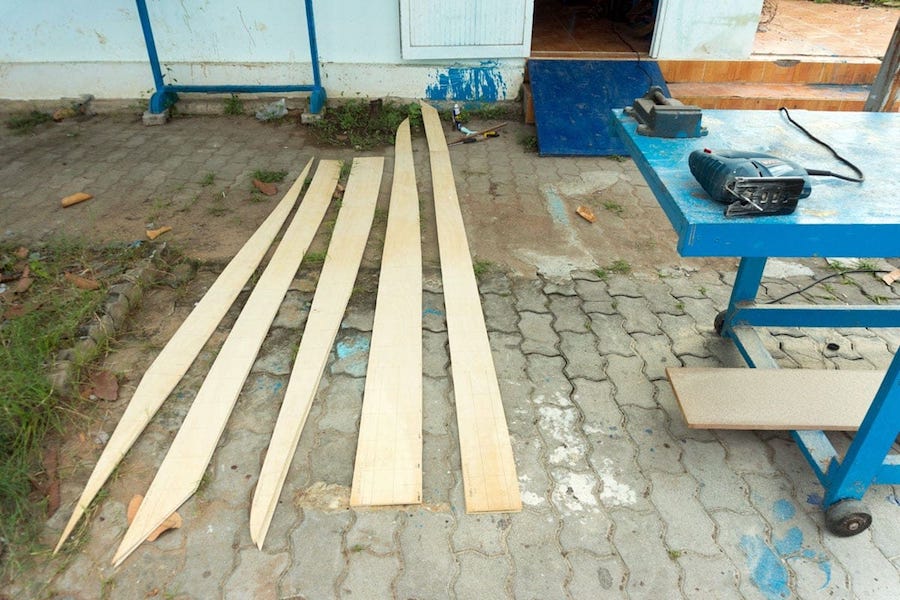
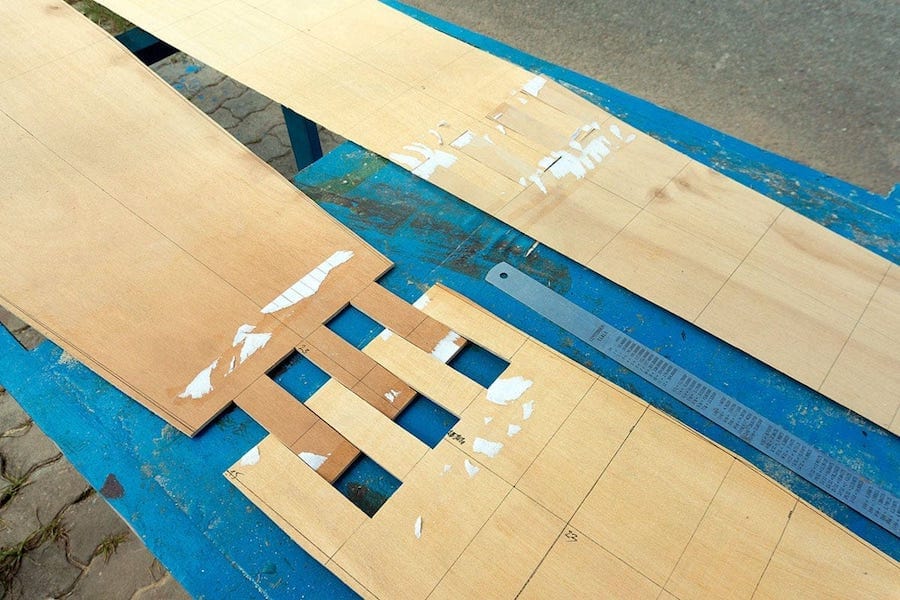
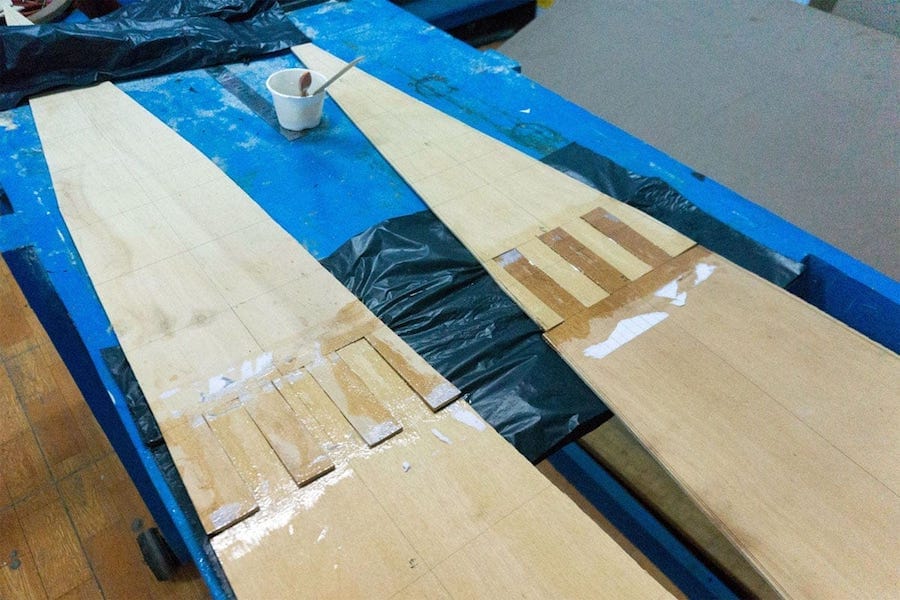
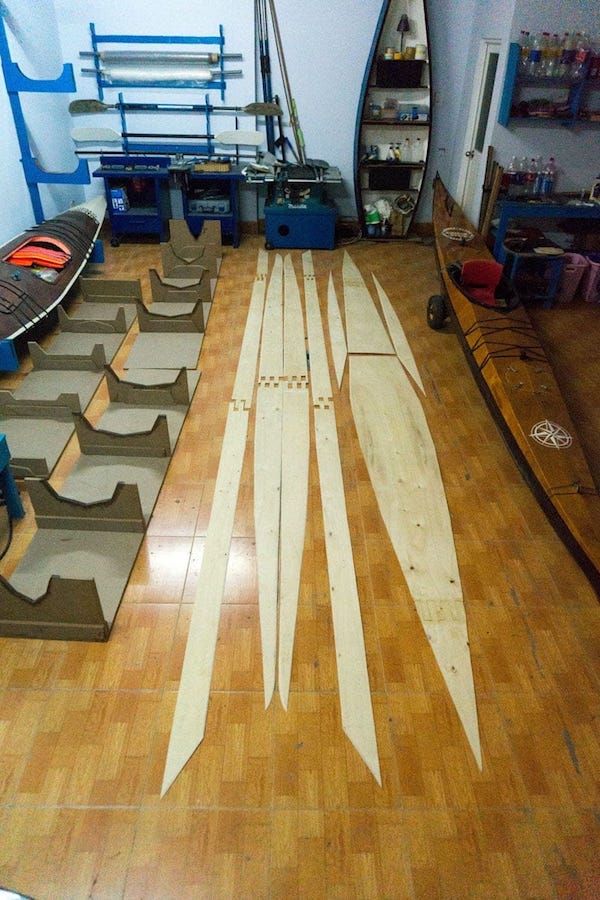
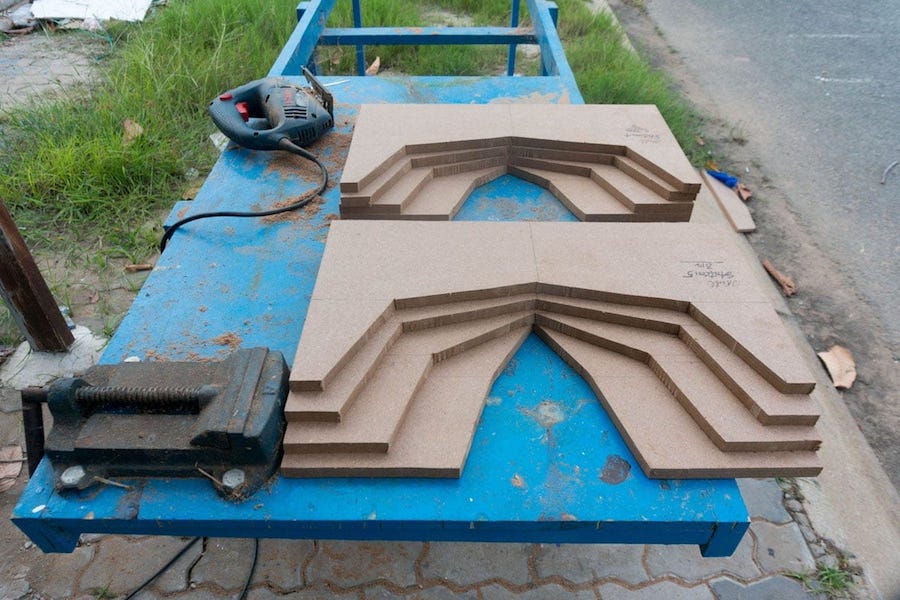
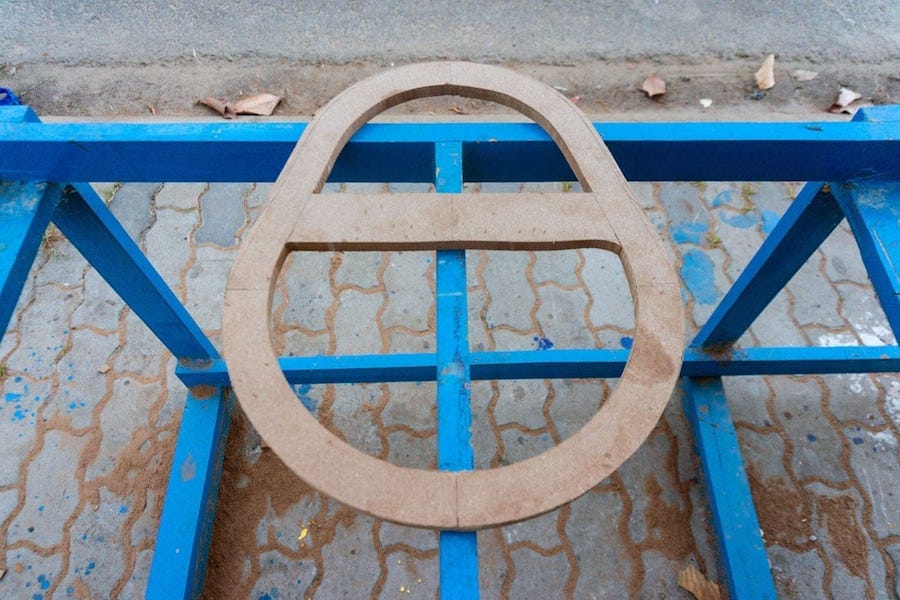
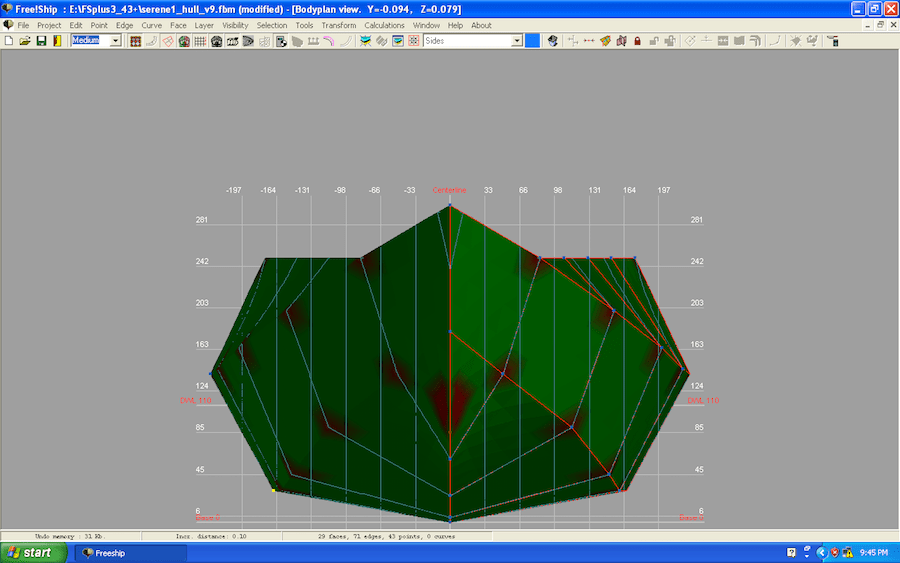
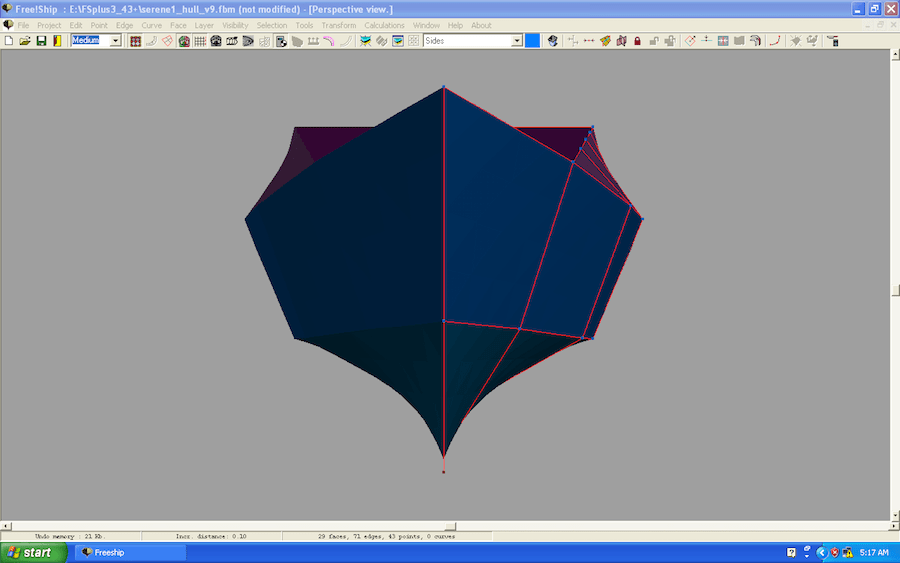
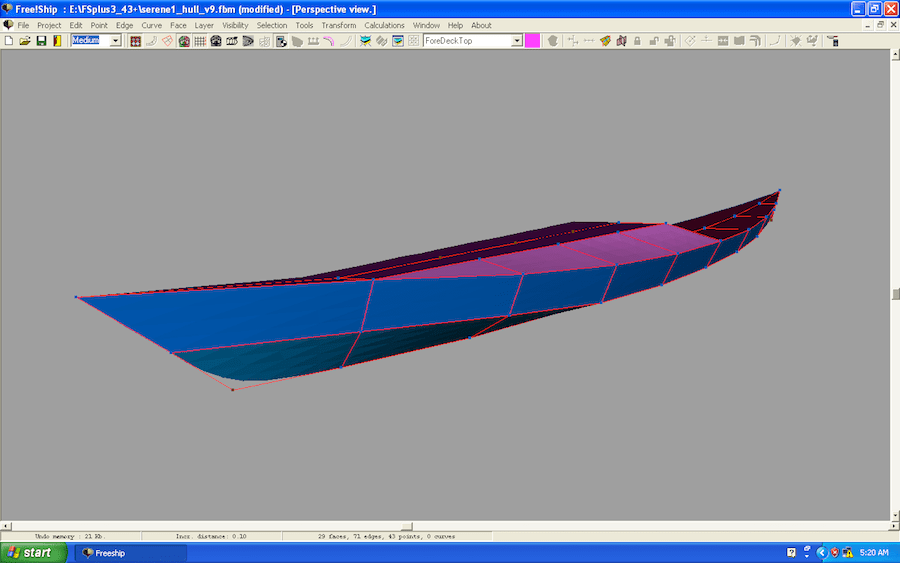
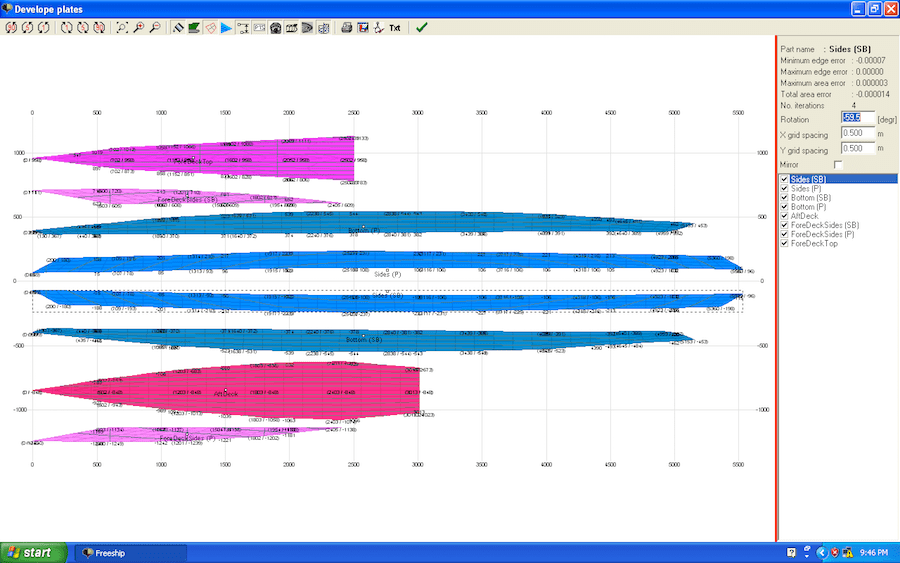
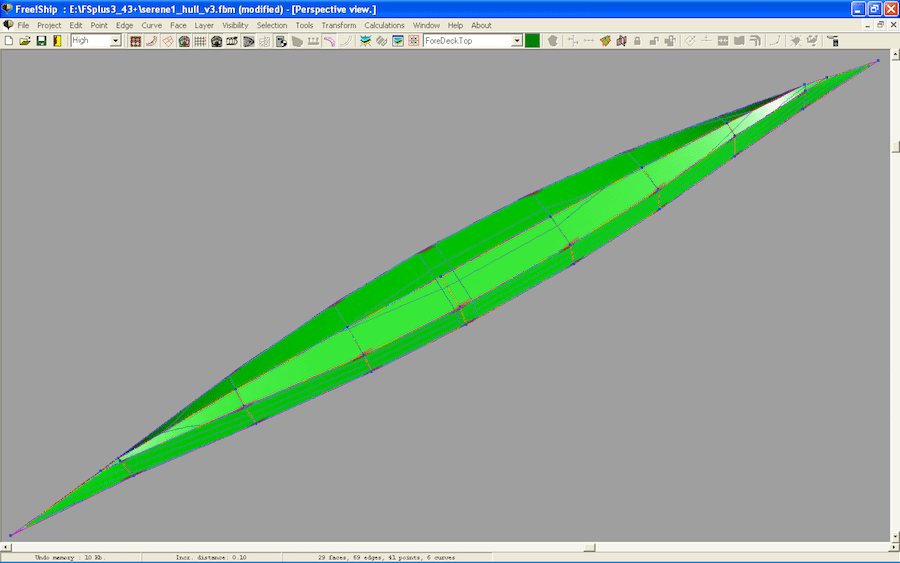
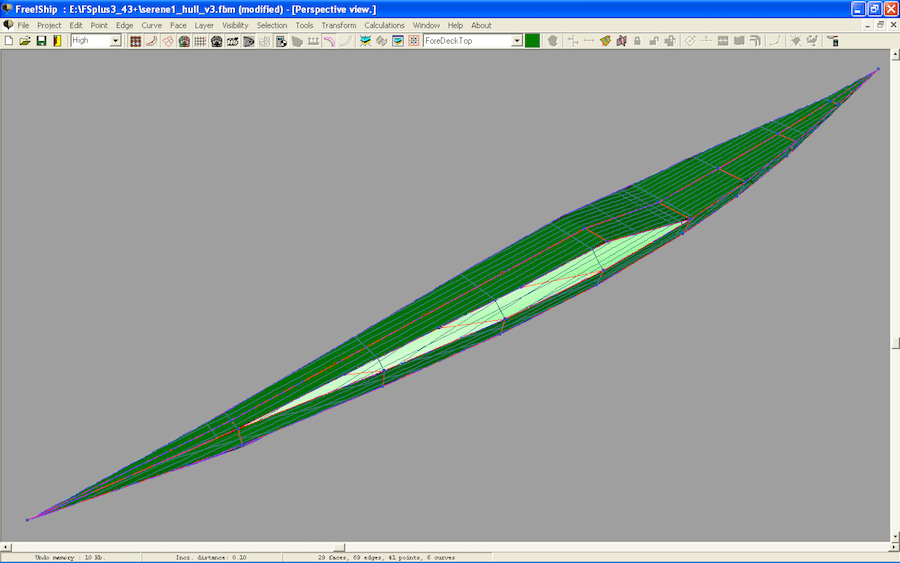
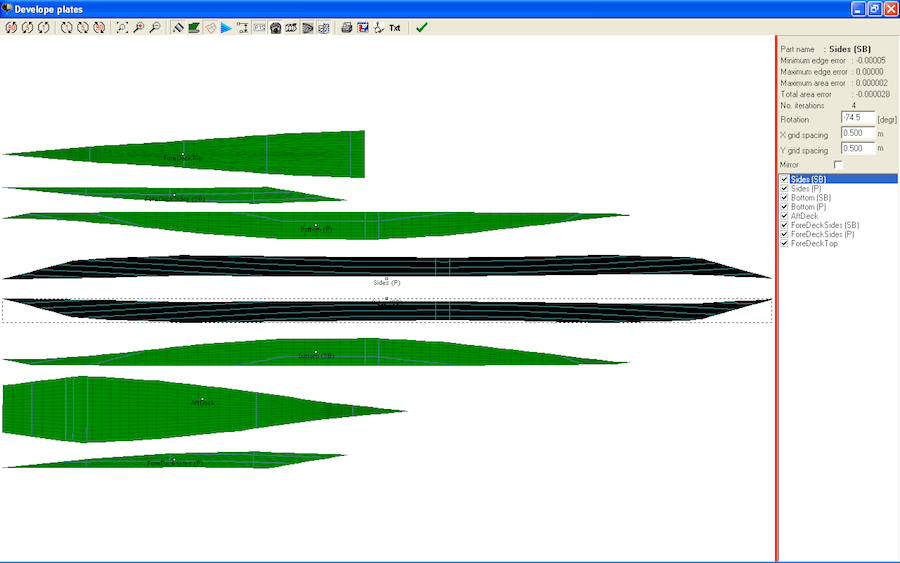
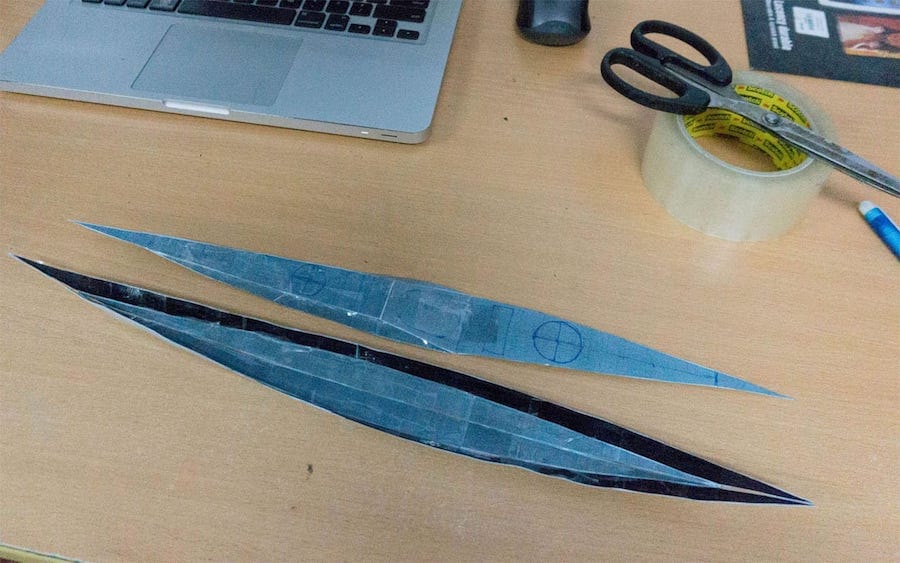
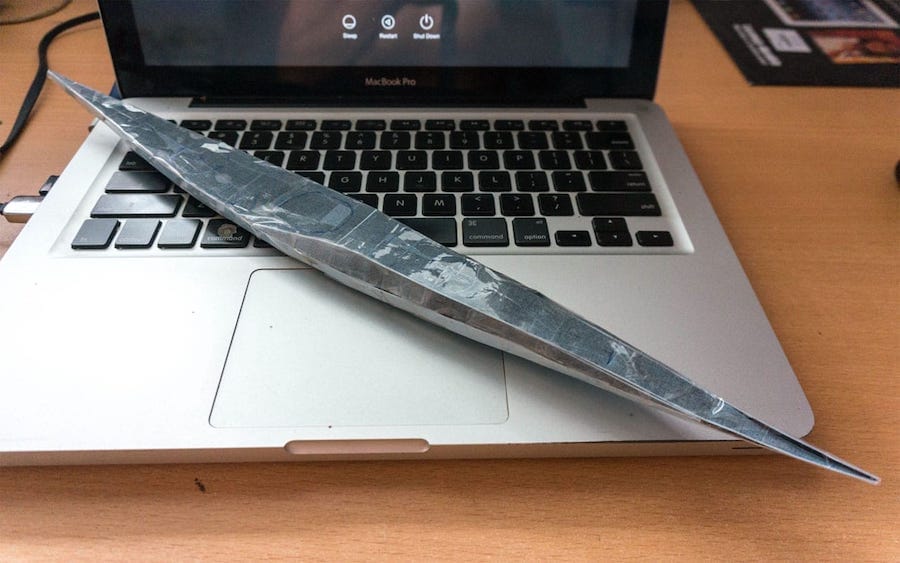
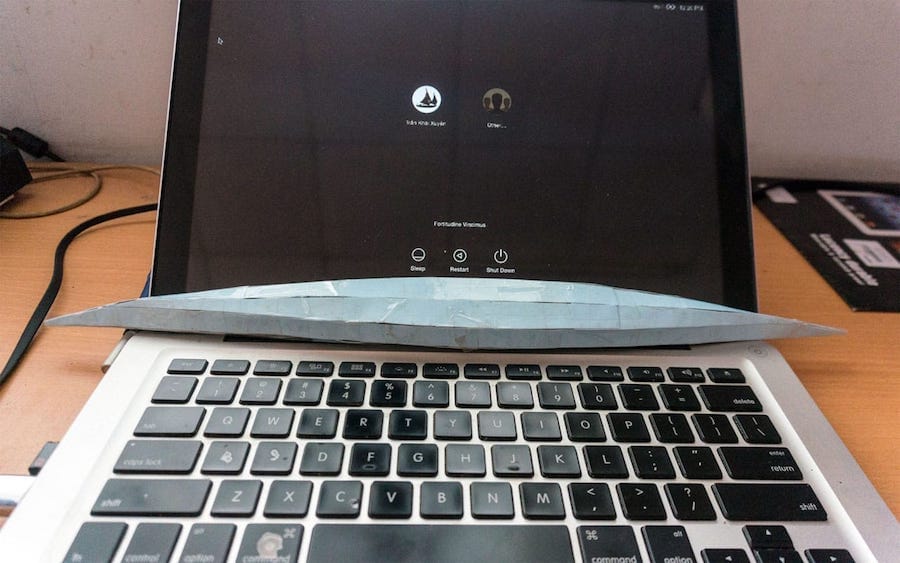
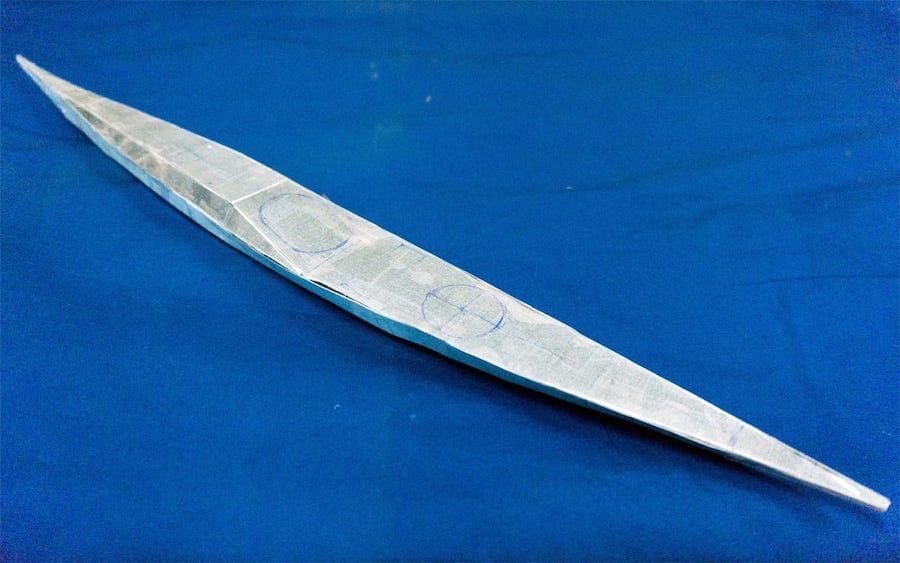
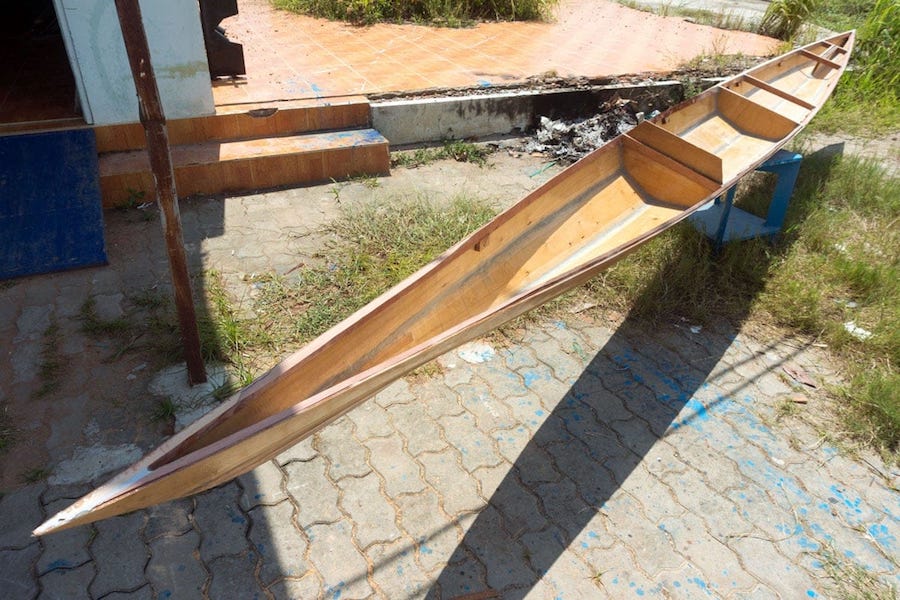
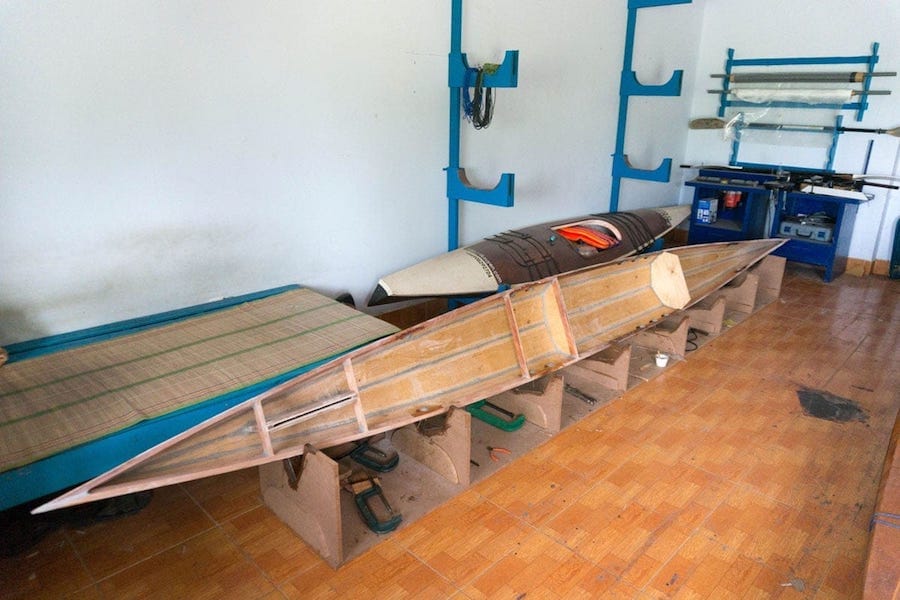
serene – 1, part 12

onitnue working on the deck part and the cockpit. But first… some pictures to show off the boat shapes, still quite a long way to the final forms, but look fascinating enough to me already, to quote a popular architectural saying: form, IT IS function 😀
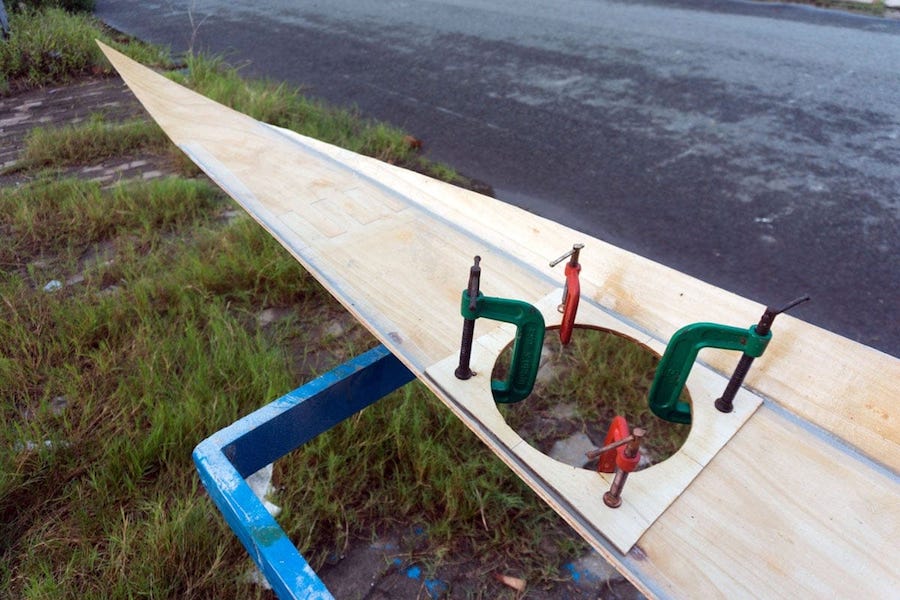
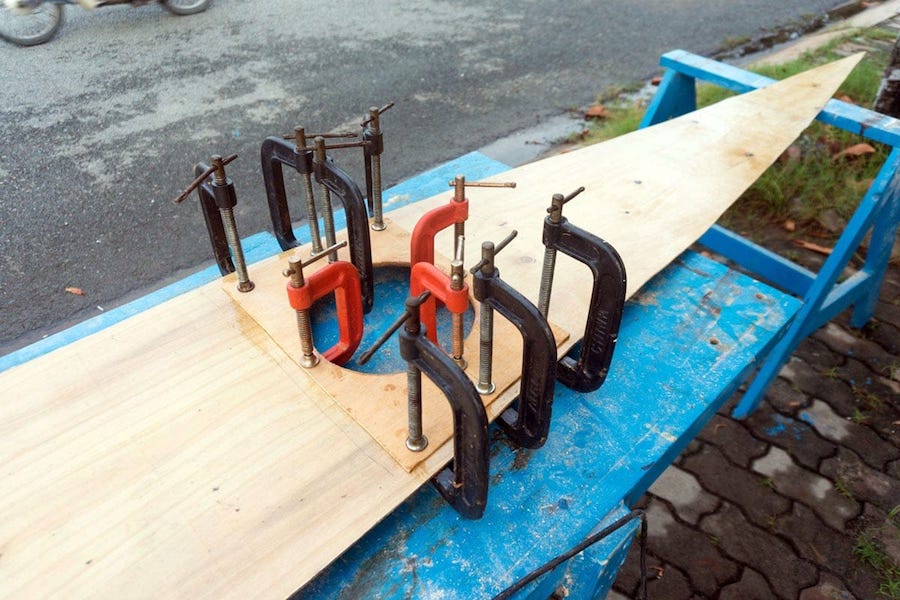
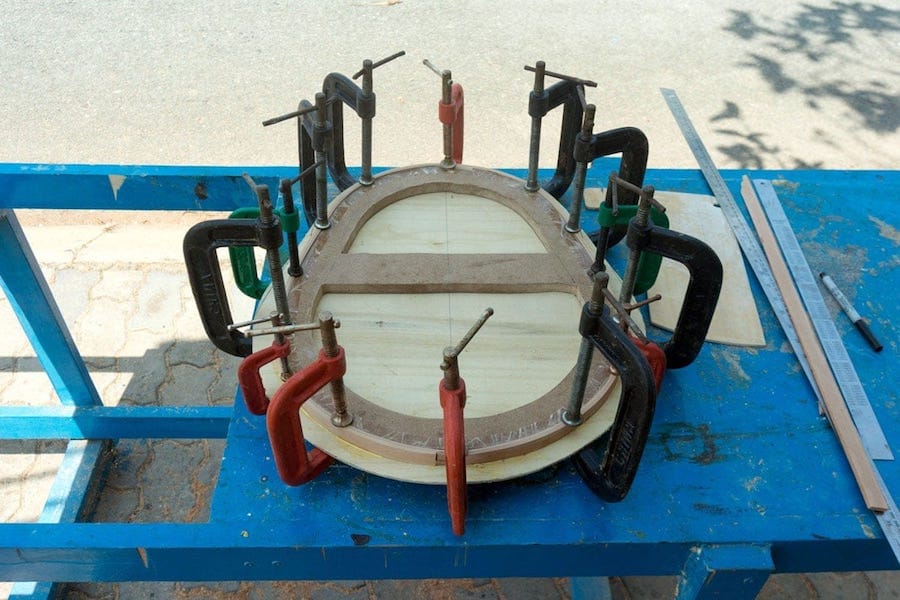
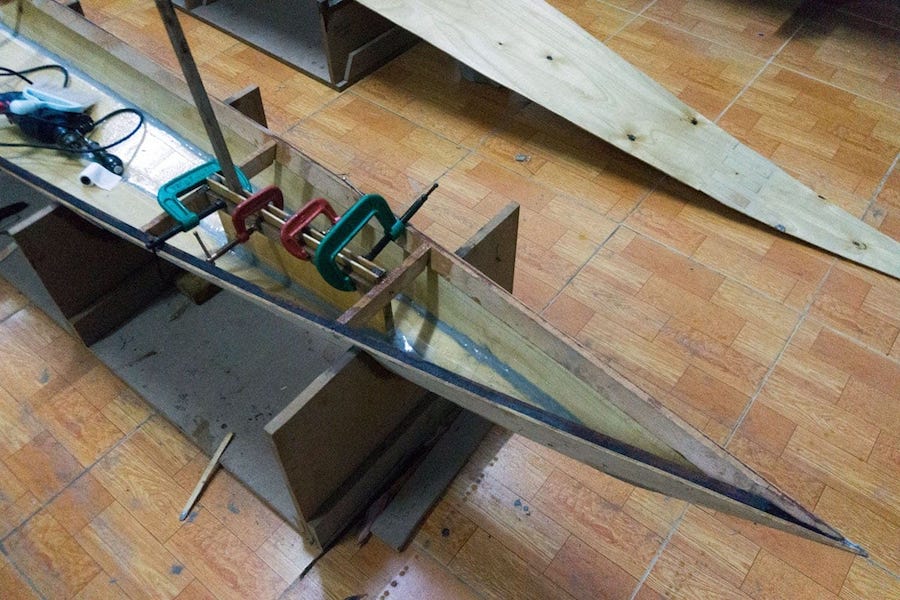
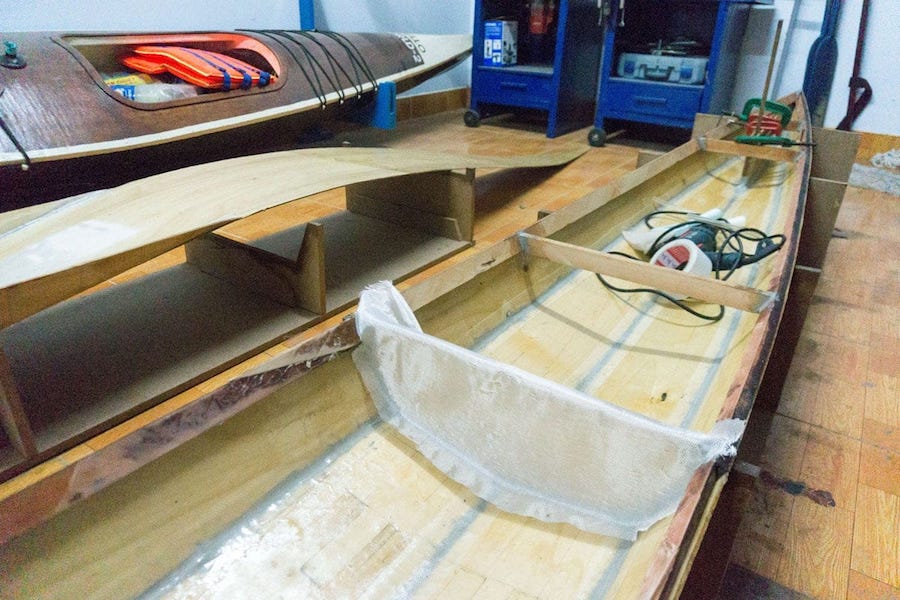
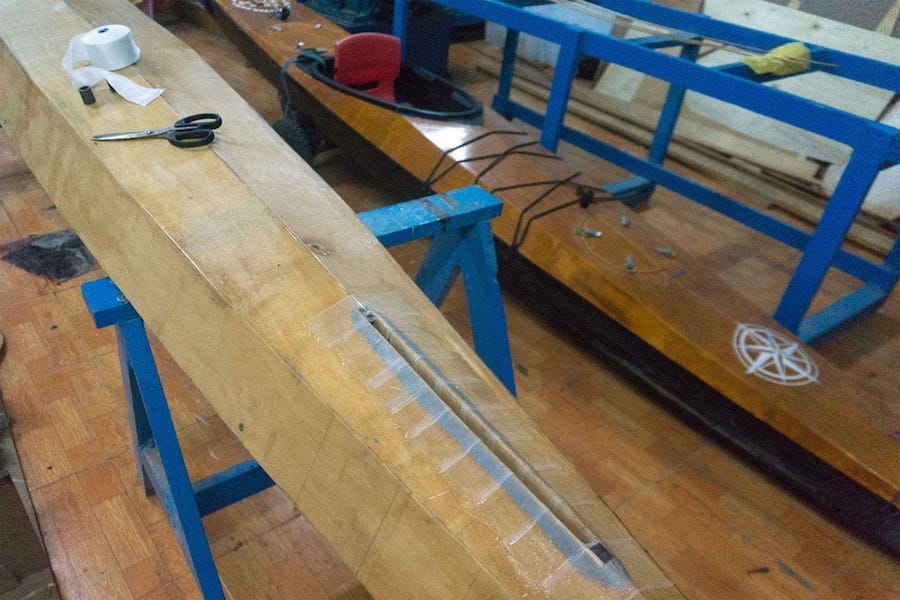
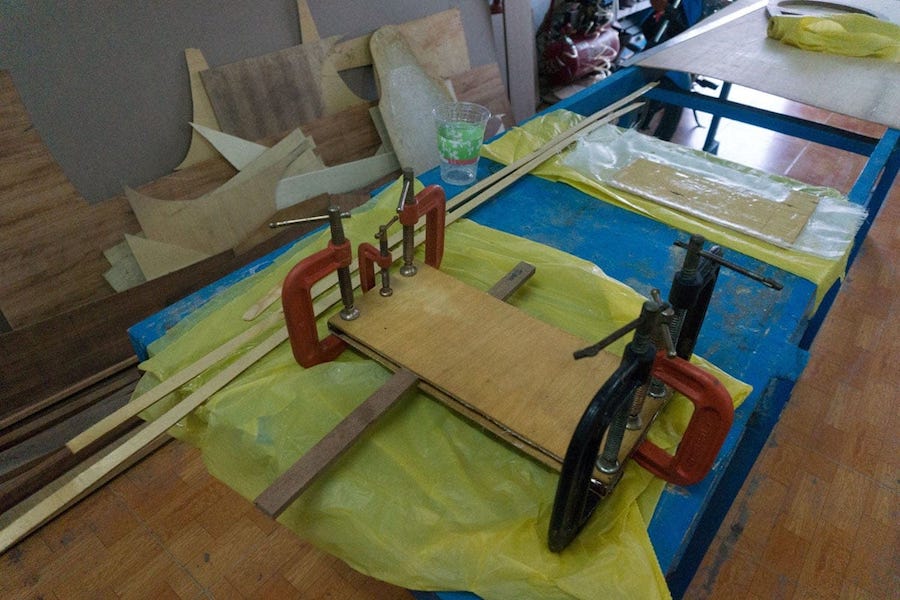
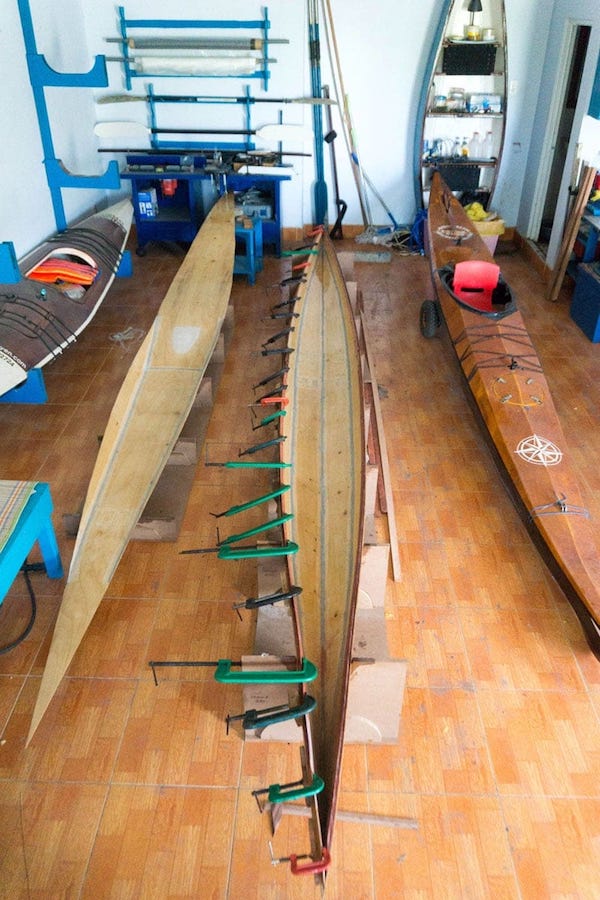
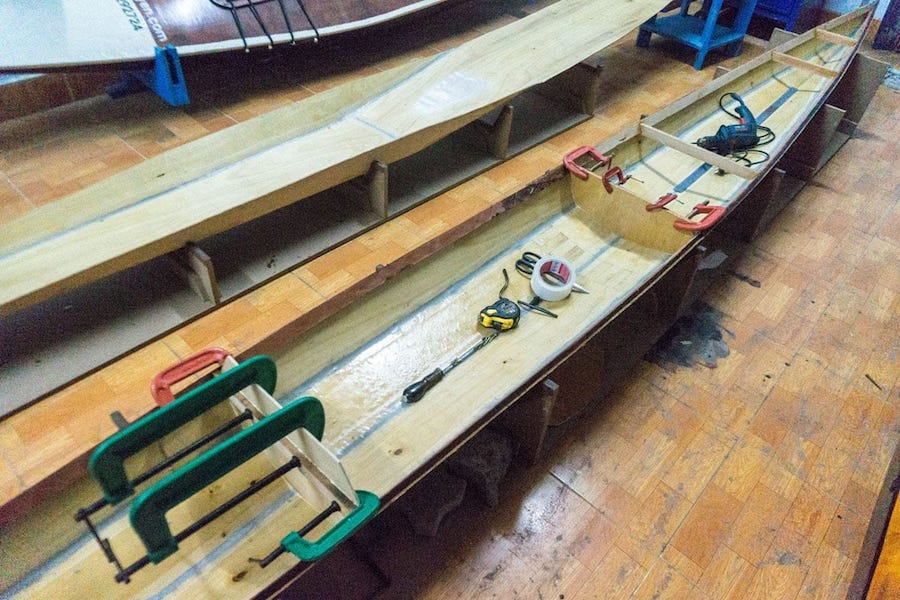
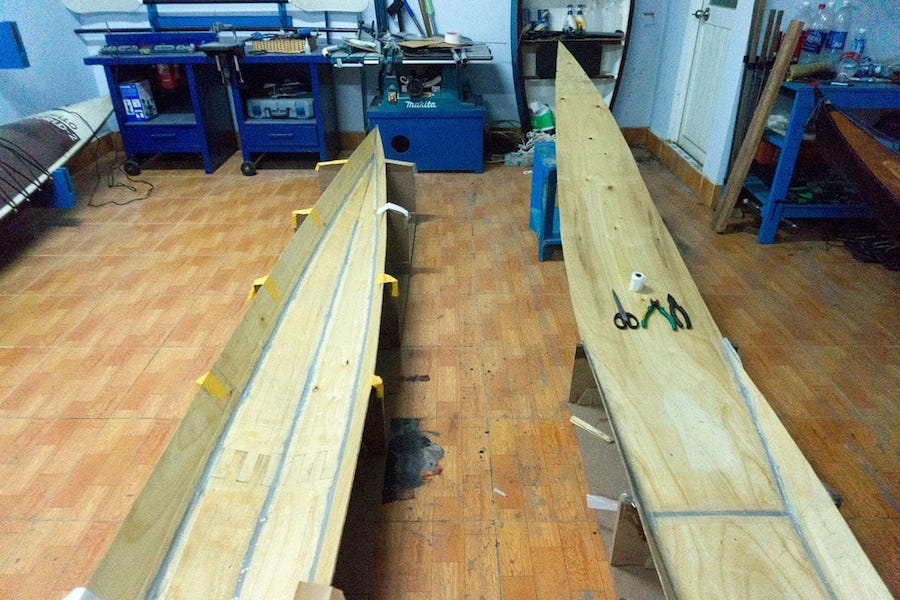
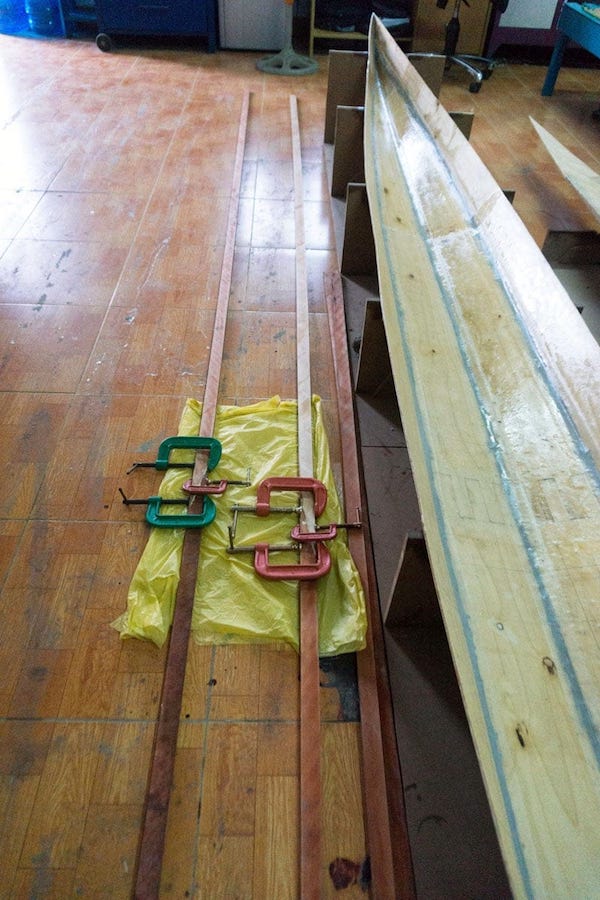
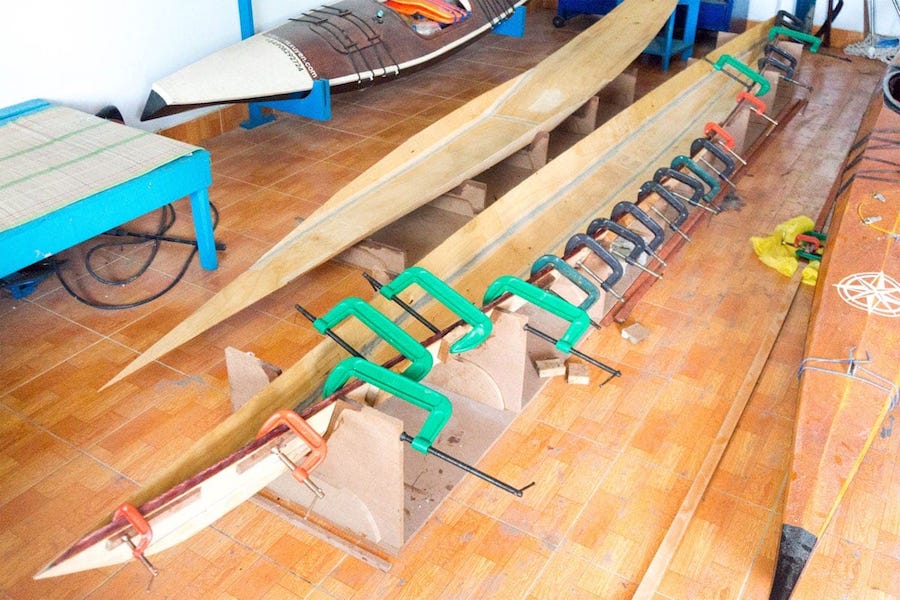
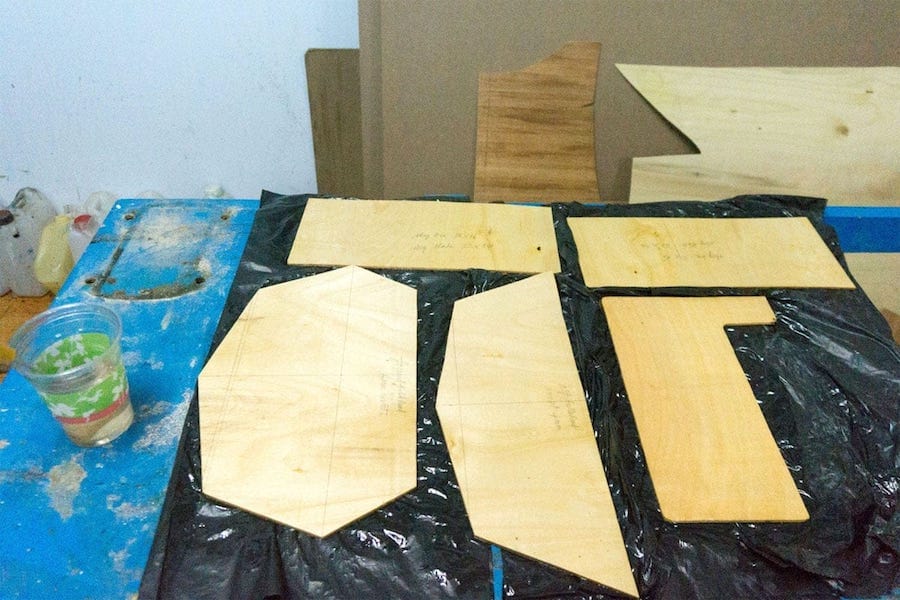
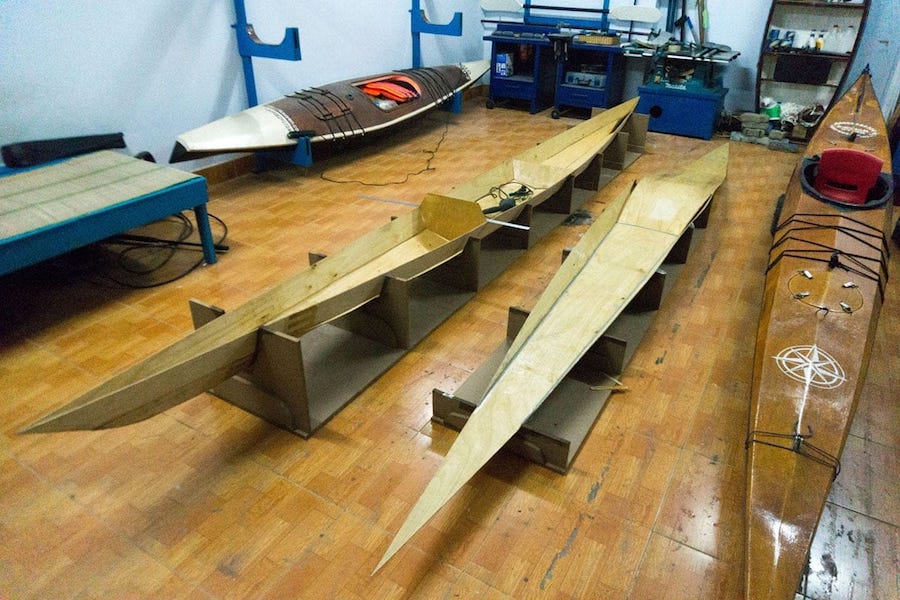
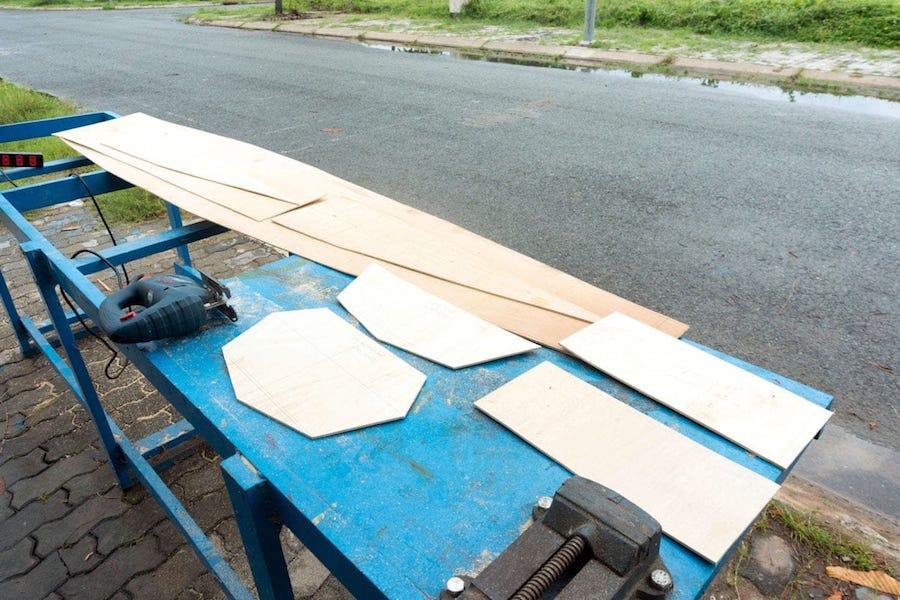
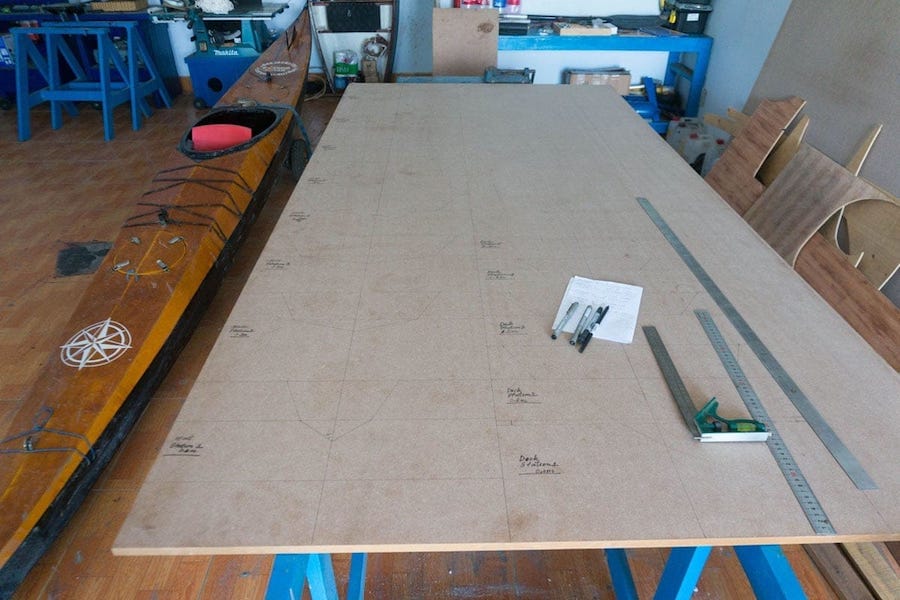
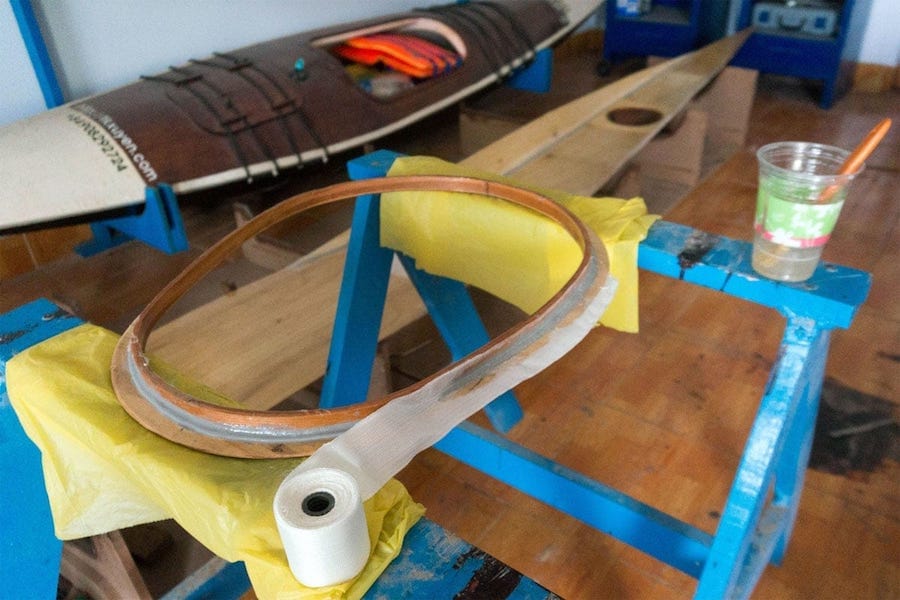
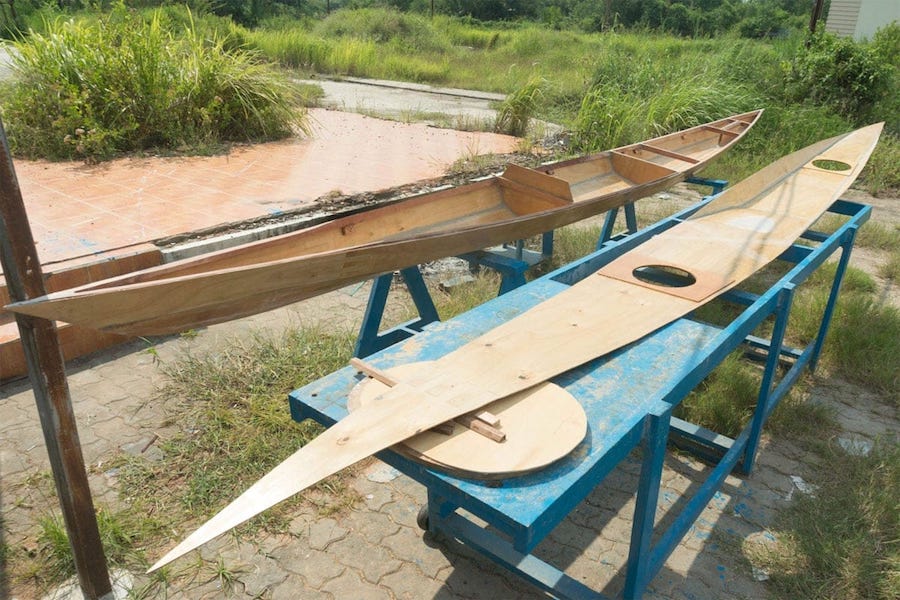
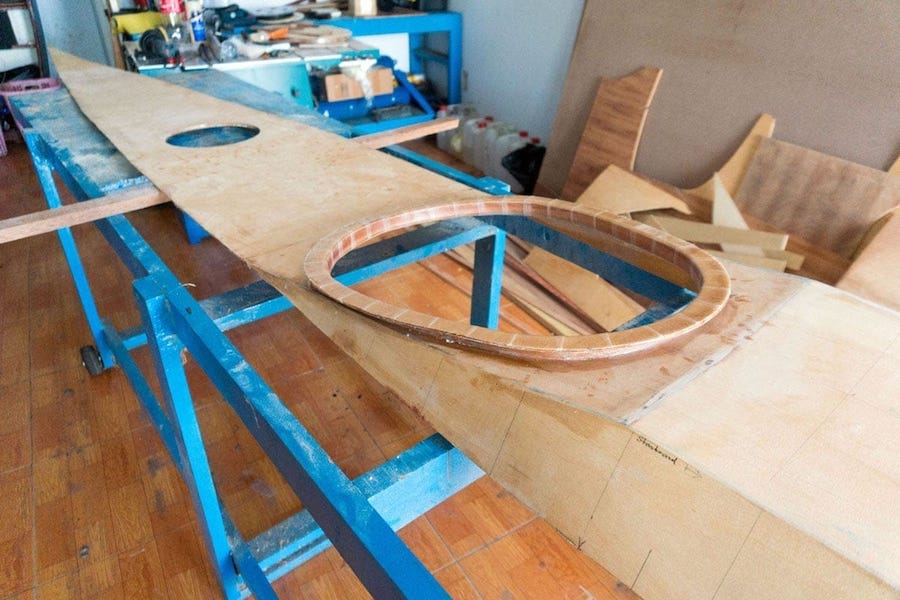
! 3rd image below: the cockpit coaming being reinforced with some putty in the corner, then a layer of fiberglass tape the under side. 5th image: cockpit being jointed to the deck. There’re some miscellaneous jobs to be done on the hull still.

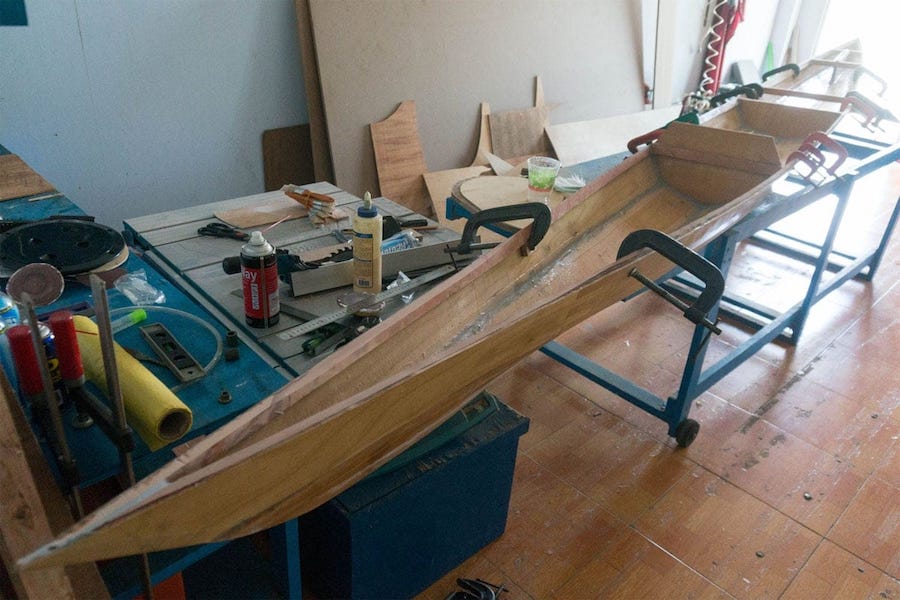
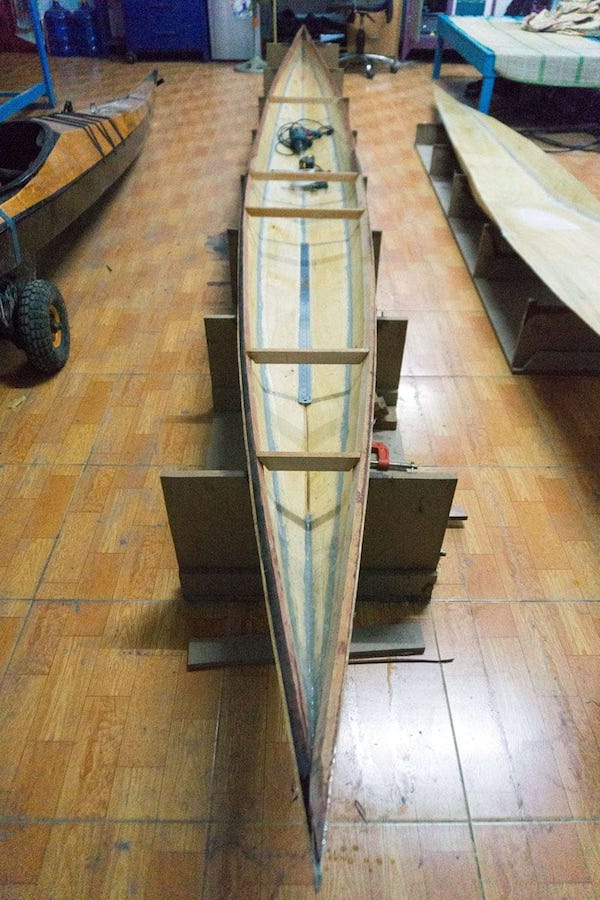
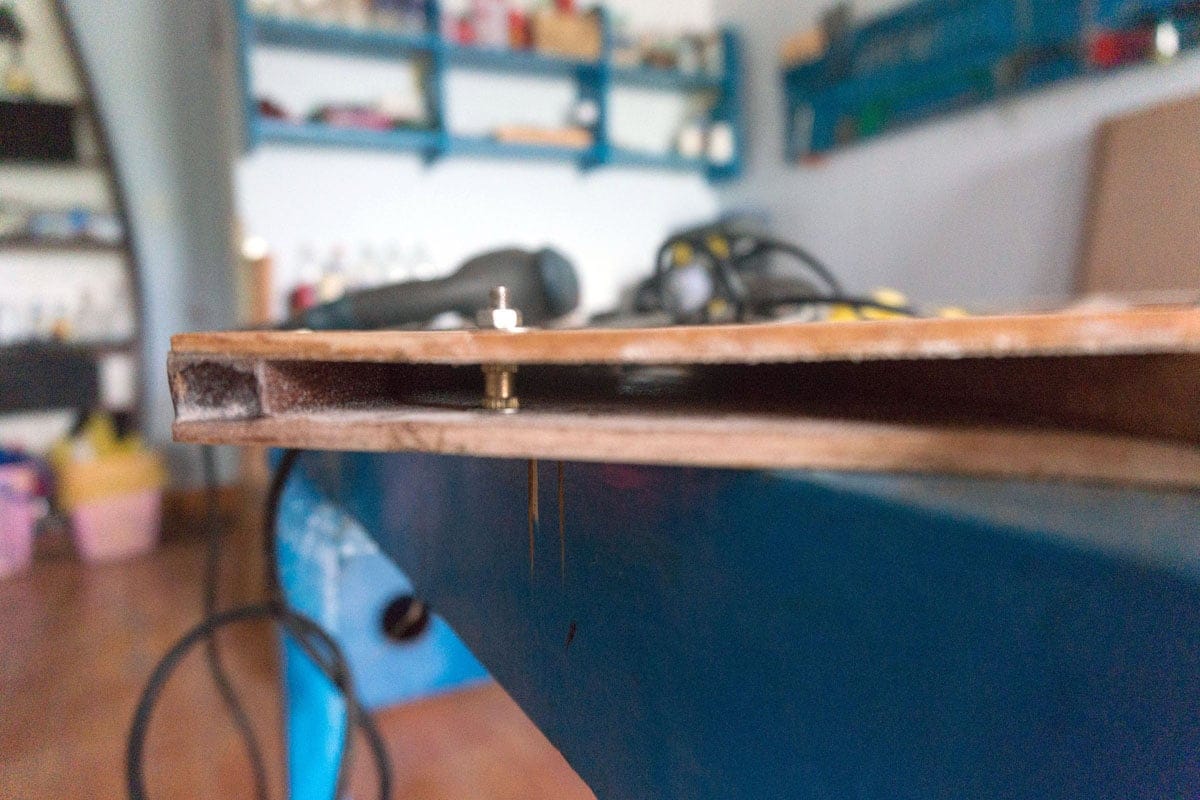
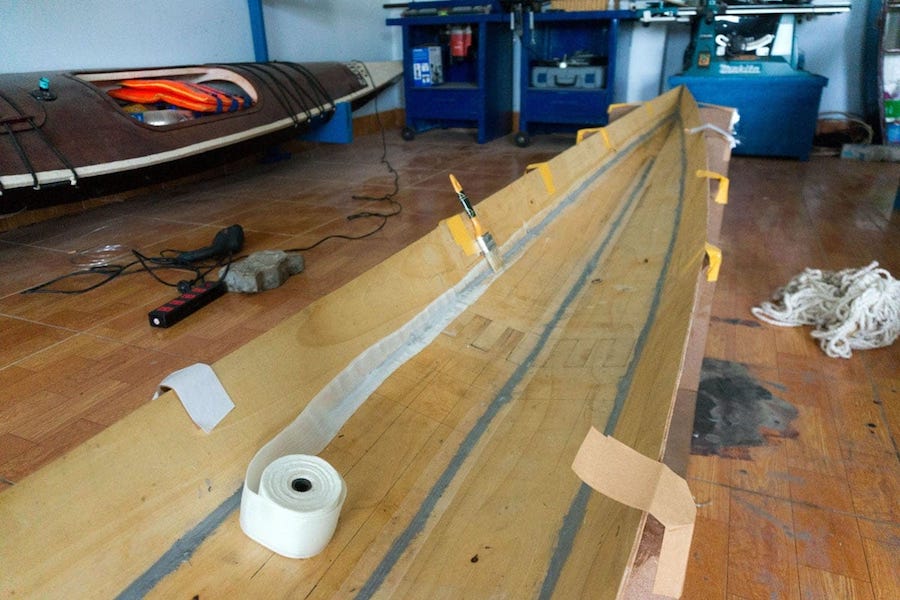
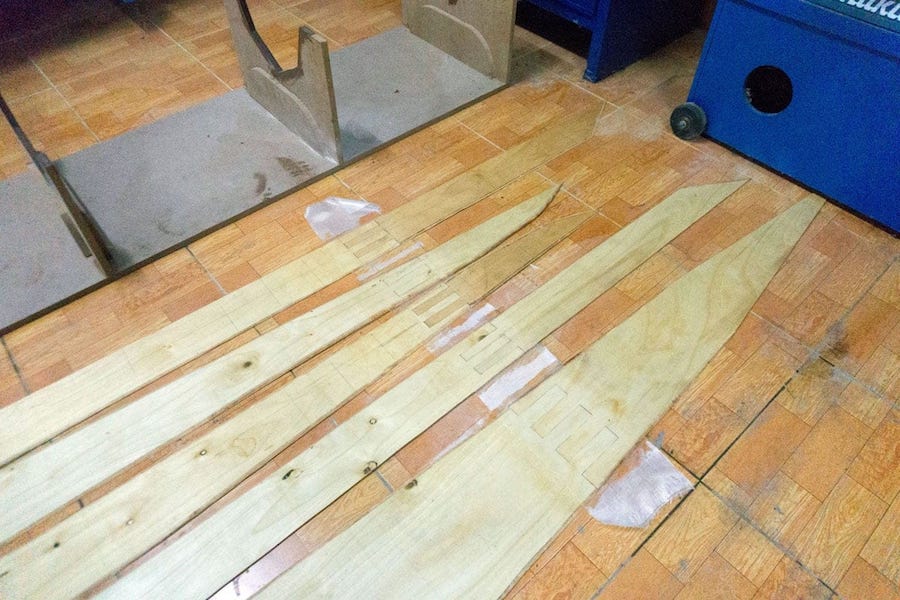
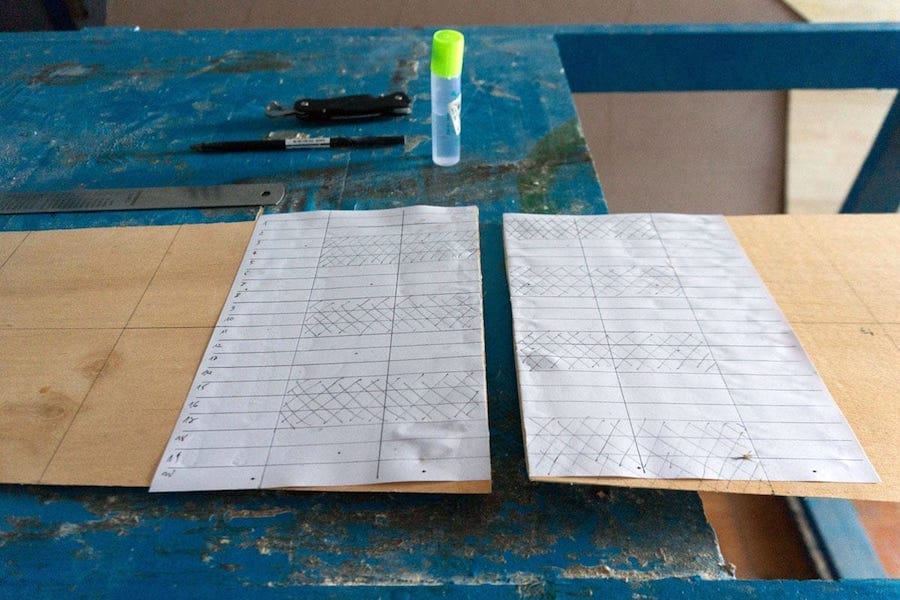
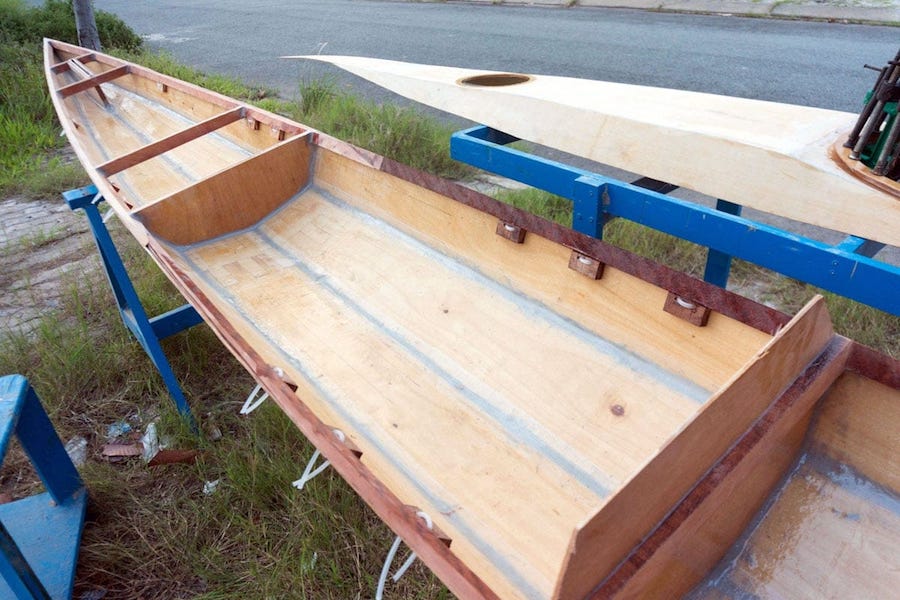
15 anchor points to be built into the hull. First, I glued small wood blocks alongside the gunwales, then drilled two holes (1 inch apart) into each block. Plastic lines 5 mm in diameter (the one usually used in fishery net) are run through, then putty is filled in, this way, just a small amount of putty is used. When the epoxy has cured, pull the lines out, you would have some “tunnels” to run the lashing through. Finally, small pieces of glass would cover and strengthen the wood blocks.

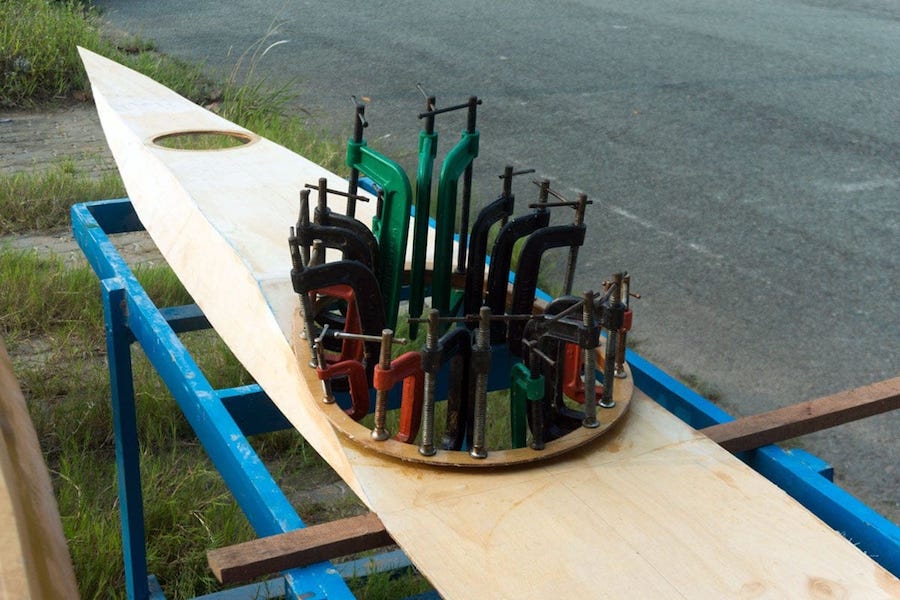
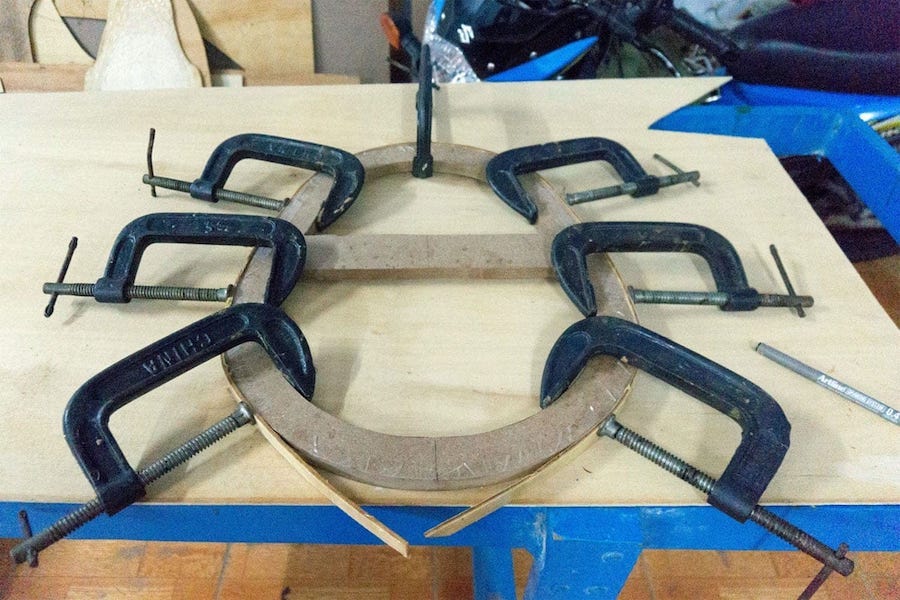
The cockpit coaming is glued, then glassed with the deck, two layers of fiberglass (one under and one upper), it’s very strong now, can withstand the weight of my whole body (while climbing onto it). For such a narrow kayak and small cockpit (45 cm in width, less internally), I don’t install any foot brace or thigh brace, and even back rest, the cockpit almost fits my lower body. I have no idea for a seat for now, maybe that I would just sit on the bare bottom, or with a thin layer of mattress.

Serene – 1 p1
Serene – 1 p2
Serene – 1 p3
Serene – 1 p4

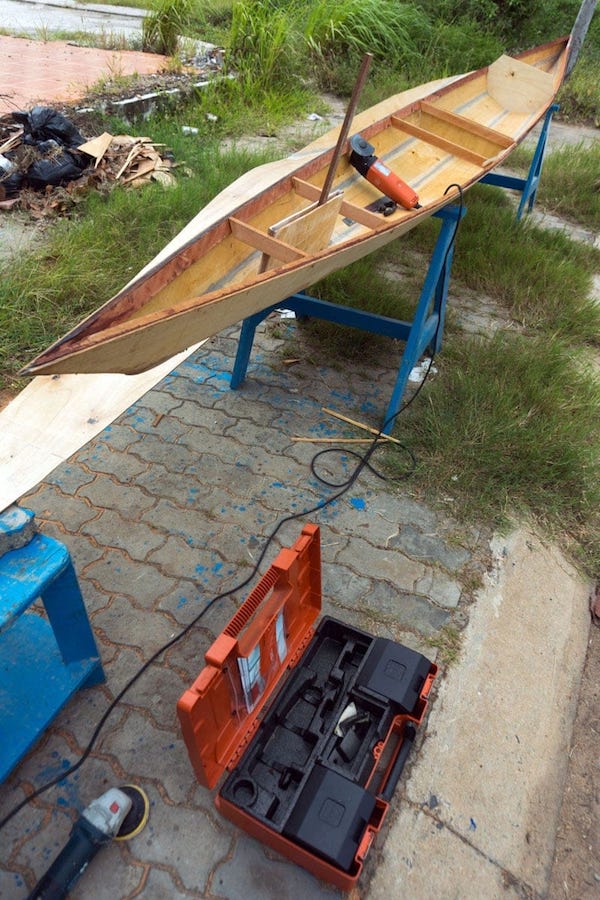
[13 ~ 18] kg is the usual weight range of wooden kayaks, with the lighter being used for tourings, and the heavier as “expedition boats”. Plastic or FRP (fiberglass – reinforced plastic) boats are much heavier, often in the [25 ~ 30] kg range. In order to go below 12 kg…

…you would need a SOF (Skin on Frame) design, or make use of the expensive carbon, kevlar fibers (usually found in racing boats). So wood is a very ideal choice for kayaks (as well as any small watercraft), and I would be very happy to have mine aimed at the 17 ~ 18 kg target.

serene – 1, part 11

ost major tasks on the hull has been completed, now continue on the deck part. First is cutting out the fore and aft hatches’ holes and fit some reinforcement rims (the plywood is weak, it can deform badly around the hatches in the long run). The Beckson hatches are quite small indeed, the largest are 8″ in internal diameter, have to live with that for now anyhow since Beckson does not have a larger size. I also made a rough fairing on the external side of the deck. Next comes the cockpit.

The plywood is so fragile and easy to crack, so I turned to using wood for building the cockpit coaming. 2 thin strips of wood is combined to form the cockpit coaming riser. The strips are cut 3 mm thick and easy enough to bend without steaming, just use the C – clamps to force them following the cockpit template. The riser is quite high, 2 cm, and would be jointed with the plywood coaming lip 3 cm in width, all would be reinforced with some putty and fiberglass before jointing to the deck.

Using the angle grinder, I adjusted the bevel edges of the gunwales to better match the hull and deck. Also glassed the 3 hull’s external seams, each with about 80 gram of epoxy (240 gram in total). With experiences gained by now, I can control the amount of material used quite precisely. Hence, this gonna be the first boat which I could have weight truly under control, my projection is somewhere around 17 ~ 18 kg overall (everything not including the paddle). Let just see if I could make it there!

Serene – 1 p1
Serene – 1 p2
Serene – 1 p3
Serene – 1 p4

The Beckson hatches come with rubber o – rings that make the water – tight sealing. I made a mistake using some petroleum – based grease as lubricant on the rings, which could degrade and wear out the rubber. Have to clean it out and use some silicone – based grease instead.

One more ugly thing working with epoxy is that I usually need to mix them in a very small batches, just 30 ~ 40 gram or so (using an electronic scale). It seems counter intuitive, but the smaller the batch, the harder you would need to stir in order to have them mixed thoroughly.

serene – 1, part 10

oat building is a labour – intensive process, and only skills and experiences could help to reduce workload and improve quality. Up until now, I’m quite pleased with the building, my 4th one. Today, I cut a slot into the aft hull to install the skeg box, the excellent Fein multimaster oscillating tool offers a nice cut as usual. Things went on smoothly, I have great confidence in this 5 cm fiberglass tape, it produces very fine and strong seam lines, so I decided to use just 2 layers (one inside, one outside).

In my previous boat, I used 4 layers of fiberglass to secure the skeg box in place (which results into more weight added). The skeg blade is smaller, 30 x 14 cm, I guess a deeper V – bottom would track easier, so I would need a smaller blade just for some weather cocking conditions. Still stay indecisive about skeg’s control, I’m not totally happy with HW – 3‘s skeg control line, which runs over the aft deck, though perfectly functional, potentially could interfere with self – rescue actions.

Working on the skeg box vs. hull joint (the external side), then give the bottom a rough fairing to remove excess putty and smoothen out the edges, then apply 300 gram of thinned epoxy to it. A long busy day with lots of dust. Next would be exposing the hull to sunlight for 1, 2 days for the xylene solvent to completely vaporize, before glassing the external seams and other jobs. The hull part would receive an additonal overall layer of fiberglass once it’s jointed with the deck part.

Serene – 1 p1
Serene – 1 p2
Serene – 1 p3
Serene – 1 p4

Epoxy & putty are heavy, typical density is in [1.1 ~ 1.4] ton / m3 range. Wood & plywood are usually lighter, with the most normally used in [0.5 ~ 0.8] range. In order to use less epoxy, putty for joints, a good fit is required, hence wood working skills are anyhow important.

Use a small foam roller to stretch epoxy on fiberglass surface, and roll thoroughly, don’t use a brush, it brings in too much material. Don’t worry about the initial un – smooth result as epoxy has great “surface tension” and tends to make a much better gloss (as compared to paint).

serene – 1, part 9

arious miscellaneous jobs in preparing for the next steps. First is glueing the skeg box and glassing the skeg blade (I use the “skeg in a well” as in my last boat, the skeg box is like a “well”, going through hull and through deck, a design that greatly facilitates maintenance and repair). Then forming the cockpit coaming by 2 nested narrow strips of 4 mm plywood, bending around the MDF frame cut earlier, the ply is so fragile that I had to brush it with a layer of epoxy to prevent cracks when bending.

There’re still lots of things to be done before two halves of the peanut shell (a.k.a hull and deck) could be jointed together: fitting the starboard gunwale, fitting and glassing fore and aft bulkheads, install some cross – beam stringers, install the skeg box and it’s control line, making and installing the cockpit as well as the two hatches’ rims, build some lashing anchor points into the hull… any many other unnamed jobs. Forcing myself to slow down as not to let my impatience harm the kayak quality.

5th image below: the stringers glued and screwed in place, these stringers serve multiple purposes: help maintaining the boat width profile, support the skeg box and bulkheads, the stringer right behind the cockpit would help strengthen the deck (as the only way to get into the kayak is climbing upon its aft deck then slide your legs in). 6th image: the fore and aft bulkheads clamped in, ready to be sealed with putty and then glassed. Next would be the important job of installing the skeg box.

Serene – 1 p1
Serene – 1 p2
Serene – 1 p3
Serene – 1 p4

A large part on boat – building here (in Vietnam) is not about learning the techniques and executing them right. Mishaply, it’s about dealing with inferior – quality materials, working around with under – standard chemicals, paints, epoxy and various faulty wood – working tools.

A “secret” in this Serene – 1 kayak design: its lines are all mathematically very well – defined. I don’t know if this would add some gains into the boat’s performance, but in building, it’s easier to draw and cut, easier to stitch and form, less bending, less fastening, less clamping etc…

serene – 1, part 8

poxy resin and putty are the most crucial parts in small watercraft building, yet they’re the most annoying, paranoidly sticky and easy to mess around. It takes me a long time to learn how to use them properly. After filling all the internal seams with the 511 putty (which I found very good for boat building), I put a layer of 5 cm – width fiberglass tape over them. I highly praise this double – weave glass tape: easy and quick to work with, precise laying, resulting in nice, tidy and tight bondings.

With my previous boats, I haven’t got these fiberglass tapes yet, hence had to resort to bias – cut fiberglass, and it is next to impossible to make out a straight narrow strip of 5 cm, consider the mediocre local plain – weave 6 – oz fabric I was using. The very satirical thing is that this tout simple commodity of fiberglass tapes is not available anywhere in Vietnam market, and so I had to buy them on Amazon.com and have them shipped from the US, with delivery fee doubles the purchasing cost!

To further reduce weight, I only glass the internal side in part, the mid section slightly larger and around the cockpit, the place that could potentially expose to water. Next would go in the gunwales (a.k.a the sheer clamps) and the bulkheads. The gunwales are 15 x 30 mm long strips of wood, bevelled to match the deck’s profile. 7th image below: jointing 2 strips of 3 m wood to form the gunwale that covers the entire 5.5 m length. It’s so good a sensation to see the boat gradually take shape!

Serene – 1 p1
Serene – 1 p2
Serene – 1 p3
Serene – 1 p4

To completely clean epoxy, putty that stick to your hands, first scrub them hard with a rough piece of sponge, then rinse thoroughly with some acetone, finally wash with soap and water. I usually don’t wear gloves while working with epoxy, my hands just become clumsy with them.

A misc thought: stitch and glue is like a kid’s game, on a larger scale. Though it requires skills to build up a good functional boat, I don’t really see this as true “wood – working”, or any “piece of art” yet. That could be later, I don’t care, pour maintenant, tout ce que je veux c’est allez à la mer!

serene – 1, part 7

he bigles jointed very well, with just some neglectable tiny defects, port and starboard pairs match perfectly. Before putting them all together to form the initial boat shape, I applied a layer of penetrating epoxy (epoxy thinned with xylene), taking care so that the amount of epoxy used won’t exceed 0.6 kg overall. For this job, I use a kind of elastic epoxy with the B5 slow hardener. There’re two kinds of epoxy: one hard and one elastic, with at least 3, 4 kinds of hardener available in the local market.

I put a layer of fiberglass to the internal side of each joints before stitching the bilges. The deck is quite easy to form, since it’s very well geometrically – defined, I don’t even need to use steel wire and thus, avoid the unpleasant job of drilling holes, just duct tape over the edges, then dully apply the putty onto the bevelled seams. The hull is not that simple, with wires to fasten particularly at the two ends. Check the geometry of the overall shape, fasten the wires tight, then fill the seams with putty.

Cares are taken to use as little putty as possible, as I especially long for this to be a light boat. The same steps as in my previous boats, but done by more skillful hands 😀. Actually, I sometimes feel bored with those same things having been been done 4 times already, I should be planning for another boat in a different building method. But sure, not until I could feel I’m good enough at the current method, if you’re not “up to the level” yet, you would probably done wrong with whatever method used.

Serene – 1 p1
Serene – 1 p2
Serene – 1 p3
Serene – 1 p4

I wouldn’t advocate the use of thinned (penetrating) epoxy here, using it or not depends on the specific situations. In general, it should be avoided as it would add much more weight to the final product. However, the plywood available to me is not of marine – grade quality.

It’s made of a kind of “tea tree” wood, though apparently has some tensile strength, is quite porous and indeed lacks compressive strength. To compensate, some penetrating epoxy would help the plywood to become more firm and prevent delaminating in the long run.

serene – 1, part 6

sing staples to clamp 2 sheets of plywood together, I then cut the hull’s planks, port and starboard, all is composed from 3 pieces. Then the deck’s pieces, and other parts: forward and aft bulkheads, skeg box and skeg blade… After 3 boats, I can now cut the wood with quite some accuracy. Sometimes, I’d wished to have the accuracy of a CNC machine, but such a machine that can cut in the 1.22 x 2.44 m dimension is not a possible option for most home builders, including me.

Next is the dusty job of beveling the edges of the plywood bilges, the edges are carefully bevelled at different angles along their lengths, to ensure a suitable gap, not too small, and not too big, for just a small amount of putty to go into the seams in a later phase. Then I joint the parts together using finger joints instead of the originally – planned puzzle joints. Straight finger joints, though not as strong as puzzle joints, they’re easier to cut and to fit, and most importantly, easier to align longitudinally.

This is very important, in my first boat, the 2 ends of port and starboard bilges differ as large as 5 ~ 6 mm. I can now confidently keep the tolerance under 1 mm along the 5.5 m length. Patterns of the joints are drawn on paper, photocopied into multiple sheets, glued onto the plywood and cut accordingly. I work carefully as to ensure a tight fit, an accuracy of a small fraction of a millimeter is required. This is quite hard when done by hand as my thinnest saw blade is already over 1 mm thick.

Serene – 1 p1
Serene – 1 p2
Serene – 1 p3
Serene – 1 p4

The phase measure twice, cut once struck me once again 😢. As I’m about to joint the bottom bilges, I discovered that 2 pieces were incorrectly drawn and hence were cut 10 cm shorter compared to the design. Frustrated, I stopped working for a day, feeling really miserable…

I found out a way to cut (puzzle) joint nicely: just draw & cut something on the 1st piece of wood, the pattern doesn’t need to be too perfect, then use it as a template to draw and cut on the 2nd piece. This method is less error – prone compared to cutting twice following one same pattern.

serene – 1, part 5

erene – 1 is quite a distinctive boat, originally took inspiration from the Black Pearl and the Anas Acuta, but in it current status, it shares not a single common point with them. The hull has been transformed into a light cruising one with long water line, deeper V bottom, little rockers and a very narrow beam (45 cm). There’re times that I’m worrying on the feasibility of the design, except for some theoretical calculations, there’s nothing to ensure me that it would be a good watercraft.

When you build something from a well – known designer, it’s already a well – proven boat. For Serene – 1, there’s no way to know, unless you build and trial it yourself. Eventually have some free time to proceed on today, first is cutting all the hull & deck framing stations in MDF. Can also see drawn is the cockpit template, this would be a very small one, 50×40 cm in dimensions, that’s what they called an “ocean cockpit”, you would need to climb over the aft deck and slide your legs into the hole.

The framing box showed up, by now, I could see how slim the boat would be, at this size, you just don’t ride the kayak, you essentially… wear it! Like an integral part of your body going to rough water, that’s how the feeling should be! Next would be the important task of drawing, and cutting the bilges from exported offset tables. For ones who don’t know, offset table is just a matrix of (x, y) coordinates, I use a very fine matrix (points every 5 cm interval) to precisely reconstruct the bilges on plywood.

Serene – 1 p1
Serene – 1 p2
Serene – 1 p3
Serene – 1 p4

One important note about various hull shapes (V – bottom, round, flat, etc…), cross section only affect stabilities, they have little effect on the boat’s speed which depends mostly on the waterline length and the wetted surface area. I tend to prefer hard chined V – bottom though.

About Prismatic Coefficient (Cp): a lower value indicates that the boat is more efficient at slower speed, a higher one tells that the boat is more efficient the faster it goes. So higher or lower Cp is neither good nor bad, it’s just that you need to know where is your desired range of velocity.

serene – 1, part 4

inalized my new kayak design, a considerable amount of work on optimizing the hull shape, adjusting it back and forth to find out the minimum drag numbers (based on the Kaper algorithm) while keeping stabilities and other parameters under control. Some numbers: LOA / LWL (length overall / waterline): 5.500 / 4.945 m, BOA / BWL (beam overall / waterline): 0.452 / 0.420 m. I reduced the boat width to exactly my hip plus 4 fingers (that is: 36 + 9 cm, my fingers are quite big, 9 cm for 4 fingers).

Designed draft: 0.11 m, Designed displacement: 95 kg, Cp (prismatic coefficient): 0.5475, Cb (block coefficient): 0.4064, LCB (longitudinal center of buoyancy): 0.5225, VCB (vertical center of buoyancy): 0.0690 m, LCF (longitudinal center of floatation): 0.5136, Cw (waterplane coefficient): 0.6445, S (wetted surface area): 1.699 m2, Aw (waterplane area): 1.329 m2, Am (midship section area): 0.034 m2, Cm (midship coefficient): 0.7466, KMt (vertical transverse metacenter): 0.196 m.

Predicted drags at 0.11 m draft (95 kg of displacement): 3 knot ~ 7.122 N, 4 knot ~ 12.622 N, 5 knot ~ 23.763 N. Predicted drags at 0.121 m draft (110 kg of displacement): 3 knot ~ 7.679 N, 4 knot ~ 13.611 N, 5 knot ~ 25.506 N. The hull is heavily optimized for speed in the [4 ~ 5] knot range with some sacrifices in stability and load capacity. Now that all “theoretical calculations” has completed, it would take a few months to build the physical boat to tell the real truths about the design! 😀

Serene – 1 p1
Serene – 1 p2
Serene – 1 p3
Serene – 1 p4

While 45 cm could be considered “extreme” for nowadays kayak (few available on the market has width at or below that value), it’s not really so with the traditional Greenland ones, some could be as narrow as 39 cm. Well for sure, it requires lots of skills to handle such a narrow boat.

The very important point here is the CG (Center of Gravity) used in calculating stability. The Sea Kayaker magazine uses a standard 25.4 cm as CG, as a reference point to compare different kayaks. I used the midpoint of VCB and KMt as CG, which is usually [12 ~ 14] cm for my cases.

serene – 1, part 3

ade some good progress in the process of modeling my new kayak… For a human – powered watercraft, water doesn’t like complex curves and shapes I think, so they need to be as simple as possible (it is not too simple to come to that simplicity though). The model is then decomposed by Free!Ship into several “developable” plates, at this point, professional builders could just output the plates to a large CNC machine, which would precisely cut the plywood accordingly.

I print those plates to paper to make a 1:15 paper model. Cut the plates with a pair of scissors, then stitch them together using transparent duct tape. Making a paper scaled model would help verifying about the “develop – ability” of the product, double check if there is any design mistake, and give a clear view on how we should compose the pieces into the final boat. For simplicity, I didn’t draw details such as the cockpit, skeg, lines or hatches, just the basic shape of the kayak.

The paper model is a bit ugly (my hands are not too skillful though), but the pieces come together perfectly, the shape just looks like a bamboo leaf! This gonna be a long, thin kayak with very little freeboard! Next would be finding some free time to materialize all these drawing onto the plywood sheets. I don’t have a printer that’s large enough to print the plates in their real sizes, so I would just redraw them using offset table exported from the CAD software, actually, I prefer this manual method!

Serene – 1 p1
Serene – 1 p2
Serene – 1 p3
Serene – 1 p4

Back to the number 70.39 Watt, a heavy labour (such as a bricklayer) produces about 75 Watt on average, and for only 8 hours. You know what it’s like to paddle 10, 12 hours on a minimum basic, or even more, like I was paddling for 16 hours from Vũng Tàu back to Sài Gòn in my last trip!

The book Kayaks Of Greenland by Harvey Golden is a great guide for home builders, it contains dozens of kayak models ready to be built, with all the necessary drawings! I used some models from the book as references and comparisons when designing this Serene – 1 kayak!