serene – 2, part 26

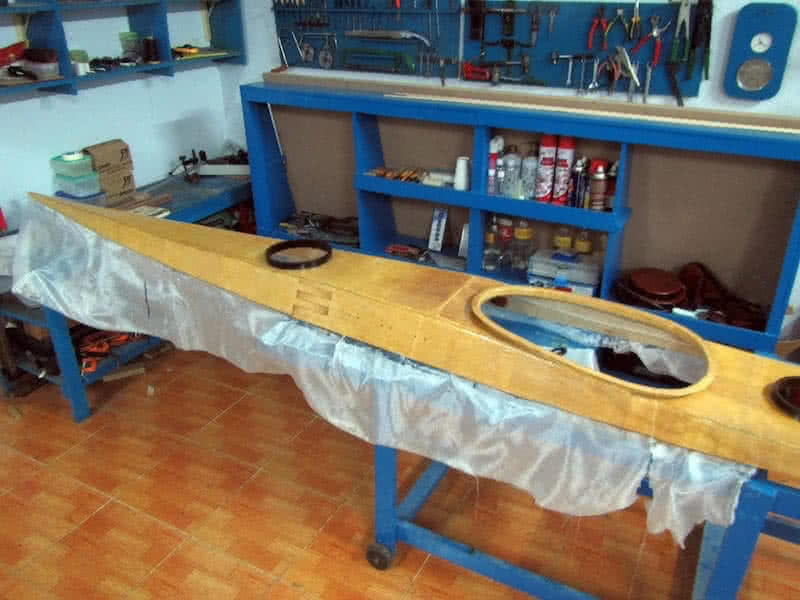
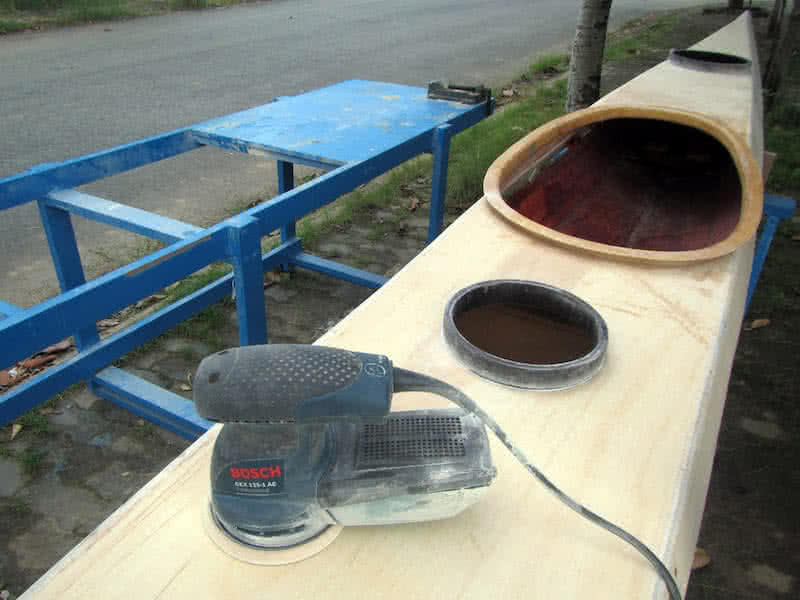
he deck is stained in a light – yellow color, compared to my previous boats, this kayak would receive a much lighter color scheme. Light, bright color would reveal more the defects on plywood and my building mistakes, but I don’t really care about that anymore, as soon as the faults are not too obvious. Then a thin layer of glass throughout the deck (first image). Next comes various deck fittings.

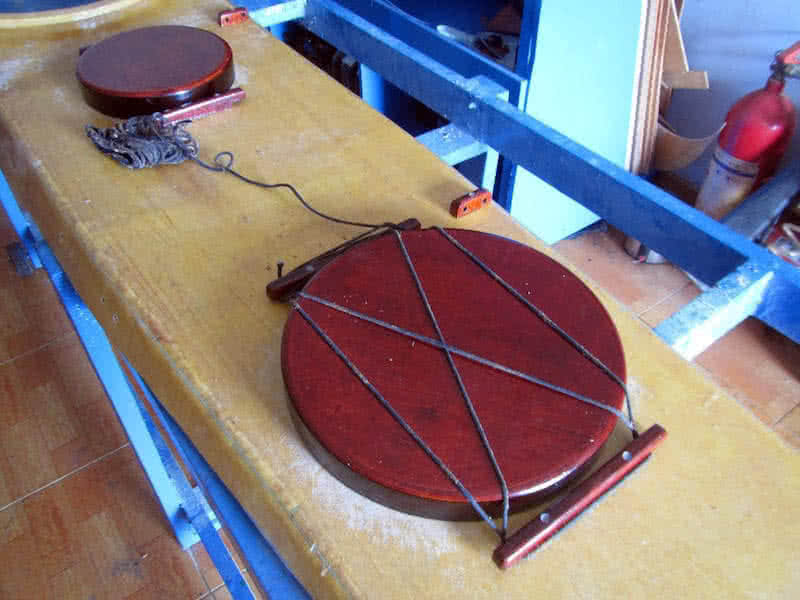
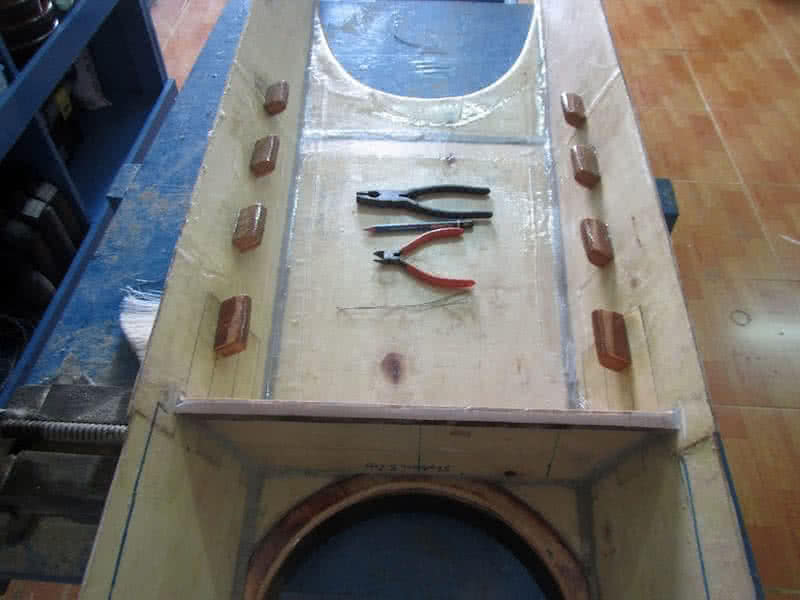
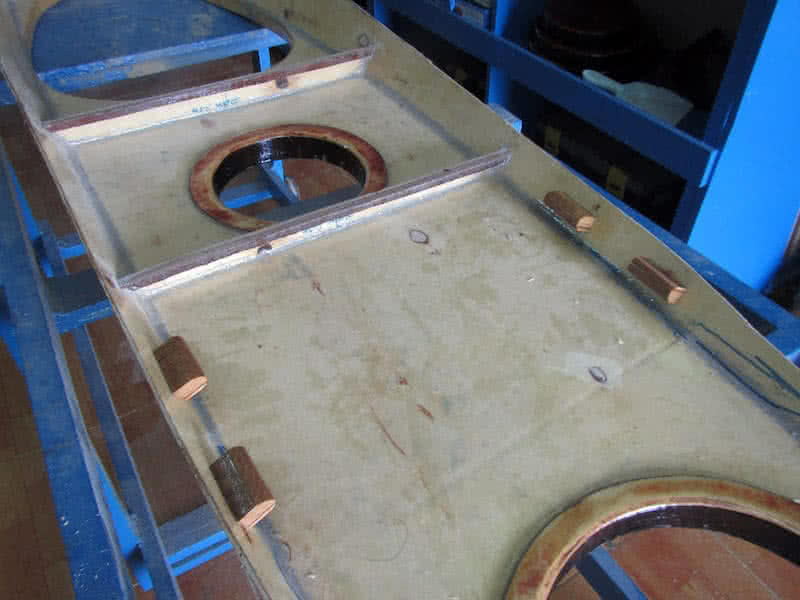
First are the cleats used to tie down the hatches’ lids. These wooden cleats are glued on, then bolted down with 2 small bolts for each cleats. I carefully fill the bolts’ holes with epoxy, then paint the internal side with some epoxy to prevent water leaking in. Tying down the hatches’ lids with lines is not a very handy way, but it’s simple and very secured, compared to other complex locking mechanisms.

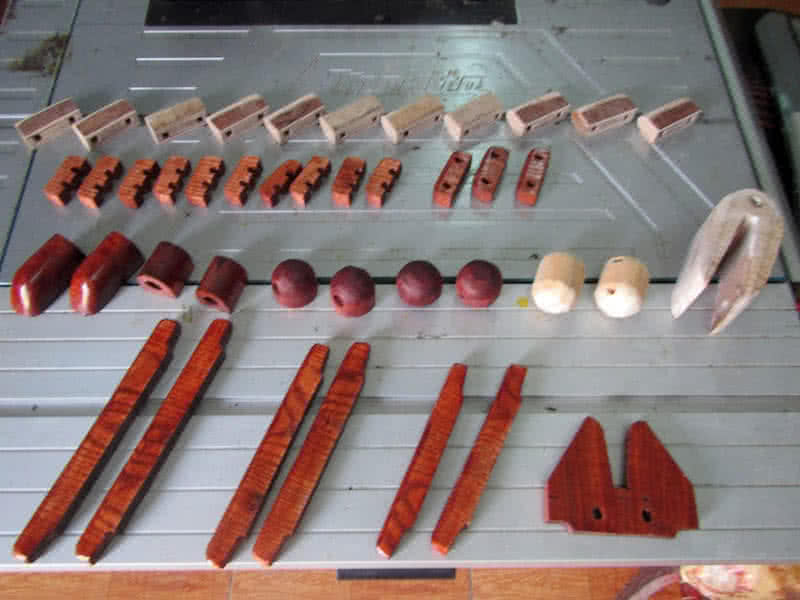
Last image: the rudder control lines’ tubes exit the deck near the stern, secured by 2 small wooden blocks, and protected by 2 cable glands to make the deck completely watertight. On the other ends of the tubes are similar cable glands inside the cockpit. I also made 2 “double – ended” wooden cleats to micro – adjust the rudder control lines’ tension. Various other wooden parts are also fitted on the deck.

The progress slows down as I approach one of the last major phase of the project: electricity. This is a complex issue, the kayak would have a 7W solar panel, which charges into a 2.2 Amph SLD (Sealed Lead Acid) battery. The battery is used primarily is for powering the boat’s bilge pump, and secondarily, to charge various electronics devices: the iPhone, Garmin, VHF radio GoPro, camera, the compass’ and signal lights, etc…

siêu trăng

Trời đất sinh ta rượu với thơ,
Không thơ, không rượu sống bằng thừa.
Công danh hai chữ mùi men nhạt…

iết mục kể chuyện đêm khuya, nhân dịp siêu trăng – super moon: ngày xửa ngày xưa, có một thằng bé mới chừng 5 tuổi, đứng giữa sân nhà, ngước nhìn lên bầu trời mà cảm thán rằng: mẹ ơi, trăng đẹp quá! Mẹ thằng bé chạy ra, đét vào đít: rồi cũng khổ thôi con ạ, rồi cũng lại giống y như cái thằng cha mày, suốt ngày rượu, thơ, trăng… Đấy, là mình phải học cái bài học đó, không được giống như cái thằng bé đó, và nhất là thằng bố nó… Trăng thơ giữ nguyên, bỏ rượu đi, thêm con thuyền vào… 😀

serene – 2, part 25

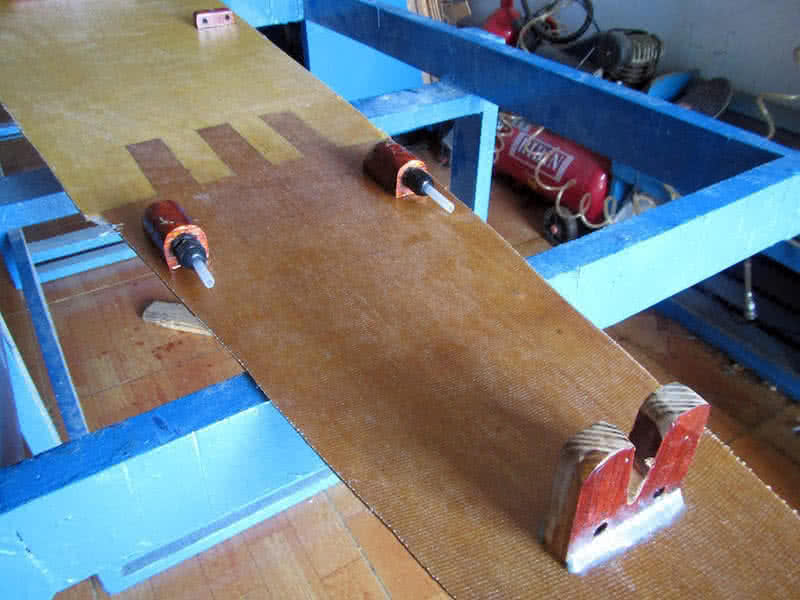
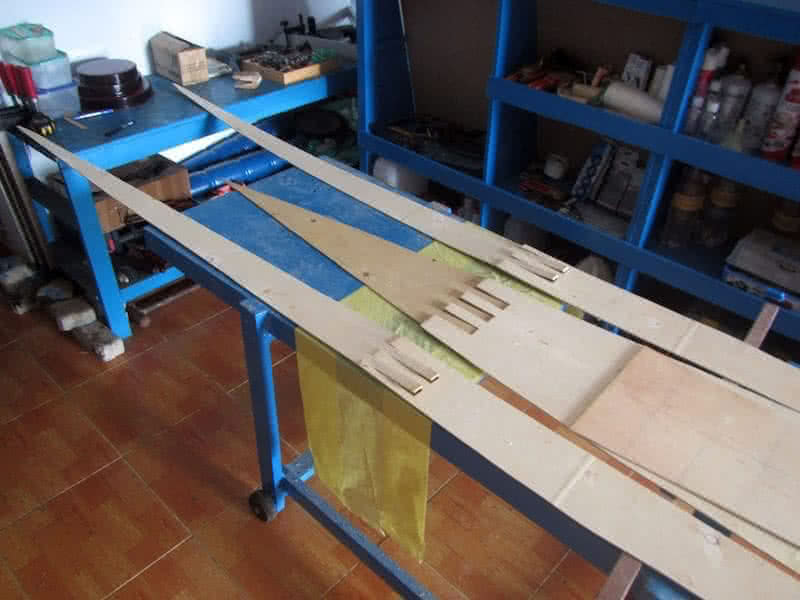
irst image: the 6 – mm diameter plastic cable glands, with a cigarette lighter for size compare. These cable glands are used at various places on my Serene – 2 kayak, but primarily used for running tubes, cables through hull. With proper installation, they should be waterproof, with the extra help of some silicone glue. Second image: the rudder control lines’ tubes, running through 4 cable glands each all the way from the cockpit.

All electric cables on my boat would be placed inside plastic tubes, to maximize their waterproof capability. So they would also need some cable glands to run through the bulkheads. But that would be the next step of the project. Now, just all things rudder related 😀! Third image: the rudder pedals, simple pieces of wood that could be rotated around hinges. Since all these parts are quite near the compass…

So the hinges, the screws… are all made of brass. I had a hard time finding these brass parts, cause most available on the local market is actually made of steel, just copper plated. It’s quite weird carrying a piece of magnet around the shops, to verify that they’re actually non – ferromagnetic, but I have to really make sure about that! 😀 For the compass, I would just used the same type as in my previous boat.

Though a simple and cheap compass, it has been verified (in my last 9 days trip) to work correctly and reliably. Before installing other parts, I slightly sanded the deck, applied some colored – thinned epoxy (for color staining, this time, the deck also has a yellow color like my previous boats, but much a lighter shade). Next would be glassing the external side of the deck, before fitting many other parts onto it.

serene – 2, part 24

here’re quite a lot of works required on the deck. First, I need to make various small wooden parts: the bungee cords’ anchor points (14 of them), the cleats (6) used to tie the hatches down, the rudder post, wooden balls for line pulling, etc… all is very “small” wood working, you would need to work on parts that a just a few centimeters in size, an ugly type of work which I don’t like, since I don’t really have skillful hands for that.

Second image: various wooden parts. First image: cut half – curve grooves for making the bungee lines’ anchor point using my router. The bungee would loop through that grooves, going from the external side, through the deck, then back to the external side again. There’re 14 anchor points like that to be installed, 8 around the cockpit, 4 on the aft deck, and 2 on the fore deck. Here, I learn to cut with the router following a template.

Third image: fitting the cockpit anchor points, the installation is quite simple and straightforward, the wooden blocks are glued on, with steel wire fastening through the holes, later some little putty would be filled in the jointing edges, and maybe some glassing too. This way, the bungee cords’ anchor points are made so simple, easier to implement, not the same nasty, clumsy way as in all of my previous boats.

Next in installing the rudder control lines’ tubes. Those are 6 – mm diameter (4 – mm internally) plastic tubes that run from the cockpit, through the day – compartment and aft compartment to near the stern, running through 4 cable glands on the way for each tube. The installation is quite messy, as I was using too much silicone glue, in an anxiety to assure that these cable glands would be completely waterproof.

serene – 2, part 23

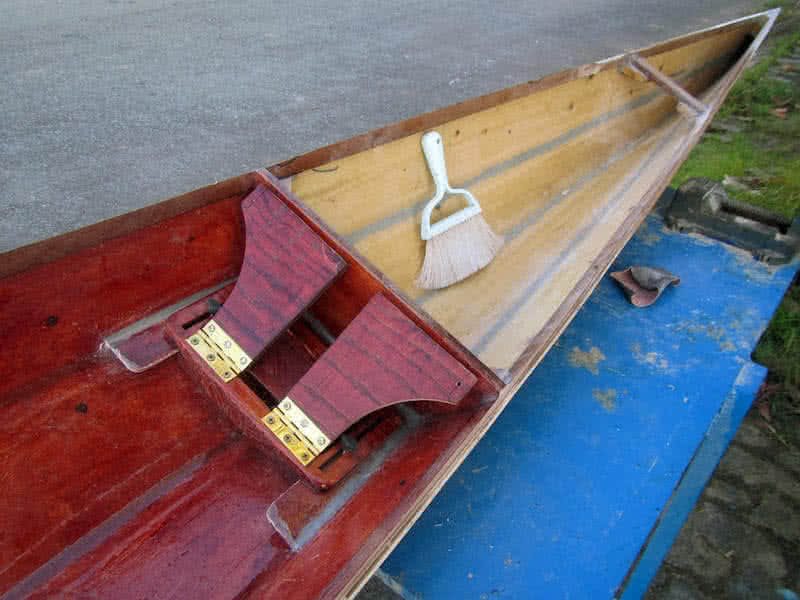
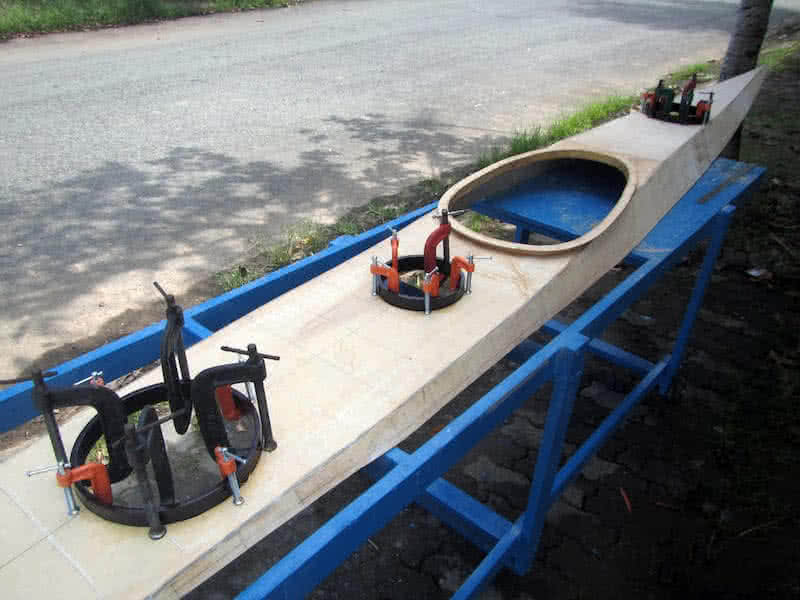
nstalling the cockpit coaming and hatches is quite straightforward: the fore and aft hatches, and the day hatch. Then I bevel the deck’s jointing seams (the external side) a bit, as well as the cockpit coaming, the seams need to be curved in order for glassing to go on well. Glassing the cockpit coaming could be a little bit tricky, as the fiber fabric should wrap around and cover both the internal and external sides.

Talking a little bit more about jointing the seams here. For the seams to be strong, I follow these 3 steps: first is priming the seams with some epoxy, then when the epoxy has not cured, apply the putty. Putty has lots of viscosity, so it won’t penetrate well into the plywood, that’s why we need epoxy as primer. And once the putty has only half – cured, I apply the glass tape. That way, the seams would be very strong.

First image: fitting the hatches. The hatches’ bases would, from beneath the deck, go through the cut – out holes, they serve as reinforcement rings around. Since the hatches’ bases and lids are of the same height, going through the deck would leave a small gap (about 4 mm) between them. That would be the place to pour some epoxy in, the type of elastic, softer epoxy which functions like the hatches’ gaskets.

I didn’t glass the internal side of the deck, just some fiberglass tapes at the seams. Instead, the deck would be glassed on the outside, which should offer better protection against water. The internal side only receives a very thin layer of epoxy coating. The external glassing would slightly overlap with the hull (about an inch), to better strengthen the deck & hull joint. It looks like basic jobs are done? Actually there’re still lots of works ahead!

serene – 2, part 22

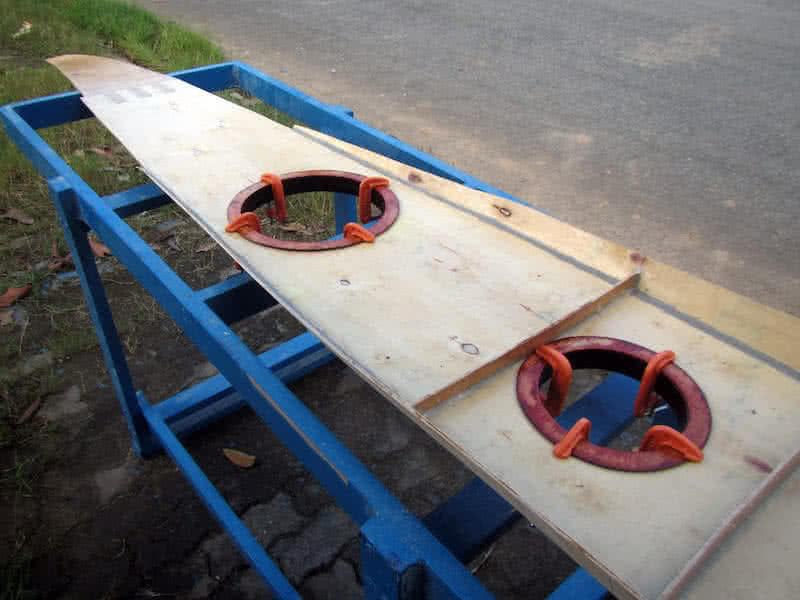
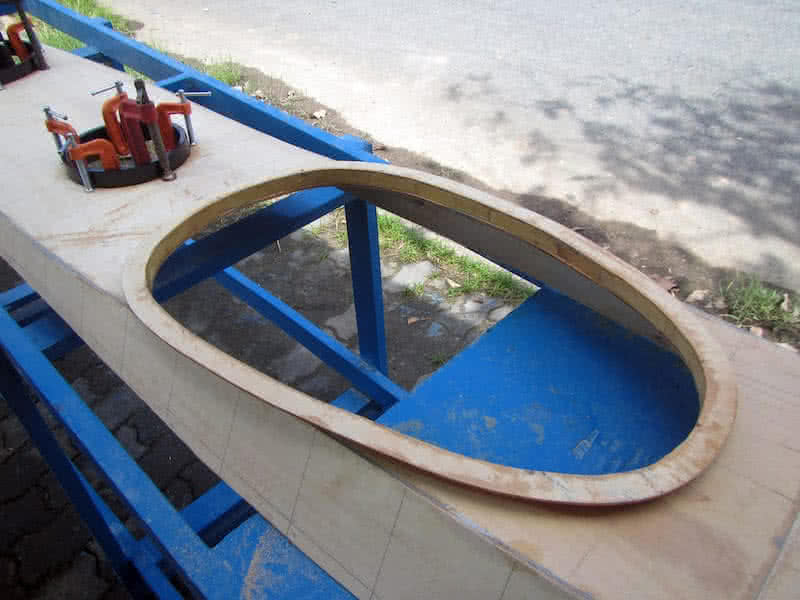
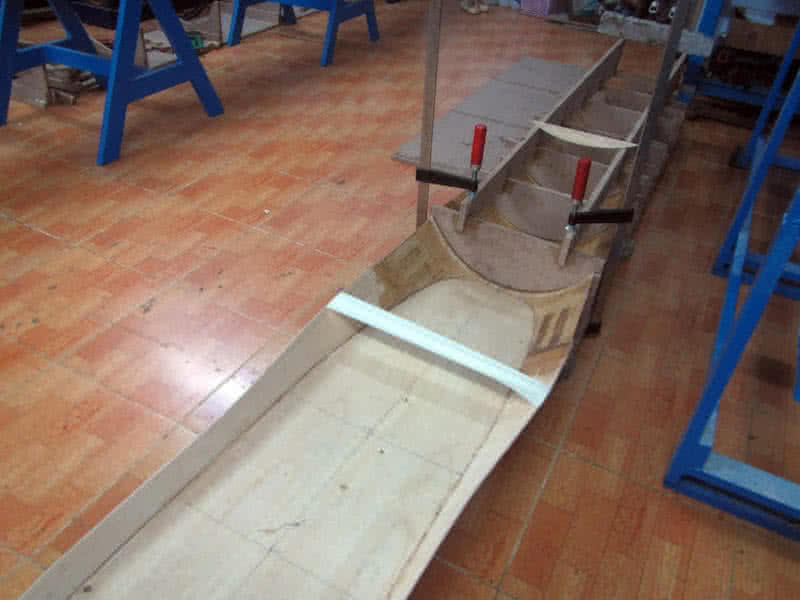
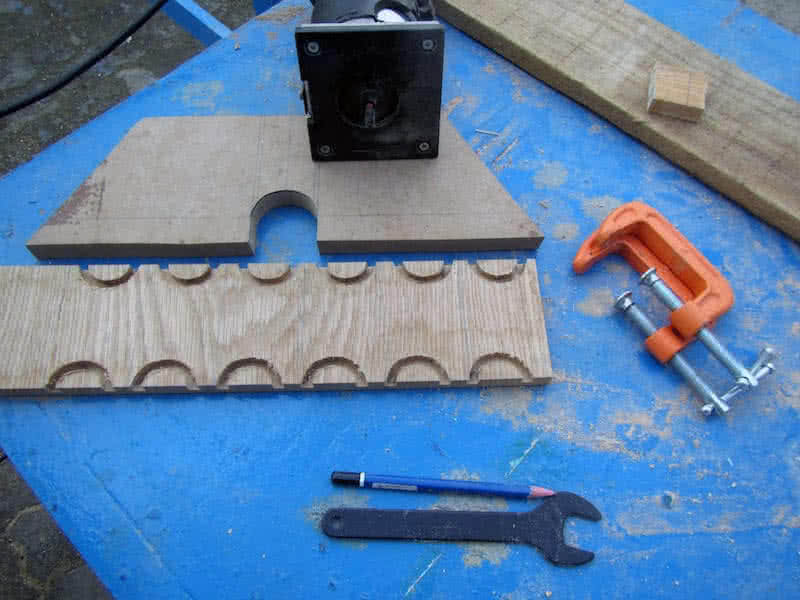
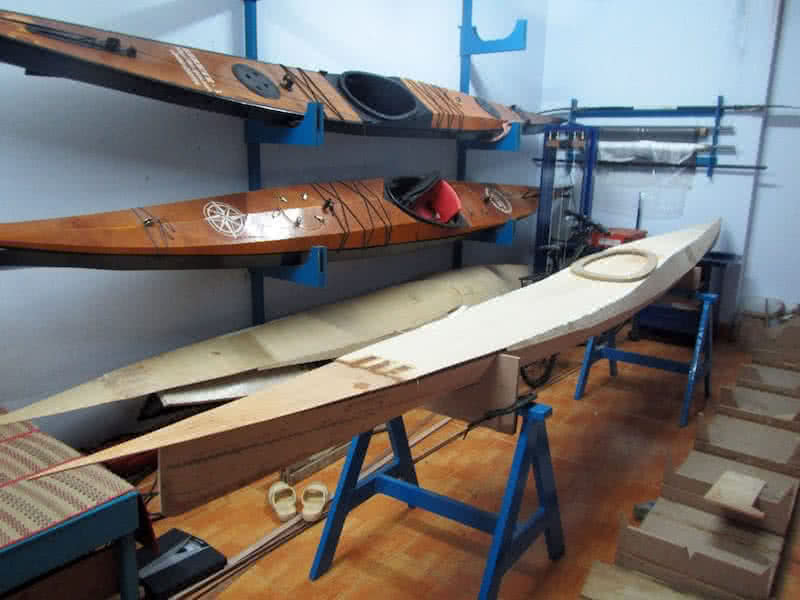
ontinue working on the new deck! The deck has 3 bulkheads of its own, corresponding to those of the hull. The two rudder control lines would run inside plastic tubes, which run through these bulkheads via waterproof cable glands. But that would be later, first is installing the cockpit coaming, which is just a thin plywood strip bending around a MDF frame. The coaming lip is also cut from plywood.

First image: you can see my beloved Fein Multi Master, the renown oscillating tool. Often when I have to cut or do other tasks in tight corners or in positions that are inaccessible or inconvenient to other reciprocal tools, this Fein is my last resort, and it’s always been very helpful to me. Here, I need to trim the already installed, but wrongly – sized bulkheads. Also, really love the tool’s Germany quality.

There’re some other tasks which are not reflected in the images here: fairing the hull and deck’s external seams, then glassing them with my fiber tapes. It’s not until now that I could comprehensively master the skills working with epoxy and glassing, using just the right amount of them. But also, I also gave up the idea of a kayak that’s as light as possible. For a training, exercising boat, lighter is of course better.

E.g: 15 vs 20 kg is a huge different, cause it’s much easier to launch and retrieve the (almost empty) boat for every training sessions. But for an expedition boats, a few kilograms doesn’t make much difference, since a loaded kayak weighs as much as 110 ~ 120 kg, with that mass, you can’t carry on your back anyhow, so a few more kilograms added would worth the value of a stiffer, more durable boat prepared for long journeys!

serene – 2, part 21

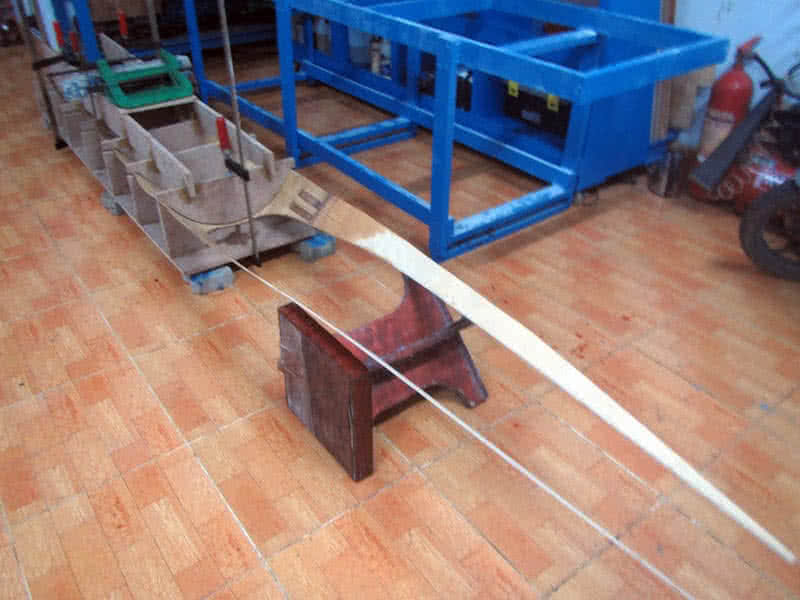
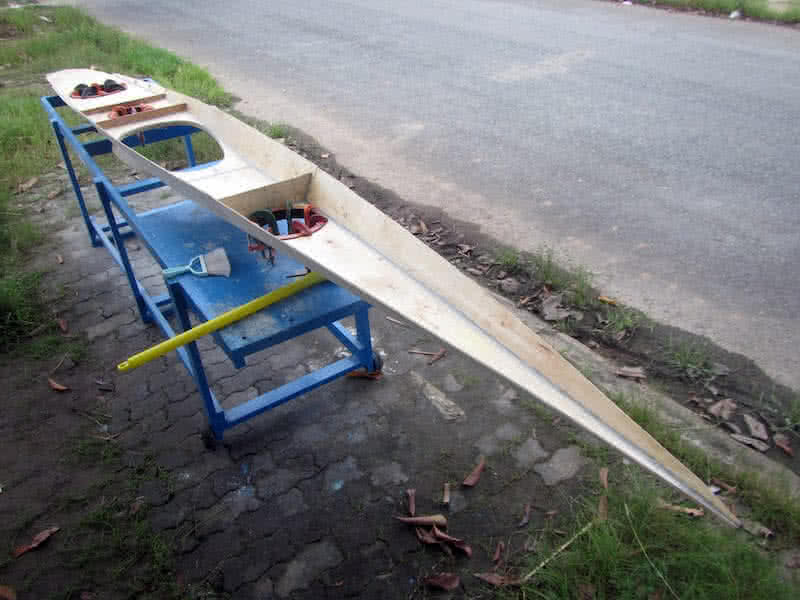
major setback in the building progress, the curved deck didn’t come out with my expected quality. After released from the molding frame, the deck slowly bend back from its curved shape, especially amid of the boat, off from the desired geometry by 3, 4 cm (first image). That’s really bad… 😢😢 I made a hard decision to discard the rounded deck, and build a hard – chined one (like my previous kayak) instead!

I had an uneasy feeling, lots of work has to be redone, cutting and jointing the deck’s bilges (second image), setup the molding female frame. I took this chance to modify the deck design a bit, raising the aft part by 1 cm, to better accommodate the rudder control lines. A hard – chined deck doesn’t look as good as a rounded one, but it’s easier to build, easier to install other things, and it would fit with the hull much better.

Third image: forming the deck shape, the geometry is so simple that it doesn’t need any wire – fastening, just some CA glue here and there to fit the bilges together, some duct tape on the outside, then putty onto the inner seams. To save weight, I only glass the deck internal side at the cockpit area, where it could be potentially exposed to water. However, the deck would receive a glassing on the external side later on.

Fourth image: dry fitting the deck and hull… perfect fit! No adjusting, no fastening, no compressing would be required, just fit them together, then trim the edges! In the image, top of the cockpit area, we can see the cockpit coaming template (cut from MDF). That would be a frame for building the coaming lip and ring around, measured 38 x 64 cm in internal dimension. The external dimension would be 44 x 70 cm.

serene – 2, part 20

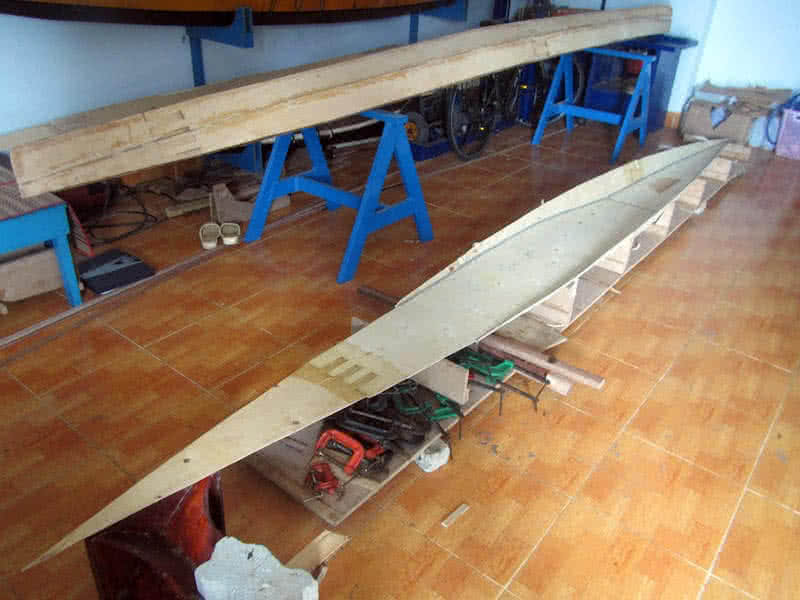
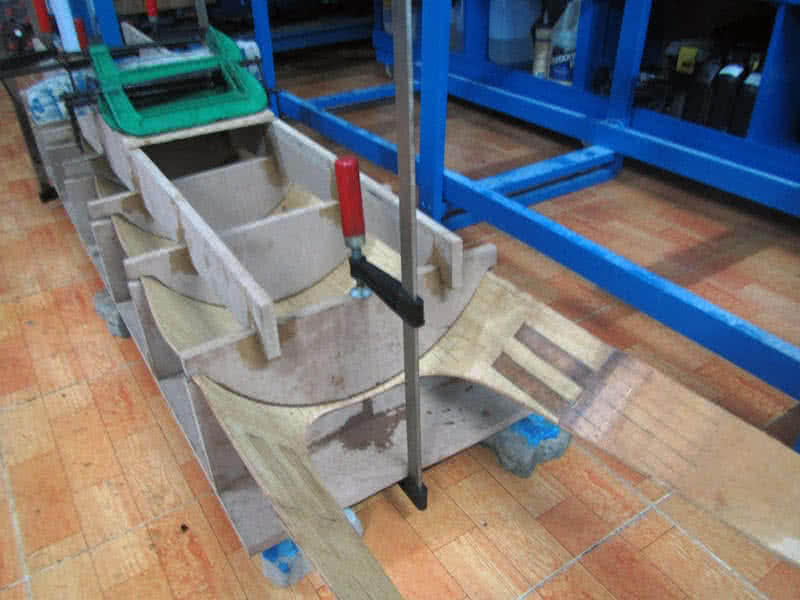
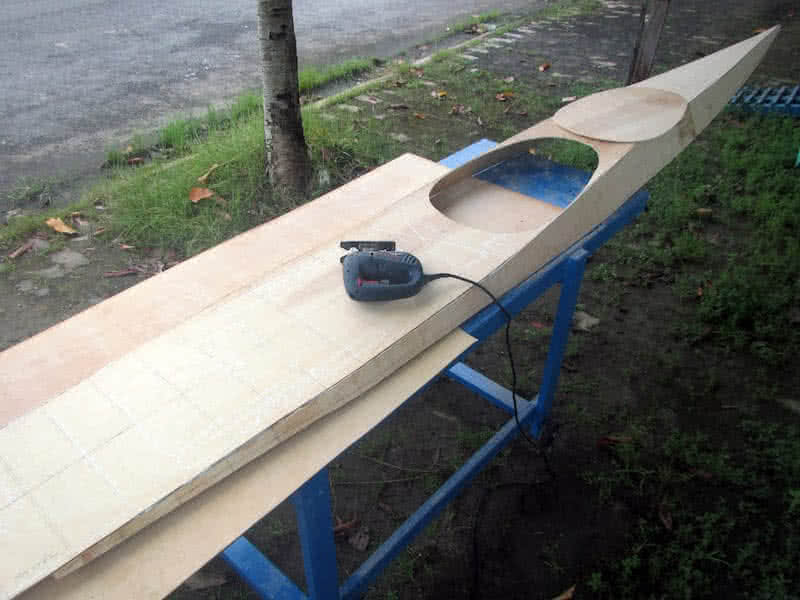
ith my Dremel – Multi – 3000 tool, I made lots of parallel cuts onto the deck internal side (see the first image), the cuts are about 1.5 cm apart, and about 1 ~ 1.5 mm deep. Those are not very deep cut, since the plywood is only 4 mm (3.75 mm to be exact). Then I soak the deck with water thoroughly, for the ply to be softened, then put it into the frame and press it down… with my body weight (just sit on it) 😀.

With the extra help of some clamps, I press it down, little by little, don’t be too quick, just do it very slowly, then the plywood bends nicely into a perfect curved shape! There’s some minor cracks on the edges, but that’s not too important, cause those parts would be trimmed away when the deck would be glued with the hull. Second and third images: you could see how well done the curved deck is!

I let it there overnight, waiting for the water to vaporize, then apply some thinned epoxy onto the deck internal side, I also apply a few glass tapes at some places, that way the curved deck would hold its shape once released from the molding frame. Next would be puttying the rear part of the deck onto the forward part, a simple and straightforward job, then again, glassing the seams with my beloved fiberglass tapes.

Joining the fore and aft parts of the deck is quite simple, though it required some wire fastening to put everything under order. FreeShip (the boat design software) strangely generates a slightly abnormal curve around the cockpit (had I made some mistake, or didn’t use the software in a correct way?). So I had to manually draw the line by hand, guessing at some places, resulting in not a very good fit.