serene – 3, part 12

ext came the hatch locks, each hatch is hold down by 3 belt – locks, similar to those usually found on your backpacks, very secured and easy to lock / unlock. But that would be later on, for now, the locks’ anchor points need to be built and installed. There are many of them (a total of 30), as the anchor points are not only used for holding the hatch lids down, but also for other lashing bungee cords, and they are built exactly as in my Serene – 1 & 2 previous kayaks, a tried and true technique.

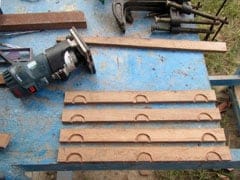
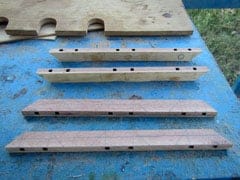
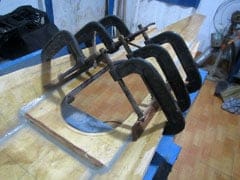
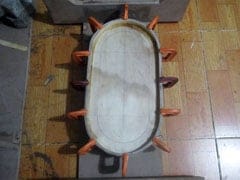
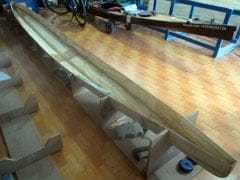
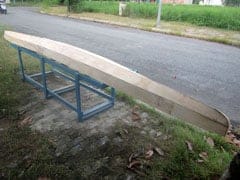
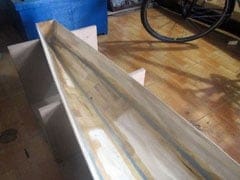
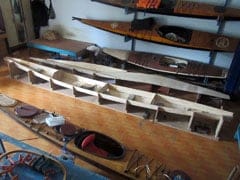
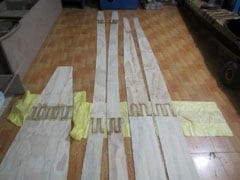
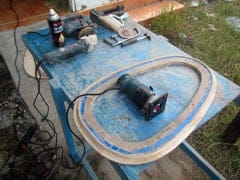
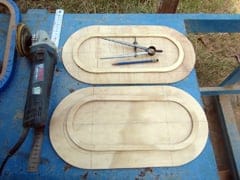
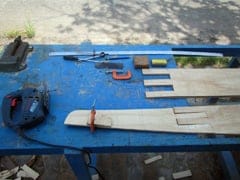
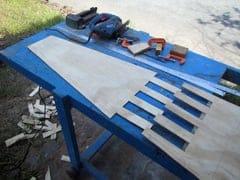
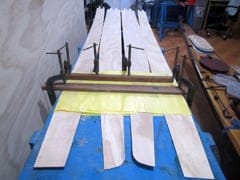
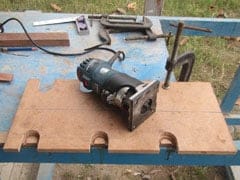
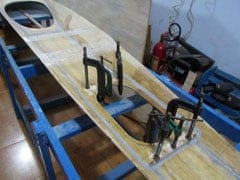
A line would (from the external side), go though the “half – circle tunnel” drilled inside the wooden blocks and loop back to the external side of the hull, forming very strong holding points for various lashing lines. I made two MDF templates and cut the grooves with my very handy Bosch router (first image), a set of three anchor points is placed on one same wooden bar (second image), and install as a whole (fourth image) for the ease of installation, just gluing the wooden bars to the deck.

The deck doesn’t receive a layer of fiberglass throughout, it is only reinforced at critical positions: around the cockpit, around the hatches, or along the seam lines, to help keeping the final weight low. But for an “expeditional boat”, weight is not the primary concern, the boat need to have some “mass” to withstand considerable amount of abuse in long paddling trips. I would expect around 20 kg finally! It’s bad that I’d seen the hull flexing a bit under heavy loads with my Serene – 2 kayak!

serene – 3, part 11

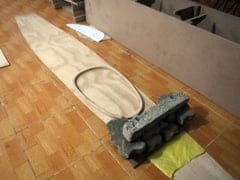
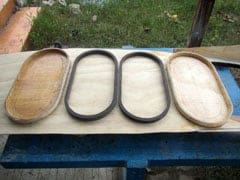
ontinue working on hatches. First image: the completed two hatches (still without the gaskets inside) with the hatch rings (rounded rectangle in shape, cut from a sheet of MDF and strengthen with quite a lot of epoxy). Second image: the recessed (flush deck) forward hatch, the deck is cut 1 inch down, and about 45 cm along the length to get a wider space to install the hatch. This part of the deck is quite weak, and need to be reinforced with some putty and fiberglass inside.
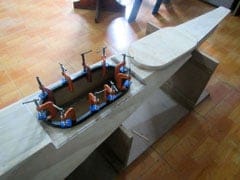
The hatches’ size look a bit small, 18 x 38 cm internal (cut out) side, but that’s sufficient to let many things through, e.g: water bottles or the tent bag, most objects are of long and narrow shapes. I intentionally try to keep the hatch size small as possible, to help with waterproofness. Third image: gluing the forward hatch ring onto the deck, the recessed base is about 1 inch lower, so that when the nearby hatch (seen on the right) is closed on, it would flush with the rest of the deck surface.

The same is done with the rear hatch (not shown here, but you can see it with the image album link on the left). Good thing is that the hatches and their rings fit together really well. Next I would round the internal side edge of the hatches’ ring a bit, cover them with a layer of glass. Completion to the very details in required indeed, in the last trip, I accidentally damaged one of my clothing bag, trying to pull it out of the cramped storage compartment over this sharp, unrounded edge.

serene – 3, part 10

ull and deck parts are basically stitched and glued, those two halves of a peanut shell. But that’s only a basic milestone, lots of jobs required still to make this shell functional. I continue to build the hatches and cockpit coaming, and various other accessories. 3rd image: the cockpit coaming glued in, stained with epoxy filled with black color pigment, later on, some layers of transparent PU paint would make the finish. While the cockpit is easy, it’s a bit more complicated for the hatches.
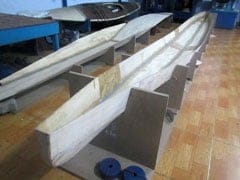
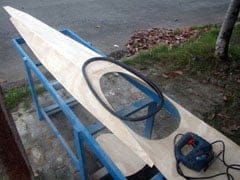
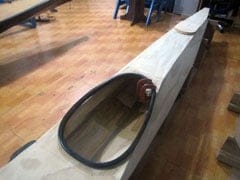
Both two hatches is of the same shape and size, for the sake of easy constructing (the hatches and their silicone gaskets). The forward hatch is built recessively into the deck, not only to keep a flushed, flat deck, but also simply because the hatch size is a few centimeters larger than the deck’s top, it needs to sink down to fit. It’s a bit tricky to build the recess, so I decide to get along with a rectangular approach (it’s much easier to build, though a circular one would certainly looks much better).

The aft hatch raises about 1 inch from the deck, not too high to interfere with reentry climb – in actions. I would try a new idea for hatch locking, something that’s easy to operate and tight enough (offer some pressure down) to secure the hatches in places and help with waterproofness. Hatches and hatch locks have been causing my headache for long, but it seems, the best solution is indeed simple, I wonder why my common – sense has not come up with it in the first place.

serene – 3, part 9

hat’s the stitch part (of “stitch and glue”), or more precisely, most of it (since there’re still the bow and stern pieces to be put in, but that would be discussed later on), next come the gluing. First the seam lines are “primed” with epoxy (applied with a small brush), then filled with fillet (the tried – and – true 2 – parts epoxy putty 511 that I’ve been using extensively). The “gluing” part is a very time – consuming job, you have to meticulously fill the putty, which slowly flow down under its own weight.
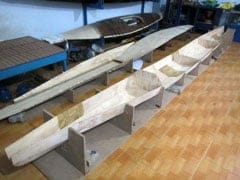
So I have to apply the putty in 2 turns, first fill in just a small bit of them, wait for it to cure, then fill over the first layer another time. This is to ensure that the putty could form curved seam lines that would be easier to glassed later on. You can also mix small batches of putty, wait for about 30 minutes for it to cure partially, then apply it on the seams, the higher viscosity of the slightly – cured putty enables it to better keep its shape. In all, it’s a very time – consuming (and dirty) job!

Next come in the bow and stern pieces. These small triangular plywood pieces need to be bended into curved shapes (see the 4th images below). I simply put them into boiled water for them to soften a bit, then slowly and carefully bend them with a pincer. The bow and stern parts are then temporarily fixed in place with hot glue and duct tape, then permanently glued with epoxy and fillet (putty). Now, the whole hull is rigidly glued in its internal side, similar job is applied to the deck part.

serene – 3, part 8

took great care in aligning a bilge’s parts, to make sure the final piece would come exactly to it designed shape, and to make sure the port and starboard bilges are identical, or else, the boat would have a twisted hull. All joints is slightly sanded, and applied a layer of glass on the internal side. Next come the job of putting everything together using a combination of fastening wires, super glue and duct tape. Having experiences from previous boat, I used very little steel wires this time.
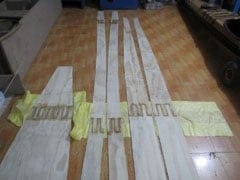
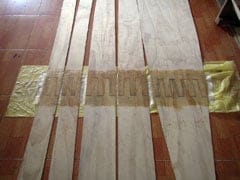
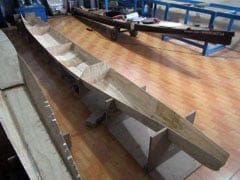
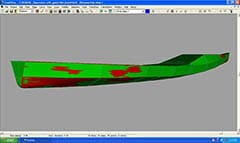
It’s so good to see the bilges fit naturally into their position, with minimum pressing, adjusting efforts. The tendency to take shape easily proves that you’ve all done right in the previous steps: measuring, drawing, cutting and jointing the biges. This is for the first time, you would have an initial impression, of how the boat would finally look like. The computer 3D renderings are too small to have a precise assessment, and of course, it’s always much more lively with a tangible object! 😀

Looking at these two halves: hull and deck, having a senses of every details, it’s easier to arrange and schedule the next tasks. There’re so many jobs ahead: make and install the (recessed) hatches, hatches’ locks, install the cockpit coaming, rudder pedals and control lines, compass, the bilge pump, etc… and of course the whole complex electric & electronic system. Things should be better done this time, with the lessons learnt (tediously and expensively) from previous boat projects.

serene – 3, part 7

n parallel to cutting, jointing the bilges and forming up the hull and deck parts, I’m also making the cockpit coaming and hatches. They both use the same techniques of bending thin strips of plywood (2 layers of them) around a MDF frame to form the lips’ shape. Now that I have some much better – quality plywood sheets, which is not too easy to crack while bending into extreme curves, this enables me to construct the cockpit coaming and hatches in a much easier and convenient way.

Both 2 hatches would be of the same shape and size, a “rectangular” with 2 circular ends (or could be called: a rounded rectangular). The hatches’ lips and the coaming lips are built up from 2 layers of 4 mm plywood strips, glued together. The flexibility of the ply serves well to the building, the lips take up shape easily, and stay in that shape steadily. In all, they’re all simple really constructions. Special thing about the hatches this time is that they would have elastic silicone gaskets inside.

Recently, I’ve learnt about silicone molding, using 2 – parts silicone mixed together just like epoxy. So I would mold the gaskets specially to accommodate the hatches, and would describe that in another following post. Hatches’ waterproofness has long been a serious issue to me, hopefully, I could resolve it completely this time. An handy (last resort) trick could also be useful: cover a layer of (very thin) PE plastic over before closing the hatch, that would make it absolutely water – tight.

serene – 3, part 6

ext is jointing the plywood pieces: 8 joints for the hull, and just 1 for the deck, to form the bilges that would build up into the boat shape. For the 2 pairs of hull’s bilges, I flip one pair by 180 degree when drawing on the boards, so that to distribute the joints at different places across the boat length, and not to concentrate too much joints into one proximity. That old boatbuilding carpenter’s trick is not completely necessary with modern building techniques, but it’s nice to do so anyway.

The tried – and – true technique of straight finger joint is used as always. The straight joints are easy to cut, and most importantly much easier to be aligned following a straight line for all the jointing parts, so that to make sure all the bilges would be jointed into the correct shapes. All the joints are treated carefully, first is applying a layer of thinned epoxy (using xylene as a solvent, for the substance to penetrate deeply into the plywood), then gluing with epoxy, then a layer of glass on the internal side.

I beveled the edges of the deck parts a bit (at 45 degrees), so that they would fit tightly and nicely together forming straight seam lines. But that’s not applied to the hull, where the cursive seam lines don’t like very thin edges. Experiences from my previous boats showed that, it’s best just to use the squared edges, the thin edges doesn’t stay on each other very well, and would deform, distort the seam lines! You would later just apply thickened epoxy on both sides (in and out) of the seams!

serene – 3, part 5

he progress is really slow lately, several weeks passed, but little get done 😢! Things started moving anyhow, I “quickly” transfer the “offset tables” onto the plywood boards, draw all the bilges, bulkheads, and other parts. The greatest thing of all is that now I’ve purchased very good sheets of plywood, not truly marine – grade (there’s no such in Vietnam), but high – grade water – resistance ones. I could feel it when do the sawing, the boards are quit tough, not fragile as with my previous ply!

There would be an immediate consequence with the new plywood, I would just use less epoxy to pre – fill the boards, and since the boards is stiffer, the glassing would be done on the outside only, that would significantly save the boat weight, I hope. All drawing is completed quickly, I finished in just less than one day, next come the steps of cutting and jointing the bilges. Everything has been done many times before already, so I didn’t have to think or consider things much, just repeat it!

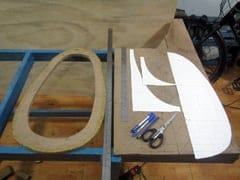
4th image: the cockpit coaming frame cut from a piece of 18 mm MDF. This cockpit is drawn using the mathematic formula mentioned in my last post. It came very closed to the shape of Serene – 2‘s cockpit, but slightly smaller on each sides by about 5 mm, so my existing spray skirt should fit tightly with this new coaming (on Serene – 2, it’s too tight). The coaming would be constructed from 2 layers of 4 mm plywood, and I would later omit out the (a bit tricky) glass reinforcement on this part!

serene – 3, part 4

inally, I managed to have some time slots to start the kayak building. Works would be carried out mostly at weekends, and hopefully, the boat could be finished within this year. After much hesitations, procrastinations, and considerations into the very details, I’ve incorporated quite some “innovations” into the final design, as well as some “simplifications” to ease the building process. I “hope” this is also my “last” stitch – and – glue boat, the 6th of “the fleet”, seems to be a lot already! 😀
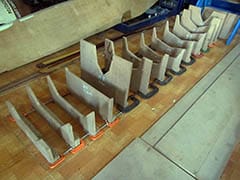
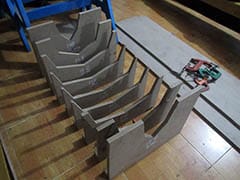
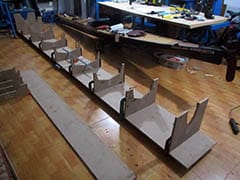
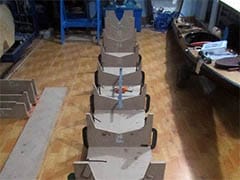
The past 2, 3 weeks were spent mostly on reviewing, fine – tuning the design, “rehearse” the overall building techniques and process. This is a design that consumes my brainstorm the most! Many building steps could be done very quick now, as they have been done 5, 6 times already. So I would skip documenting in various parts, as they are all similar as in my previous boats, only to highlight things that are different. First is setting up the molding stations, cut from MDF as usual.

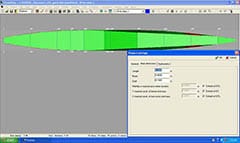
There would be 9 molding stations (female type) for the hull, and only 4 stations for the deck, each positioned 0.6m apart. One of my last changes to the deck was modifying its sides’ “slope” to 45 degrees, the deck would have lots of “flare” in the inverted position, that’s to make rolling easier. Once the boat is up – side – down and the deck becomes the bottom, so a “stable” full – shape deck wouldn’t be good for practicing kayak rolling. And I guess it could give some help to the boat’s windage too.

serene – 3, part 3

here’re so many minor improves here and there, and lots of design considerations too, to maximize the usability of the kayak under various real – world conditions. The aft deck is lowered a bit, to facilitate climbing in the cockpit once thrown own by a complete capsize. There’re two deep – water reentry techniques that I was considering possible with this boat design. Wet – reentry has been a shortcoming of previous designs, being too slim and unstable to make an easy access.

This is not a kayak specially tailored for rolling, but Serene – 3 is designed with concerns of balance – brace and rollings in mind. At the moment, I’m not too sure about its capability to roll under full load and heavy sea conditions, but I’m quite confident for its easy recovering in brace actions. Also, the hatches’ design has been reviewed and modified, to improve their water – tight capability, I’m putting great hope in the new gaskets which would be made by silicone molding to accommodate the hatches.

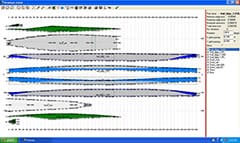
Also, there would be 3 hatches, all big (no small day hatch) to better utilize the internal containing volume. The rudder design is also reviewed and altered, I need lighter pedaling, and quicker overall responsiveness for the rudder actions, a new type of rudder post, new layout for control cabling too. The electronic system would received a bunch of improves in building techniques, decoupling the whole system into several separable components, to make maintenance and repair easier later on.