serene – 3, part 22

ne more lesson learnt: we can thin the epoxy when glassing too, sometimes the epoxy has such high viscosity (e.g epoxy from the bottom of the container) that it’s a bit hard to wet out the fiberglass, so I added some xylene solvent (less than 1/4 by weight), so that the glassing could go on easier, and the curing time is also prolonged, an important factor in hot tropical weather. Don’t worry about not having enough epoxy inside the fiber, cause we would usually have another fill coat anyhow.

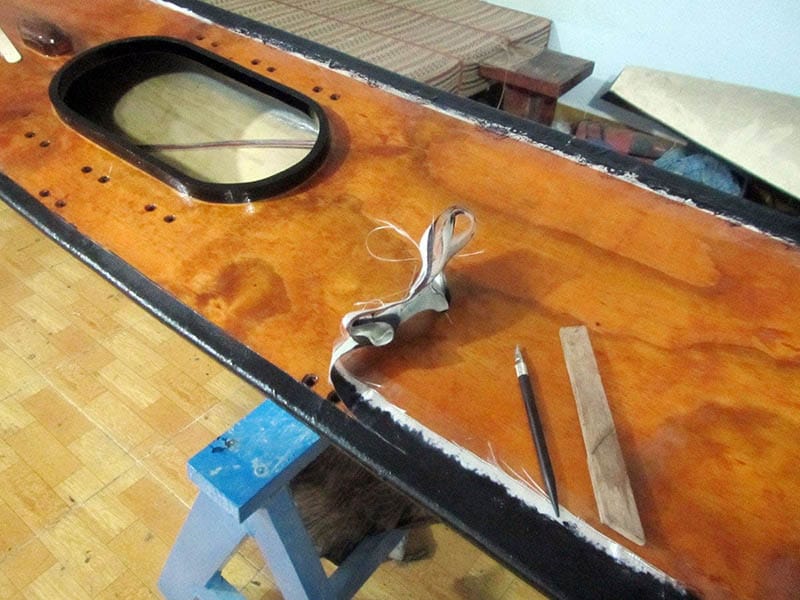
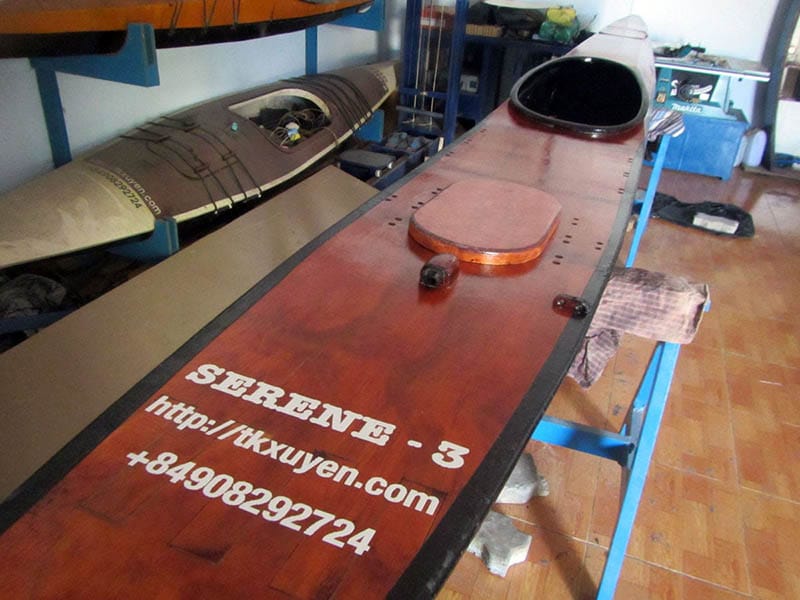
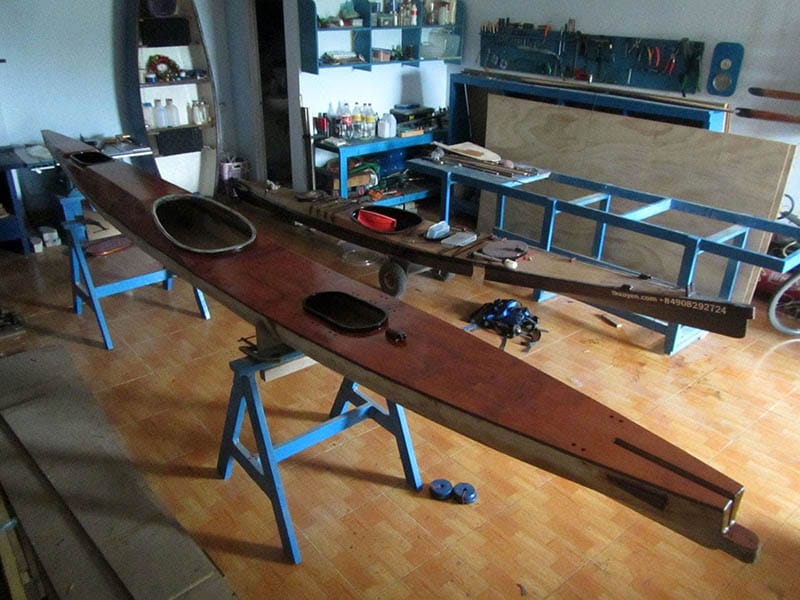
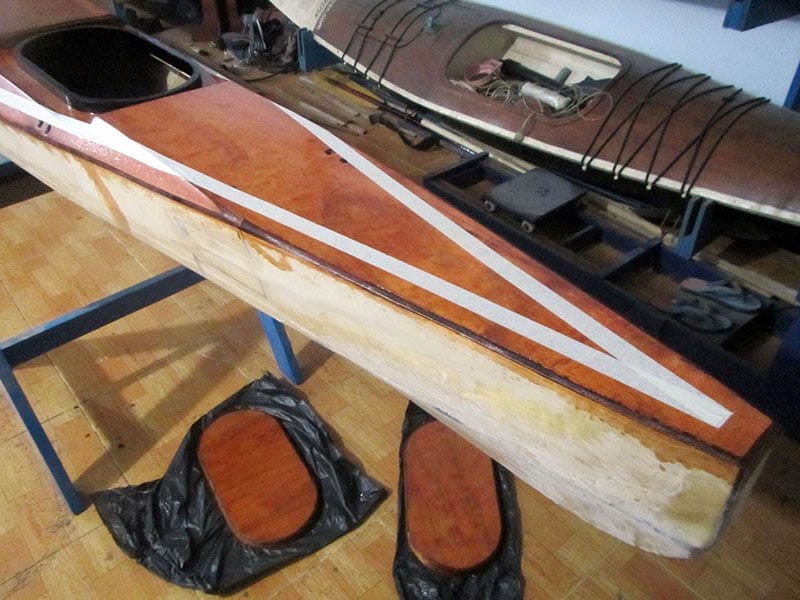
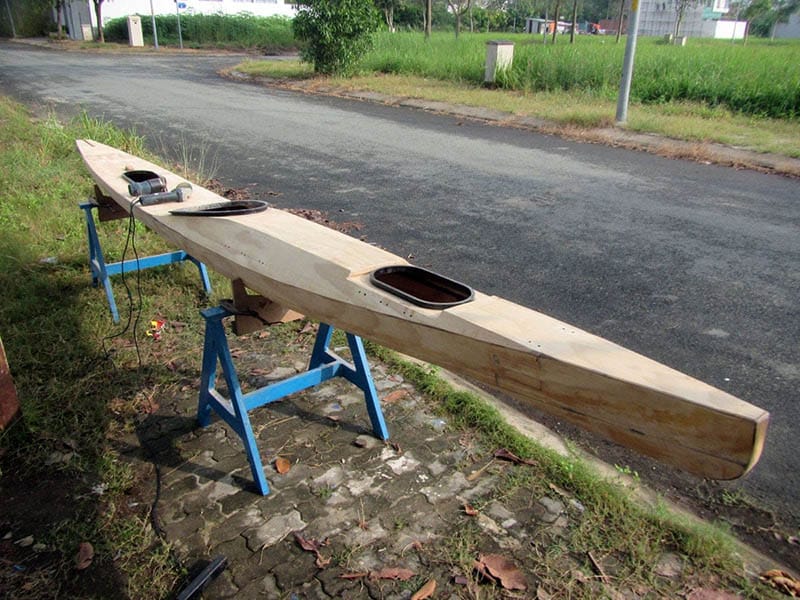
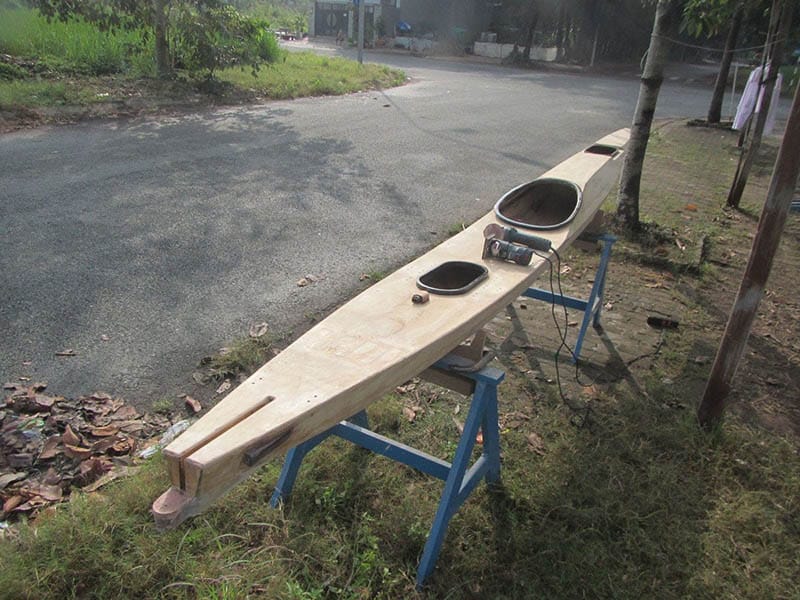
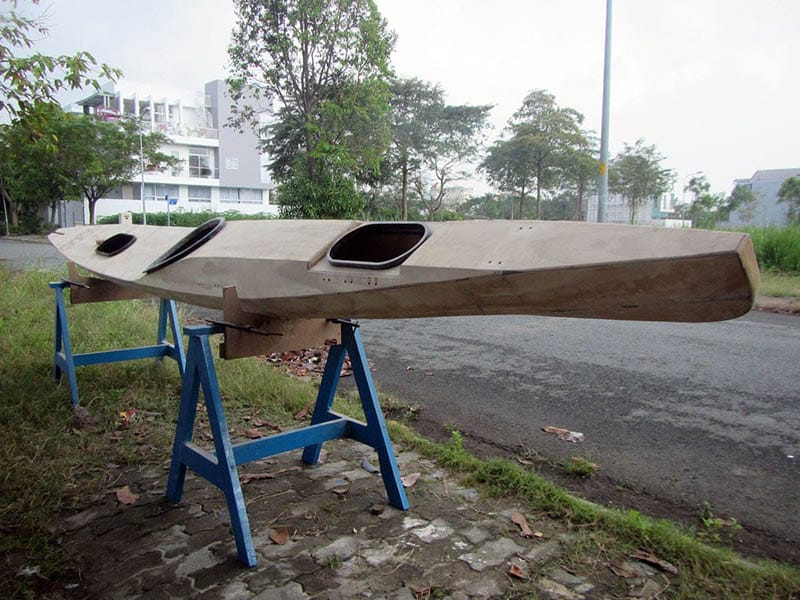
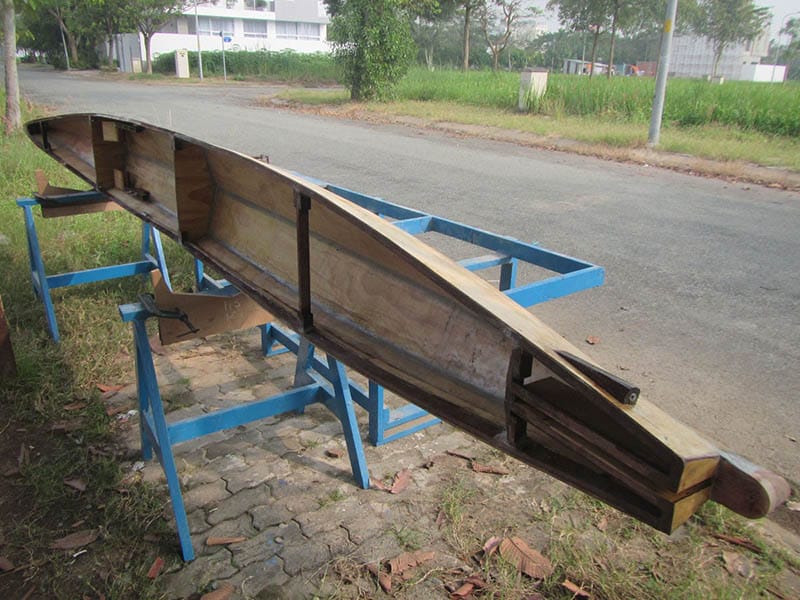
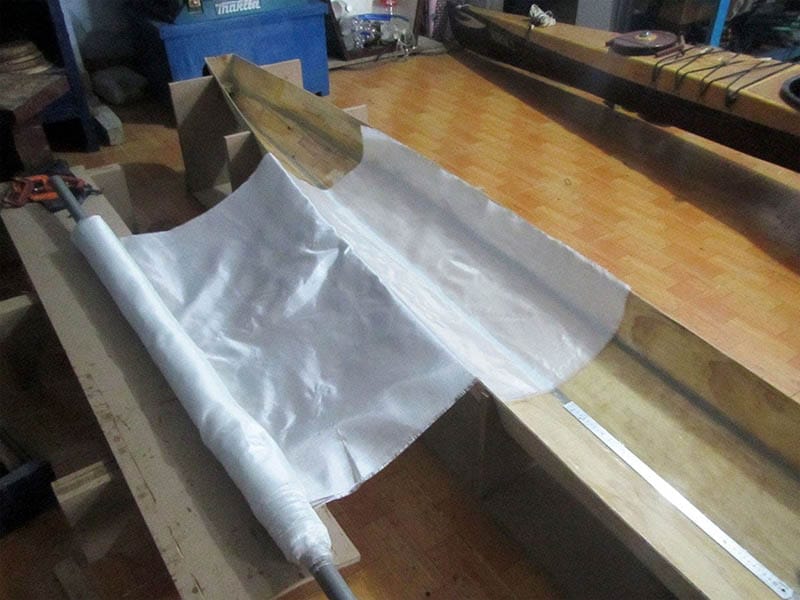
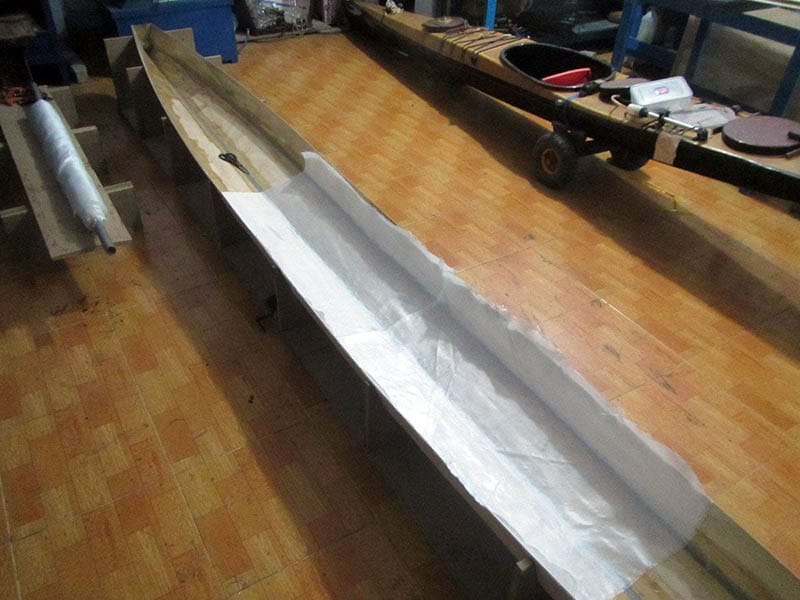
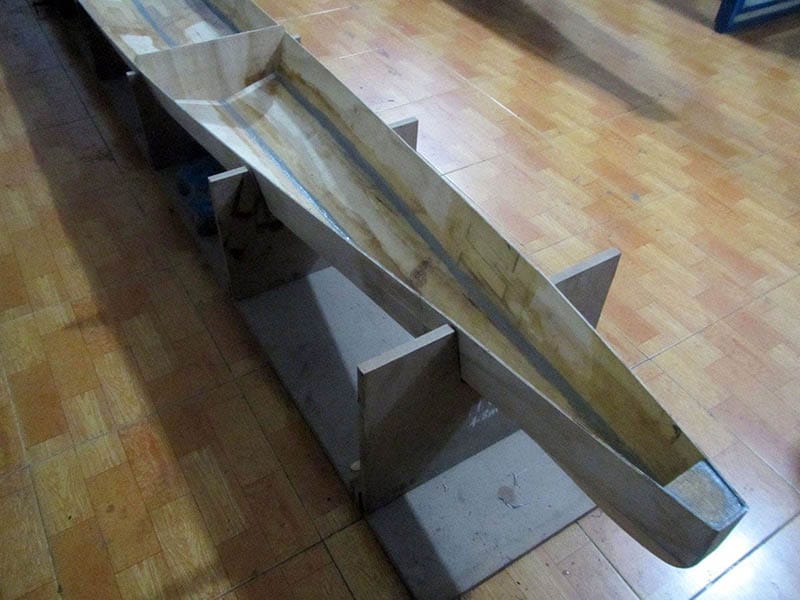
Hull glassed, 1st image: trim the glass with a small scalpel and peel off the excess. Next, I put the fill coat on until no woven fabric is clearly visible, then slightly sanded the whole bottom. Then I sticked the white vinyl decals for the boat’s eyes and information (3rd and 4th images). Next, I painted the deck with 2 layers of transparent PU paint, and the hull with 3 layers. I ran out of PU thinner (butyl acetate) on the way, so I used acetone instead, it’s also a good solvent for thinning PU paint.

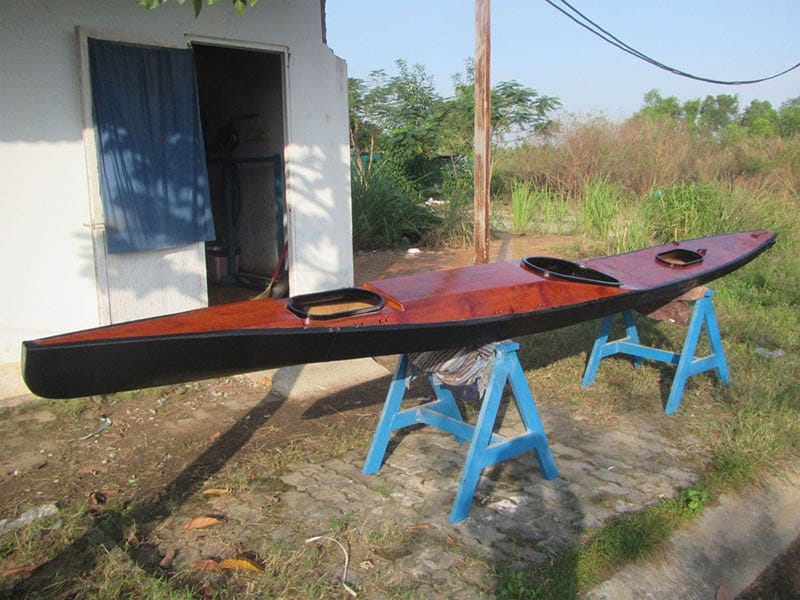
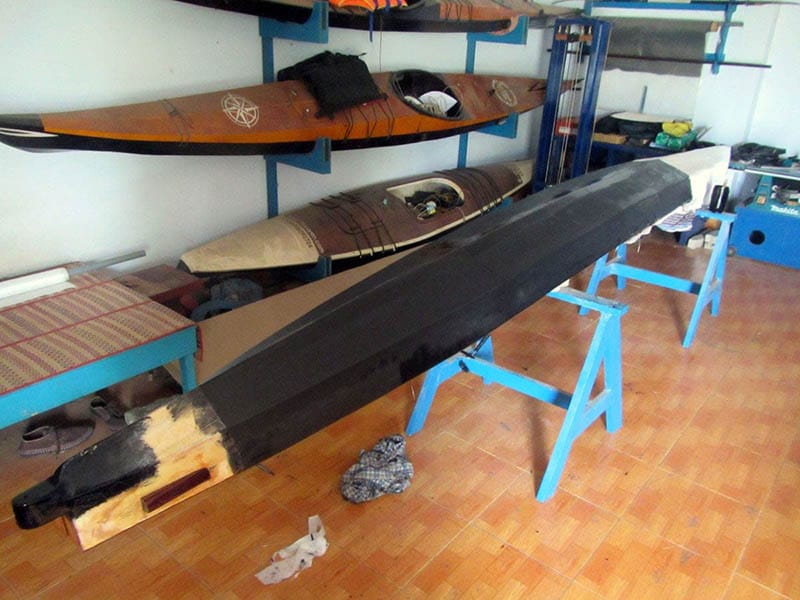
After 2 layers of paint on the hull, I slightly sanded it one more time, before applying the final coat. Well, I’m not particularly good at finishing, and like all my boats, all finish is just “barely – good – enough”, not a “very – fancy” look anyhow. But it’s important to have an even, smooth and thick – enough coating to protect the epoxy from UV and other abuses, the “2K” PU paint I used forms up a very hard protection really. In total, I used roughly about 1.2 kg of paint for the whole boat.

serene – 3, part 21

eck is stained with brownish wooden color, a color pigment is mixed with thinned epoxy and brushed over its surface. Epoxy is thinned for two purposes: first, to lower its viscosity so that the mixture flows easier and make a more even surface, second is for the epoxy to be absorbed into the deck, since there’s no glassing for deck, better to add some water resistance capability to the exposed plywood. This has always been my method of treating plywood if there’s no glassing.

Next is to glass the bottom, this gonna be a quite heavy kayak (estimated to be approximately around 25 kg) since I’d decided to glass both the internal and external side of the hull, while the deck only receives some glass reinforcement on the internal side. I run duct tapes along the deck (third image) to mask the margin for glassing, two layers of duct tapes to prevent the blackened epoxy to spill over the deck. One very annoying thing with every duct tapes I used is that no matter how I try…

Epoxy still leaks a bit under the duct tapes, and the border line between hull and deck would become blurry. I used a trick to overcome this problem, after sticking the tapes, I brush a very thin layer of transparent PU over them, cured paint would prevent epoxy from leaking through while still enable pilling off the tapes. Fourth image: glassing the bottom, epoxy is mixed with a deep black color pigment, almost jet – black. Later, several layers of transparent PU would make the final finish.

serene – 3, part 20

eck and hull jointed, for almost the entire length, almost no additional glueing is needed, almost a perfect fit, no light seen through 😀. Only around the cockpit, the widest part of the boat, needs some fillet to fill some small gaps. However, as a precaution, I applied some little additional fillet at places along the gunwales to make sure the joint is really secured. Now trimming the deck to match the hull, cut the slot on top of the rudder box, round the seam lines to facilitate glassing later.

Next, the whole hull and deck receive some sanding to smoothen out their surfaces, erase all the pencil and sketch pen marks. Those sketch pens offer very good indications, though they’re a bit hard to be erased off the plywood. Sanding is just a slow and dirty job, and it’s very itchy. The ugliest part of S & G boat building is sanding on fiberglass, it produces dust, which is essentially just tiny particles of silica sand, and those are extremely itchy, I have to take a bath 2, 3 times after the work.

Over the time, I devised a trick to cope with this: rub your exposed body parts with some mineral oil (e.g Johnson’s baby) before doing the sanding job, then taking a bath after would remove those hateful dust easier. This time, I do the sanding job more carefully, one at 100 grit and another at 120 grit before applying the wood staining. This time, I decided to go with a less vibrant color scheme, light brownish for the deck and black for the hull, unlike previous boats with bright yellowish tone.

serene – 3, part 19

ots of “unnamed” jobs need to be done: slightly modify the rudder (shorten its rotating arms, slightly shorten then rudder blade by 1 cm, add the carabiners for simpler rudder line attachment…), prepare the bilge pump mount, double check to make sure if all electrical wiring works (things made easy with a multimeter: voltage, current, resistence) etc… Then I carefully check the bevel along the gunwales, to make sure the hull and deck would match, adjusting their slopes with an angle grinder.

Then, let joint the two halves of the peanut shell 😀, it’s always a really good feeling when your boat initially is turned into its final shape! I ran out of the very handy and useful 511 putty, and lazy going out to buy a new batch, I fall back to working with wood flour fillet, though wood flour is not as good as the very fine grain powder of 511. Priming the joint with epoxy and some fillet, press the two halves together with weights, duct tapes, clamps, fastening belts… anything that’s convenient.

The deck has not come to its final shape yet since it’s cut oversized in order to have some fault tolerance. Next is the job of trimming the deck to the desired shape, then reinforce the hull – deck joint with some fillet at places, there’re still some small gaps between them that need to be filled. If done properly, it should make air tight (and water tight) compartments inside the hull. Later a layer of hull glassing would overlap about an inch onto the deck, to help securing the joint further.

serene – 3, part 18

fter lots of considerations, I made up my mind to implement the electrics – electronics system of this Serene – 3 kayak as simple as possible. There would be no built – in compass and nav lights. Only a set of six 18650 Li-ion battery cells charged from the solar panel, and a reed switch to activate the bilge pump. That would reduce the electrics wiring hassle to minimum, simplify the installation quite a lot. Of course, the compass still needs lighting to be used at night, and the nav light too.

Looking back on the electric, electronics part of Serene – 2, I’ve seen that I’d over – engineered quite a lot, things should be simpler. The compass and nav lights would now be a single hand – held torch, powered by rechargeable AA batteries, I would detail this “solution” in later posts. And the electrics components should be decoupled to facilitate repairing, upgrading. All the wiring runs inside plastic tubes (as additional protection) and can be pulled out of the hull for repair when needed.

So basically, the system composes mainly of Li-ion cells that would have 2 duties: power the bilge pump & the charger that would replenish some AA batteries. The AA batteries would be then used to power the Garmin and the light torch. Also in the waterproof electric box is the USB charger, which could be used for a variety of electronic devices. And I believe most if not all chargers could be modified to use either the 5V (USB) or the 12V (Li-ion) source, would try to check (prove) it later on.

serene – 3, part 17

ext came the rudder box, an interesting idea that I’ve come up with lately. First, when not in use, the rudder would be retracted completely inside the rudder box (and so inside the hull), it would be safer, tidier when transporting, moving the boat around. Second, and more importantly, the rudder box allows mounting the rudder in a lower position, which enables a smaller rudder blade. From the design phase, when drawing a hull with lots of overall rocker (the keel line has quite some curvature)…

I saw that bottom of the stern would barely touch water when the kayak is at full load, hence, it’s good to mount the rudder lower down, about 10 cm lower compare to my previous boat. So I would just reuse my previous rudder with more steering effect. Lessons learnt from Serene – 2 showed me that I need a more responsive rudder, so everything, from the rudder post to the control pedals must be redesigned, shorter “rotating arms” for the rudder, and smaller “moving distances” for the pedals.

For this Serene – 3, I would make the seat position fixed, so the rudder pedals must be adjustable, back and forth about 12 ~ 15 cm. Of course there would be only one paddler for this boat, that’s me, but an adjustable rudder pedals is desirable anyhow, though it’s not very frequently needed. I choose a pedal layout that would let me stretch and relax my legs and feet. Not a surfing boat, rudder is for some slight course adjustment only, I don’t have to rest my feet on the pedals most of the time.

serene – 3, part 16

ull is rigid like a walnut shell now 😀, I took it out for a slight sanding on the external side before applying extra layers of glass at bow and stern, the two ends that would withstand quite some abuse when landing on unfavorable shores. Then I install the rudder post, a piece of wood that protrudes the flat stern about 7 cm, glued, screwed, filled with putty and then finally two layers of glass. Lots of extra reinforcement for this rudder post, a lamination of 3 different layers of wood.

I carefully choose different types of wood, with different wood grains to make up this simple rudder post. The grains that run in different directions would ensure that this wooden block would be more resilient to forces from various “angles of attack”. Then I install the rudder control tubes, plastic tubes 10 mm in external diameter (6 mm internally), quite large indeed. The large tubes is, for later, I could easily try various types of rudder control cable, to see which works best.

The tubes run just below, and along the gunwales, through the bulkhead, fixed in place using epoxy putty and small strips of plywood. A lesson learnt from my previous boat: fix the tube positions, don’t let them run loose, slightly different port and starboard tubes would result into different tensions on the control lines, or an awkward rudder pedaling control effect. The tubes exit the hull through small slots cut very near to the stern, protected outside by small blocks of wood.

serene – 3, part 15

ow go in the gunwales, bulkheads and thwarts, which make the hull looks more “full fledged”… Indeed, those gunwales, bulkheads and thwarts would transform the hull into a structure, which is much more stiff. Gunwales are thin strips of wood, 1.5 x 3 cm in cross section. I cut all those wooden strips with my small Makita table saw, which is extremely helpful for a wide range of different jobs, especially because it cuts are flat and straight, unlike those made with a hand held jig saw.

The more I use it, the more I discover new techniques and tricks to get some jobs done. Also with the Makita table saw, I bevelled the gunwales, diagonal cuts at 45 degrees along the forward parts of the gunwales. I would adjust those bevelled edges along the boat length later, to better match the hull versus the deck. Now having a total of 32 clamps of different types, I’m able to install the two gunwales, port and starboard at the same time, not one after another like before.

There’re two bulkheads compartmentalizing the kayak into 3 sections, and 3 additional thwarts near the two ends that would help transforming all into a rigid structure. All is glued in places, then reinforced with small 4 cm screws connecting them to the gunwales. Then putty – fill the bulkheads to secure them to the hull, then a layer of glass over on the cockpit side since that’s where they could be potentially exposed to water. Still some more jobs need to be done to complete the hull!

serene – 3, part 14

urchased a new roll of 6 oz fiberglass, also “plain weave” like that was used in my previous boats. Surprisingly, the 2 kinds of fiberglass cloth, both 6 oz and plain weave, are not really the same, the later cloth has finer and denser fiber, it’s slightly heavier, a bit harder to wrap around and it absorbs more epoxy. It’s now time for some glassing, the hull receive a layer throughout its internal side, while the deck is only reinforced at places: around the forward hatch and around cockpit.

In my calculation, glassing adds, on the average, about 0.4 kg per square meter of surface (the glass mass itself plus the epoxy). So, glassing both inside and outside of the hull would add about 2 kg into the boat weight. That’s not really a big issue, as long as the glassing work is done properly, avoid using too much epoxy and keep weight in control. Sometimes, you need to step back and watch for everything you’d done during the past times. It seems that with 5 kayaks, all stitch & glue…

I’m becoming what they usually call: a prisoner of one own experiences, having designed and built several boats again and again using the same methods and techniques. While that’s somewhat true, in each boat, I’ve been trying to incorporate new things, new design ideas, new techniques, new accessories… My thirst for “the perfect kayak” has not been wholly quenched yet! And that “great journey” has not been done yet, lots of things waiting ahead to be full – filled, to be accomplished!

serene – 3, part 13

eck works continue… installing the anchor points, 12 for the 2 hatches, and another 12 for the lashing bungee cords, and additional 6 at various places along the deck, quite a lot of work. But there’re many other “unnamed” jobs related to the deck still: beveling the cockpit and hatches joints, glassing the cockpit joint, install the bulkhead… I also switch back and forth between the deck and the hull: glassing the hull’s internal seam lines, gluing the wooden blocks at bow and stern, etc…

First image: the anchor points to hold down the forward hatch, 6 pairs of 6 mm holes (both on port and starboard sides) are used to mount the 6 loops of 4 mm paracord, which in turn are used to secure the belt locks. Second image: various anchor points are placed along the deck, some used for the hatches, some used for bungee cords, and some are just “reserved”, those are not readily in use, but provided for lashing things down on to the deck should the need arise.

Third image: wooden block glued to the bow, later a hole would be drilled through to run the kayak’s pulling line. Fourth image: another wooden block glued at the stern, note the two 5 cm screws, to fasten and reinforce the rudder post (would be installed later). The rudder post is another wooden block glued on the external side of the stern, rudder, rudder post, rudder control lines and control pedals, and the “new” rudder box are important issues that would be covered in next posts.