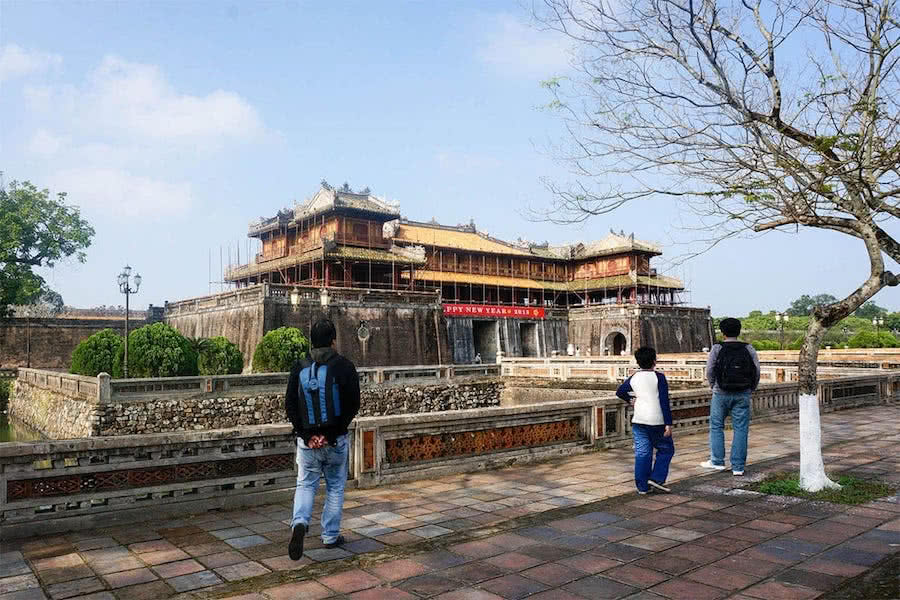
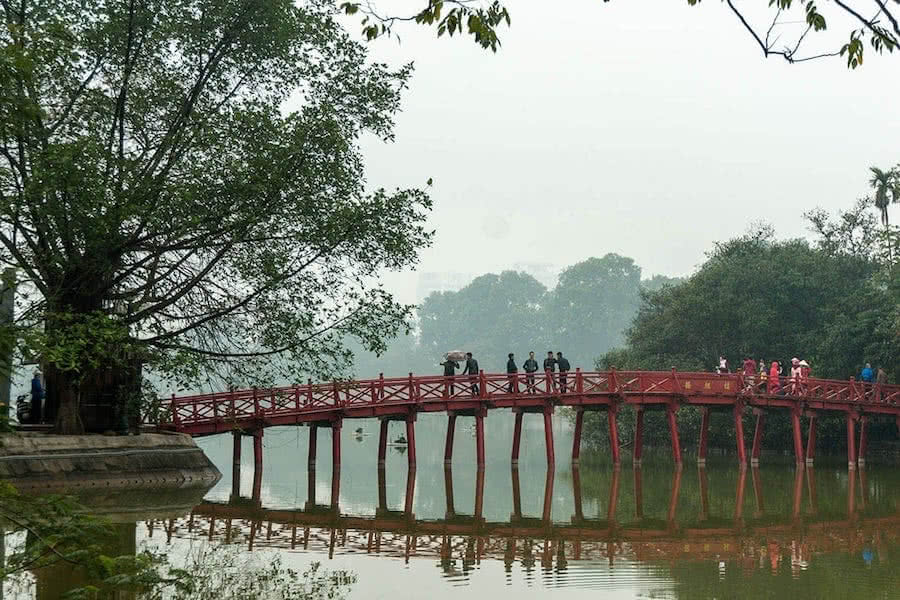
serene – 3, part 27

Between the trials, I managed to complete a couple of things. First is to mount the compass, the tried – and – true type of compass used in all boats of the Serene series, this without an internal lighting. Then, I built another paddle, a simple one with rattan shaft, and plywood blades, a little bit bigger, weights at 1.1 kg, slightly heavier than the Greenland companion – my “storm paddle”, 0.9 kg. Still considered an Euro – type paddle, but with a smaller blade to resemble Greenland style.

As I sometimes need larger power faces to propel the boat under unfavorable conditions. The rudder control lines are modified to be more easily adjustable, see the second image below. The pedals are attached to small segment of chains, to adjust the tension, you simple move the shackle to another chains’ eye, this could be quickly done while you’re in the field. I also replaced the bungee cords holding the pedals back by 2 large steel springs, providing better “suspension”.

Just release one pedal and the springs would pull the rudder blade back to its neutral position. I added 4 tiny 3.7V LED bulbs (series wiring) to the electric box, in an attempt to indicate the batteries’ remaining capacity (as there’s no easy way to do so). This is a trick I learnt from experiences, when 1 or 2 of the LED bulbs won’t turn on, or their brightness is drastically reduced, you’d need to plug in the solar panel then! Not all works has been completed, but it’s time to clean up the workshop a bit!

serene – 3, part 26

Launch the boat today, first day of the year 2018! Took the kayak out to water on a sunny, breezy afternoon for a 12 km paddling, the temperature was around 25 ~ 27 Celsius, considered “cool” with this hot – all – around – the – year tropical climate. The short paddling is just to get some first impressions, to check if everything works, and how it feels, the new hull shape, something radically different from my previous boats. Yet all confirms things I’d known from the design phase.

The kayak is nimble and very predictable, probably not too agile compared to Serene – 1 and Serene – 2, it’s also a bit more stable across all its axis. It’s easier to get in and out of the cockpit with these stabilities. The rudder works nicely, changing course instantly with just some slight pedal kicks, though I’ve come up with some new ideas to improve the “fine – tuning mechanism” for the rudder control lines’ tension (the cleats used are fine, but not too convenient for adjusting the tension).

The rudder pedals offer very good seating position, together with the plastic seat (used for testing), fixing my lower body well to the hull. I would decide later whether to just use this plastic seat, or build another lower one to facilitate reentry actions. The hatches are absolutely water tight, an important criterion! The overall feeling is very satisfactory, yet more trials are needed, in different conditions, especially on rougher water, to really understand the capabilities of this new boat.

serene – 3, part 25

Almost ready for the water, but the tide is unfavorable for the weekend (its heights are at night), and the Tembin cyclone is crossing the East sea, threatening the area. So I take the time to complete a couple more things. Attaching the electric box through cable gland is quite straight forward, everything works out right, in essence the bilge pump and reed switch. I added one master switch to the electric circuit, in order to turn everything off and not to drain the 18650 batteries to exhaustion.

One critically important issue with the 18650 batteries is that, never used them to exhaustion, when the voltage drops below 1 ~ 1.5 V or so, the battery just becomes dead, you simple could just throw them away, a costly lesson the last time I hadn’t paddled for some weeks, and let the batteries run until dead . Next, I “refurbish” one of my old paddles to match the new boat style, turning it to black, and make it a bit stronger (and slightly heavier) with an extra layer of fiberglass.

The paddle was specially built from rattan and balsa wood, and is light enough already at 0.8 kg. I would try to use this paddle first, before deciding if it’s necessary to make an extra new one, weight and durability are two major concerns. Third image: a “smoke test” to verify if the bilge pump and the solar panel all properly works. Now wait out for a few more days before going to water, just some 10 ~ 12 km of paddling, to see how the kayak behaves, how everything would feel out there.

serene – 3, part 24

Gaskets fabrication: the critical thing in a hatch’s waterproofness is its gasket, and I realized that the best material for gasket is silicone: flexible, durable and offer a very good fit. And for a custom size and shape hatch, somehow I’ll need to make the gaskets too. It turned out to be pretty much easy, using the 2 – parts silicone available here on local market. You mix up component A to component B (catalyst, around 1 ~ 4 % by weight) and pour it into a mold, wait for about 2 hours, and it’s done.

1st image: the mold (cut from plywood) is filled with silicone, I use the “Silicone” (red bottle) spray as a mold release, it’s “strange” that silicone is used as a release agent also for silicone. 2nd image: the product, the O – ring released from the mold. 3rd image: the gaskets inside the hatch lids. The gaskets are 15 mm wide, 5 mm thick, and are pressed down to the hatch rings with those belt locks. I hope I would end up with excellent waterproofness, but let wait until “sea trial” to know better.

I reuse the bilge pump from my previous boat, it still sees very little use, the installation is quite straight forward using some cable ties fastening the bilge pump into its mount. The flexible water pipe leads to a hose right on the right side behind the cockpit, the hose is protected by a screw – in cap, to prevent water from leaking back into the boat when waves wash over the low aft deck. The bilge pump really offers lots of convenience and confidence when you are out there, in the roughness.

serene – 3, part 23

First image: the aft deck hatch, secured by 3 belt locks. These locks are usually found on your backpacks, and while they are a bit cumbersome to install, they offer quite some holding power and downward pressure, which is essential for the silicone gaskets inside the hatches’ lids to properly work (would mention about those gaskets in the next post). Similar locking for the forward hatch (2nd image). There’re 3 locks per hatch, so if one failed, the other two could still full – fill their duty.

Next, I installed the rudder pedals and control lines. 3rd image: the rudder in retracted position, 4th image: the rudder in its working position. Thank to the lessons learnt with my previous boat, I redesigned, rearranged every details so that the rudder actions now is very light, smooth, and balanced: kick the pedals lightly and the rudder would follow, release a pedal and the rudder would come back to its neutral position. All control lines tension could easily be adjusted from within the cockpit.

I lubricated with silicone grease all the moving parts of the rudder system, the pivoting points, the lines and pedals, and everything became much smoother. I’m very happy with the overall working of the rudder, though this is still in – dock testing, let see how they would behave while on water. Can’t wait for water trial yet, as there’re still much things to be completed, the bilge pump, the electric box, the hatches’ gaskets, the seat, cart, and a new pair of paddles, etc… still many jobs ahead.

serene – 3, part 22

One more lesson learnt: we can thin the epoxy when glassing too, sometimes the epoxy has such high viscosity (e.g epoxy from the bottom of the container) that it’s a bit hard to wet out the fiberglass, so I added some xylene solvent (less than 1/4 by weight), so that the glassing could go on easier, and the curing time is also prolonged, an important factor in hot tropical weather. Don’t worry about not having enough epoxy inside the fiber, cause we would usually have another fill coat anyhow.

Hull glassed, 1st image: trim the glass with a small scalpel and peel off the excess. Next, I put the fill coat on until no woven fabric is clearly visible, then slightly sanded the whole bottom. Then I sticked the white vinyl decals for the boat’s eyes and information (3rd and 4th images). Next, I painted the deck with 2 layers of transparent PU paint, and the hull with 3 layers. I ran out of PU thinner (butyl acetate) on the way, so I used acetone instead, it’s also a good solvent for thinning PU paint.

After 2 layers of paint on the hull, I slightly sanded it one more time, before applying the final coat. Well, I’m not particularly good at finishing, and like all my boats, all finish is just “barely – good – enough”, not a “very – fancy” look anyhow. But it’s important to have an even, smooth and thick – enough coating to protect the epoxy from UV and other abuses, the “2K” PU paint I used forms up a very hard protection really. In total, I used roughly about 1.2 kg of paint for the whole boat.

serene – 3, part 21

Deck is stained with brownish wooden color, a color pigment is mixed with thinned epoxy and brushed over its surface. Epoxy is thinned for two purposes: first, to lower its viscosity so that the mixture flows easier and make a more even surface, second is for the epoxy to be absorbed into the deck, since there’s no glassing for deck, better to add some water resistance capability to the exposed plywood. This has always been my method of treating plywood if there’s no glassing.

Next is to glass the bottom, this gonna be a quite heavy kayak (estimated to be approximately around 25 kg) since I’d decided to glass both the internal and external side of the hull, while the deck only receives some glass reinforcement on the internal side. I run duct tapes along the deck (third image) to mask the margin for glassing, two layers of duct tapes to prevent the blackened epoxy to spill over the deck. One very annoying thing with every duct tapes I used is that no matter how I try…

Epoxy still leaks a bit under the duct tapes, and the border line between hull and deck would become blurry. I used a trick to overcome this problem, after sticking the tapes, I brush a very thin layer of transparent PU over them, cured paint would prevent epoxy from leaking through while still enable pilling off the tapes. Fourth image: glassing the bottom, epoxy is mixed with a deep black color pigment, almost jet – black. Later, several layers of transparent PU would make the final finish.

serene – 3, part 20

Deck and hull jointed, for almost the entire length, almost no additional glueing is needed, almost a perfect fit, no light seen through. Only around the cockpit, the widest part of the boat, needs some fillet to fill some small gaps. However, as a precaution, I applied some little additional fillet at places along the gunwales to make sure the joint is really secured. Now trimming the deck to match the hull, cut the slot on top of the rudder box, round the seam lines to facilitate glassing later.

Next, the whole hull and deck receive some sanding to smoothen out their surfaces, erase all the pencil and sketch pen marks. Those sketch pens offer very good indications, though they’re a bit hard to be erased off the plywood. Sanding is just a slow and dirty job, and it’s very itchy. The ugliest part of S & G boat building is sanding on fiberglass, it produces dust, which is essentially just tiny particles of silica sand, and those are extremely itchy, I have to take a bath 2, 3 times after the work.

Over the time, I devised a trick to cope with this: rub your exposed body parts with some mineral oil (e.g Johnson’s baby) before doing the sanding job, then taking a bath after would remove those hateful dust easier. This time, I do the sanding job more carefully, one at 100 grit and another at 120 grit before applying the wood staining. This time, I decided to go with a less vibrant color scheme, light brownish for the deck and black for the hull, unlike previous boats with bright yellowish tone.

serene – 3, part 19

Lots of “unnamed” jobs need to be done: slightly modify the rudder (shorten its rotating arms, slightly shorten then rudder blade by 1 cm, add the carabiners for simpler rudder line attachment…), prepare the bilge pump mount, double check to make sure if all electrical wiring works (things made easy with a multimeter: voltage, current, resistence) etc… Then I carefully check the bevel along the gunwales, to make sure the hull and deck would match, adjusting their slopes with an angle grinder.

Then, let joint the two halves of the peanut shell, it’s always a really good feeling when your boat initially is turned into its final shape! I ran out of the very handy and useful 511 putty, and lazy going out to buy a new batch, I fall back to working with wood flour fillet, though wood flour is not as good as the very fine grain powder of 511. Priming the joint with epoxy and some fillet, press the two halves together with weights, duct tapes, clamps, fastening belts… anything that’s convenient.

The deck has not come to its final shape yet since it’s cut oversized in order to have some fault tolerance. Next is the job of trimming the deck to the desired shape, then reinforce the hull – deck joint with some fillet at places, there’re still some small gaps between them that need to be filled. If done properly, it should make air tight (and water tight) compartments inside the hull. Later a layer of hull glassing would overlap about an inch onto the deck, to help securing the joint further.

serene – 3, part 18

After lots of considerations, I made up my mind to implement the electrics – electronics system of this Serene – 3 kayak as simple as possible. There would be no built – in compass and nav lights. Only a set of six 18650 Li-ion battery cells charged from the solar panel, and a reed switch to activate the bilge pump. That would reduce the electrics wiring hassle to minimum, simplify the installation quite a lot. Of course, the compass still needs lighting to be used at night, and the nav light too.

Looking back on the electric, electronics part of Serene – 2, I’ve seen that I’d over – engineered quite a lot, things should be simpler. The compass and nav lights would now be a single hand – held torch, powered by rechargeable AA batteries, I would detail this “solution” in later posts. And the electrics components should be decoupled to facilitate repairing, upgrading. All the wiring runs inside plastic tubes (as additional protection) and can be pulled out of the hull for repair when needed.

So basically, the system composes mainly of Li-ion cells that would have 2 duties: power the bilge pump & the charger that would replenish some AA batteries. The AA batteries would be then used to power the Garmin and the light torch. Also in the waterproof electric box is the USB charger, which could be used for a variety of electronic devices. And I believe most if not all chargers could be modified to use either the 5V (USB) or the 12V (Li-ion) source, would try to check (prove) it later on.

serene – 3, part 17

Next came the rudder box, an interesting idea that I’ve come up with lately. First, when not in use, the rudder would be retracted completely inside the rudder box (and so inside the hull), it would be safer, tidier when transporting, moving the boat around. Second, and more importantly, the rudder box allows mounting the rudder in a lower position, which enables a smaller rudder blade. From the design phase, when drawing a hull with lots of overall rocker (the keel line has quite some curvature)…

I saw that bottom of the stern would barely touch water when the kayak is at full load, hence, it’s good to mount the rudder lower down, about 10 cm lower compare to my previous boat. So I would just reuse my previous rudder with more steering effect. Lessons learnt from Serene – 2 showed me that I need a more responsive rudder, so everything, from the rudder post to the control pedals must be redesigned, shorter “rotating arms” for the rudder, and smaller “moving distances” for the pedals.

For this Serene – 3, I would make the seat position fixed, so the rudder pedals must be adjustable, back and forth about 12 ~ 15 cm. Of course there would be only one paddler for this boat, that’s me, but an adjustable rudder pedals is desirable anyhow, though it’s not very frequently needed. I choose a pedal layout that would let me stretch and relax my legs and feet. Not a surfing boat, rudder is for some slight course adjustment only, I don’t have to rest my feet on the pedals most of the time.

serene – 3, part 16

Hull is rigid like a walnut shell now, I took it out for a slight sanding on the external side before applying extra layers of glass at bow and stern, the two ends that would withstand quite some abuse when landing on unfavorable shores. Then I install the rudder post, a piece of wood that protrudes the flat stern about 7 cm, glued, screwed, filled with putty and then finally two layers of glass. Lots of extra reinforcement for this rudder post, a lamination of 3 different layers of wood.

I carefully choose different types of wood, with different wood grains to make up this simple rudder post. The grains that run in different directions would ensure that this wooden block would be more resilient to forces from various “angles of attack”. Then I install the rudder control tubes, plastic tubes 10 mm in external diameter (6 mm internally), quite large indeed. The large tubes is, for later, I could easily try various types of rudder control cable, to see which works best.

The tubes run just below, and along the gunwales, through the bulkhead, fixed in place using epoxy putty and small strips of plywood. A lesson learnt from my previous boat: fix the tube positions, don’t let them run loose, slightly different port and starboard tubes would result into different tensions on the control lines, or an awkward rudder pedaling control effect. The tubes exit the hull through small slots cut very near to the stern, protected outside by small blocks of wood.

serene – 3, part 15

Now go in the gunwales, bulkheads and thwarts, which make the hull looks more “full fledged”… Indeed, those gunwales, bulkheads and thwarts would transform the hull into a structure, which is much more stiff. Gunwales are thin strips of wood, 1.5 x 3 cm in cross section. I cut all those wooden strips with my small Makita table saw, which is extremely helpful for a wide range of different jobs, especially because it cuts are flat and straight, unlike those made with a hand held jig saw.

The more I use it, the more I discover new techniques and tricks to get some jobs done. Also with the Makita table saw, I bevelled the gunwales, diagonal cuts at 45 degrees along the forward parts of the gunwales. I would adjust those bevelled edges along the boat length later, to better match the hull versus the deck. Now having a total of 32 clamps of different types, I’m able to install the two gunwales, port and starboard at the same time, not one after another like before.

There’re two bulkheads compartmentalizing the kayak into 3 sections, and 3 additional thwarts near the two ends that would help transforming all into a rigid structure. All is glued in places, then reinforced with small 4 cm screws connecting them to the gunwales. Then putty – fill the bulkheads to secure them to the hull, then a layer of glass over on the cockpit side since that’s where they could be potentially exposed to water. Still some more jobs need to be done to complete the hull!

cossacks – 1

Giống như khi phái đoàn ngoại giao Grand Embassy của Sa Hoàng Peter the Great lần đầu tiên sang châu Âu, những ban nhạc cung đình châu Âu biểu diễn âm nhạc cổ điển sang trọng, lịch sự, từ tốn. Để đáp lại, dàn nhạc của Peter biểu diễn một thứ âm nhạc với huýt sáo và hò hét. “Cũng tương tự”, muốn nghe hò hét, huýt sáo trong không gian âm nhạc thính phòng, hãy xem Alexandrov Ensemble biểu diễn tại Anh năm 88, một trong những bài dân ca Slavơ nổi tiếng nhất…

Cossack không phải là một dân tộc riêng biệt, mà chỉ là một sub – culture trong không gian văn hoá Slavơ chung: Nga, Ucraina, Belarus… Từ thời xa xưa, họ sống trên các thảo nguyên, lối sống trồng trọt, chăn thả, giỏi về chiến đấu trên lưng ngựa. Trong tất cả các thời đại, từ thời các Sa hoàng đến thời Sô – viết, và hiện đang thấy rất rõ trong giai đoạn nước Nga Putin hiện đại, Cossack vẫn luôn luôn là “cơ bắp” của chế độ: giữ gìn, mở rộng biên cương, trấn áp nội gian, nội loạn.

serene – 3, part 14

Purchased a new roll of 6 oz fiberglass, also “plain weave” like that was used in my previous boats. Surprisingly, the 2 kinds of fiberglass cloth, both 6 oz and plain weave, are not really the same, the later cloth has finer and denser fiber, it’s slightly heavier, a bit harder to wrap around and it absorbs more epoxy. It’s now time for some glassing, the hull receive a layer throughout its internal side, while the deck is only reinforced at places: around the forward hatch and around cockpit.

In my calculation, glassing adds, on the average, about 0.4 kg per square meter of surface (the glass mass itself plus the epoxy). So, glassing both inside and outside of the hull would add about 2 kg into the boat weight. That’s not really a big issue, as long as the glassing work is done properly, avoid using too much epoxy and keep weight in control. Sometimes, you need to step back and watch for everything you’d done during the past times. It seems that with 5 kayaks, all stitch & glue…

I’m becoming what they usually call: a prisoner of one own experiences, having designed and built several boats again and again using the same methods and techniques. While that’s somewhat true, in each boat, I’ve been trying to incorporate new things, new design ideas, new techniques, new accessories… My thirst for “the perfect kayak” has not been wholly quenched yet! And that “great journey” has not been done yet, lots of things waiting ahead to be full – filled, to be accomplished!

serene – 3, part 13

Deck works continue… installing the anchor points, 12 for the 2 hatches, and another 12 for the lashing bungee cords, and additional 6 at various places along the deck, quite a lot of work. But there’re many other “unnamed” jobs related to the deck still: beveling the cockpit and hatches joints, glassing the cockpit joint, install the bulkhead… I also switch back and forth between the deck and the hull: glassing the hull’s internal seam lines, gluing the wooden blocks at bow and stern, etc…

First image: the anchor points to hold down the forward hatch, 6 pairs of 6 mm holes (both on port and starboard sides) are used to mount the 6 loops of 4 mm paracord, which in turn are used to secure the belt locks. Second image: various anchor points are placed along the deck, some used for the hatches, some used for bungee cords, and some are just “reserved”, those are not readily in use, but provided for lashing things down on to the deck should the need arise.

Third image: wooden block glued to the bow, later a hole would be drilled through to run the kayak’s pulling line. Fourth image: another wooden block glued at the stern, note the two 5 cm screws, to fasten and reinforce the rudder post (would be installed later). The rudder post is another wooden block glued on the external side of the stern, rudder, rudder post, rudder control lines and control pedals, and the “new” rudder box are important issues that would be covered in next posts.

serene – 3, part 12

Next came the hatch locks, each hatch is hold down by 3 belt – locks, similar to those usually found on your backpacks, very secured and easy to lock / unlock. But that would be later on, for now, the locks’ anchor points need to be built and installed. There are many of them (a total of 30), as the anchor points are not only used for holding the hatch lids down, but also for other lashing bungee cords, and they are built exactly as in my Serene – 1 & 2 previous kayaks, a tried and true technique.

A line would (from the external side), go though the “half – circle tunnel” drilled inside the wooden blocks and loop back to the external side of the hull, forming very strong holding points for various lashing lines. I made two MDF templates and cut the grooves with my very handy Bosch router (first image), a set of three anchor points is placed on one same wooden bar (second image), and install as a whole (fourth image) for the ease of installation, just gluing the wooden bars to the deck.

The deck doesn’t receive a layer of fiberglass throughout, it is only reinforced at critical positions: around the cockpit, around the hatches, or along the seam lines, to help keeping the final weight low. But for an “expeditional boat”, weight is not the primary concern, the boat need to have some “mass” to withstand considerable amount of abuse in long paddling trips. I would expect around 20 kg finally! It’s bad that I’d seen the hull flexing a bit under heavy loads with my Serene – 2 kayak!

nguyễn văn minh

Chuyện về thiếu tướng tình báo Phạm Xuân Ẩn (PXA) thì nhiều người đã biết và biết khá nhiều rồi. Nhưng có 1 câu chuyện khác, 1 nhân vật khác cũng ly kỳ không kém, theo một đường hướng hoàn toàn khác.

PXA là 1 điệp viên hạng nhất, điều đó không có gì phải bàn cãi. Sinh ra trong 1 gia đình công chức thuộc địa cao cấp, 1 địa chủ giàu có, được ăn học đàng hoàng. Tham gia CM năm 45, kết nạp Đảng năm 53 bởi chính Lê Đức Thọ, ông trùm nội chính VN, được hướng dẫn bởi bác sĩ Phạm Ngọc Thạch, 1 nhân sĩ được ông Hồ hết sức yêu mến và tin tưởng, được hỗ trợ và chỉ đạo từ Mười Hương, Tư Cang… những nhân vật tình báo chuyên nghiệp (chuyên nghiệp hiểu trong ngữ cảnh VN, chứ chưa thể so với CIA hay KGB được). PXA là 1 điệp viên hạng nhất trên mọi phương diện, định hướng hoạt động tình báo chiến lược từ sớm, được tổ chức gởi đi Mỹ học, làm việc cho những thông tấn xã hàng đầu thế giới như Time và Reuter, có quan hệ với tất cả những nhân vật tinh hoa, chóp bu của giới quân sự và chính quyền miền Nam, các nhân vật tình báo hàng đầu của tất cả các bên như William Colby, Edward Lansdale, Lucien Conein, Bs. Trần Kim Tuyến…

Còn Nguyễn Văn Minh (Ba Minh – NVM) sinh ra trong một gia đình nghèo khó đông con, chỉ mới học hết lớp 5, gia cảnh khó khăn và sức khoẻ kém, đã từng muốn vào chiến khu tham gia CM nhưng không thực hiện được (cũng vì lý do sức khoẻ). Cho đến năm 54, cái gọi là “hoạt động CM” của ông chỉ dừng lại ở mức “cảm tình viên” ở cấp quận, huyện, chủ yếu là cung cấp những tin tức thuộc loại làng nhàng. Hoạt động tố Cộng, diệt Cộng của Ngô Đình Diệm những năm 55, 56 làm nhiều tổ chức, đường dây bị vỡ, NVM mất liên lạc suốt gần 10 năm. Một số lần đường dây được nối lại, nhưng rồi lại đứt. Những hoạt động của ông giai đoạn đầu chưa thể xem là tình báo, chỉ mới ở mức độ thông tin cấp thấp. Năm 55, ông học đánh máy chữ, chủ động bán nhà lấy tiền hối lộ để được vào làm nhân viên đánh máy ở Bộ tổng tham mưu chế độ cũ, hàm “thượng sĩ nhất”. Đây là bước đi đầu tiên chứng tỏ ông có một kế hoạch, một bài bản để làm tình báo chuyên nghiệp.

Trong suốt 18 năm, từ 1955 đến 1973, NVM tìm cách nối lại đường dây liên lạc với tổ chức, nhiều lần không thành công. Một số lần thành công thì cái vị trí, cấp bậc quá thấp của những người trong đường dây làm cho những tin tức của ông không được đánh giá đúng, mặc dù theo như lời NVM, ông đang “ngồi trên một núi vàng”, vì rõ ràng cái vị trí dù chỉ là nhân viên đánh máy trong Bộ tổng Tham mưu cho phép NVM tiếp cận với những thông tin thuộc loại tối mật. Không mất kiên nhẫn, trong suốt 18 năm đằng đẵng, NVM tìm cách liên hệ và chờ đợi cái ngày mà người ta đánh giá đúng những thông tin mà ông có thể cung cấp! Không biết chắc là vì những lý do gì, nhưng mãi cho đến cuối năm 1973, mạng lưới điệp báo A.3 mới chính thức được thành lập, và 1 dòng chảy thông tin trực tiếp từ Bộ tổng Tham mưu được hình thành. Người ta bắt đầu đánh giá đúng về giá trị của tình báo viên NVM, dù chỉ trong khoảng 1 năm rưỡi cuối cùng của cuộc chiến.

Nhà nghèo với 10 đứa con, lương của một “thượng sĩ nhất” không đủ nuôi chừng đó miệng ăn. Nhưng ngày nào ông cũng làm việc 15, 16 tiếng chép tay lại toàn bộ thông tin để đưa ra ngoài. NVM học thêm tiếng Anh chừng 1 năm để có thể copy được tài liệu tiếng Anh, và như ông có nói: tôi ít học, không đủ trình độ để phân tích, đánh giá thông tin, tôi chỉ làm 1 việc nhỏ nhoi, nhưng làm rất tốt! Có lần, tổ chức đưa 200 000 để ông mua chiếc xe máy để tiện cho việc đi lại, liên lạc. NVM mua chiếc xe Honda 67 hết hơn 100 000, trả phần còn lại! Sau này được hỏi về hành động đó, sao không giữ lại tiền mà nuôi 10 đứa con, ông trả lời: “tôi không bán tin, tôi cũng làm CM như các anh thôi!” Cách trả lời cho thấy ông ấy hoàn toàn ý thức về vai trò cũng như giá trị của một điệp viên hạng nhất! Chất lượng của những thông tin ông ấy cung cấp không phải bàn cãi, khi sau 75, người ta thăng anh “thượng sĩ” lên đại tá, và trao tặng danh hiệu Anh hùng lực lượng vũ trang.

Tóm tắt về nhân vật, để thấy rằng NVM không có những gì PXA có: không sinh ra trong 1 gia đình truyền thống giàu có, không được học hành đầy đủ, thậm chí không có được sức khoẻ tốt! Không được “giác ngộ cách mạng” với những nhân vật lão thành hàng đầu như Lê Đức Thọ, Phạm Ngọc Thạch, không được hỗ trợ bởi 1 đội ngũ điệp báo hạng nhất như Mười Hương, Tư Cang, không được định hướng và đào tạo về hoạt động tình báo bài bản từ sớm như PXA. NVM khởi đầu chỉ là một “cảm tình viên” cấp quận, huyện, và hầu như không có một tiếp xúc, định hướng, huấn luyện nào về nghiệp vụ tình báo! Đôi lúc có cảm tưởng rằng, mọi đường đi nước bước là tự ông ấy tính toán lấy, từ việc vào làm ở Bộ Tổng tham mưu, cho đến việc móc nối, chờ đợi 18 năm để người ta có thể hiểu đúng giá trị của mình! Và thậm chí có cảm giác rằng, trong nhiều năm, người ta không tin tưởng NVM, có thể vì ông ấy không nằm trong diện được đào tạo, được “quy hoạch”.

Sự thực là suốt 20 năm hoạt động tình báo, NVM chưa bao giờ là Đảng viên, ông chỉ gia nhập đảng CS sau 1975, 1 bước “thủ tục” cần thiết để có thể thăng ông ấy lên đại tá và trao tặng danh hiệu Anh hùng. Nhiều sự việc nằm ngoài hiểu biết của tôi, hay có điều gì “một nửa sự thật” mà ngành tình báo đến giờ vẫn không thể nói ra!? Trong suy nghĩ của tôi, điều đó gần như là không thể, khi con 1 nhà lao động nghèo ít học, không có được bất kỳ tiếp xúc gì với các thành phần “lý tưởng”, “tinh hoa CM”, gần như không được hướng dẫn, hỗ trợ bởi một tổ chức! Gần như là đơn phương, đơn tuyến, tự mình vạch ra đường đi nước bước, tự mình liên hệ và chờ đợi để người ta hiểu đúng về giá trị của những thông tin mà mình cung cấp! Lòng yêu nước “thuần thành” hay còn điều gì khác!? PXA đã là 1 câu chuyện ly kỳ, NVM là 1 điều kỳ diệu! Dân tộc VN tồn tại được qua nhiều biến động của lịch sử vì có những điều kỳ diệu chưa thể được lý giải đầy đủ như thế!

serene – 3, part 11

Continue working on hatches. First image: the completed two hatches (still without the gaskets inside) with the hatch rings (rounded rectangle in shape, cut from a sheet of MDF and strengthen with quite a lot of epoxy). Second image: the recessed (flush deck) forward hatch, the deck is cut 1 inch down, and about 45 cm along the length to get a wider space to install the hatch. This part of the deck is quite weak, and need to be reinforced with some putty and fiberglass inside.

The hatches’ size look a bit small, 18 x 38 cm internal (cut out) side, but that’s sufficient to let many things through, e.g: water bottles or the tent bag, most objects are of long and narrow shapes. I intentionally try to keep the hatch size small as possible, to help with waterproofness. Third image: gluing the forward hatch ring onto the deck, the recessed base is about 1 inch lower, so that when the nearby hatch (seen on the right) is closed on, it would flush with the rest of the deck surface.

The same is done with the rear hatch (not shown here, but you can see it with the image album link on the left). Good thing is that the hatches and their rings fit together really well. Next I would round the internal side edge of the hatches’ ring a bit, cover them with a layer of glass. Completion to the very details in required indeed, in the last trip, I accidentally damaged one of my clothing bag, trying to pull it out of the cramped storage compartment over this sharp, unrounded edge.