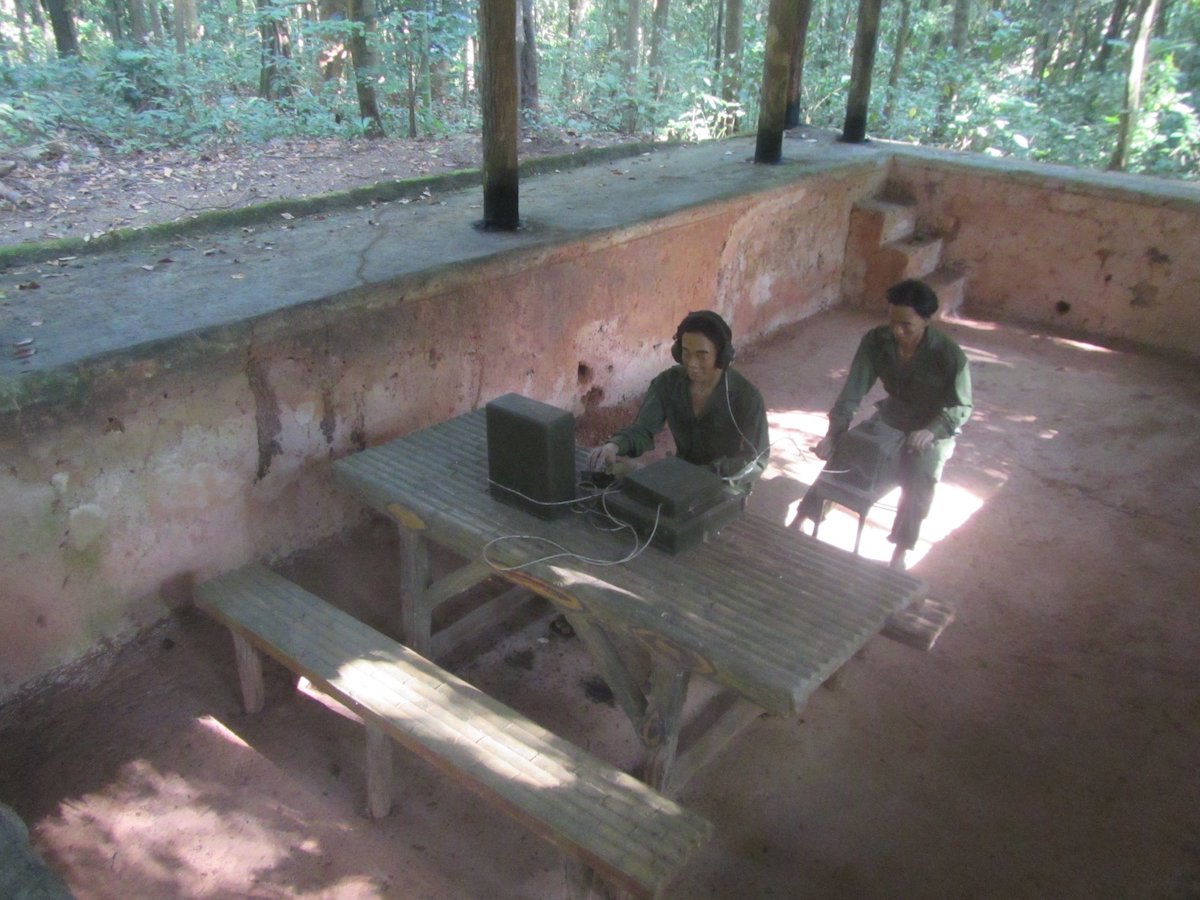
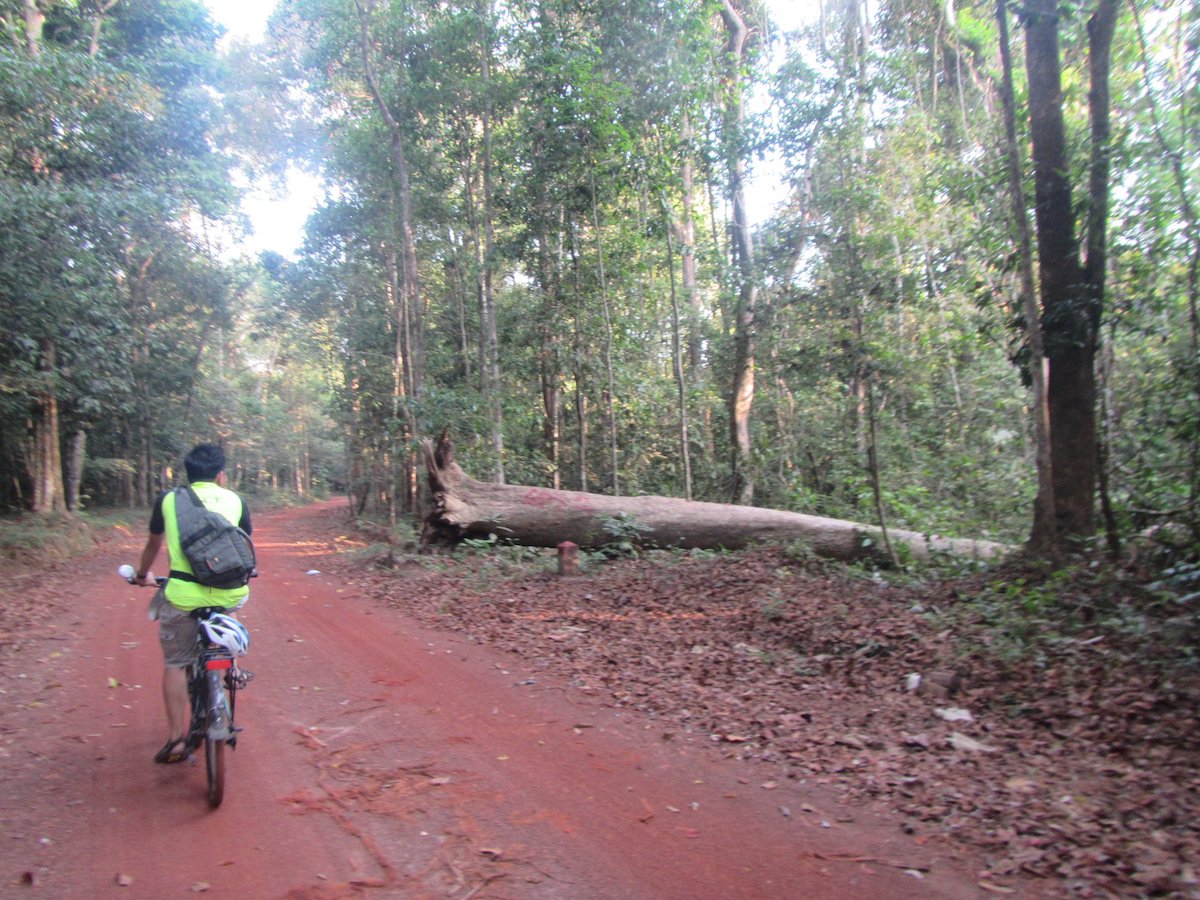
serene – 3, part 28

took the kayak out for several more paddling around my area, 12 ~ 24 km, and also took a few video shots, mostly from second – person positions. I want to observe the whole boat under action, its motions and its wakes, etc… I also want to see how the rudder works, to check if the hull need some trimming, as well as to observe my own paddling movements. Actually, I’m very lazy for video capturing (and editing), they’re time consuming jobs, I’d better concentrate just on paddling.

I made a new seat from plywood, of a very simple design, composed of 3 pieces of ply bended into curved forms around a frame made from MDF. This batch of plywood is really good, no cracks, no breakages even though tortured to extreme shapes. The seat is bolted onto two “hip braces”, connecting the cockpit coaming and the floor, providing a comfortable seat, and together with the rudder pedals, offer a very tight fit for my lower body, required to control the boat in turbulences.

The overall evaluation for Serene – 3 is very satisfying, the boat behaves very well, and very predictable under different conditions. Its stabilities enable me to lean the boat to extreme angles without falling, and I really enjoy its agility, which reacts instantly to my different paddle strokes. The hatches are completely waterproof, the rudder has (more than) enough steering power, and the electric – bilge pump system works just fine. More trialling ahead on this Lunar new year holiday.

đoạn trường tân thanh

aizzaa… ngày xưa, cụ Nguyễn Du chỉ vì say mê cuốn tiểu thuyết “ngôn tình” Đoạn trường tân thanh, loại “dâm thư” có tiếng của Tàu, mà viết nên Truyện Kiều, hậu bối ngày nay xem là áng văn chương tuyệt tác. Khá khen cho biết bao nhiêu thế hệ tài tử, văn nhân, cũng vì trí lực, ngôn năng có hạn mà đành phải vin vào loại thi ca nhàm chán đó. Chữ nghĩa tuy có đôi phần tài hoa, bay bướm, nhưng ý tưởng, thần thái, tựu chung than thân trách phận, yếm thế não tình, quả thật bỏ thì thương, vương thì tội! 😀

serene – 3, part 27

etween the trials, I managed to complete a couple of things. First is to mount the compass, the tried – and – true type of compass used in all boats of the Serene series, this without an internal lighting. Then, I built another paddle, a simple one with rattan shaft, and plywood blades, a little bit bigger, weights at 1.1 kg, slightly heavier than the Greenland companion – my “storm paddle”, 0.9 kg. Still considered an Euro – type paddle, but with a smaller blade to resemble Greenland style.

As I sometimes need larger power faces to propel the boat under unfavorable conditions. The rudder control lines are modified to be more easily adjustable, see the second image below. The pedals are attached to small segment of chains, to adjust the tension, you simple move the shackle to another chains’ eye, this could be quickly done while you’re in the field. I also replaced the bungee cords holding the pedals back by 2 large steel springs, providing better “suspension”.

Just release one pedal and the springs would pull the rudder blade back to its neutral position. I added 4 tiny 3.7V LED bulbs (series wiring) to the electric box, in an attempt to indicate the batteries’ remaining capacity (as there’s no easy way to do so). This is a trick I learnt from experiences, when 1 or 2 of the LED bulbs won’t turn on, or their brightness is drastically reduced, you’d need to plug in the solar panel then! 😀 Not all works has been completed, but it’s time to clean up the workshop a bit!

serene – 3, part 26

aunch the boat today, first day of the year 2018 😀! Took the kayak out to water on a sunny, breezy afternoon for a 12 km paddling, the temperature was around 25 ~ 27 Celsius, considered “cool” with this hot – all – around – the – year tropical climate. The short paddling is just to get some first impressions, to check if everything works, and how it feels, the new hull shape, something radically different from my previous boats. Yet all confirms things I’d known from the design phase.

The kayak is nimble and very predictable, probably not too agile compared to Serene – 1 and Serene – 2, it’s also a bit more stable across all its axis. It’s easier to get in and out of the cockpit with these stabilities. The rudder works nicely, changing course instantly with just some slight pedal kicks, though I’ve come up with some new ideas to improve the “fine – tuning mechanism” for the rudder control lines’ tension (the cleats used are fine, but not too convenient for adjusting the tension).

The rudder pedals offer very good seating position, together with the plastic seat (used for testing), fixing my lower body well to the hull. I would decide later whether to just use this plastic seat, or build another lower one to facilitate reentry actions. The hatches are absolutely water tight, an important criterion! The overall feeling is very satisfactory, yet more trials are needed, in different conditions, especially on rougher water, to really understand the capabilities of this new boat.

serene – 3, part 25

lmost ready for the water, but the tide is unfavorable for the weekend (its heights are at night), and the Tembin cyclone is crossing the East sea, threatening the area. So I take the time to complete a couple more things. Attaching the electric box through cable gland is quite straight forward, everything works out right, in essence the bilge pump and reed switch. I added one master switch to the electric circuit, in order to turn everything off and not to drain the 18650 batteries to exhaustion.

One critically important issue with the 18650 batteries is that, never used them to exhaustion, when the voltage drops below 1 ~ 1.5 V or so, the battery just becomes dead, you simple could just throw them away, a costly lesson the last time I hadn’t paddled for some weeks, and let the batteries run until dead 😢. Next, I “refurbish” one of my old paddles to match the new boat style, turning it to black, and make it a bit stronger (and slightly heavier) with an extra layer of fiberglass.

The paddle was specially built from rattan and balsa wood, and is light enough already at 0.8 kg. I would try to use this paddle first, before deciding if it’s necessary to make an extra new one, weight and durability are two major concerns. Third image: a “smoke test” to verify if the bilge pump and the solar panel all properly works. Now wait out for a few more days before going to water, just some 10 ~ 12 km of paddling, to see how the kayak behaves, how everything would feel out there.

bão

ách chằng buộc nhà chống gió bão của các cụ ngày xưa, hình chụp tại… xã Kim Liên, huyện Nam Đàn, tỉnh Nghệ An 😀 Kỳ vừa rồi đúng là nơm nớp lo sợ, bão cấp 12 mà đánh vào SG là cái xưởng mộc của mình, cũng như nhiều nhà tạm khác, sẽ bay sạch. tuoitre.vn – Dân chúng miền Tây chế ra nhiều kiểu chằng buộc kỳ quái, không hiệu quả tí nào…

serene – 3, part 24

askets fabrication: the critical thing in a hatch’s waterproofness is its gasket, and I realized that the best material for gasket is silicone: flexible, durable and offer a very good fit. And for a custom size and shape hatch, somehow I’ll need to make the gaskets too. It turned out to be pretty much easy, using the 2 – parts silicone available here on local market. You mix up component A to component B (catalyst, around 1 ~ 4 % by weight) and pour it into a mold, wait for about 2 hours, and it’s done.

1st image: the mold (cut from plywood) is filled with silicone, I use the “Silicone” (red bottle) spray as a mold release, it’s “strange” that silicone is used as a release agent also for silicone. 2nd image: the product, the O – ring released from the mold. 3rd image: the gaskets inside the hatch lids. The gaskets are 15 mm wide, 5 mm thick, and are pressed down to the hatch rings with those belt locks. I hope I would end up with excellent waterproofness, but let wait until “sea trial” to know better.

I reuse the bilge pump from my previous boat, it still sees very little use, the installation is quite straight forward using some cable ties fastening the bilge pump into its mount. The flexible water pipe leads to a hose right on the right side behind the cockpit, the hose is protected by a screw – in cap, to prevent water from leaking back into the boat when waves wash over the low aft deck. The bilge pump really offers lots of convenience and confidence when you are out there, in the roughness.

serene – 3, part 23

irst image: the aft deck hatch, secured by 3 belt locks. These locks are usually found on your backpacks, and while they are a bit cumbersome to install, they offer quite some holding power and downward pressure, which is essential for the silicone gaskets inside the hatches’ lids to properly work (would mention about those gaskets in the next post). Similar locking for the forward hatch (2nd image). There’re 3 locks per hatch, so if one failed, the other two could still full – fill their duty.

Next, I installed the rudder pedals and control lines. 3rd image: the rudder in retracted position, 4th image: the rudder in its working position. Thank to the lessons learnt with my previous boat, I redesigned, rearranged every details so that the rudder actions now is very light, smooth, and balanced: kick the pedals lightly and the rudder would follow, release a pedal and the rudder would come back to its neutral position. All control lines tension could easily be adjusted from within the cockpit.

I lubricated with silicone grease all the moving parts of the rudder system, the pivoting points, the lines and pedals, and everything became much smoother. I’m very happy with the overall working of the rudder, though this is still in – dock testing, let see how they would behave while on water. Can’t wait for water trial yet, as there’re still much things to be completed, the bilge pump, the electric box, the hatches’ gaskets, the seat, cart, and a new pair of paddles, etc… still many jobs ahead.

serene – 3, part 22

ne more lesson learnt: we can thin the epoxy when glassing too, sometimes the epoxy has such high viscosity (e.g epoxy from the bottom of the container) that it’s a bit hard to wet out the fiberglass, so I added some xylene solvent (less than 1/4 by weight), so that the glassing could go on easier, and the curing time is also prolonged, an important factor in hot tropical weather. Don’t worry about not having enough epoxy inside the fiber, cause we would usually have another fill coat anyhow.

Hull glassed, 1st image: trim the glass with a small scalpel and peel off the excess. Next, I put the fill coat on until no woven fabric is clearly visible, then slightly sanded the whole bottom. Then I sticked the white vinyl decals for the boat’s eyes and information (3rd and 4th images). Next, I painted the deck with 2 layers of transparent PU paint, and the hull with 3 layers. I ran out of PU thinner (butyl acetate) on the way, so I used acetone instead, it’s also a good solvent for thinning PU paint.

After 2 layers of paint on the hull, I slightly sanded it one more time, before applying the final coat. Well, I’m not particularly good at finishing, and like all my boats, all finish is just “barely – good – enough”, not a “very – fancy” look anyhow. But it’s important to have an even, smooth and thick – enough coating to protect the epoxy from UV and other abuses, the “2K” PU paint I used forms up a very hard protection really. In total, I used roughly about 1.2 kg of paint for the whole boat.

serene – 3, part 21

eck is stained with brownish wooden color, a color pigment is mixed with thinned epoxy and brushed over its surface. Epoxy is thinned for two purposes: first, to lower its viscosity so that the mixture flows easier and make a more even surface, second is for the epoxy to be absorbed into the deck, since there’s no glassing for deck, better to add some water resistance capability to the exposed plywood. This has always been my method of treating plywood if there’s no glassing.

Next is to glass the bottom, this gonna be a quite heavy kayak (estimated to be approximately around 25 kg) since I’d decided to glass both the internal and external side of the hull, while the deck only receives some glass reinforcement on the internal side. I run duct tapes along the deck (third image) to mask the margin for glassing, two layers of duct tapes to prevent the blackened epoxy to spill over the deck. One very annoying thing with every duct tapes I used is that no matter how I try…

Epoxy still leaks a bit under the duct tapes, and the border line between hull and deck would become blurry. I used a trick to overcome this problem, after sticking the tapes, I brush a very thin layer of transparent PU over them, cured paint would prevent epoxy from leaking through while still enable pilling off the tapes. Fourth image: glassing the bottom, epoxy is mixed with a deep black color pigment, almost jet – black. Later, several layers of transparent PU would make the final finish.