serene – 3, part 6

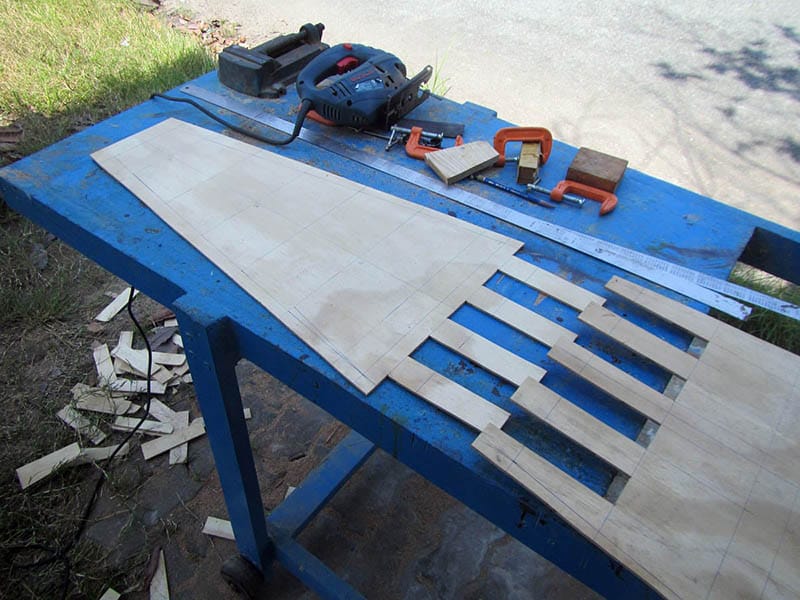
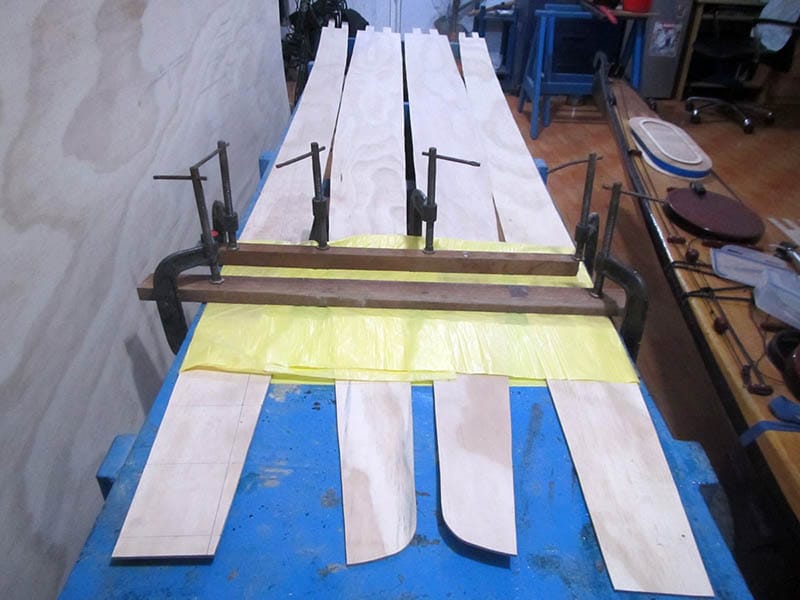
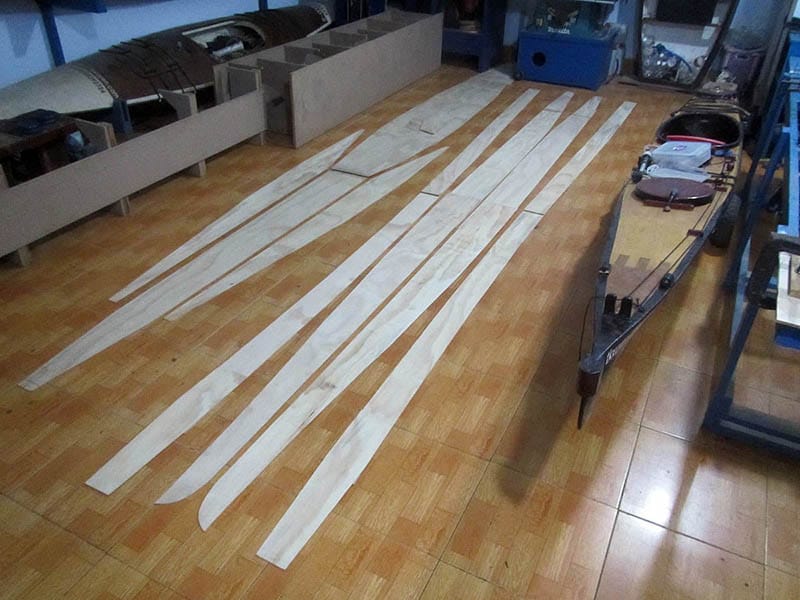
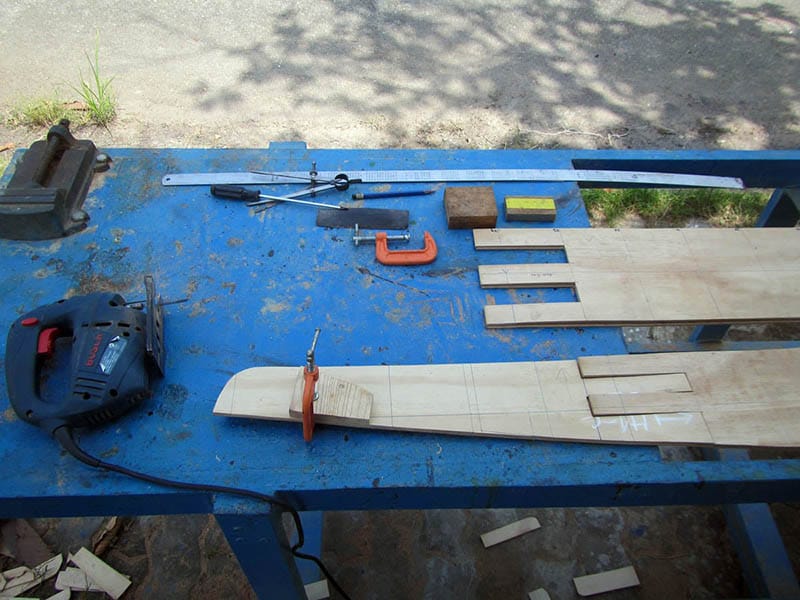
Next is jointing the plywood pieces: 8 joints for the hull, and just 1 for the deck, to form the bilges that would build up into the boat shape. For the 2 pairs of hull’s bilges, I flip one pair by 180 degree when drawing on the boards, so that to distribute the joints at different places across the boat length, and not to concentrate too much joints into one proximity. That old boatbuilding carpenter’s trick is not completely necessary with modern building techniques, but it’s nice to do so anyway.

The tried – and – true technique of straight finger joint is used as always. The straight joints are easy to cut, and most importantly much easier to be aligned following a straight line for all the jointing parts, so that to make sure all the bilges would be jointed into the correct shapes. All the joints are treated carefully, first is applying a layer of thinned epoxy (using xylene as a solvent, for the substance to penetrate deeply into the plywood), then gluing with epoxy, then a layer of glass on the internal side.

I beveled the edges of the deck parts a bit (at 45 degrees), so that they would fit tightly and nicely together forming straight seam lines. But that’s not applied to the hull, where the cursive seam lines don’t like very thin edges. Experiences from my previous boats showed that, it’s best just to use the squared edges, the thin edges doesn’t stay on each other very well, and would deform, distort the seam lines! You would later just apply thickened epoxy on both sides (in and out) of the seams!
serene – 3, part 5

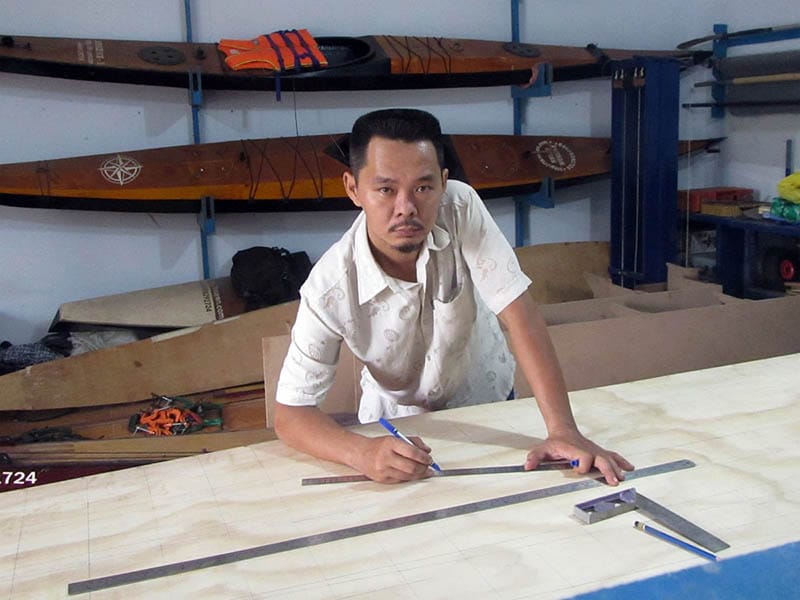
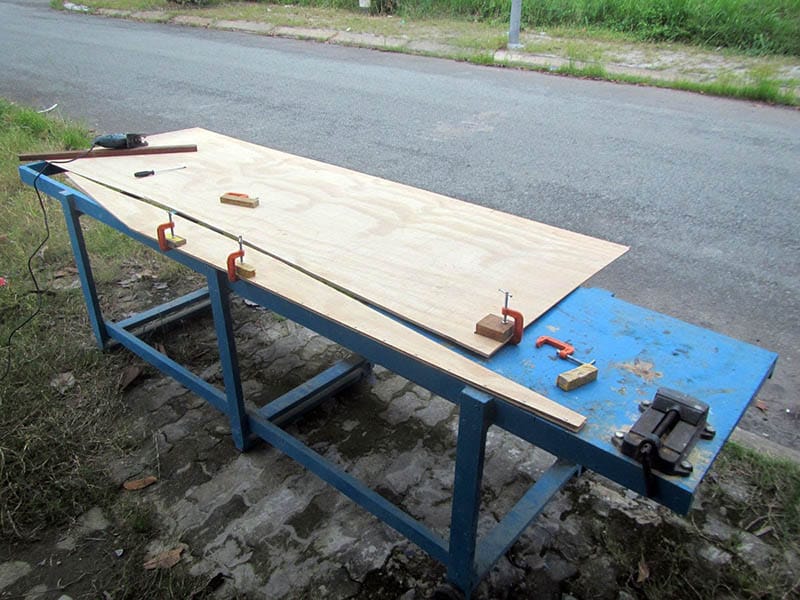
The progress is really slow lately, several weeks passed, but little get done! Things started moving anyhow, I “quickly” transfer the “offset tables” onto the plywood boards, draw all the bilges, bulkheads, and other parts. The greatest thing of all is that now I’ve purchased very good sheets of plywood, not truly marine – grade (there’s no such in Vietnam), but high – grade water – resistance ones. I could feel it when do the sawing, the boards are quit tough, not fragile as with my previous ply!

There would be an immediate consequence with the new plywood, I would just use less epoxy to pre – fill the boards, and since the boards is stiffer, the glassing would be done on the outside only, that would significantly save the boat weight, I hope. All drawing is completed quickly, I finished in just less than one day, next come the steps of cutting and jointing the bilges. Everything has been done many times before already, so I didn’t have to think or consider things much, just repeat it!

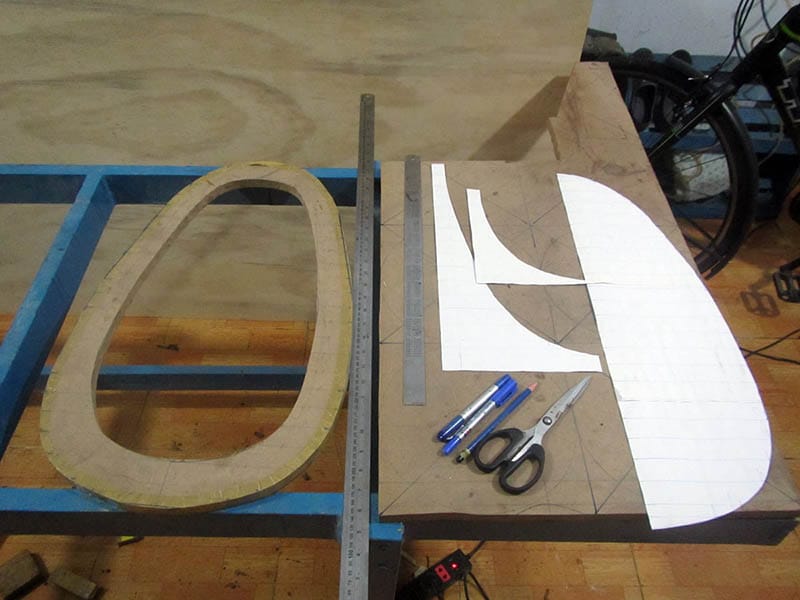
4th image: the cockpit coaming frame cut from a piece of 18 mm MDF. This cockpit is drawn using the mathematic formula mentioned in my last post. It came very closed to the shape of Serene – 2‘s cockpit, but slightly smaller on each sides by about 5 mm, so my existing spray skirt should fit tightly with this new coaming (on Serene – 2, it’s too tight). The coaming would be constructed from 2 layers of 4 mm plywood, and I would later omit out the (a bit tricky) glass reinforcement on this part!

how to draw a kayak cockpit mathematically?

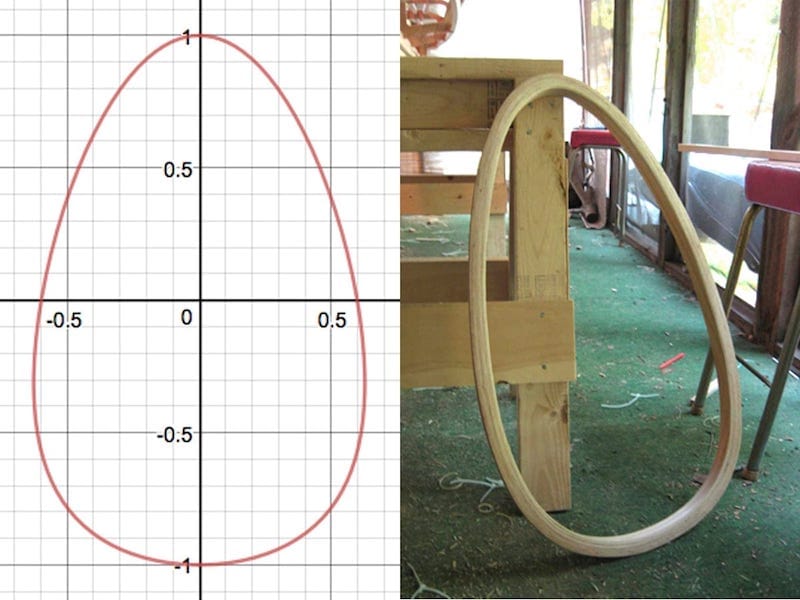
Over the years of designing and building wooden kayak, often a recurring question comes to my mind: how can we precisely construct a kayak cockpit shape in a mathematical way. Today, I spent 30 minutes to figure out the problem, it turned out to be quite easy indeed. But first of all, there are so many different shapes for cockpits, and everyone may have his / her own preference on how it should look like. Here I try to plot a shape that is most suited to my eyes, and closed to what’s usually called “an ocean cockpit” found on Greenland kayaks.

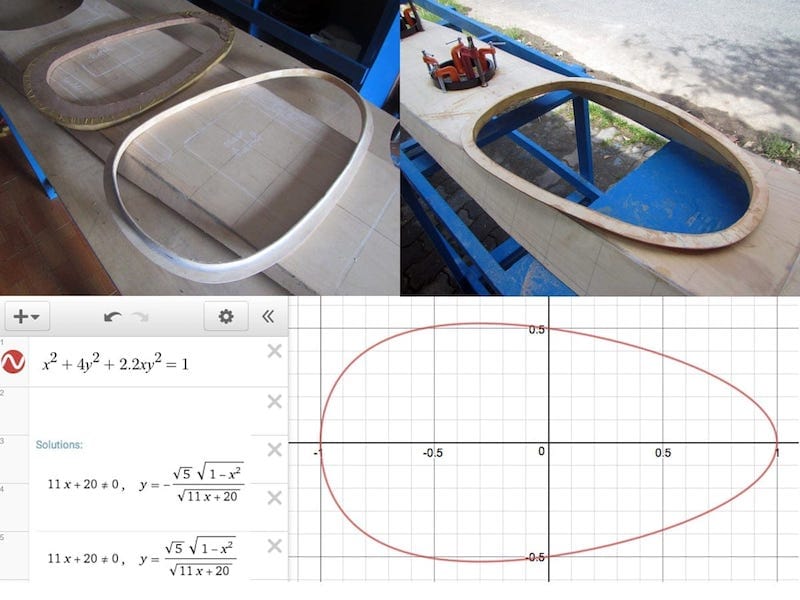
I went to the Wolfram Alpha website (wolframalpha.com) and entered an ellipse function. Apparently a cockpit shape is not elliptic, but rather an asymmetric “egg shape”. I tweaked around the equation for a while, changing its components, and the shape came out, closely resembles that of my Serene – 2. I’d also tried to construct other types of “egg shapes”, for example, an 3 – ellipse that has 3 foci, something that could be drawn with closed thread of rope running around 3 nails pinned on a wooden board (similar to drawing an 2 – ellipse with 2 foci).

Next come the question of how to draw this shape onto the wooden board that would actually construct the cockpit coaming? A bit of thinking has the problem solved too. The Wolfram Alpha website provides us with numerical formulas. The general steps are like this:

1. Draw a bounding box in the dimensions you want, mine is: 39×72 (cm), the dimension that your spray skirt would fit into (and the spray skirt vendor usually supply you with this information before – hand). The x value would have the value range of [-1, 1].

2. Draw a dense grid of x & y inside that bounding box, for each value of x from -1 to 1, calculate the y value with the formulas given above. Giving very fine incremental values of x, say every 1 or 2 cm, it would be possible to construct a good looking “egg shape” then.

Of course, I want to find out a way to draw the “egg shape” more precisely and more conveniently, e.g: print the plotting actual size on paper, but found it a bit cumbersome as I have no printer of that size! Anyone finding out a good way, please kindly let me know!

But it’s hard to determine the dimensions of that 3 – ellipse, and the positions of its 3 foci. Finally, I found out the formula that is best suited for me, something that could be determined numerically to ease out the actual drawing. The formula finally: x2 + 3.5y2 + 1.5xy2 = 1. Upon close inspection, the “egg shape” turned out to be very satisfactory. One might try changing just the “weight” parameters (e.g: 3.5, 1.5…) and retaining degrees of the polynomial’s terms, to experiment with different other shapes, to figure out what is best according to one’s need.

the final count down

Ai cũng biết bài hát xưa như trái đất này, nhưng mấy người biết nó nói về cái gì!? “The final count down” – lệnh đếm ngược: 9, 8, 7… 3, 2, 1… Preliminary stage, Intermediate, Main, Lift – off… đọc lời bài hát sẽ rõ, ngồi trên hàng trăm tấn thuốc nổ, trong một tích tắc là đi vào lịch sử (hoặc trở về với cát bụi)!

We’re leaving together, but still it’s farewell. And maybe we’ll come back to earth, who can tell? I guess there is no one to blame. We’re leaving ground. Will things ever be the same again? It’s the final countdown! We’re heading for Venus and still we stand tall. Cause maybe they’ve seen us and welcome us all, yeah. With so many light years to go and things to be found. I’m sure that we’ll all miss her so. It’s the final countdown!

analog computers

Một chủ đề ưa thích của tôi là lịch sử Khoa học Kỹ thuật. Lên Đại học, tiếp xúc với các khái niệm automata, tự động hoá và điều khiển, tôi được học chung về các nguyên tắc đầu vào và đầu ra của các hệ thống máy tính điện tử. Tất cả các tín hiệu “in và out” (sensor, control, actuator…) được “lượng hoá” từ tín hiệu analog thành digital, vì máy tính hoạt động trên nguyên tắc tín hiệu số, dĩ nhiên có một số bộ chuyển đổi AD, DA đâu đó. Nhưng mãi lâu về sau, tôi mới được biết đến cái gọi là “analog computer”, ngược hẳn với “digital computer”, đó là những “máy tính tương tự”, hoạt động trên các “tín hiệu tương tự”, sử dụng những nguyên tắc cơ, điện, quang… Một ví dụ “kinh khủng” nhất cho các “analog computer” là các “máy tính” sử dụng trong điều khiển tàu vũ trụ của Liên Xô, mở ra bên trong thấy toàn các bánh xe cơ giới!

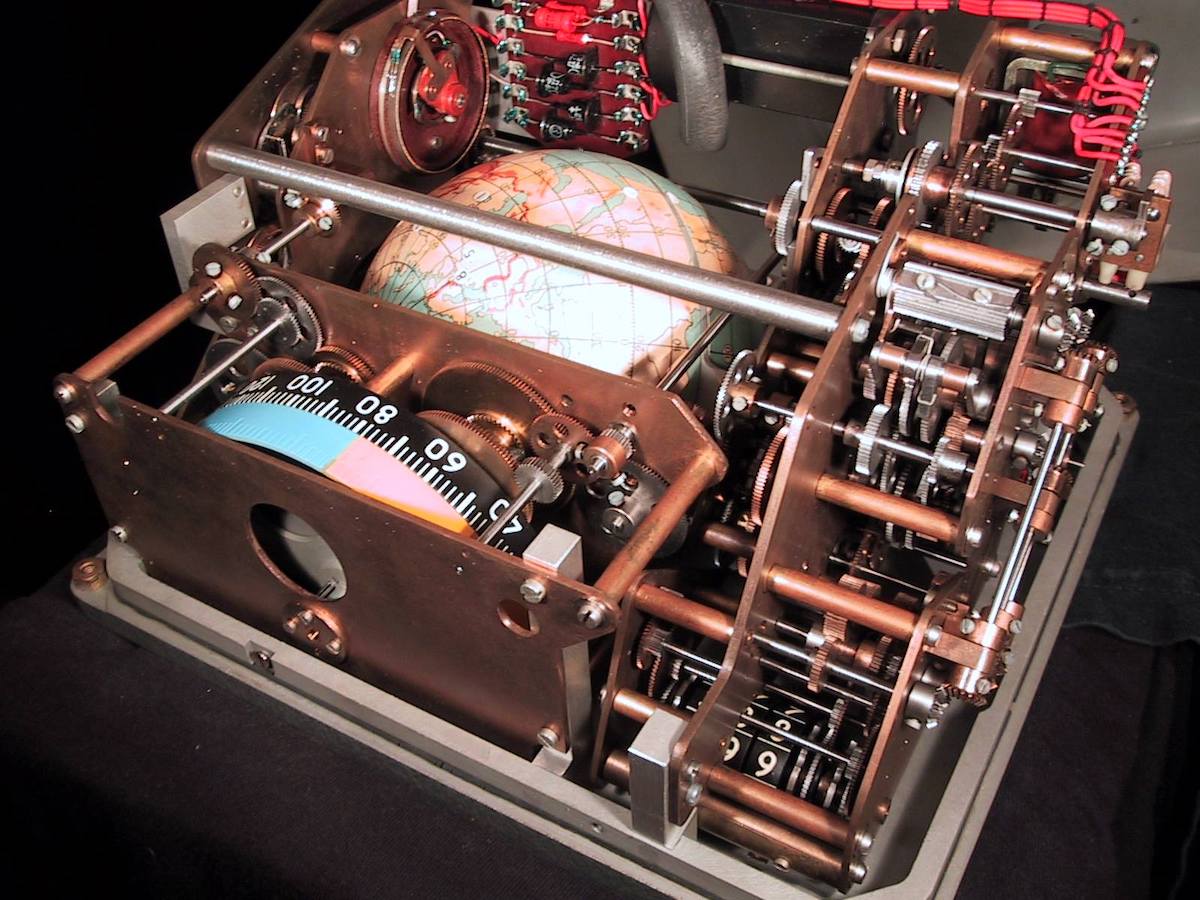
Một sự thật làm tôi há hốc mồm vì kinh ngạc! Tàu con thoi Soyuz được phóng lên vũ trụ và hạ cánh xuống mặt đất, được tự động hoá từ A đến Z, không cần người điều khiển, sử dụng những bánh xe, cánh tay đòn hoàn toàn cơ giới như thế. Trong khi tàu con thoi – space shuttle của Mỹ, sử dụng digital computer hẳn hoi – hiện đại hơn Liên Xô cả một thế hệ, nhưng không thể tự động hoá hoàn toàn, phải có người điều khiển! Hình dưới đây, bảng điều khiển tàu vũ trụ Liên Xô, một quả địa cầu được xoay bằng các trục và bánh xe, chỉ cho phi công biết con tàu đang ở đâu so với mặt đất! Mở ra bên trong trông như một cái đồng hồ, một kỳ quan thực sự về cơ khí phức tạp! Phải mất rất lâu ta mới hiểu ra rằng, có nhiều hơn một cách để làm “chuyện ấy”, và những cách khác ấy đôi khi rất “dị” so với quan điểm thông thường!

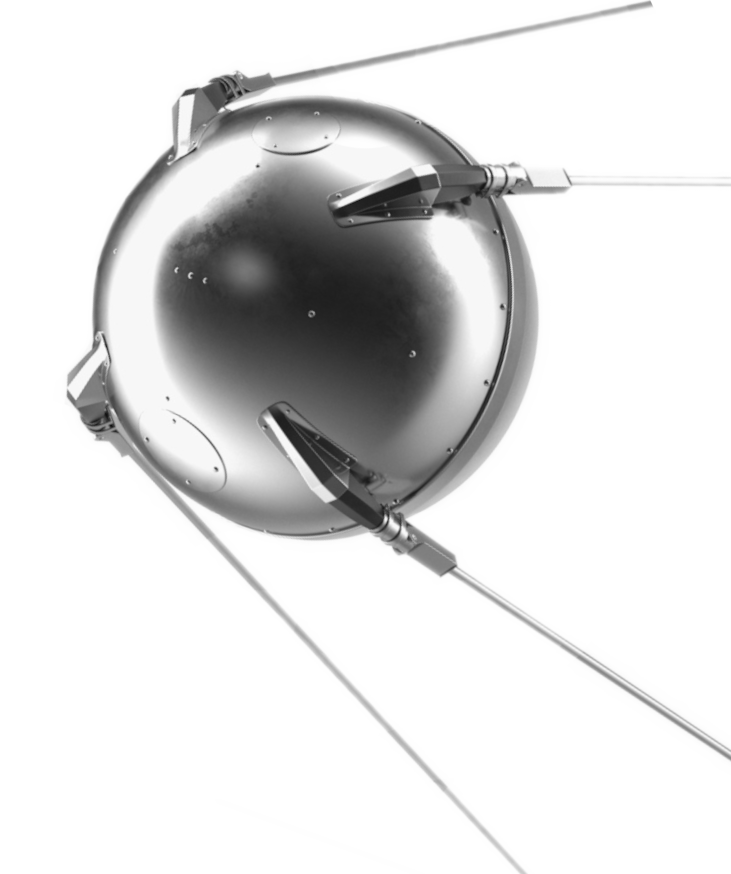
sputnik

Ngày này, cách đây 60 năm… Từ một động cơ “kép”, vừa để thể hiện sức mạnh khoa học kỹ thuật của “Moguchiy Sovetskiy Soyuz – Liên bang Xô viết hùng mạnh”, vừa phát triển công nghệ quốc phòng; đã khởi đầu cho kỷ nguyên không gian, nhờ đó mà bây giờ chúng ta có GPS, có điện thoại vệ tinh, có vệ tinh thời tiết, và vô số những thành tựu khác. Đưa được vệ tinh vào quỹ đạo cũng có nghĩa là người Nga đã có loại tên lửa đưa được đầu đạn hạt nhân đến bất kỳ nơi đâu trên toàn cầu! Nước Mỹ không còn an toàn như trước!
Nó cũng tạo ra “ấn tượng” rằng, trình độ KHKT của Liên bang Xô viết đã vượt qua phương Tây! Chiến tranh lạnh cũng có mặt tích cực của nó, KHKT được ưu tiên phát triển! Cuộc chạy đua vào không gian bắt đầu! Một năm sau, bố tôi về nhà thông báo với ông nội rằng người Mỹ vừa đặt chân lên mặt trăng! Ông nội lắc đầu hoài nghi, hoàn toàn không tin, kiên quyết phản đối. Không thể nào cái vầng trăng tuyệt mỹ, thiêng liêng như trong thơ Đường của ông lại có thể bị “xâm hại” như thế được! Chuyện ấy đơn giản là không thể, tuyệt đối không thể…

power plants on the moon?

Trong 1 thoáng suy nghĩ tình cờ, tôi chợt nhận ra lý do tại sao Elon Musk vừa đầu tư cho công nghệ điện mặt trời, lại vừa đầu tư cho du hành vũ trụ. Họ sẽ làm những “solar farm” – nông trại điện mặt trời trên mặt trăng để tạo ra điện, chuyển qua dạng vi ba (microwave) và truyền về trái đất, kiểu giống như sạc điện không dây cho các thiết bị di động vậy! Không phải chỉ có Mỹ, cả Nga và TQ tuy không nói ra nhưng đều nhắm đến việc xây nhà máy điện mặt trời trên mặt trăng. Ở đó cường độ bức xạ cao hơn trái đất nhiều lần, không bị che bởi khí quyển như mặt đất, hầu như là có sáng 24/7, nên hiệu suất điện năng rất cao, xây ở một quy mô siêu lớn dùng robot, vì số lao động có thể đưa lên mặt trăng khá hạn chế!

Năng lượng mặt trời, cùng với xăng sinh học (ở VN đang là E5, Mỹ là E75, Brazil đã là E100) sẽ giải quyết triệt để vấn đề năng lượng hoá thạch (không thể tái tạo) và năng lượng hạt nhân (không an toàn). Dĩ nhiên với xăng sinh học vẫn còn đó lưỡng đề nan giải: “food or fuel”! Haizza, cảm nghĩ vẩn vơ trong một chiều bị “nướng” bởi hàng triệu ống bô xe ở SG! Đừng vội cho rằng tôi “cả nghĩ”! Một tương lai sạch và xanh đúng nghĩa, không dùng đến năng lượng hoá thạch, hạn chế tối đa khí thải, toàn bộ năng lượng hầu như đều có khả năng tái tạo, tương lai đó hoàn toàn khả thi! Không những chỉ khả thi mà tôi tin chắc rằng mình sẽ còn sống đến ngày được thụ hưởng những thành quả ấy!

thời hoa đỏ – 2

Anh mải mê về một màu mây xa
Về cánh buồm bay qua ô cửa nhỏ,
Em thầm hát một câu thơ cũ,
Về một thời thiếu nữ say mê
Về một thời hoa đỏ diệu kỳ…

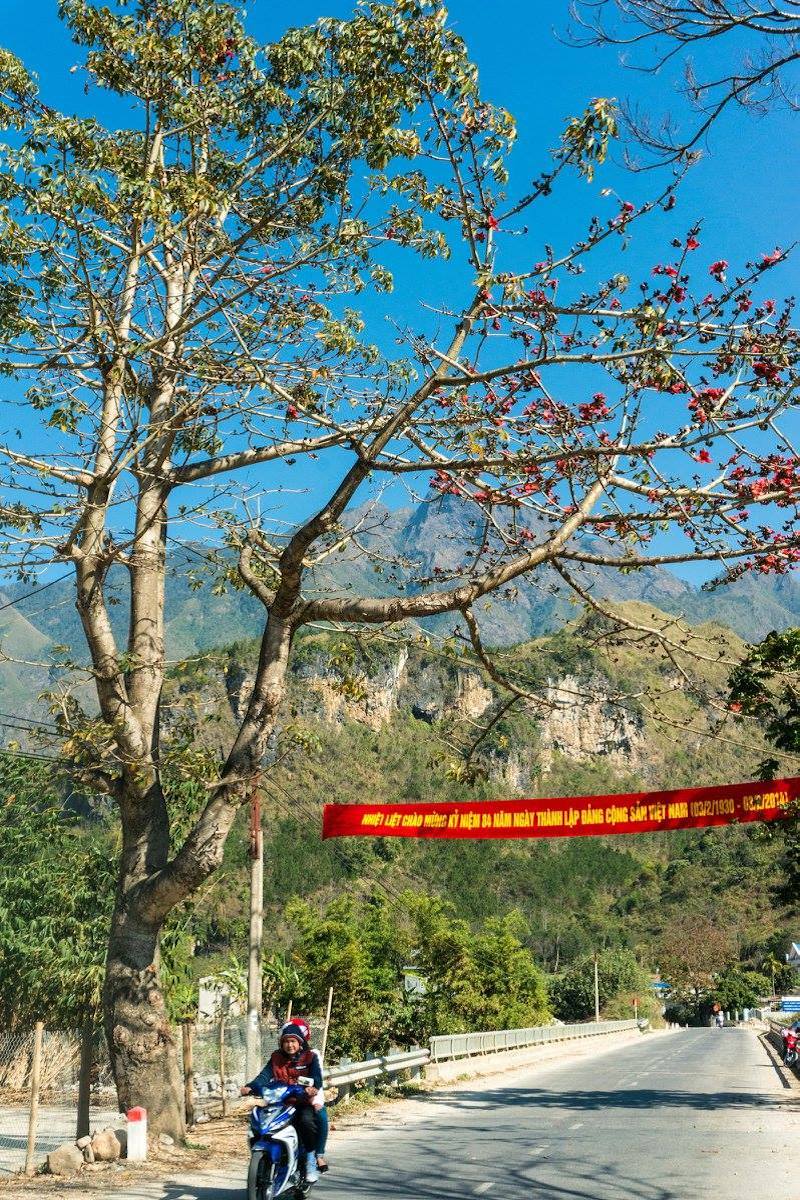
Chạy dọc trên triền đê sông Thao, rồi qua Nghĩa Lộ, Mù Cang Chải, lên đến Lai Châu… thi thoảng lại bắt gặp cái mầu hoa gạo đỏ nao lòng này… Những ai đã từng tận mắt chứng kiến mùa hoa gạo nở (thử dùng google image search với 2 từ khoá: “chùa Hương” + “hoa gạo”) mới hiểu được cái đẹp quyến rũ đến lạ kỳ của “Thời hoa đỏ”.

tuoitre.vn – Vĩnh biệt nhà thơ Thanh Tùng, tác giả Thời hoa đỏ

Thời hoa đỏ - Nguyễn Đình Bảng 

serene – 3, part 4

Finally, I managed to have some time slots to start the kayak building. Works would be carried out mostly at weekends, and hopefully, the boat could be finished within this year. After much hesitations, procrastinations, and considerations into the very details, I’ve incorporated quite some “innovations” into the final design, as well as some “simplifications” to ease the building process. I “hope” this is also my “last” stitch – and – glue boat, the 6th of “the fleet”, seems to be a lot already!

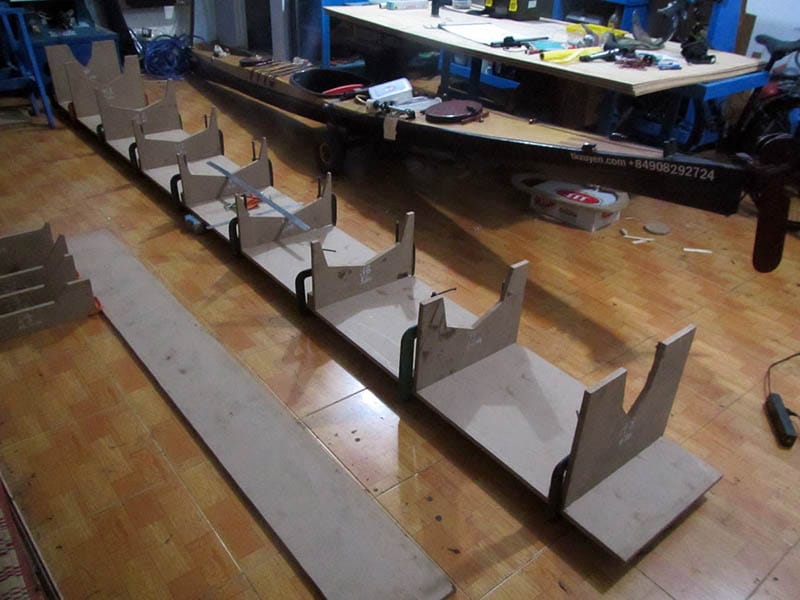
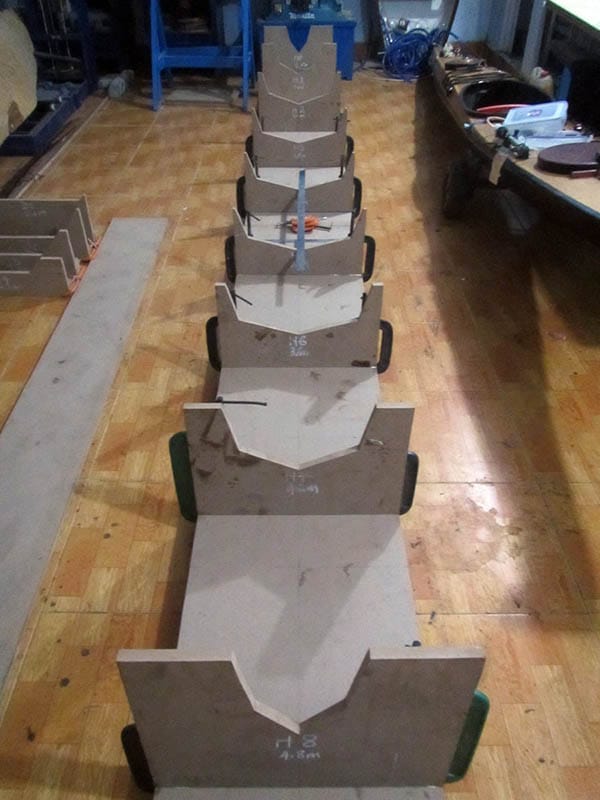
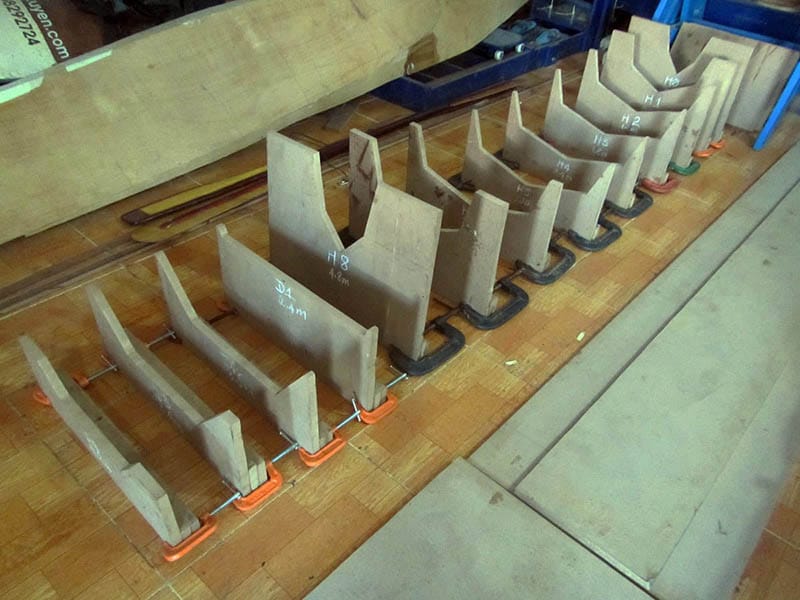
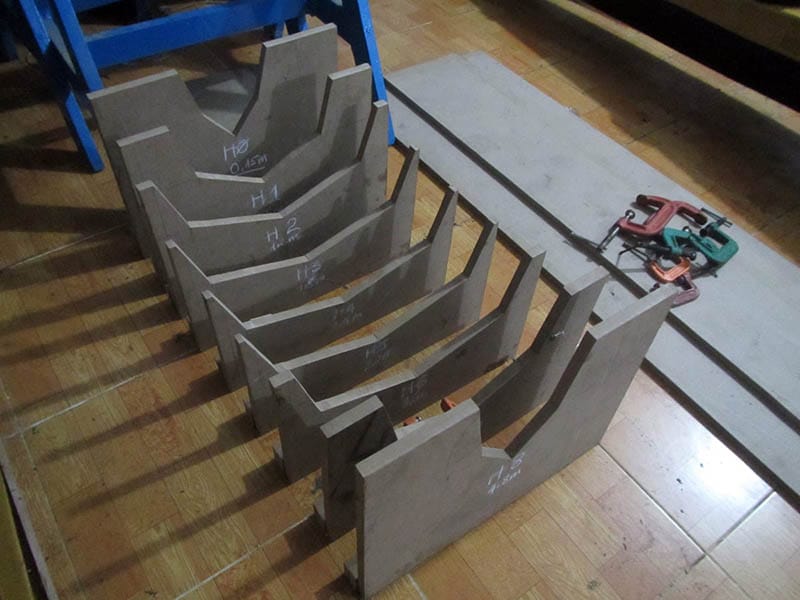
The past 2, 3 weeks were spent mostly on reviewing, fine – tuning the design, “rehearse” the overall building techniques and process. This is a design that consumes my brainstorm the most! Many building steps could be done very quick now, as they have been done 5, 6 times already. So I would skip documenting in various parts, as they are all similar as in my previous boats, only to highlight things that are different. First is setting up the molding stations, cut from MDF as usual.

There would be 9 molding stations (female type) for the hull, and only 4 stations for the deck, each positioned 0.6m apart. One of my last changes to the deck was modifying its sides’ “slope” to 45 degrees, the deck would have lots of “flare” in the inverted position, that’s to make rolling easier. Once the boat is up – side – down and the deck becomes the bottom, so a “stable” full – shape deck wouldn’t be good for practicing kayak rolling. And I guess it could give some help to the boat’s windage too.