serene – 1, part 14

Some tweaks here and there to smoothen the jointing edges between the hull and deck, putty – seal the bulkheads to the deck, then some slight overall fairing and sanding before putting on the final layer of fiberglass to the bottom part. The glass will marginally wrap over the deck (about 1 inch of overlapping) to strengthen and completely seal the joint. Deck would have no fiberglass on the external side, and would only be clear – coated with thinned epoxy and polyurethane (PU) paint.

4th image below: the deck thoroughly sanded with 100 grit paper, it looks quite fine now! In my previous boats, I was usually over sanding, with multiple grit – levels applied, and lots of efforts too. But now, I’d realized that I actually don’t need a furniture – grade finish (and I couldn’t do it as nice as a professional woodworker nevertheless). After all, a boat is a functional (not a show – case) object with lots of hard and harsh uses. A too perfect finish wouldn’t be of any practical good!

5th image: the deck has been stained with thinned epoxy mixed with color pigment (yellowish wooden color). The white duct tapes mark the area of wrapping when glassing the bottom. 6th, 7th images: glassing the hull exterior and wrap the fiberglass an inch over the deck. I used exactly 300 gram of epoxy mixed with dark brown wooden color pigment. A lesson learnt from the previous boat: use lighter colors for the wood to appear natural, too strong, deep colors look very… ‘artificial’.

Serene – 1 p1
Serene – 1 p2
Serene – 1 p3
Serene – 1 p4

About polyurethane (PU) paint: it’s a broad category of paint with different sub – types and applications, but in Vietnam, the term is narrowly and misleadingly meant to be one used for (semi – clear color) wood – surface finish only, as people is only familiar with that widespread use.

So if you want to see other types of the paint, say: Polyurethane, don’t say PU! As the vendors will assume you know nothing about it, and by telling the chemical formula, you would be given more choices, don’t say PU, or you would be wrongly given the interior / inferior furniture finish!

serene – 1, part 13

Carved and installed two wood blocks at the two ends to drill holes for the pulling knots (to further save weight, I won’t pour epoxy into the two tips, just the wood blocks with some sealing putty), sanding the cockpit coaming, glassing the lashing lines’ anchor points built into the hull, some more miscellaneous jobs before I can dry – fitting the hull and deck together. In the next couple of days, we’ll see the boat in its final shape! First two images below: inside and outside of the anchor points.

Cut a slot in the aft deck for the skeg box to get through, then the hull and deck are ready to be jointed together, with just some epoxy (not putty) applied to the edges. The two ends, bow and stern, fit well, I just need duct tapes to press them together. The mid section requires some fastening as the plywood bent and and does not offer a perfect match. Nevertheless, the overall process is smoother compared to my previous boats, and I’m so happy to see the kayak taking on the designed shape!

I spent times going around and around the boat, watching the fruit of my efforts! The hull shape looks very fine to me, the deck shape is quite crude indeed (not as cursive and fine as that of Hello World – 3, since the deck was drawn to be easy to build). But in essence, the lines, size, weight… all gives me a very comfortable and manageable feeling! Just a few more weeks from now and the kayak would be ready for her new life on water, can’t wait any more for that!

Serene – 1 p1
Serene – 1 p2
Serene – 1 p3
Serene – 1 p4

With a flat deck, the kayak wouldn’t be particularly easy to roll, as once ‘turtled’, the deck becomes the bottom, and flat bottom is quite stable and difficult to turn over. So rolling is not a strong point of this design apparently, nor I did had rolling intention in mind!

Admittedly, I haven’t learned and practiced the Eskimo rolling techniques, and I couldn’t do it whatsoever, since my previous boats are too big and too heavy for me to roll. The techniques are in my (long – term) TODO list anyhow, at some points, I will try to master them!

serene – 1, part 12

Conitnue working on the deck part and the cockpit. But first… some pictures to show off the boat shapes, still quite a long way to the final forms, but look fascinating enough to me already, to quote a popular architectural saying: form, IT IS function! 3rd image below: the cockpit coaming being reinforced with some putty in the corner, then a layer of fiberglass tape the under side. 5th image: cockpit being jointed to the deck. There’re some miscellaneous jobs to be done on the hull still.

15 anchor points to be built into the hull. First, I glued small wood blocks alongside the gunwales, then drilled two holes (1 inch apart) into each block. Plastic lines 5 mm in diameter (the one usually used in fishery net) are run through, then putty is filled in, this way, just a small amount of putty is used. When the epoxy has cured, pull the lines out, you would have some “tunnels” to run the lashing through. Finally, small pieces of glass would cover and strengthen the wood blocks.

The cockpit coaming is glued, then glassed with the deck, two layers of fiberglass (one under and one upper), it’s very strong now, can withstand the weight of my whole body (while climbing onto it). For such a narrow kayak and small cockpit (45 cm in width, less internally), I don’t install any foot brace or thigh brace, and even back rest, the cockpit almost fits my lower body. I have no idea for a seat for now, maybe that I would just sit on the bare bottom, or with a thin layer of mattress.

Serene – 1 p1
Serene – 1 p2
Serene – 1 p3
Serene – 1 p4

[13 ~ 18] kg is the usual weight range of wooden kayaks, with the lighter being used for tourings, and the heavier as “expedition boats”. Plastic or FRP (fiberglass – reinforced plastic) boats are much heavier, often in the [25 ~ 30] kg range. In order to go below 12 kg…

…you would need a SOF (Skin on Frame) design, or make use of the expensive carbon, kevlar fibers (usually found in racing boats). So wood is a very ideal choice for kayaks (as well as any small watercraft), and I would be very happy to have mine aimed at the 17 ~ 18 kg target.

serene – 1, part 11

Most major tasks on the hull has been completed, now continue on the deck part. First is cutting out the fore and aft hatches’ holes and fit some reinforcement rims (the plywood is weak, it can deform badly around the hatches in the long run). The Beckson hatches are quite small indeed, the largest are 8″ in internal diameter, have to live with that for now anyhow since Beckson does not have a larger size. I also made a rough fairing on the external side of the deck. Next comes the cockpit.

The plywood is so fragile and easy to crack, so I turned to using wood for building the cockpit coaming. 2 thin strips of wood is combined to form the cockpit coaming riser. The strips are cut 3 mm thick and easy enough to bend without steaming, just use the C – clamps to force them following the cockpit template. The riser is quite high, 2 cm, and would be jointed with the plywood coaming lip 3 cm in width, all would be reinforced with some putty and fiberglass before jointing to the deck.

Using the angle grinder, I adjusted the bevel edges of the gunwales to better match the hull and deck. Also glassed the 3 hull’s external seams, each with about 80 gram of epoxy (240 gram in total). With experiences gained by now, I can control the amount of material used quite precisely. Hence, this gonna be the first boat which I could have weight truly under control, my projection is somewhere around 17 ~ 18 kg overall (everything not including the paddle). Let just see if I could make it there!

Serene – 1 p1
Serene – 1 p2
Serene – 1 p3
Serene – 1 p4

The Beckson hatches come with rubber o – rings that make the water – tight sealing. I made a mistake using some petroleum – based grease as lubricant on the rings, which could degrade and wear out the rubber. Have to clean it out and use some silicone – based grease instead.

One more ugly thing working with epoxy is that I usually need to mix them in a very small batches, just 30 ~ 40 gram or so (using an electronic scale). It seems counter intuitive, but the smaller the batch, the harder you would need to stir in order to have them mixed thoroughly.

serene – 1, part 10

Boat building is a labour – intensive process, and only skills and experiences could help to reduce workload and improve quality. Up until now, I’m quite pleased with the building, my 4th one. Today, I cut a slot into the aft hull to install the skeg box, the excellent Fein multimaster oscillating tool offers a nice cut as usual. Things went on smoothly, I have great confidence in this 5 cm fiberglass tape, it produces very fine and strong seam lines, so I decided to use just 2 layers (one inside, one outside).

In my previous boat, I used 4 layers of fiberglass to secure the skeg box in place (which results into more weight added). The skeg blade is smaller, 30 x 14 cm, I guess a deeper V – bottom would track easier, so I would need a smaller blade just for some weather cocking conditions. Still stay indecisive about skeg’s control, I’m not totally happy with HW – 3‘s skeg control line, which runs over the aft deck, though perfectly functional, potentially could interfere with self – rescue actions.

Working on the skeg box vs. hull joint (the external side), then give the bottom a rough fairing to remove excess putty and smoothen out the edges, then apply 300 gram of thinned epoxy to it. A long busy day with lots of dust. Next would be exposing the hull to sunlight for 1, 2 days for the xylene solvent to completely vaporize, before glassing the external seams and other jobs. The hull part would receive an additonal overall layer of fiberglass once it’s jointed with the deck part.

Serene – 1 p1
Serene – 1 p2
Serene – 1 p3
Serene – 1 p4

Epoxy & putty are heavy, typical density is in [1.1 ~ 1.4] ton / m3 range. Wood & plywood are usually lighter, with the most normally used in [0.5 ~ 0.8] range. In order to use less epoxy, putty for joints, a good fit is required, hence wood working skills are anyhow important.

Use a small foam roller to stretch epoxy on fiberglass surface, and roll thoroughly, don’t use a brush, it brings in too much material. Don’t worry about the initial un – smooth result as epoxy has great “surface tension” and tends to make a much better gloss (as compared to paint).

serene – 1, part 9

Various miscellaneous jobs in preparing for the next steps. First is glueing the skeg box and glassing the skeg blade (I use the “skeg in a well” as in my last boat, the skeg box is like a “well”, going through hull and through deck, a design that greatly facilitates maintenance and repair). Then forming the cockpit coaming by 2 nested narrow strips of 4 mm plywood, bending around the MDF frame cut earlier, the ply is so fragile that I had to brush it with a layer of epoxy to prevent cracks when bending.

There’re still lots of things to be done before two halves of the peanut shell (a.k.a hull and deck) could be jointed together: fitting the starboard gunwale, fitting and glassing fore and aft bulkheads, install some cross – beam stringers, install the skeg box and it’s control line, making and installing the cockpit as well as the two hatches’ rims, build some lashing anchor points into the hull… any many other unnamed jobs. Forcing myself to slow down as not to let my impatience harm the kayak quality.

5th image below: the stringers glued and screwed in place, these stringers serve multiple purposes: help maintaining the boat width profile, support the skeg box and bulkheads, the stringer right behind the cockpit would help strengthen the deck (as the only way to get into the kayak is climbing upon its aft deck then slide your legs in). 6th image: the fore and aft bulkheads clamped in, ready to be sealed with putty and then glassed. Next would be the important job of installing the skeg box.

Serene – 1 p1
Serene – 1 p2
Serene – 1 p3
Serene – 1 p4

A large part on boat – building here (in Vietnam) is not about learning the techniques and executing them right. Mishaply, it’s about dealing with inferior – quality materials, working around with under – standard chemicals, paints, epoxy and various faulty wood – working tools.

A “secret” in this Serene – 1 kayak design: its lines are all mathematically very well – defined. I don’t know if this would add some gains into the boat’s performance, but in building, it’s easier to draw and cut, easier to stitch and form, less bending, less fastening, less clamping etc…

serene – 1, part 8

Epoxy resin and putty are the most crucial parts in small watercraft building, yet they’re the most annoying, paranoidly sticky and easy to mess around. It takes me a long time to learn how to use them properly. After filling all the internal seams with the 511 putty (which I found very good for boat building), I put a layer of 5 cm – width fiberglass tape over them. I highly praise this double – weave glass tape: easy and quick to work with, precise laying, resulting in nice, tidy and tight bondings.

With my previous boats, I haven’t got these fiberglass tapes yet, hence had to resort to bias – cut fiberglass, and it is next to impossible to make out a straight narrow strip of 5 cm, consider the mediocre local plain – weave 6 – oz fabric I was using. The very satirical thing is that this tout simple commodity of fiberglass tapes is not available anywhere in Vietnam market, and so I had to buy them on Amazon.com and have them shipped from the US, with delivery fee doubles the purchasing cost!

To further reduce weight, I only glass the internal side in part, the mid section slightly larger and around the cockpit, the place that could potentially expose to water. Next would go in the gunwales (a.k.a the sheer clamps) and the bulkheads. The gunwales are 15 x 30 mm long strips of wood, bevelled to match the deck’s profile. 7th image below: jointing 2 strips of 3 m wood to form the gunwale that covers the entire 5.5 m length. It’s so good a sensation to see the boat gradually take shape!

Serene – 1 p1
Serene – 1 p2
Serene – 1 p3
Serene – 1 p4

To completely clean epoxy, putty that stick to your hands, first scrub them hard with a rough piece of sponge, then rinse thoroughly with some acetone, finally wash with soap and water. I usually don’t wear gloves while working with epoxy, my hands just become clumsy with them.

A misc thought: stitch and glue is like a kid’s game, on a larger scale. Though it requires skills to build up a good functional boat, I don’t really see this as true “wood – working”, or any “piece of art” yet. That could be later, I don’t care, pour maintenant, tout ce que je veux c’est allez à la mer!

serene – 1, part 7

The bigles jointed very well, with just some neglectable tiny defects, port and starboard pairs match perfectly. Before putting them all together to form the initial boat shape, I applied a layer of penetrating epoxy (epoxy thinned with xylene), taking care so that the amount of epoxy used won’t exceed 0.6 kg overall. For this job, I use a kind of elastic epoxy with the B5 slow hardener. There’re two kinds of epoxy: one hard and one elastic, with at least 3, 4 kinds of hardener available in the local market.

I put a layer of fiberglass to the internal side of each joints before stitching the bilges. The deck is quite easy to form, since it’s very well geometrically – defined, I don’t even need to use steel wire and thus, avoid the unpleasant job of drilling holes, just duct tape over the edges, then dully apply the putty onto the bevelled seams. The hull is not that simple, with wires to fasten particularly at the two ends. Check the geometry of the overall shape, fasten the wires tight, then fill the seams with putty.

Cares are taken to use as little putty as possible, as I especially long for this to be a light boat. The same steps as in my previous boats, but done by more skillful hands. Actually, I sometimes feel bored with those same things having been been done 4 times already, I should be planning for another boat in a different building method. But sure, not until I could feel I’m good enough at the current method, if you’re not “up to the level” yet, you would probably done wrong with whatever method used.

Serene – 1 p1
Serene – 1 p2
Serene – 1 p3
Serene – 1 p4

I wouldn’t advocate the use of thinned (penetrating) epoxy here, using it or not depends on the specific situations. In general, it should be avoided as it would add much more weight to the final product. However, the plywood available to me is not of marine – grade quality.

It’s made of a kind of “tea tree” wood, though apparently has some tensile strength, is quite porous and indeed lacks compressive strength. To compensate, some penetrating epoxy would help the plywood to become more firm and prevent delaminating in the long run.

serene – 1, part 6

Using staples to clamp 2 sheets of plywood together, I then cut the hull’s planks, port and starboard, all is composed from 3 pieces. Then the deck’s pieces, and other parts: forward and aft bulkheads, skeg box and skeg blade… After 3 boats, I can now cut the wood with quite some accuracy. Sometimes, I’d wished to have the accuracy of a CNC machine, but such a machine that can cut in the 1.22 x 2.44 m dimension is not a possible option for most home builders, including me.

Next is the dusty job of beveling the edges of the plywood bilges, the edges are carefully bevelled at different angles along their lengths, to ensure a suitable gap, not too small, and not too big, for just a small amount of putty to go into the seams in a later phase. Then I joint the parts together using finger joints instead of the originally – planned puzzle joints. Straight finger joints, though not as strong as puzzle joints, they’re easier to cut and to fit, and most importantly, easier to align longitudinally.

This is very important, in my first boat, the 2 ends of port and starboard bilges differ as large as 5 ~ 6 mm. I can now confidently keep the tolerance under 1 mm along the 5.5 m length. Patterns of the joints are drawn on paper, photocopied into multiple sheets, glued onto the plywood and cut accordingly. I work carefully as to ensure a tight fit, an accuracy of a small fraction of a millimeter is required. This is quite hard when done by hand as my thinnest saw blade is already over 1 mm thick.

Serene – 1 p1
Serene – 1 p2
Serene – 1 p3
Serene – 1 p4

The phase measure twice, cut once struck me once again. As I’m about to joint the bottom bilges, I discovered that 2 pieces were incorrectly drawn and hence were cut 10 cm shorter compared to the design. Frustrated, I stopped working for a day, feeling really miserable…

I found out a way to cut (puzzle) joint nicely: just draw & cut something on the 1st piece of wood, the pattern doesn’t need to be too perfect, then use it as a template to draw and cut on the 2nd piece. This method is less error – prone compared to cutting twice following one same pattern.

serene – 1, part 5

Serene – 1 is quite a distinctive boat, originally took inspiration from the Black Pearl and the Anas Acuta, but in it current status, it shares not a single common point with them. The hull has been transformed into a light cruising one with long water line, deeper V bottom, little rockers and a very narrow beam (45 cm). There’re times that I’m worrying on the feasibility of the design, except for some theoretical calculations, there’s nothing to ensure me that it would be a good watercraft.

When you build something from a well – known designer, it’s already a well – proven boat. For Serene – 1, there’s no way to know, unless you build and trial it yourself. Eventually have some free time to proceed on today, first is cutting all the hull & deck framing stations in MDF. Can also see drawn is the cockpit template, this would be a very small one, 50×40 cm in dimensions, that’s what they called an “ocean cockpit”, you would need to climb over the aft deck and slide your legs into the hole.

The framing box showed up, by now, I could see how slim the boat would be, at this size, you just don’t ride the kayak, you essentially… wear it! Like an integral part of your body going to rough water, that’s how the feeling should be! Next would be the important task of drawing, and cutting the bilges from exported offset tables. For ones who don’t know, offset table is just a matrix of (x, y) coordinates, I use a very fine matrix (points every 5 cm interval) to precisely reconstruct the bilges on plywood.

Serene – 1 p1
Serene – 1 p2
Serene – 1 p3
Serene – 1 p4

One important note about various hull shapes (V – bottom, round, flat, etc…), cross section only affect stabilities, they have little effect on the boat’s speed which depends mostly on the waterline length and the wetted surface area. I tend to prefer hard chined V – bottom though.

About Prismatic Coefficient (Cp): a lower value indicates that the boat is more efficient at slower speed, a higher one tells that the boat is more efficient the faster it goes. So higher or lower Cp is neither good nor bad, it’s just that you need to know where is your desired range of velocity.

serene – 1, part 4

Finalized my new kayak design, a considerable amount of work on optimizing the hull shape, adjusting it back and forth to find out the minimum drag numbers (based on the Kaper algorithm) while keeping stabilities and other parameters under control. Some numbers: LOA / LWL (length overall / waterline): 5.500 / 4.945 m, BOA / BWL (beam overall / waterline): 0.452 / 0.420 m. I reduced the boat width to exactly my hip plus 4 fingers (that is: 36 + 9 cm, my fingers are quite big, 9 cm for 4 fingers).

Designed draft: 0.11 m, Designed displacement: 95 kg, Cp (prismatic coefficient): 0.5475, Cb (block coefficient): 0.4064, LCB (longitudinal center of buoyancy): 0.5225, VCB (vertical center of buoyancy): 0.0690 m, LCF (longitudinal center of floatation): 0.5136, Cw (waterplane coefficient): 0.6445, S (wetted surface area): 1.699 m2, Aw (waterplane area): 1.329 m2, Am (midship section area): 0.034 m2, Cm (midship coefficient): 0.7466, KMt (vertical transverse metacenter): 0.196 m.

Predicted drags at 0.11 m draft (95 kg of displacement): 3 knot ~ 7.122 N, 4 knot ~ 12.622 N, 5 knot ~ 23.763 N. Predicted drags at 0.121 m draft (110 kg of displacement): 3 knot ~ 7.679 N, 4 knot ~ 13.611 N, 5 knot ~ 25.506 N. The hull is heavily optimized for speed in the [4 ~ 5] knot range with some sacrifices in stability and load capacity. Now that all “theoretical calculations” has completed, it would take a few months to build the physical boat to tell the real truths about the design!

Serene – 1 p1
Serene – 1 p2
Serene – 1 p3
Serene – 1 p4

While 45 cm could be considered “extreme” for nowadays kayak (few available on the market has width at or below that value), it’s not really so with the traditional Greenland ones, some could be as narrow as 39 cm. Well for sure, it requires lots of skills to handle such a narrow boat.

The very important point here is the CG (Center of Gravity) used in calculating stability. The Sea Kayaker magazine uses a standard 25.4 cm as CG, as a reference point to compare different kayaks. I used the midpoint of VCB and KMt as CG, which is usually [12 ~ 14] cm for my cases.

serene – 1, part 3

Made some good progress in the process of modeling my new kayak… For a human – powered watercraft, water doesn’t like complex curves and shapes I think, so they need to be as simple as possible (it is not too simple to come to that simplicity though). The model is then decomposed by Free!Ship into several “developable” plates, at this point, professional builders could just output the plates to a large CNC machine, which would precisely cut the plywood accordingly.

I print those plates to paper to make a 1:15 paper model. Cut the plates with a pair of scissors, then stitch them together using transparent duct tape. Making a paper scaled model would help verifying about the “develop – ability” of the product, double check if there is any design mistake, and give a clear view on how we should compose the pieces into the final boat. For simplicity, I didn’t draw details such as the cockpit, skeg, lines or hatches, just the basic shape of the kayak.

The paper model is a bit ugly (my hands are not too skillful though), but the pieces come together perfectly, the shape just looks like a bamboo leaf! This gonna be a long, thin kayak with very little freeboard! Next would be finding some free time to materialize all these drawing onto the plywood sheets. I don’t have a printer that’s large enough to print the plates in their real sizes, so I would just redraw them using offset table exported from the CAD software, actually, I prefer this manual method!

Serene – 1 p1
Serene – 1 p2
Serene – 1 p3
Serene – 1 p4

Back to the number 70.39 Watt, a heavy labour (such as a bricklayer) produces about 75 Watt on average, and for only 8 hours. You know what it’s like to paddle 10, 12 hours on a minimum basic, or even more, like I was paddling for 16 hours from Vũng Tàu back to Sài Gòn in my last trip!

The book Kayaks Of Greenland by Harvey Golden is a great guide for home builders, it contains dozens of kayak models ready to be built, with all the necessary drawings! I used some models from the book as references and comparisons when designing this Serene – 1 kayak!

serene – 1, part 2

It tooks just a few hours to learn the new software and construct the basic 3D objects: hull & deck. The time – consuming tasks are adjusting the shapes and playing around with hydrostatics. Some basic measures: LOA / LWL (length overall / waterline): 5.50 / 4.44 m, BOA / BWL (beam overall / waterline): 0.483 / 0.451 m, Draft: 0.1 m, S (wetted surface area): 1.66 m2, Cp (prismatic coefficient): 0.5619, LCB (longitudinal center of buoyancy): 0.5150, LCF (longitudinal center of floatation): 0.5192.

Additional hydrostatics parameters, VCB (vertical center of buoyancy): 0.0590 m, Cb (block coefficient): 0.4684, Cm (midship coefficient): 0.8336, Cw (water plane coefficient): 0.6385, Displacement: 0.096 tonne… Well, I wouldn’t pretend that I fully understand those parameters above, cause they contain insights into a boat that can only be correctly interpreted by an experienced designer. However, I’m tweaking around to optimize the parameters toward a higher Cp, higher LWL, and lower S.

Drag (resistance) predicted by the KAPER algorithm looks fine till now, however, the displacement is sacrificed already, 96 kg, barely enough for me (65 kg) plus 30 kg of gears. This gonna be a demanding boat with low primary stability, not recommended for beginner. It takes some real world experiences to understand why low initial stability is indeed a good thing, and why a kayak which appears to be very stable on flat water could probably throw you up side down in bumpy conditions.

Serene – 1 p1
Serene – 1 p2
Serene – 1 p3
Serene – 1 p4

Some rough calculations on the energy required to propel a kayak. My target speed is 7 kmph, or 3.8 knots. From the numbers recorded by my Garmin over the years, in normal big rivers and sea conditions, speed is reduced by 1/3 compared to the ideal condition of flat water.

That is you have to struggle at 5 knots to assure that 3.8 knots. The Kaper algorithm tells you that, this Serene – 1 hull produces a resistance force of 27.35 Newton at 5 knots (or 2.57 meters per second). Making the multiply: 2.57 x 27.35, that’s the output required: 70.39 Watt!

serene – 1, part 1

In the progress of learning to design my new kayak… you know its name already. I’m using Free!Ship, a CAD software running on Win XP virtual machine (with VirtualBox) on my Macbook. I haven’t used any CAD software before, haven’t designed anything 3D, not to say about a watercraft. So why designing a kayak!? Well, first, just for the fun of doing something yourself from A to Z. Second, though I’m no naval designer in any sense, I believe I have some guts on how a good kayak should be!

Many kayaks are designed for 70 ~ 90 kg paddlers on average, I’m not that bold, and I need something slimmer, lighter, with the drawback of sacrificing some load capacity of course. I’m re – modeling my kayak after Björn Thomasson’s Black Pearl, using just some publicly – available pictures of the boat. And it’s not a copy, there’re some modifications: slightly narrower beam, slightly less rocker, and slightly deeper V – bottom. And I would stick still to my familiar stitch & glue construction method.

Why stitch & glue!? Strip build generally offers best boat shapes, but look at the Inuit people’s SOF (skin on frame) kayaks, those “hard chines” suit naturally to S&G, the method is simpler and takes less time (which I don’t really have much for now). It gonna be not an easy process: just for the hull, adjust the 60 control points back and forth, recalculate the stability and performance parameters, repeat again and again until you’re satisfied with the results. I hope I can finish the design in about a month or so.

Serene – 1 p1
Serene – 1 p2
Serene – 1 p3
Serene – 1 p4

Recently, I’d noticed that Japanese kayakers usually use kinds of slim, long kayak similar to the Black Pearl, that’s quite understandable cause the body – building of Japanese is Vietnamese alike, we’re not too bold. Use a slimmer, lighter boat, and pack your gears cleverly for longer trip!

It’s interesting to know that, in the old day, in building kayaks, the Inuit people has “recipes” to measure the size of the boat: length should be 3 times the height of the paddler, width should be the hip plus somewhere from 4 to 8 “finger”. Well, like shoes, boat is tailored to match the user.

workshop, 2

Như dòng sông ra đại dương, qua bao ghềnh và đá cheo leo.
Đấu tranh này bền lòng em ơi, mới tới ngày nắng ấm…

Lời người ra đi - Trần Hoàn - Khí nhạc: Nguyễn Đình Nghĩa 

Take my little free time to do some updates for the workshop, it’s covered with layers of dust after months without any woodworking projects. First is the wall – mounted kayak rack, a simple structure to stack – up my boats to better utilize the room’s space. Seen mounted on the rack are my HW – 2 & HW – 3 kayaks. The HW – 1 canoe has been in dis – use for a very long time already, so I decided to turn it into… a shelf!

Cut out the aft part, attach a MDF sheet to make a standing base, erect it upright et voilà, you have a shelf to store various miscellaneous things! I was a bit hesitating in “scarifying” a canoe in such a way, but I would stick with sea kayaks for some years to come, would be back to canoes at an uncertain time. Also, I’m in the initial stage of planning for my next build, something I would start by designing it, or at least learn to design it!

đồng hoà, june 2015

Mắt được thấy dòng sông ra gặp bể,
Ta với mẻ thép gang đầu, là lứa trẻ sinh đôi!

Someone eventually turns on the tap, and the rainy season is officially here, it comes so late this year. I haven’t had the best physical preparation, been quite busy for the last couple of weeks, but can’t wait anymore to start the long – planned trip. Saying to myself: just do it, go out there, play it “safe and sane”, for whatever the nature might throw at you. I started my trip to Đồng Hoà, the small town – let opposite of Vũng Tàu on the other side of Gành Rái bay, 4:30 AM, June 16th.

The lunar phase is Waxing Crescent (unlike last year, it was Full Moon), tidal coefficient is in [80 ~ 90] range, a high value (not extremely high), but I don’t really care about them anymore. The general plan is going through Lòng Tàu river to Gành Rái bay (40 km) then 20 km on sea to reach Đồng Hoà. The next day would cross Đồng Tranh bay, then make it through Soài Rạp river back to Sài Gòn (55 km). The area is a complex joinery of many rivers, in essence, going around the Cần Giờ mangrove biosphere reserve.

DAY 1

Leg 1

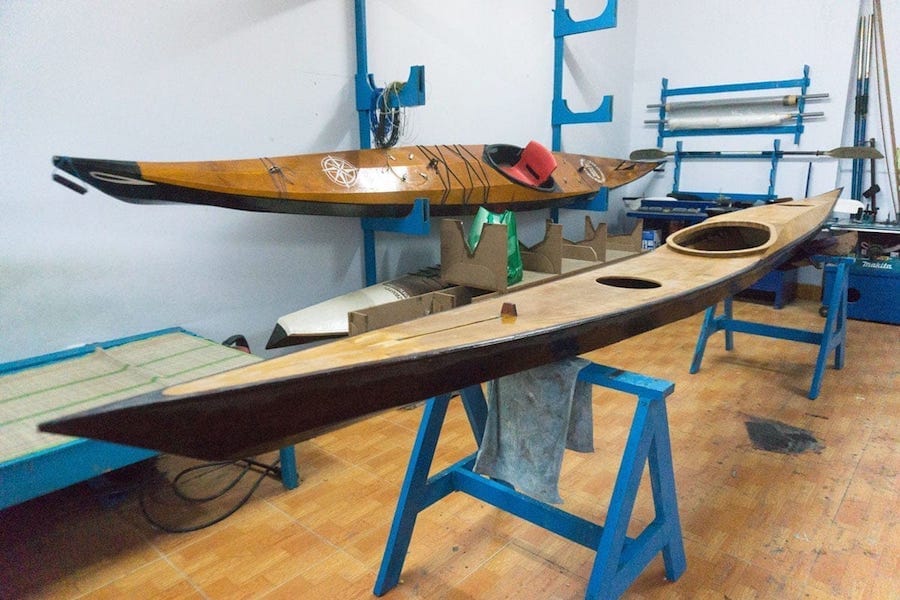
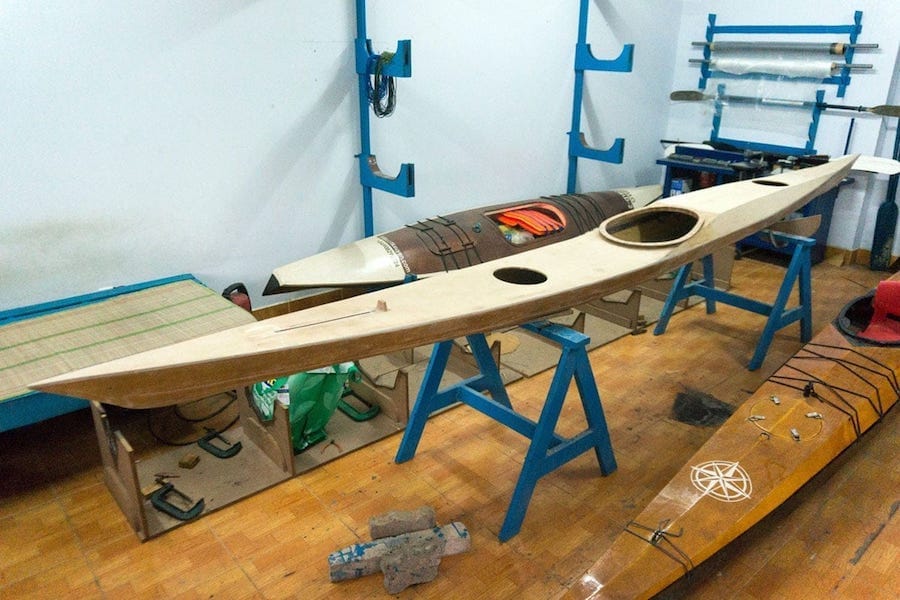
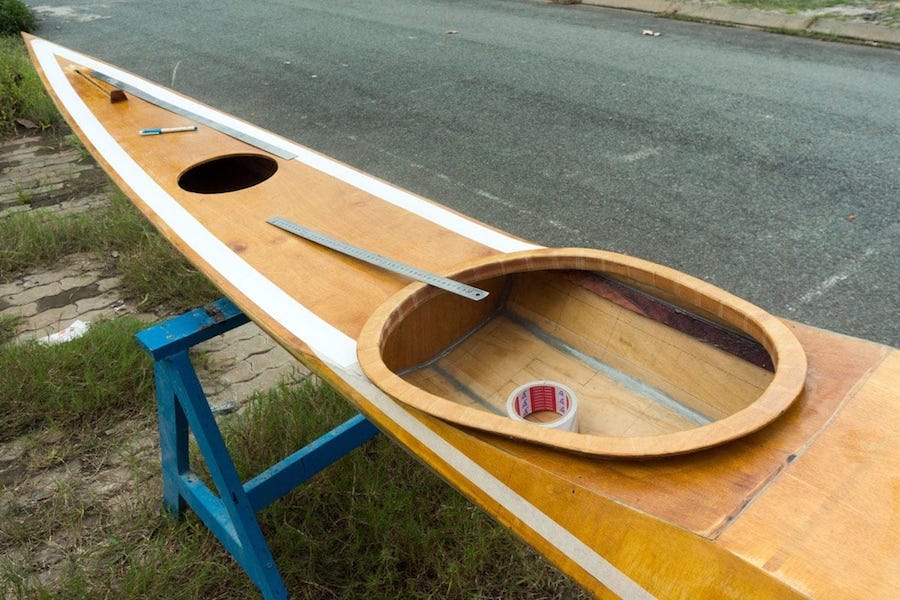
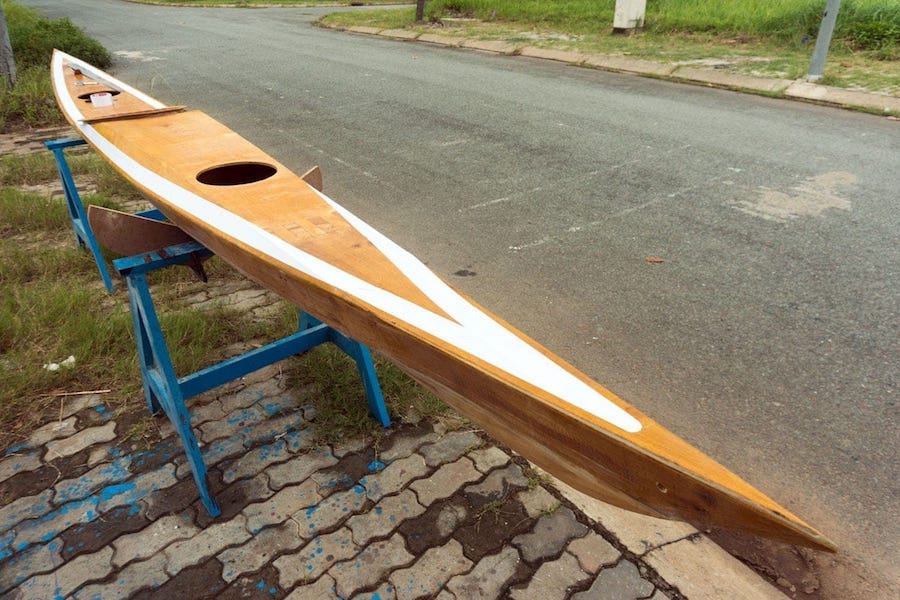
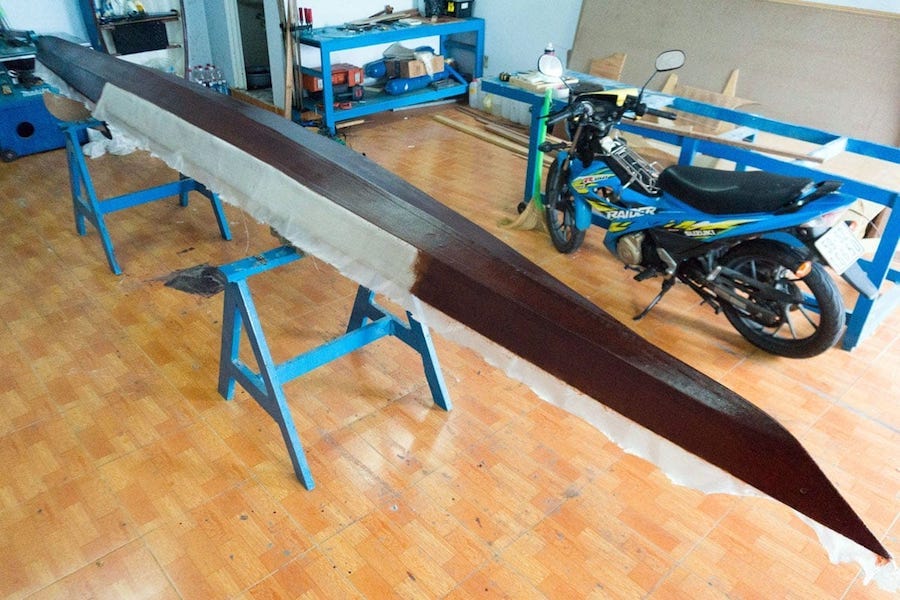
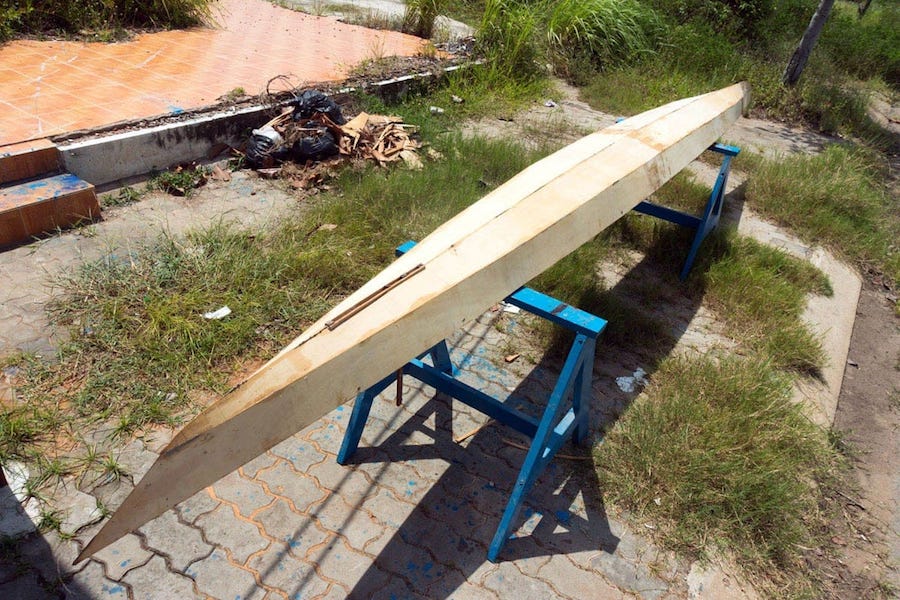
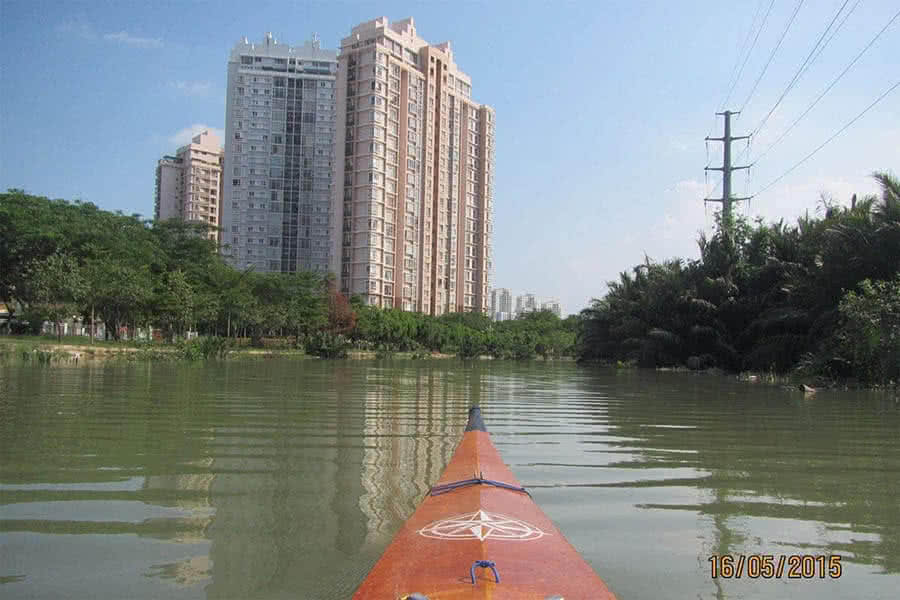
The trip starts smoothly as I expected, speed increases gradually as the tide was coming to help: 6.5, 7.0… 9, 9.5… 11, 11.5, 12… top at 13 kmph, that’s really good. The tide is not as strong as last year, but my HW – 3 kayak goes faster. The Lòng Tàu river is narrow and deep, fast running water with some large, dangerous – looking whirlpools, but that’s all. I finish the first 20 km one hour sooner compared to last trip, which is quite obvious since I paddle now a better kayak, not a 14 footer anymore.

The next leg completed at 9:30 AM, that’s superb! I stop at the river mouth, having a break and lunch for 1 hour, before continue on. The hydrofoils run this route every 45 minutes or so. It’s so fun (and thrilling) to watch it coming straight on you, looking from the head, those “legs” lifting the whole body above the water, exactly like a giant spider. Dangerous spiders indeed, have been causing numerous accidents, fortunately, those Soviet – made machines can be heard many kilometers away.

Leg 2

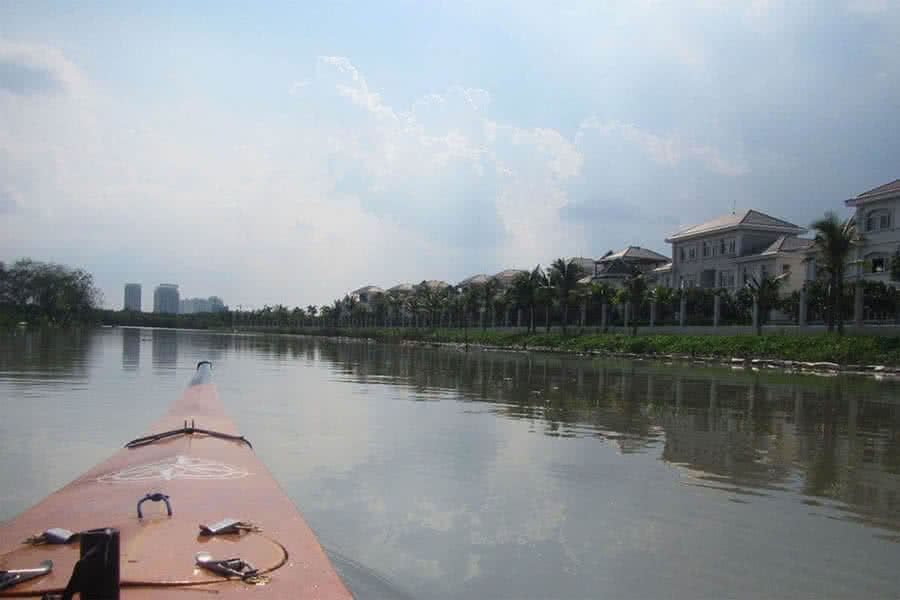
The next 10 kilometers goes on as smooth, it’s very pleasing to roam the immense, peaceful water space of the estuary. I was thinking I could finish the day within 10 hours of paddling, but life turned out to be not that easy. As soon as I round the Cần Thạnh horn, wind and wave gradually pick up, they get stronger and stronger, and they came straight from where I was going to. I knew that the weather wouldn’t be good these days, but I just didn’t think my next couple of hours to be that hard.

Waves soon reach 4 feet high, and even more, luckily, the wave lengths are still a bit long, they are not too steep. A perfectly – fun environment to play against the waves and winds, as I could rarely be in the same situation again, to horn my “acrobatic skills” with a kayak. I was quite tired already, but still eager to take the chance to enroll in that “advanced kayaking course”. The sky was divided into two halves, one white and and black, from Đồng Hoà direction, a tropical gale was coming.

Leg 3

The last 3 kilometers, I was in the gale, the wind gusts were so terrible that I couldn’t even hold the paddle upright, making advance was really really hard. But I had nothing to fear: I’m quite closed to my target already, the lowering tide seems to make the distance looks further, but actually the water is shallow, less than 2 meters, I could easily beach the kayak at any moment if something goes wrong. I reached Phương Nam Pearl resort at 4:30 PM after 12 hours of paddling, exhausted!

It took 7 hours to complete the first 50, and it took 5 hours to complete the last 10 kilometers! I spent some last daylight hours to wander the beach, the lowered tide left millions of small fishes imprisoned in those water ponds, jumping and sparkling like silver. And the sea birds were gathering for their ‘clamorous’ party, in the mist of heavy rain and strong wind. The resort offered me a 70% discount since it was not weekend, and I need some comforts to recover in preparation for my next day!

Day 2

Leg 4

I begin the next morning slowly with breakfast and coffee, thinking that I could finish the 55km return trip in about 12 hours. It turned out that I’m completely and severely wrong. Departed at 8:30 AM, 10 km across Đồng Tranh bay into the Soài Rạp river mouth, there were some waves, but nothing particularly difficult. I’d thought that it should be calmer on the river, but Soài Rạp is completely different (compared to Lòng Tàu river), it’s just so wide, and the weather deteriorates toward the afternoon.

The next 20 km up the river, I found myself playing the “acrobatic game” again! Waves were large, even larger than yesterday, surely wouldn’t give you a safe feeling at all. And the winds signal that another gale could come at any moment. When it did come at 1 PM, I made a quick decision to immediately take shelter in the mangrove forest, white breaking – waves were all across the river, and I can’t risk wasting my strength since I still have 30 kilometers ahead of me to complete.

Leg 5

It was where the Vàm Cỏ branch joining the Soài Rạp river, turbulences, and the gale was so brutal, I had to wait 1.5 hours before being able to go on. 6 PM, passed Vàm Sát branch, paused for dinner (sliced bread with canned tuna, some bananas). 7 PM, passed Hiệp Phước ferry, it was dark already, and it’s not immediately obvious for me to recognize that my speed stalled significantly. A quick check on the Garmin shows that, even though I was paddling hard, my real speed was under 1.5 kmph.

That means there’s a 5.5+ current here! I’ve never seen such a powerful opposite current! The Garmin map shows a very sharp S – shape river turning, which explains the strong current, and the tide was at its extreme too! I felt very… despondent, only 15 kilometers from my destination, but that would mean many more hours of paddling. I had to continue on anyhow, some desperate paddling struggles, my shoulder was in great pain, and my arms swell up like two bunches of bananas.

Leg 6

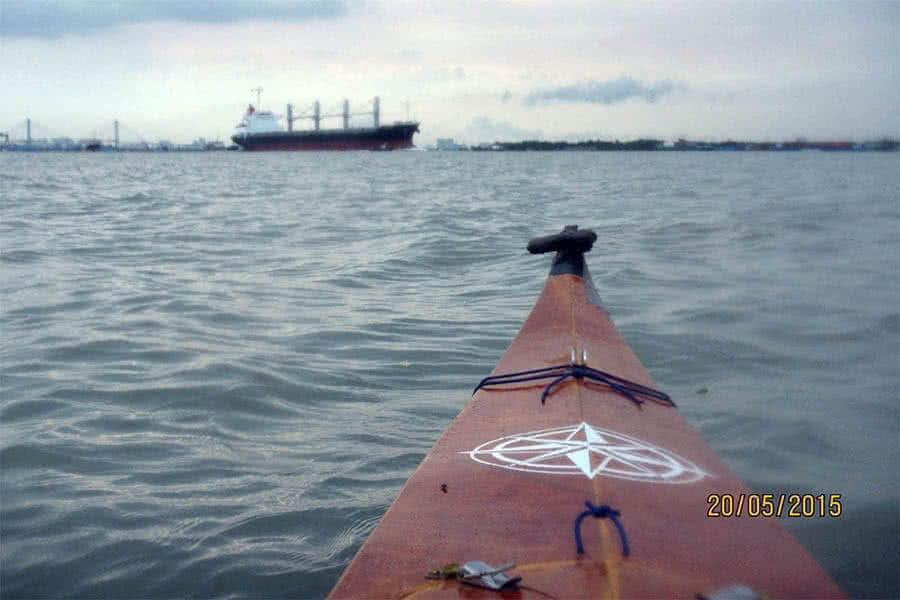
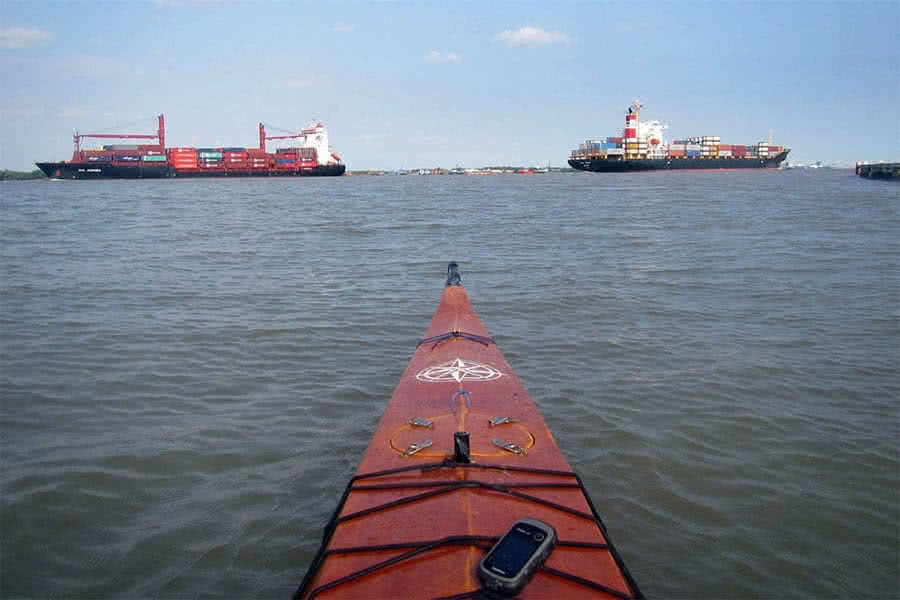
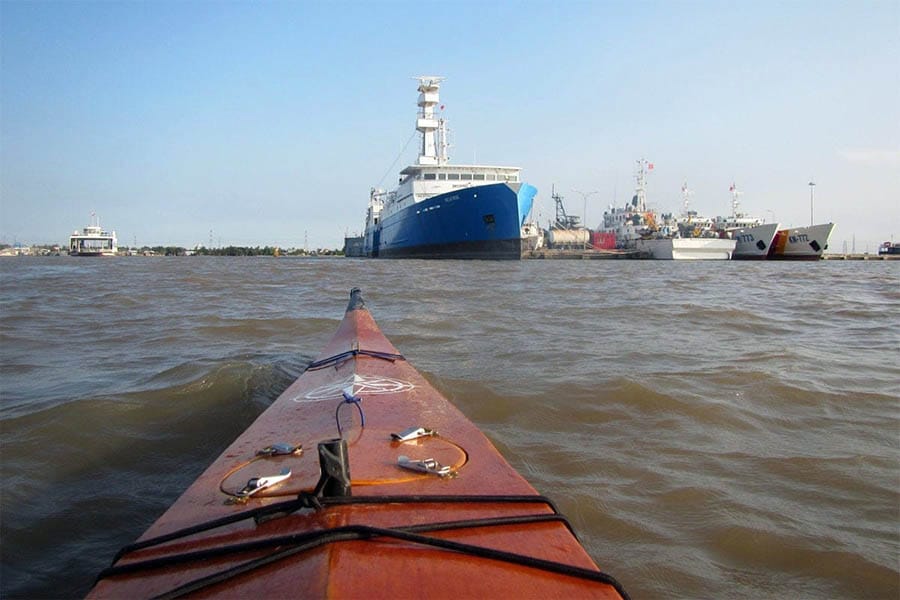
The last several kilometers were very painful, I have to stop for a break often, very inconvenient to navigate in the dark along the Hiệp Phước port area, where there’re many freighters traffic. I reached home haft past midnight, after 16 hours of paddling, not exhaustion, but a ‘worn – out’ condition to be correct. But never have I had the idea of giving up, on the other hand, I was feeling very very pleased as I’d completed what’s settled to be done at the beginning of the journey.

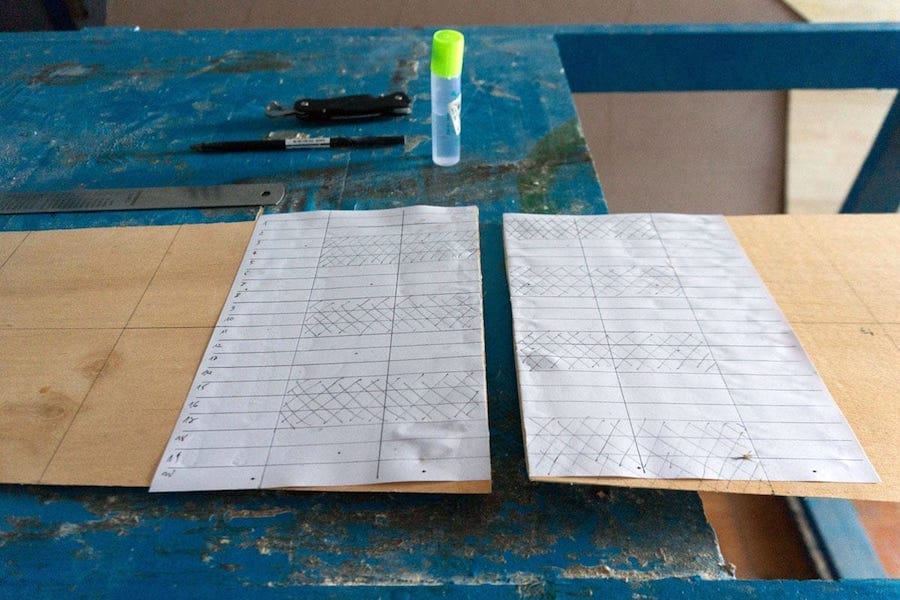
The Garmin – recorded route viewed on Google Earth, first 6 images: the 6 legs of the trip, last 2 images: day 1 & 2 of the trip, the 6th image: the route terminated some kms from my home cause the Garmin battery ran out, I had a pair of backup, but too tired to replace then. Thanks to the Garmin, navigating is easy and convenient. But don’t forget the paper maps, I always check the routes on papers, note down the distances, headings, tide table etc… learn them by heart before any trip.

The rainy season has just come back, at its full throttle these days. It rains cat and dog every afternoon, and there’re gales a few times in a day. Those gales usually won’t last very long, but could be very dangerous since the wind gusts could momentarily reach 7, 8 or more on the Beaufort scale. Just three days ago, a large fishing boat capsized with 37 people on board, right on this Soài Rạp river during a gale, resulting in 2 deaths. So, I proceed my trip with lots of cautiousness.

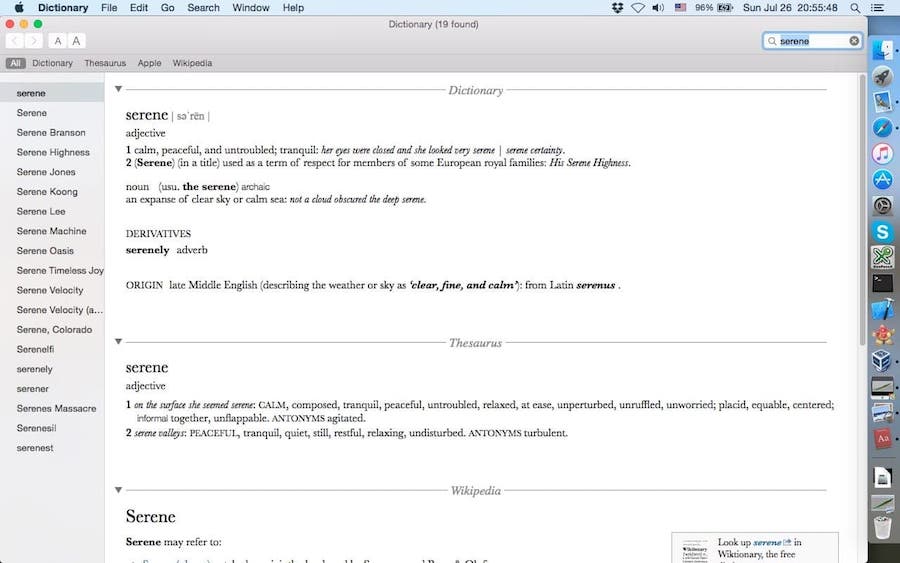
But after a gale, it’s always very calm, the water looks tranquil as if nothing has happened. And so is my mood, a kind of internal serenity for my mind that I surely wouldn’t trade anything for it. Now sitting here writing these lines, but all I would like to say is that: there’s no wifi on water whatsoever, but I’m sure you would find a better connection there!, not just a disconnection to the madnesses of modern society, but a true connection to the nature, to your inner self…

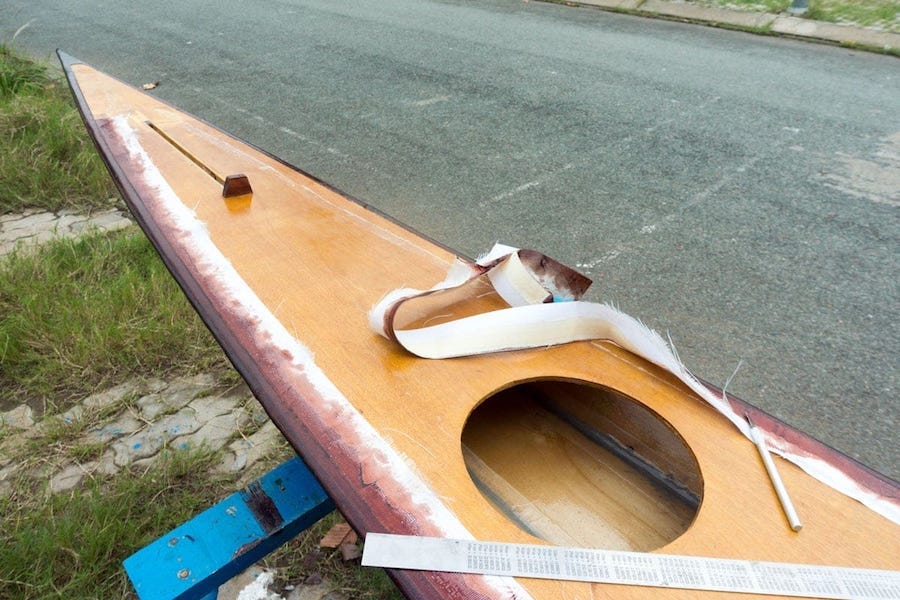
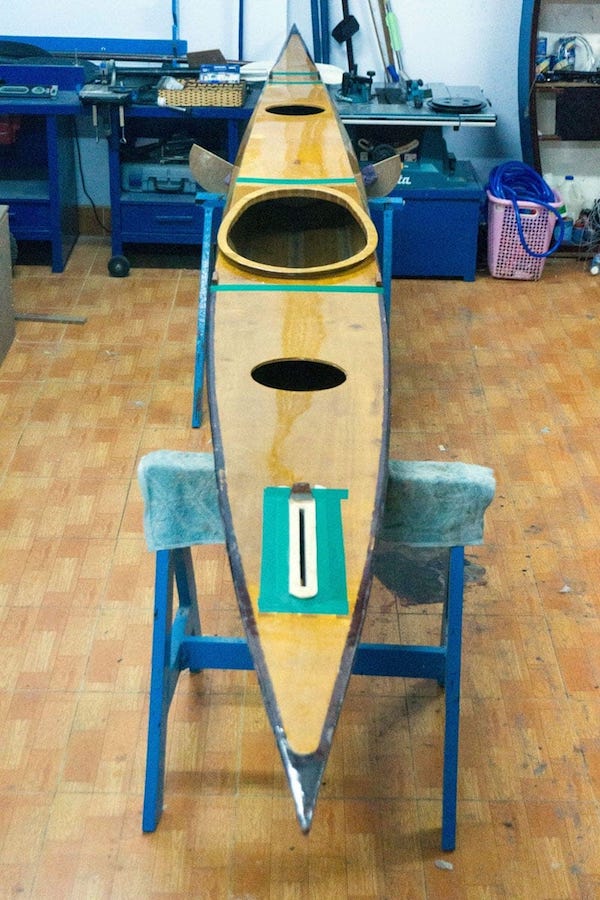
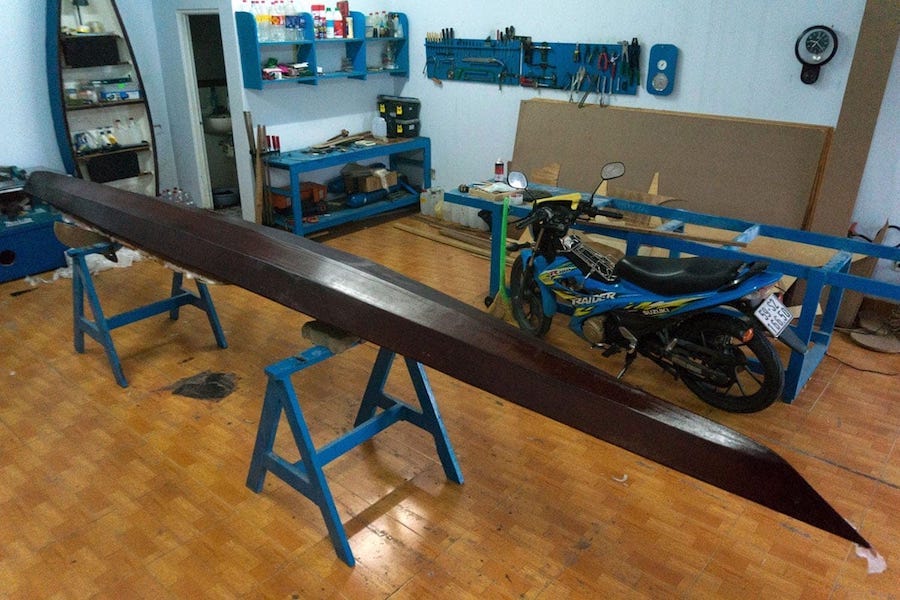
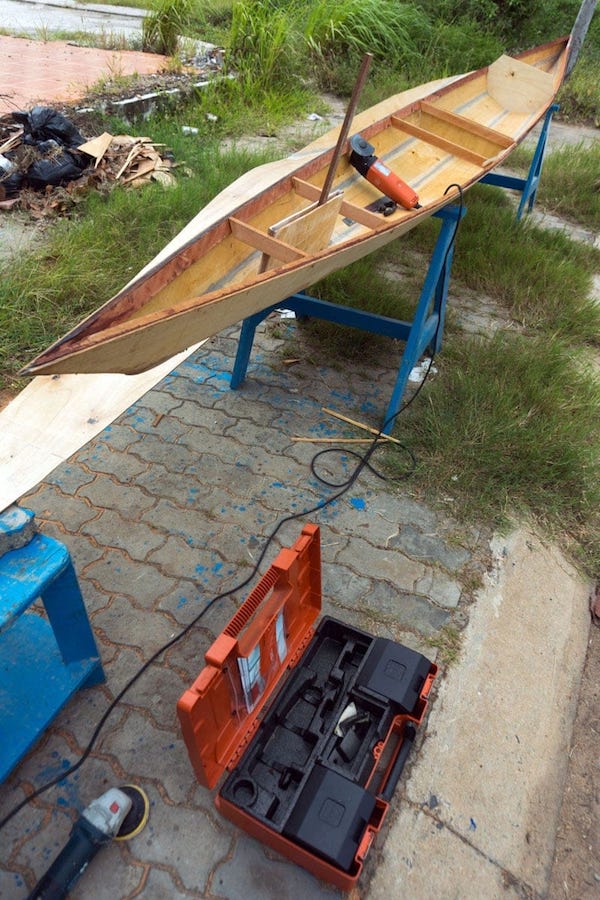
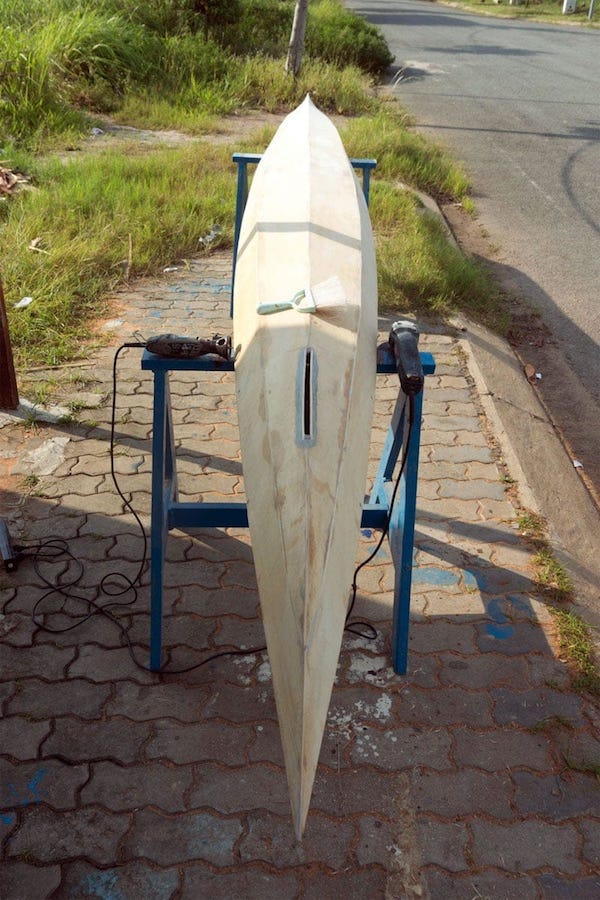
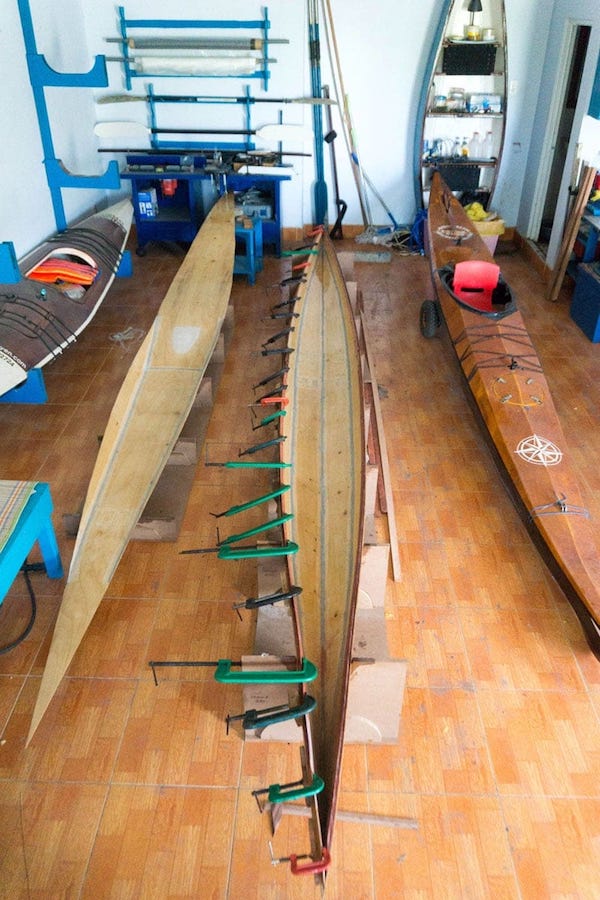
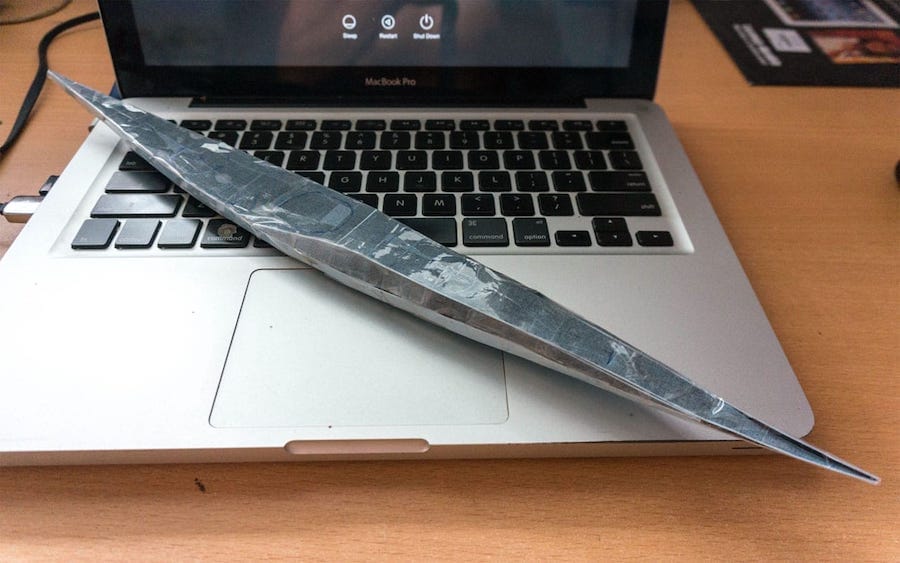
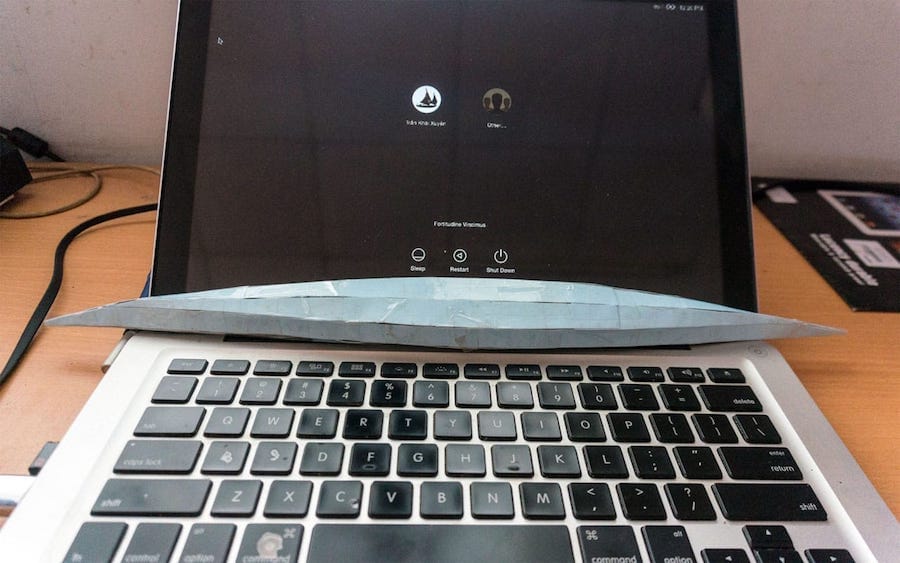
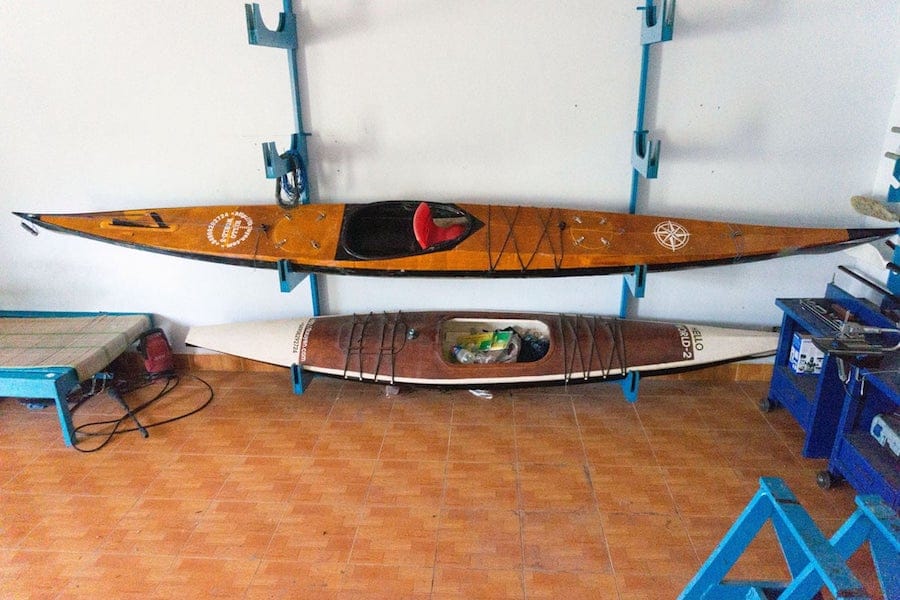
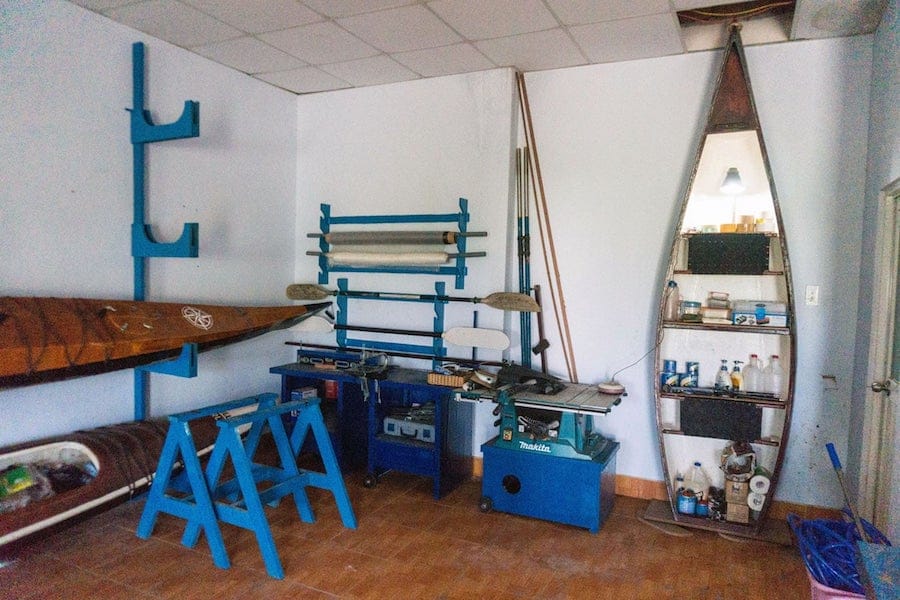
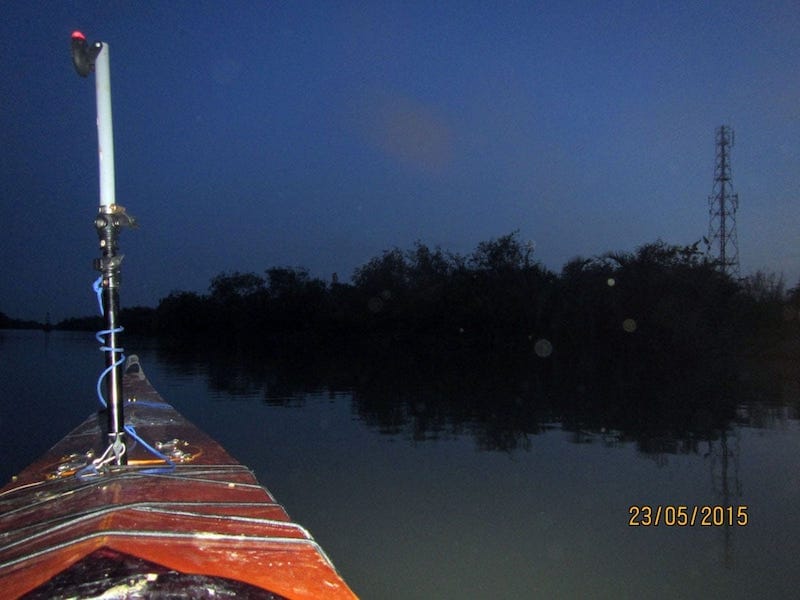
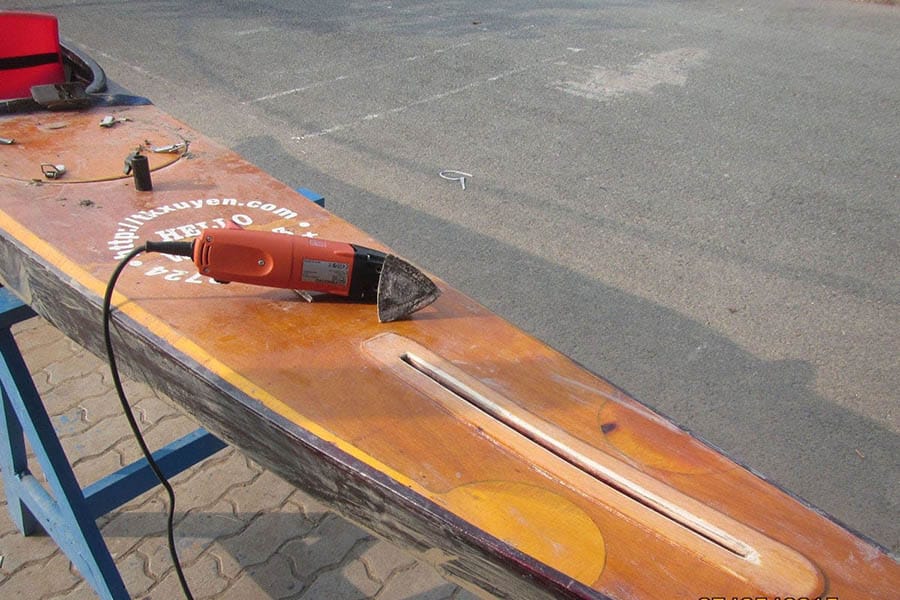
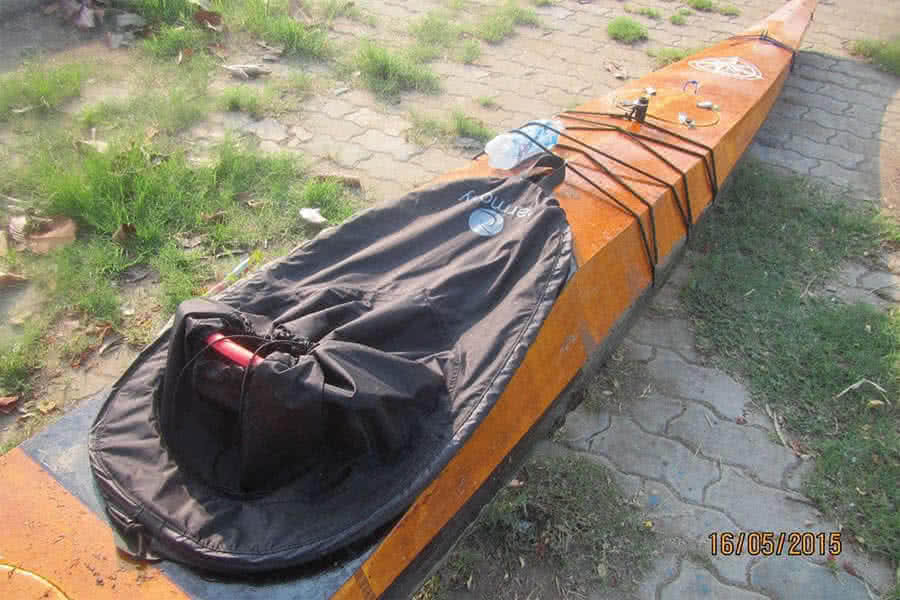
You may have noticed from the pictures that I had a life vest on the back of my kayak, but in the gale at the end of the first day, it was blown away, and I continue the rest of the trip without a PFD (Personal Floating Device). During the gale, it is very hard to make a steady picture shot, and something went wrong with my GoPro (it shoots still images instead of videos), and I couldn’t have just a second to fix it, was worrying about a potential capsize, so I missed many of the interesting moments.

The GoPro 3 has some drawbacks, it couldn’t produce fine image quality in lower – lighting conditions, such in a gale, and when water dust has covered all over its glass box, the resulted video is very blurry and obscured. But I don’t really mind, those fascinating moments were in my memory already, like having a higher adrenaline level in your blood, those playful hours facing the big waves, trying to keep your boat balanced, and make advances, meter after meter, to your destination.

This is only my first longer trip, 2 days of hard paddling, 12 hours for the first day, and 16 hours for the second, 115 kilometers in total. Nothing comparable to the feeling, you and yourself, the long road ahead, and a commitement to complete it no matter what. This is the first time I tasted the real hardship that nature could throw at me, gales and waves, strong current… unlike my last year’s trip to Vũng Tàu, in which I was just lucky to have it done smoothly within 12 hours with good weather.

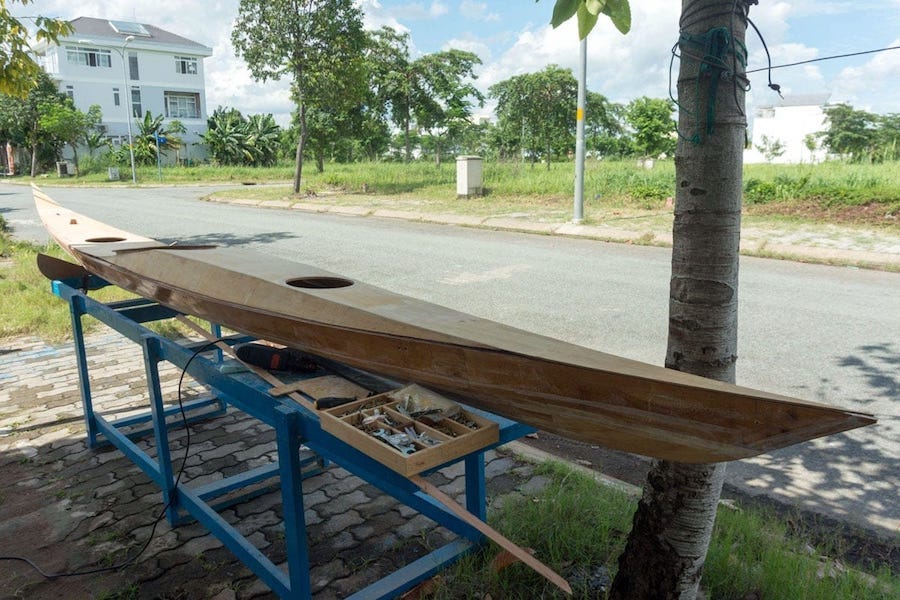
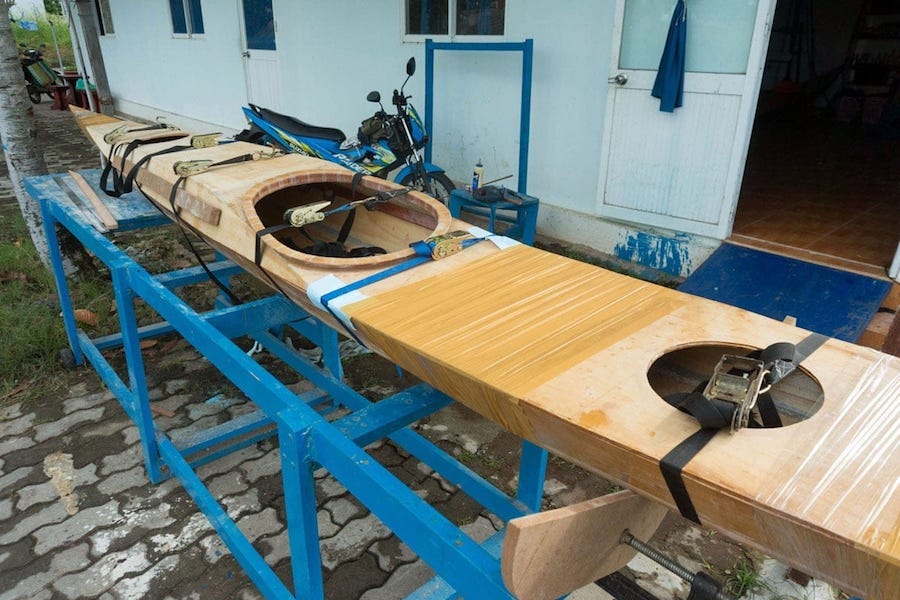
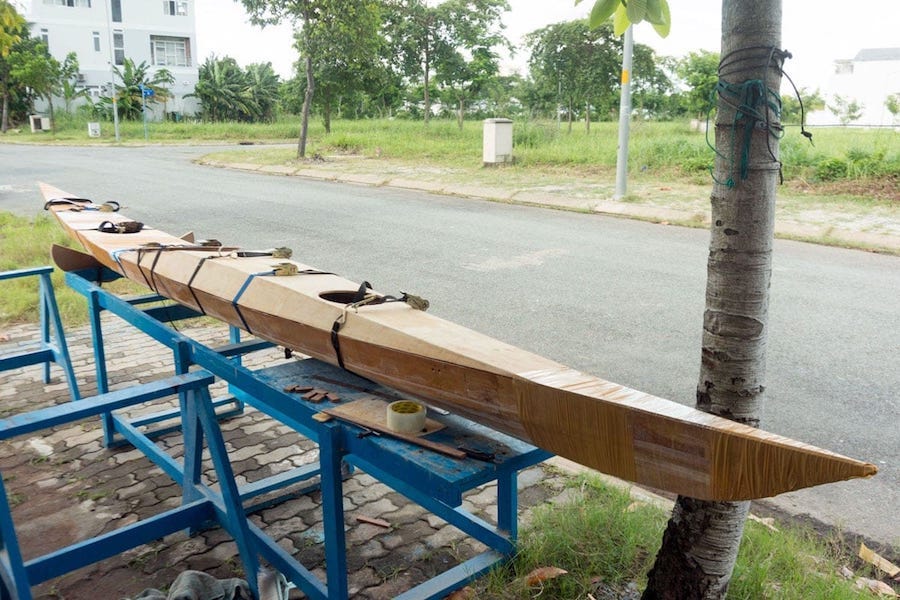
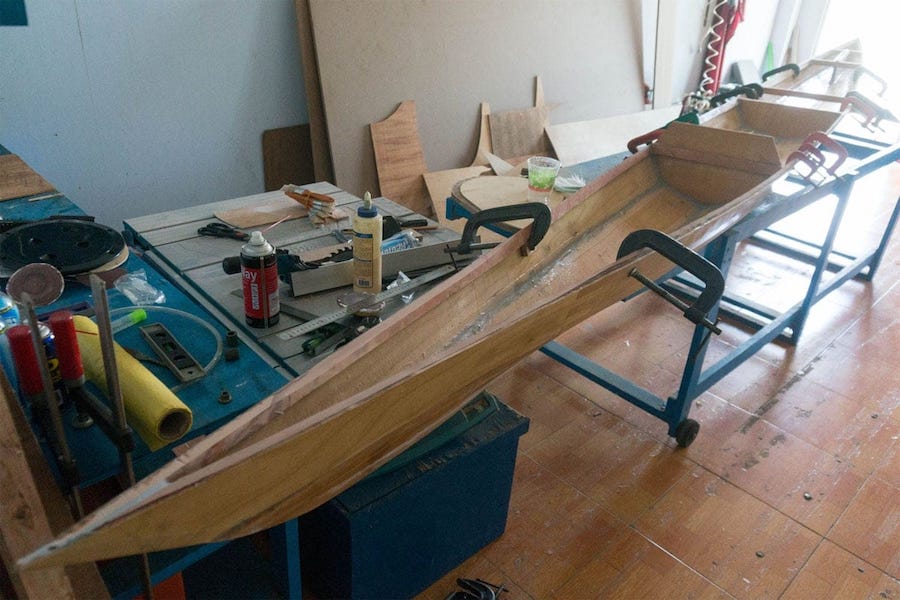
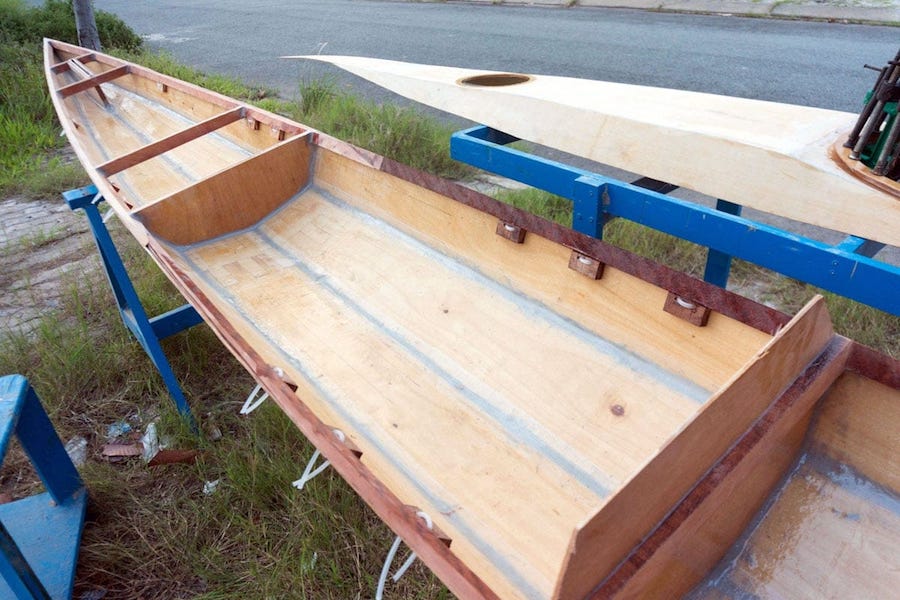
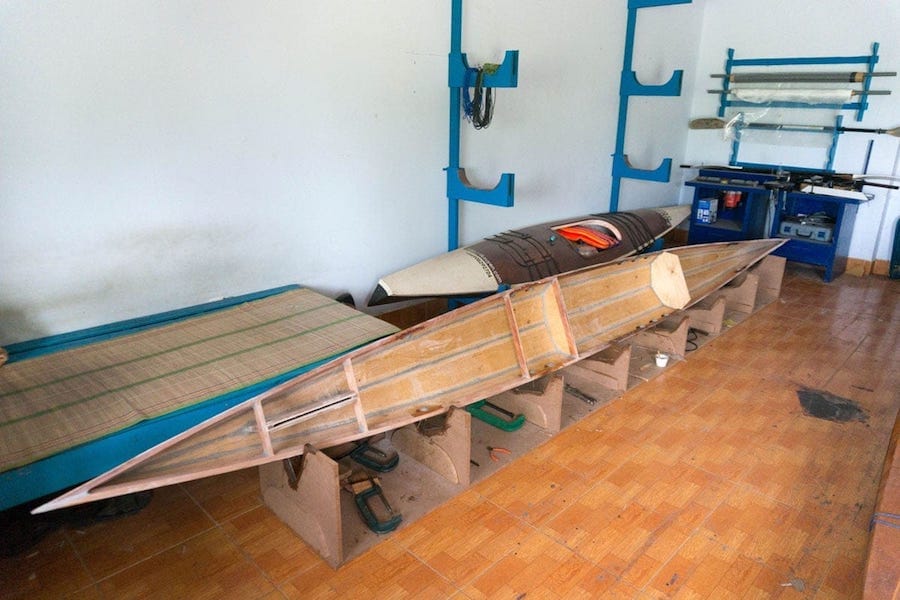
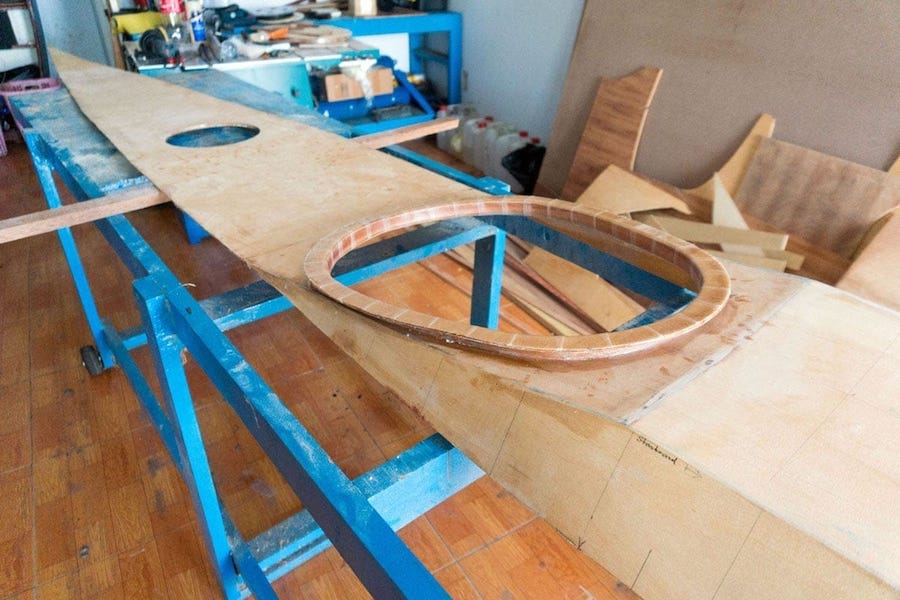
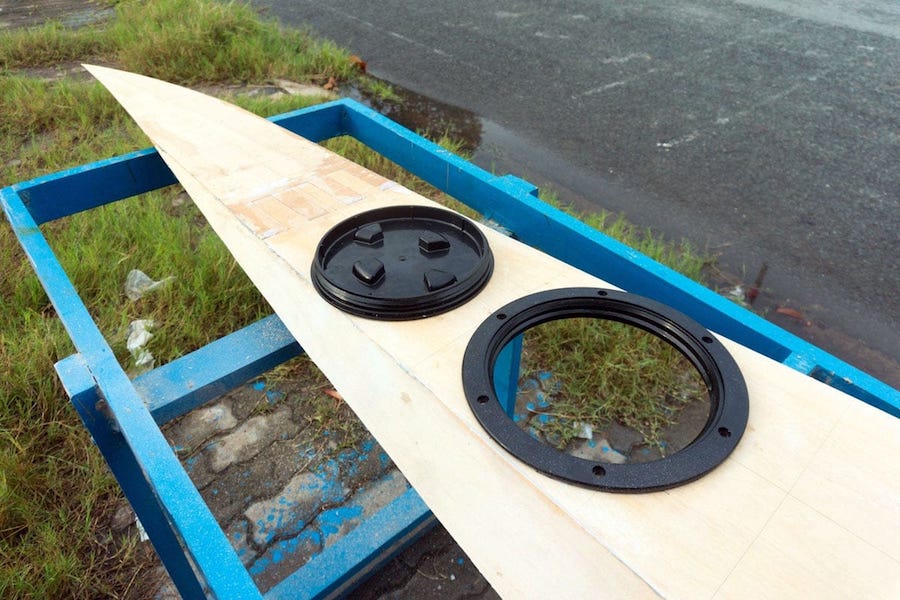
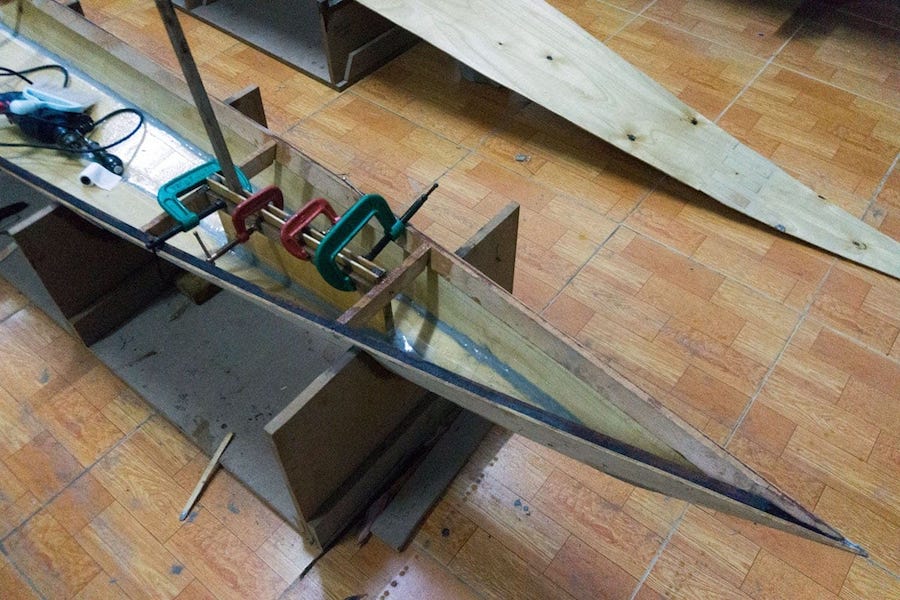
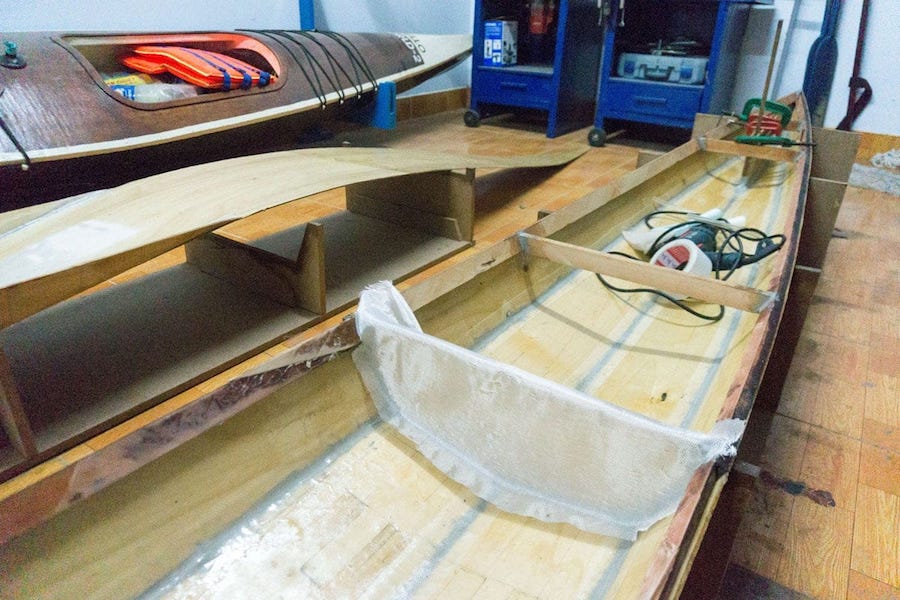
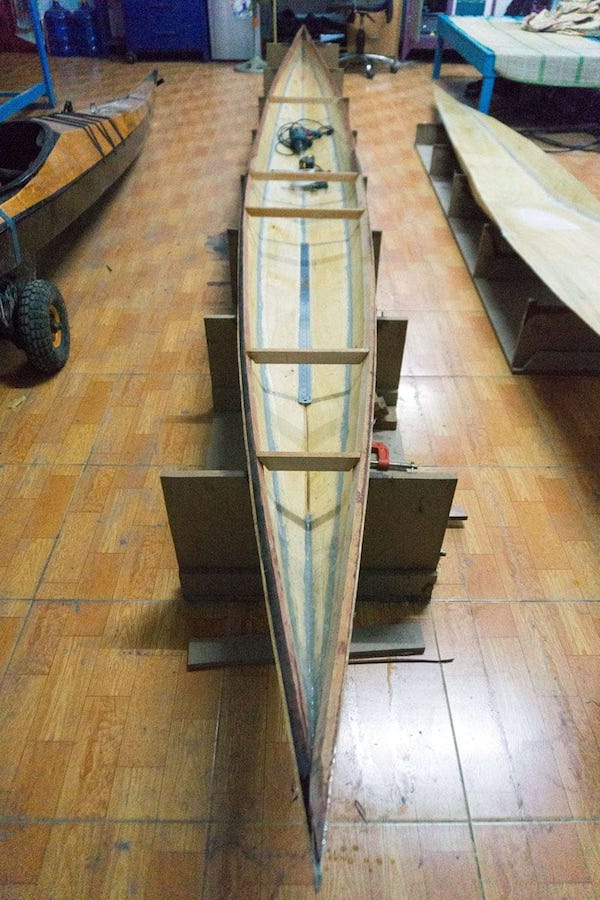
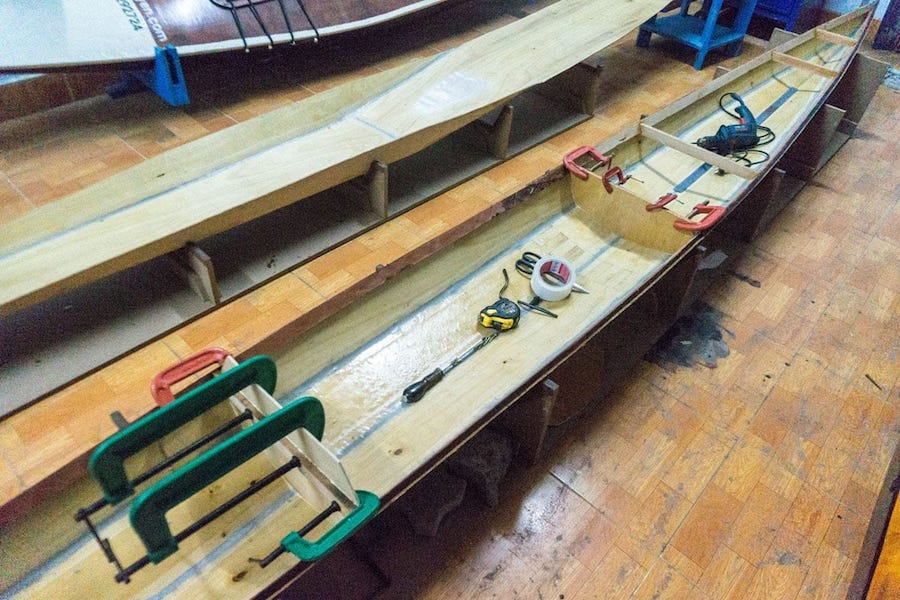
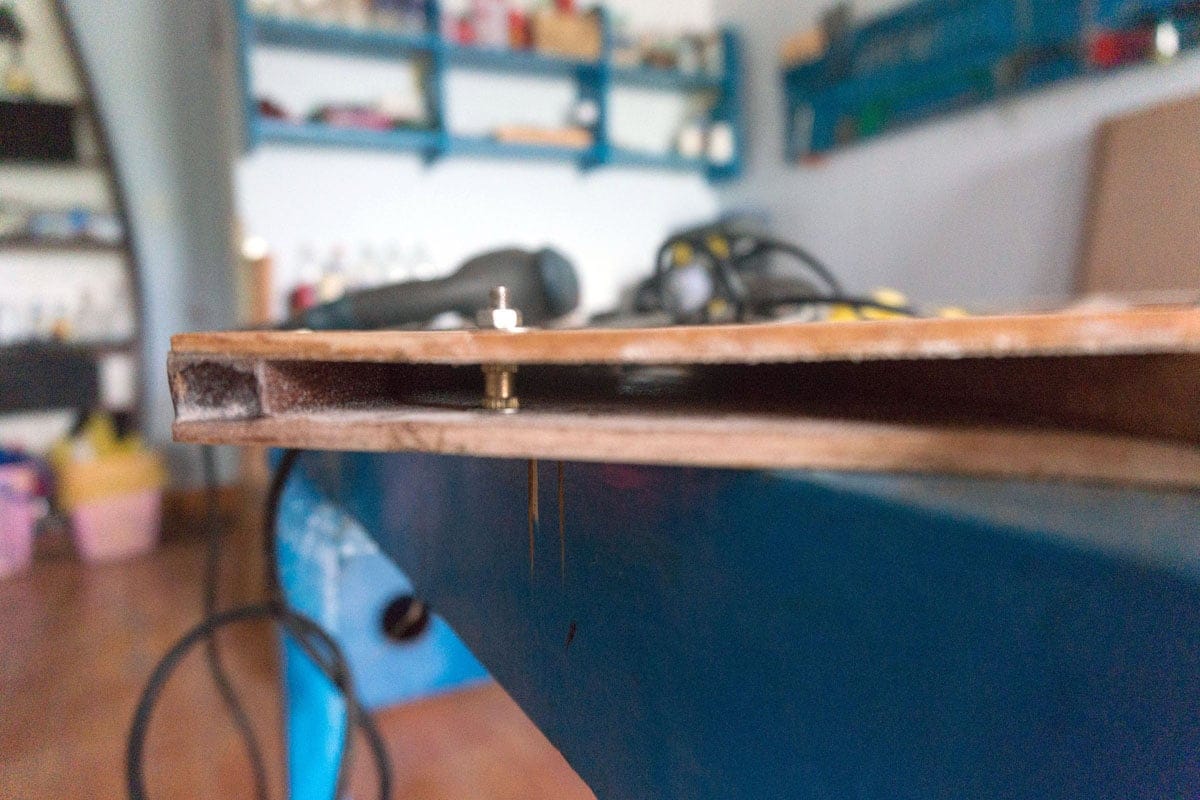
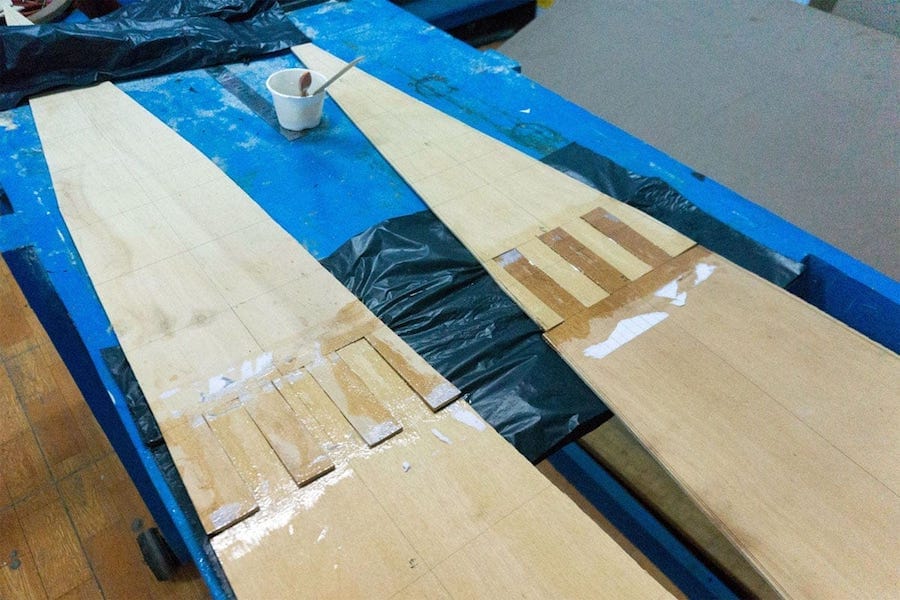
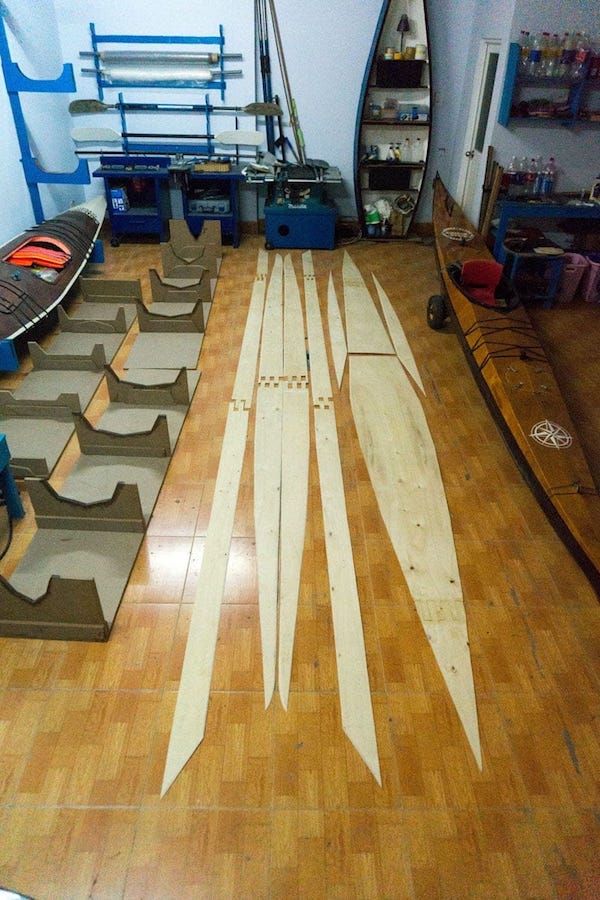
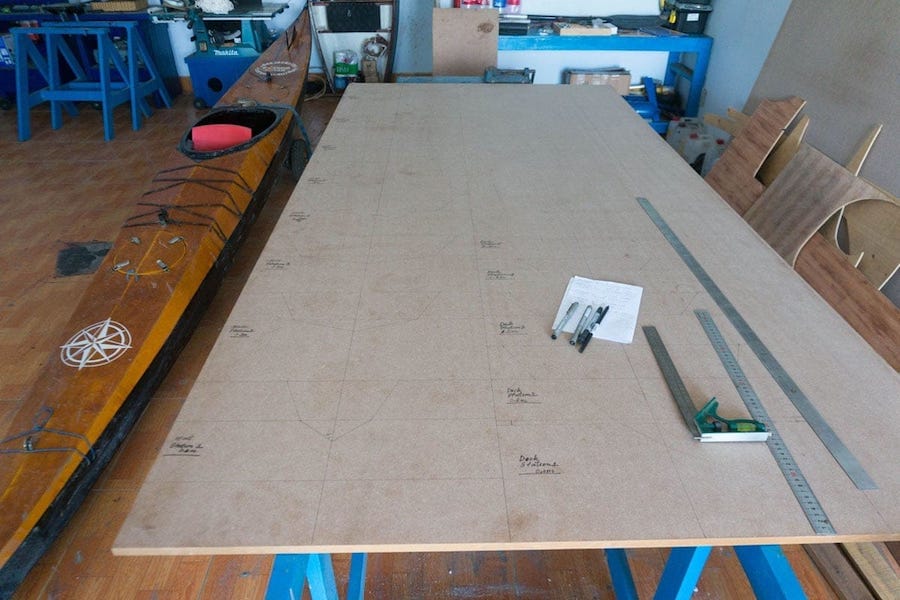
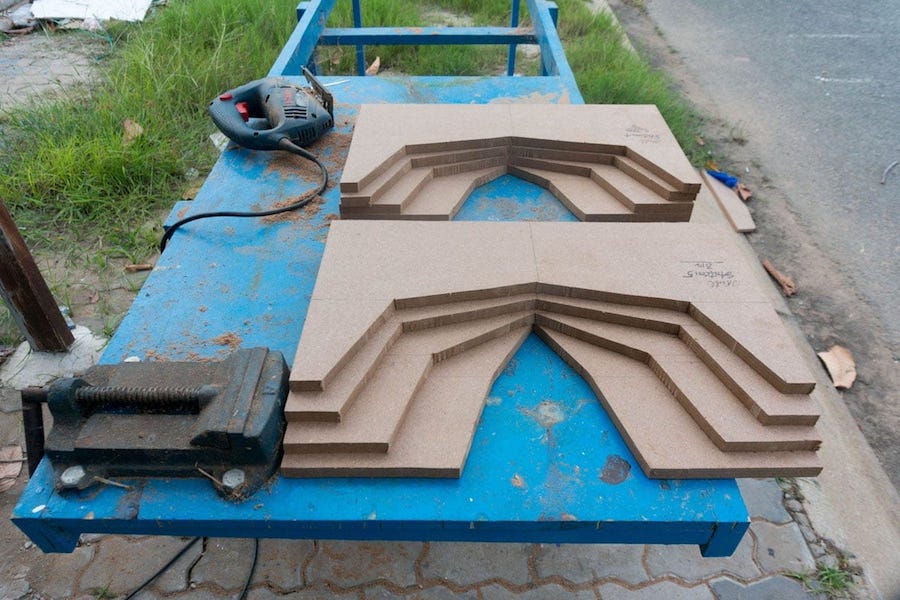
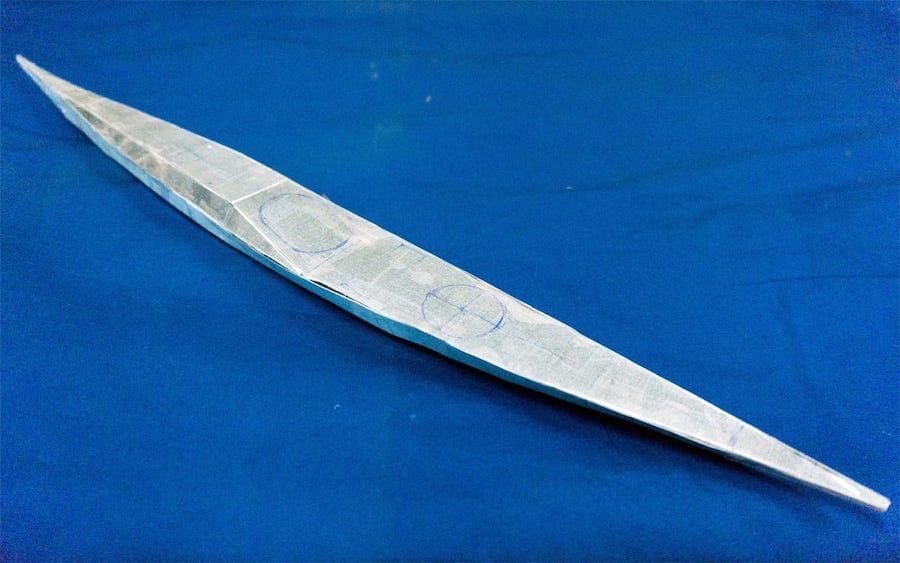
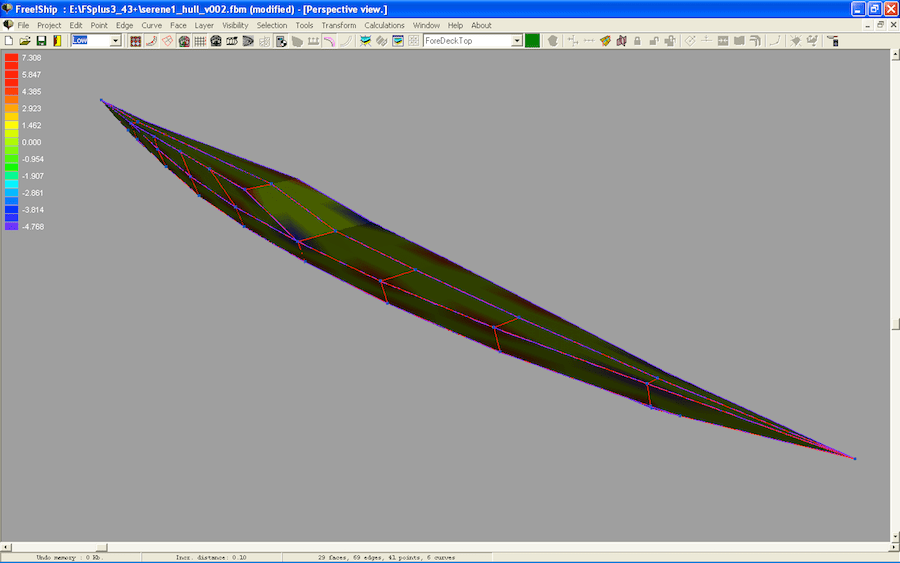
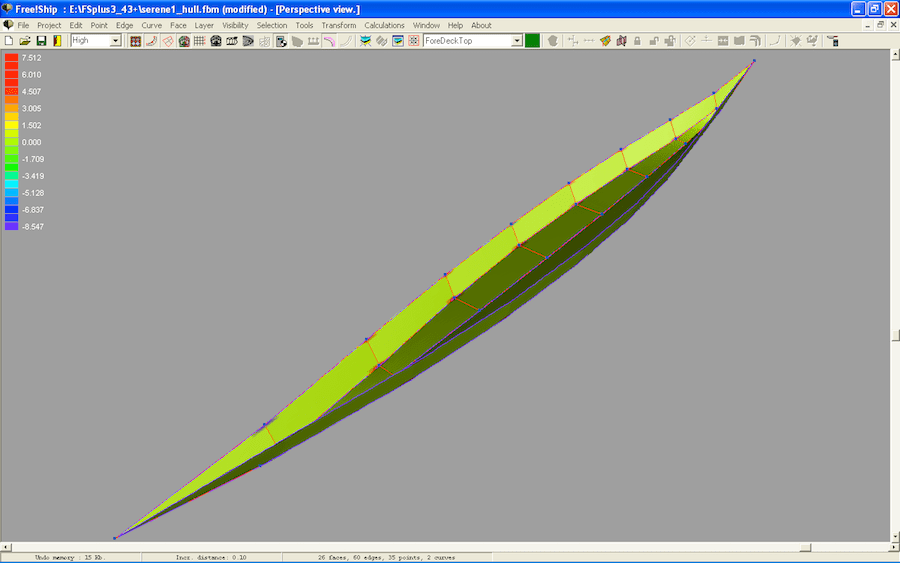
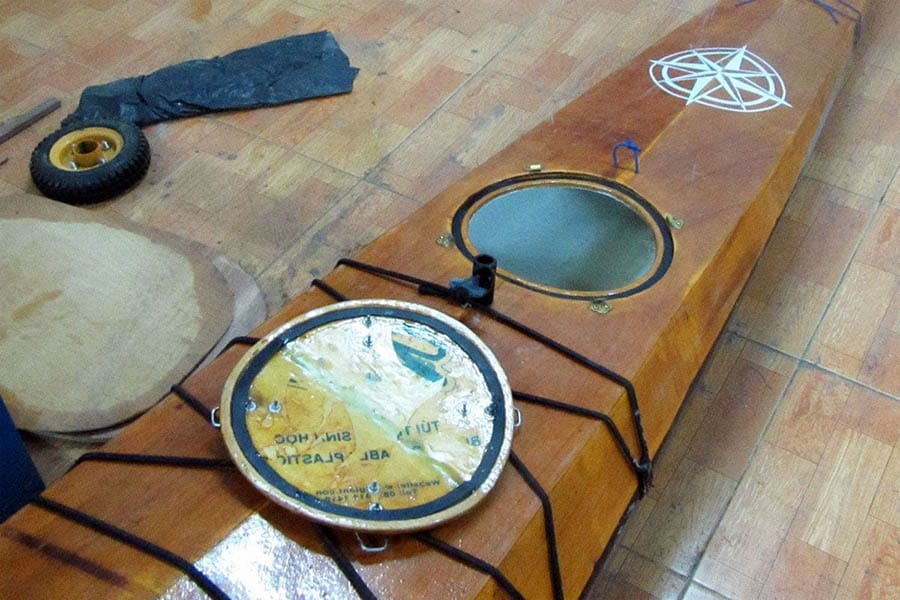
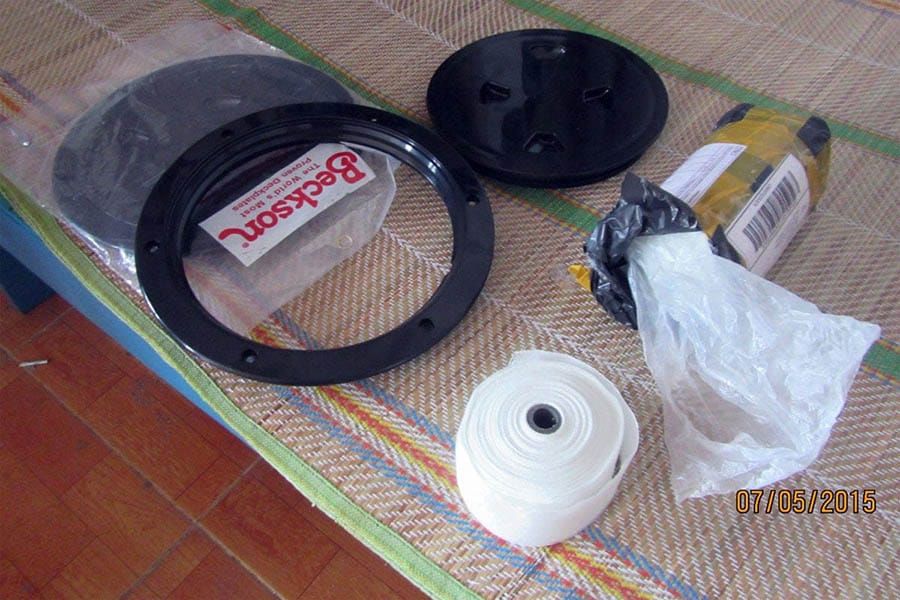
There’re lots of things learned from this trip: some improvements to be made in kayak building, some more adjustments for equipments, gears, preparation for food and drink… the experiences and skills to handle rough conditions… and above all, the understanding you achieve, not only on wind, wave, current, navigation… but on yourself. That’s all about the purposes of longer journeys, you don’t win the mileage, you don’t win the nature (gales or current), you just try to… win yourself!

Đồng Hoà and its nearby sister town Cần Thạnh are both very small but peaceful towns, unlike the much bigger Vũng Tàu city on the other side of they bay. Small communities living on fishing and planting (mango), and tourism. I usually go there on motorbike, for one single day, every few months or so, just to stand by the shores and watching, listening to the sea. Out there, the great blue sphere of ocean, white breaking waves, my “playground” for many years to come!

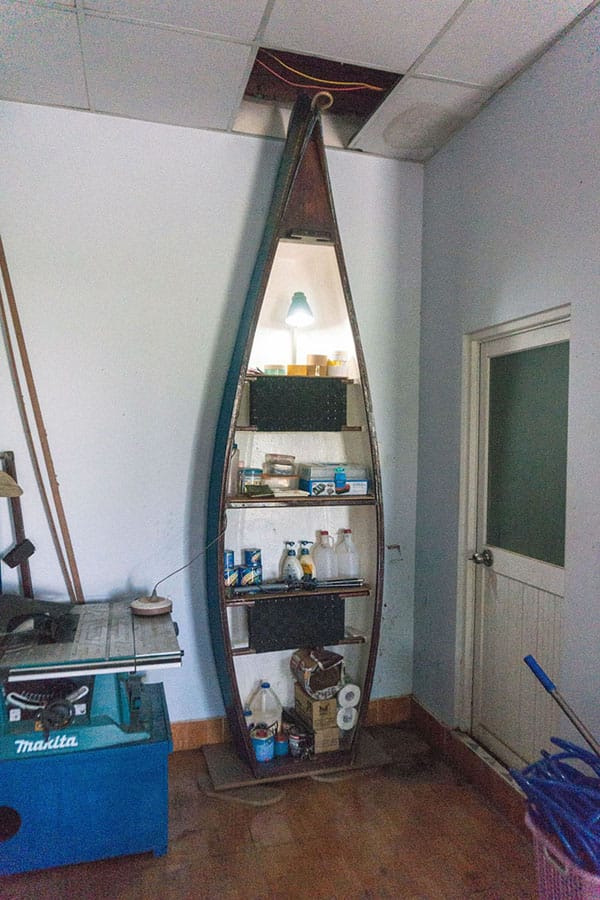
It’s simply just pleasing to wander the shores when the tide was lowering, or to watch the sun rising with a cup of coffee. You could also go to its fishing harbour to buy some sea foods, or visit the “commune house”, a small local “museum”, which preserves a large whale’s skeleton, and exhibits some models of fishing sail boats that were used by the local inhabitants (images below). Pieces of tradition and history could still be found here and there along this narrow but lovely strip of land.

⓵⏎ Một câu thơ cũ (Chế Lan Viên) với phép ẩn dụ có phần lạc hậu. Mắt được thấy dòng sông ra gặp bể: ý nói mở rộng tầm mắt và tâm hồn để thấy những điều rộng lớn, thực ra có nhiều thứ còn rộng lớn hơn nơi dòng sông gặp bể, tuy nhiên cũng đã là một trời khác biệt so với những kiểu “lòng người như cống rãnh” của thời bây giờ. Ta với mẻ thép gang đầu là đứa trẻ sinh đôi: ý nói sự cứng rắn, mạnh mẽ của con người cũng như gang thép, thật ra như tôi thấy, ý chí con người còn ngàn lần cứng hơn.

giang hồ

鳳有高梧鶴有松,偶來江外寄行蹤。。。

Nhiều đêm đi chơi xuồng kayak, 4, 5 tiếng đồng hồ một mình chèo trong bóng tối mênh mông, không một ánh điện, không biết đâu là bến bờ, tuyệt nhiên yên tịnh. Hoàn toàn phó theo cảm giác vì không thể nhìn thấy gì, toàn những bóng đen mờ ảo, cũng đã quá thuộc sông nước quanh đây. Quả nhiên không sai đây chính là khung cảnh lửa chài, cây bến còn vương giấc hồ từng chứng kiến bao nhiêu tiền kiếp về trước.

Rồi những đêm rằm trăng sáng rạng ngời, cảnh quang thuyền một lá đông tây lặng ngắt, một vầng trăng trong vắt lòng sông thật hứng thú vô cùng. Chốn này dường tách biệt hẳn với hồng trần thị phi, an nhiên tự tại không còn biết hôm nay là của ngày tháng năm nào nữa. Nhìn lên nghĩ bụng chị Hằng chắc là lạnh lắm, rồi tự hỏi phải chăng đây là cõi trời nguyệt minh tinh hy, ô thước nam phi thủa nào!?

Lại đôi khi gặp phải luồng cá lớn, dài trên hàng cây số, cá rượt đuổi theo song song như muốn đùa vui cùng với chiếc thuyền, hàng ngàn hàng vạn con bé nhỏ vọt lên khỏi mặt nước, réo rắt như một trận mưa rào mùa hạ. Hàng trăm con như những mũi phi tiêu lao qua mui thuyền, nhiều con rớt cả vào trong khoang. Rồi bỗng dưng bắt gặp mình ngâm nga khúc huống ta vớt củi buông câu, lứa đôi tôm cá bạn bầu hươu nai…

Cái sự khoái hoạt, phóng dật trong chốn giang hồ thật không một từ ngữ, không một bút mực nào gột tả hết cho được! Ghi lại vài dòng để còn gợi nhớ đến cảm giác, không gian này! Mở ngoặc nói cho rõ ràng rằng, từ nguyên, giang hồ – 江湖, đơn giản tức là giang – – sông và hồ – – hồ, nghĩa gốc vốn như thế, chỉ nơi sông nước, nhàn cư, ẩn dật… không phải hiểu theo nghĩa phái sinh của nó.

⓵⏎ Phượng hữu cao ngô, hạc hữu tùng, Ngẫu lai giang ngoại ký hành tung…, trích bài Ngạc Châu ngụ quán Nghiêm Giản trạch – Nguyên Chẩn.

hello world – 3, part 27

Gonna end the series on my Hello World – 3 kayak building & fitting here with some comments on the design. It is an excellent boat in almost every aspects. The outlook is beautiful and attractive, extremely good stabilities (both primary and secondary), good tracking capability, and turning is easy with some slight edging. The hull shape is good for surfing too, it goes into turbulences, water or wind, with great confidence. And it is roomy, having lots of space for gear storage on longer trips.

On another side, the boat is more suitable for bolder paddlers, in order to sustain a higher speed. Me, at 64 kg, belong to the medium – low paddler group. With my inexperiences (still) in building, boat weight is quite large. Everything put together, my whole day sustainable speed with HW – 3 is bounded into the [6.2 ~ 6.5] kmph range, a bit behind my expectation. Of course, my expectation is of my own, some goals set and to be reached, not something to blame on the kayak design.

And maybe my physical excercising has not been hard enough too! Like I’d mentioned earlier, boats are like shoes, you try until you find something that fits your needs, and also like shoes, owning 4, 5 pairs or more is just quite normal for an average person nowadays. Looking back on all my building and boating experiences, the last 2 years is, anyhow a short period of time, for a life – time hobby. I’m still at the beginning of the road, there’re lots of things to be learned and to be accomplished!

Lots of things happened during that less than 2 years time period, at the beginning of which I even can’t tell the (now – obvious) differences between a kayak and a canoe, I didn’t know how to operate a hammer or a block plane, never done any woodworking before (as well as any other real ‘manual’ labour). Started from the most primitive A, B, C… sometimes I’d wished I didn’t have to do everything the hard way like that. Well, things gradually unfold, like the sceneries ahead of your kayak!

hello world – 3, part 26

The other day, I was conducting some re – entry tests: supposed that you’re thrown out of the boat by waves, and you need to climb in again, pump the water out to continue paddling before another wave hits you. But the hatches leak so much that re – entry is very difficult, the harder the next tries, as the kayak continues to take water in, it becomes heavy and unstable. This is very dangerous, imagine if this happens on open sea, and I would never want to be in an… “Abandon ship” situation.

I ordered some Beckson deck plates (plus other things) from Amazon.com as a fix to the hatch leaking problem. But it took forever for the ordered packages to be delivered, first from Amazon to a friend in the U.S, then from him to Saigon (some goods can not be shipped directly to Vietnam, so you have to make it via a “freight – forwarder”). Can’t wait the progress, I decided to try another solution: install some rubber washers and tighten the locks to help sealing the hatch better. It works quite well indeed.

The packages arrive today finally! But 2 Beckson screw – in deck plates would be used for the next boat instead, as I’m satisfied with the leaking problem now. Also arrived are some rolls of 2″ – width fiberglass tape, those would be very useful for my next builds, and a spray skirt. A spray skirt is absolutely important for kayaking in rougher conditions. It recalls to me that I was really risking (and was lucky too) when paddling to Vũng Tàu last year with no working water pump, and no spray skirt.

Below are a couple of shots showing the spray skirt in action. On calm rivers and canals, it’s not of pretty much usefulness, but it would become critically important once you enter the steep estuary and coastal sea areas. Also showed is the beautiful lines of my HW – 3, people is all taking photographs or shooting video on the kayak when encountered along my paddling routes these days! Despite some building faults here and there, she looks so gorgeous, almost sexy, doesn’t she!?

hello world – 3, part 25

Updates after updates, Hello World – 3 has become quite heavy indeed, now around 30 kg, too heavy to be handled on my back for long distance. Weight has been one of my weakest point in boat building, I’ve always had fears that the boat will not be strong enough, so put more and more materials in, that results into a much heavier boat than originally speculated. This is the most important thing to be improved in my next build (projected to be toward the third quarter of this year).

Want it or not, HW – 3 is my main boat for now, though quite heavy, it’s strong and has the best performance characteristics among my boats. And I’m gonna have some more preparations for my upcoming trips. I added one more mounting point for the light and camera poles, there’re one aft and one forward of the cockpit, so the camera can be mounted in different positions. Also decided that the Canon Powershot D30 would be my sole camera onboard, used for both picture and video shooting.

The Canon Powershot D30 has much better battery life compared to my GoPro Hero 3, and video quality is comparable, though video resolution is not as good. Furthermore, bringing just one camera, one kind of backup batteries would make things simpler, having less to be cared for when on the waterway. I’m not too keen on taking super fine photographs, bringing a DSLR is too bulky and risky for me, so this D30 is already good, an all – round cam: pictures, videos, and can also be used for diving.

I’ve built another cart for my kayak from cheap MDF, made water – resistant using thinned epoxy and paint, it’s smaller and lighter compared to the previous one (which was made of iron tubes). And I reused the two big air – filled tires, you know how it is pulling a heavy load with small solid wheels on a ‘sinking’ sandy beach. There’re some stuffs I originally planned for my kayak, but they turned out to be very troublesome when faced reality. Among such things are the hatches, simply put: they leak too much!