
We are building something like this, a 3D user interface. Day by day, we’re witnessing more and more diversities in computer user interface: concepts, designs, look and feel, animations, effects… While some would stick to an bare – bone, obscured text console, the others prefer some fancy, eye – candy GUI with all its bells & whistles. Things are much easier now with many 3D libraries and tools. Remind me about how I did all the 3D things: polygon, mesh, texture, sprite, shading, lighting, scene – graph, etc… with C & assembly on DOS!
Category: linux
vim for programmer
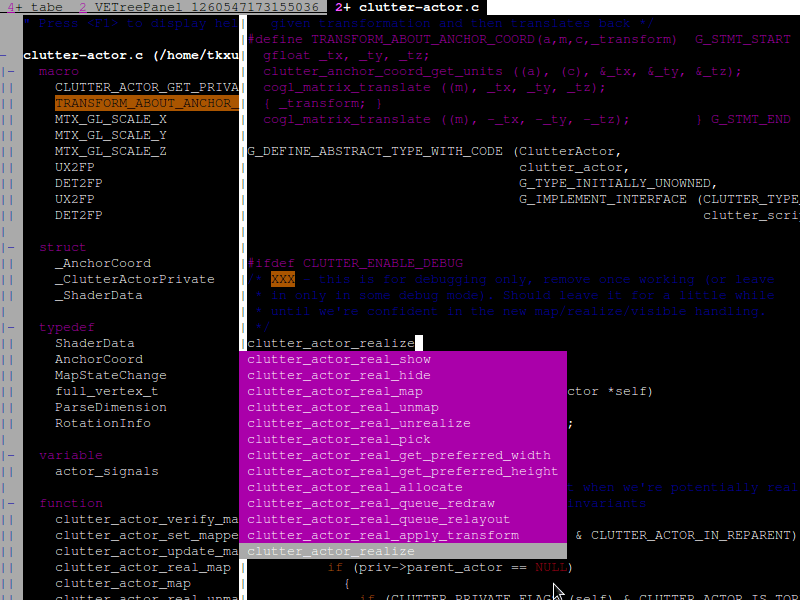
VIM “IDE” with symbol – browsing and auto – completion
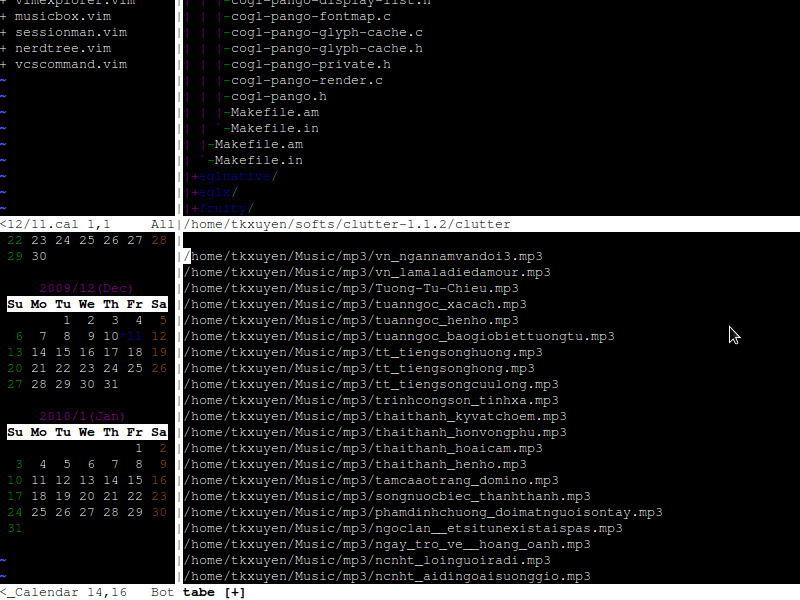
Various utilities inside VIM: media player, calendar, file explorer…
I have been using VIM for most of my daily programming, and everyday, I’ve been discovering new things about VIM. We can tune VIM into a full-fledged and powerful IDE (Integrated Development Environment) that far surpasses every others! With ctags and taglist.vim, we can build tags database, which would then enable searching, browsing all symbols, variables, functions in a code – base. cscope enhances ctags even more with advanced search & browsing features. And I would need no external diff tool since we’d already have vimdiff to compare and merge code.
Working with different types of version – control system, we’d already had vcscommand.vim, which can help interfacing with svn, cvs or git! To interact with file system, I would use NERDTree or vimExplorer, a lot of tasks with fs is done even without leaving VIM! I’m not fool enough trying to do everything with VIM, but there are many other plug-ins that you would find useful: a.vim and c.vim would help you a lot in C/C++ programming, calendar.vim helps you viewing date, and keeping small notes (diary) for each day, musicbox.vim serves you with media playing inside VIM, and vimail helps send, receiving emails with just a few convenient keystrokes!
virtualization
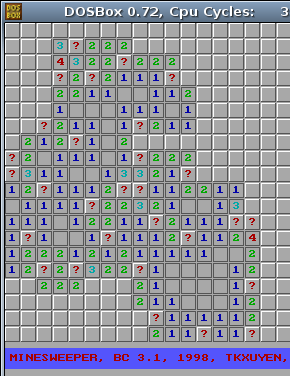
MineSweeper running in DOSBox
Click the demo page below (jpcapplet.jar – 1.8 MB in size), it would take some times to load, embedded in it is a DOS image (floppy.img) of a floppy’s size (1.4 MB). In Linux, using dd to create a blank image file, launch JPC app, mount the empty image, fdisk to give it a partition structure, format to give it a bootable FAT12 file system, copy the files over, edit autoexec.bat to have the game run at startup, and voila – there you are, the classic DOS game of MineSweeper on the web!
Beside is screen-shot of my very first programming, the classic MineSweeper, an exercise I did first year at university. After getting started with Borland C++ 3.1, I began to write numerous toys like this; small games, graphics, animation, 3D… are among the things I was very fond of. We still had not had Internet in Vietnam then, lacking of information, we’d reinvented many wheels, including a package for displaying 3D objects (in form of polygon mess), a complete GUI for DOS with window, menu, toolbar, all kinds of controls: combo, list, button… But as they say: don’t reinvent the wheel, unless you plan on learning more about wheels, the reason we did all that fun stuff.
Back to my MineSweeper, it’s tiny, about 350 LOC (Line Of Code), using BGI (Borland Graphics Interface), C/C++ and some ASM. Yesterday, just want to check the old source, but didn’t have a Windows machine at hand, I needed to run the Borland C++ 3.1 compiler on my Linux box. Wine is good for many Windows applications, but it simply won’t work with pure DOS programs. Then I found DOSBox, you start it up in form of a console, mount a directory in local file system, have BC 3.1 installed and compiles flawlessly, and MineSweeper runs well on this virtual DOS on top of Linux!
That’s some layers of virtualization, say I want more, I want to show MineSweeper on the web, but don’t want to make change to the code, or even to the compiled binary. Could it be possible? The answer is: YES! You would need JPC, a pure Java IBM-PC emulator, it runs where there is Java: x86, RISC, mobile phone… On top of it, you can run a bundle of different OS: DOS, Linux, Windows… Then comes the delicate distinction between virtualization and emulation, hardwares, softwares, all can be virtualized to some great extent. Imagine you would run some games & utilities on a virtual DOS (or Linux) running inside JPC, hosted in Firefox browser, which in turn runs on Windows (or Linux)!
JPC can only bring about 20% power of the native machine, and even a tiny game like this is overkill to it, and mouse functioning is really crappy too. But that’s suffice to demonstrate the idea, JPC could be improved I believe. More games would be added to this Web DOS console later on! Anyone still remember Tetris, Croix-Zero, Snake, Mario…? So, what’s the points for JPC? Demonstrating the fractal principles in hardware, software evolution? Too much “nostalgia” for the “good old days” – DOS games? Anything else or just reinventing the wheel? The answer may be so, but I love this idea of cultivating the past, and pop out new things for the future!
math expression on www
I rarely need to write mathematics expressions on the web, but the last time I did, it took me some times to figure out just how to do. It’d turned out to be pretty easy, there’s a free LaTeX rendering server at yourequations.com. Excellent site! Just feed it with a LaTeX expression, it would render an image for you to put on your web page. This may be the best solution for now, while waiting for an workable HTML version that supports math.
There’s also a guide to embed this feature onto Blogger blogs (and also WordPress, and some PHP forums…) Just insert your LaTeX code between the pre (or code) tags as below and the jsTeXrender JavaScript would do the rest for you. This works fine for any browser with JavaScript support (mouse over the expressions and you would see the underlying LaTeX code). You may also need this LaTeX Reference Card for a list of LaTeX’s symbols.
Update, Otc 1st, 2010
Due to heavy traffic, yourequations.com has ceased the service. Please see this new post on how to run a LaTeX rendering server of your own!
fingerprint sensor & ubuntu
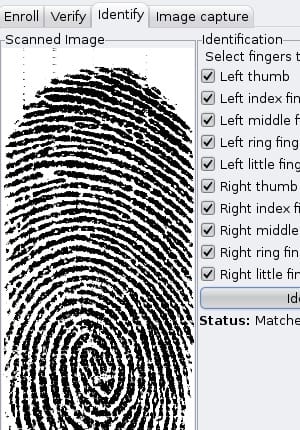
My right index finger scanned and correctly identified

Too much literature, too much music lately, now some technical to line up thoughts in my head. Fingerprint reader has been out for quite a long time, but has only come to my hand recently on this HP 6910p laptop. The machine has an AuthenTec AES2501 fingerprint sensor built in, and using it is quite straight – forward under Hardy Heron:
1. Install fprint-demo, libfprint-dev, libfprint0 and libpam-fprint from the ppa.launchpad.net/madman2k repo.
2. Use fprint_demo to enroll some fingers. Identification and verification is good for thumb and index fingers, but really bad for middle, ring and litte ones.
3. Configure pam module to make use of fprint, add the two lines: auth sufficient pam_fprint.so & auth required pam_unix.so nullok_secure to your /etc/pam.d/common-auth file. Remember to enable still password login since fprint is quite preliminary.
Now restart your machine and enjoy! At login prompt, you would need to enter username, then enroll a finger for authentication. If enrolling fails, normal password login would then be applied. In KDE, screen-locking and gksudo work seemlessly with fprint.
I observe for a while the fingers’ scanned images, to find out how they did all the identification and verification tasks. It’s quite clear that they are using some control points (called minutiae). You can see red dots in the image on the left (binarized from raw scanned image): they are either end points or branching points (point at which vein separates into more veins). They don’t need to match all veins of fingerprints, they only need to do some pattern – matching on the set of minutiae. Given two sets of minutiae, some Cartesian measures on points’ position may be enough for matching two fingerprints.
This machine, HP 6910p, is designed for medium performance, but for advanced security: the machine has TMP chip inside, with a smart card slot, and a fingerprint sensor. That would be quite sufficient to protect your privacy.
file system encryption

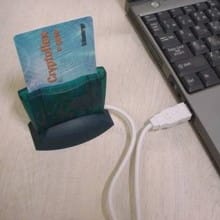
The pc-link reader, could be in many forms: usb, serial, pcmcia, pinpad…

An Axalto (previously Schlumberger’s, now Gemalto) smart card, this could be an access – control card, a bank debit / credit card, health – care card, social – identification card… Some smart card types are actually tiny computers – they have an Operating System, and Java virtual machine inside. Note: many of the smart card vendors are OEM – ed from SCM Microsystems, a Germany – based company. We’d better choose hardware and firmware directly from SCM when work on open – source projects.
You have important data on your laptop, and one day the laptop is stolen. The best you can expect is that you loose all those valuable information. The worse… who know what it can be!? Since having a computer (hardware) in touch means having access to every data stored on it. How can you protect yourself from that situation?
The solution is encrypting your storage and keep your key safe from others’ access. You can encrypt your home directory or a whole data partition. (Some even encrypts /boot, /swap and /(root) – full disk encryption – so that their activities leave no traces). With Linux, every tools is at your hand, so let start making your life easier. Below is some guide lines on how to do it on Debian.
1. Install eCryptfs: a Linux native and POSIX – compliant enterprise – class stacked cryptographic file system.
$ apt–get install ecryptfs–utils
$ modprobe ecryptfs
# you may have to patch your kernel in order for
# ecryptfsd (the key management daemon of eCryptfs)
# to work. in that case, you’d better grab and
# build eCryptfs from the latest source.
$ modprobe ecryptfs
# you may have to patch your kernel in order for
# ecryptfsd (the key management daemon of eCryptfs)
# to work. in that case, you’d better grab and
# build eCryptfs from the latest source.
2. Setup eCryptfs:
# simple setup, passphrase entered from stdin,
# eCryptfs allows overlay mounting: mount point
# and the actual storage can be the same.
$ mount –t ecryptfs /encrypted/storage /mount/point
# you can now see your new fs using the command df,
# test it, go to your mount point and input some
# data, watch the output at the encrypted storage.
$ cd /mount/point
$ echo “Hello World” > hi.txt
$ cd /encrypted/storage
$ less hi.txt
# umount /mount/point and the file system
# is not accessible anymore
# eCryptfs allows overlay mounting: mount point
# and the actual storage can be the same.
$ mount –t ecryptfs /encrypted/storage /mount/point
# you can now see your new fs using the command df,
# test it, go to your mount point and input some
# data, watch the output at the encrypted storage.
$ cd /mount/point
$ echo “Hello World” > hi.txt
$ cd /encrypted/storage
$ less hi.txt
# umount /mount/point and the file system
# is not accessible anymore
HOW TO PROTECT YOUR KEY?
Every security solution comes to a very dead-end that there’s must be a MASTER KEY as the main entrance for the whole system. And we have several ways to protect the master key:
+ the tricky way: store the key somewhere on the disk, e.g: at the first sector of the volume image (offset some bytes to a position only you know) so that the key is hard to find and can not be accidentally deleted. More information about the trick is here.
+ the explicit way: store on an external storage such as usb, the system could only be functional once the usb is plugged in.
+ the “smart” way: smart card is the best way to store key. Since you can write public / private key to a smart card but can only read public key back, no – one can read the private key, including you. Smart card is designed to do encryption / decryption jobs: just request the card to encrypt / decrypt some data using a specified key, and the card sends back the required output.
In an organization, the private key is stored on smart card and given to the “person in charge” without the fear of loosing the key. For personal use, I think the second solution (using usb) is quite enough.
1. Setup smart card:
# install pcscd, the daemon to talk with
# card reader install OpenSC, the open
# source smart card project
$ apt–get install pcscd
$ apt–get install opensc
# in my case, I have an Axalto reader which is not
# supported by pcscd. knowing that Axalto’s
# hardwares are OEM-ed from SCM, I just download
# the firmware from SCM, flash the reader and it’s
# then recognized as a SCM SCR 331 device. You can
# play around the smart card using opensc-tool,
# you can erase, init the card’s file system,
# create some PIN, generate some keys using
# pkcs#15-init, encrypt/decrypt can be
# done using pkcs#15-crypt
# card reader install OpenSC, the open
# source smart card project
$ apt–get install pcscd
$ apt–get install opensc
# in my case, I have an Axalto reader which is not
# supported by pcscd. knowing that Axalto’s
# hardwares are OEM-ed from SCM, I just download
# the firmware from SCM, flash the reader and it’s
# then recognized as a SCM SCR 331 device. You can
# play around the smart card using opensc-tool,
# you can erase, init the card’s file system,
# create some PIN, generate some keys using
# pkcs#15-init, encrypt/decrypt can be
# done using pkcs#15-crypt
2. Working with keys:
Public and private keys are fundamental concepts of Digital Signature. In short, multiply two big prime numbers – two private keys – you have a semi-prime number – the public key. Certificate is wrapper of the public key to work with a CA (Certificate Authority), for the public to check if a public key really belongs to an organization.
# generate public and private keys in RSA 1024
# bit pem format extract the public key from this
# keys pair, encrypt/decrypt with the keys
$ openssl genrsa –out private.pem 1024
$ openssl rsa –in private.pem –out public.pem –outform PEM –pubout
$ openssl rsautl –encrypt –inkey public.pem –pubin –in file.txt –out file.ssl
$ openssl rsautl –decrypt –inkey private.pem –in file.ssl –out decrypted.txt
# create the smart card’s file system,
# then create a PIN
$ pkcs15–init —create–pkcs15
$ pkcs15–init —store–pin —auth–id 01 —label “mycom”
# copy private key to smart card, to decrypt,
# we need to specify key’s usage
$ pkcs15–init —store–private–key private.pem —auth–id 01 —id 45 —format pem —key–usage sign,decipher
# bit pem format extract the public key from this
# keys pair, encrypt/decrypt with the keys
$ openssl genrsa –out private.pem 1024
$ openssl rsa –in private.pem –out public.pem –outform PEM –pubout
$ openssl rsautl –encrypt –inkey public.pem –pubin –in file.txt –out file.ssl
$ openssl rsautl –decrypt –inkey private.pem –in file.ssl –out decrypted.txt
# create the smart card’s file system,
# then create a PIN
$ pkcs15–init —create–pkcs15
$ pkcs15–init —store–pin —auth–id 01 —label “mycom”
# copy private key to smart card, to decrypt,
# we need to specify key’s usage
$ pkcs15–init —store–private–key private.pem —auth–id 01 —id 45 —format pem —key–usage sign,decipher
3. Setup the whole thing:
With your smart card properly setup (a public/private key pair has been stored), we can use the following script to: 1. create a temporary volatile file system 2. use smart card to decrypt the password and store to that file system (these files would simply disappear when the machine power down) 3. using the decrypted password to mount with eCryptfs.
# 1. create a volatile fs to temporarily store the
# decrypted passfile
$ mount –t tmpfs –o size=10M,nr_inodes=10k,mode=0700 /tmp_fs
# 2. decrypt the password file from
# /root/passwd to /tmp_fs/passwd
$ pkcs15–crypt —pkcs1 —decipher –k 45 –i /root/passwd –o /tmp_fs/passwd
# 3. now mount our encrypted
# directories with eCryptfs
$ mount –t ecryptfs /encrypted/storage /mount/point –o key=passphrase:passfile= /tmp_fs/passwd, cipher=aes, ecryptfs_key_bytes=16, passthrough=1, verbosity=0
# decrypted passfile
$ mount –t tmpfs –o size=10M,nr_inodes=10k,mode=0700 /tmp_fs
# 2. decrypt the password file from
# /root/passwd to /tmp_fs/passwd
$ pkcs15–crypt —pkcs1 —decipher –k 45 –i /root/passwd –o /tmp_fs/passwd
# 3. now mount our encrypted
# directories with eCryptfs
$ mount –t ecryptfs /encrypted/storage /mount/point –o key=passphrase:passfile= /tmp_fs/passwd, cipher=aes, ecryptfs_key_bytes=16, passthrough=1, verbosity=0
Done! Choose a strong encryption algorithm (e.g AES 256 – bit), and in most cases, you and your data would be safe until they have quantum computer running. Be sure to keep your key secret or your efforts would be of no help. For maximum security, choose a good smart card model, increase your keys’ size, revise all procedures of your software system…
(You’re pretty safe right now, so why there’s an “in most cases” in my last paragraph? The truth of being secured is actually more complex than that, as a quite-simple technique like this could be applied to steal password of a disk-encryption system. This bases on the fact that data in DRAM is not faded right away after loosing power, it still can last for some seconds (or even minutes), and by cooling the DRAM using an air duster (to slow down the fading speed), the DRAM module could than be copied and scanned for password (assuming that password has been entered and kept in memory). Nothing is really safe, however, hardware problem like this should have a hardware solution (like this AES 256-bit encryption Fujitsu hard drives).


